Gear Reviews

Filmmaking is a Game!

From the initial idea to the final export of your film, there are lots of steps you need to do which will help you achieve The Film Look. It’s kind of like playing a game of Monopoly.

Let me explain.

The-Game-of-Filmmaking1.gif

Idea/Writing

Every film starts of with an idea. Some ideas will be good, some bad, and sometimes you just have to make them to find out.

An idea is nothing unless you have a script.

The first properties on a monopoly board are not the most desirable at the start of the game, but in the case of filmmaking these are the most valuable.

Investing time is all you will need to do at this stage of the game, and developing your idea by writing the 1st, 2nd, 3rd or how many drafts of your film should be done now.

Once you have a draft you are happy with, take a chance and let others read it. Take their feedback onboard, make changes where needed, and work on it until you have a final draft you are happy with.

Having a solid script will definitely be your get out of jail free card when you are on set shooting it.

Pre-Production

You want to be spending more time in pre-production that you do in production. Having a thought-out production plan will help make the shoot go a lot smoother.

First you want to invest in someone who can help you produce the film.

Depending on the level of film you are trying to make, this person could have a lot of experience or none at all, but they need to be as passionate as you are.

Next you can work out the budget for the film. Whatever it is, start to assemble your cast and crew. Invest as much time and energy as you can here; these are the people who will be helping make your film a reality.

Scout around and find the locations for your film. We have a video about how to do that if you want to check it out.

Build a production plan that is made up of your shots list, storyboards, and shooting schedule. Be organised but don't advance to shooting just yet.

Spend time and money on the production design of your film. The right-looking costumes, props, and set dressing will allow you to be ahead of the game and achieve The Film Look a lot sooner.

This is where all those hours spent planning your film come into play. Things will not always go to plan, so be flexible and work with your team to make the film.

Don’t take a chance with sound; get someone whose sole job it is to record sound. And let your picture and sound people do there job, but if you are the picture and sound person, don’t forget to direct your actors.

The-Game-of-Filmmaking3.gif

The more roles you can give to others, the more each person can concentrate on their own job.

From the planning stage, your camera operator will understand the look you are going for, and he or she can direct the 1st AD, Grip, and Gaffers to help achieve that look.

After hours, days, weeks, or even months of shooting, you will now have all of the footage you need to edit your film.

Post-Production

But don’t jump ahead and start editing just yet. Time is back on your side so spend it Organising and syncing your files. Once the edit gets complex, you’ll be glad you spent time organising it as you can’t buy this time back.

Get your rough cut done; but don’t worry about how the colour grading looks, how the effects shots are not complete, or even how the audio sounds at this point.

Share it with others, ask them about the edit and what does and does not work. It’s better to find this out now.

From the feedback you receive, make changes, colour grade your film, finish the effects, and add your Foley and sound effects.

Then don’t look at it for a week!

That separation from the project will allow you to see the edit with fresh eyes; you will see your mistakes and way you can improve it. Do as much as you can to make it the best you can, but tax yourself to get it complete.

Having a final film you can show others and learn from will be your most valuable asset.

There are many steps to filmmaking that I haven't described. Plus it’s not as easy as a board game, but you CAN play the filmmaking game like you're playing monopoly.

Take every opportunity, buy every property, take every chance.

At first your films might not turn out the way you thought they would, but you will have learned about the process of how to make a film. The more times you go around the board, the more your skills you’ll take with you onto the next film.

Once you’ve gone around the board a few times, look at the skills you have developed. You might find there is an area of filmmaking which you want to invest more time and energy into because you enjoy it the most. The more you learn, the more you can invest, and before you know it you have won the game.

Play the game of filmmaking as much as you can, and hit the orange lens cap to subscribe, and remember achieve it one shot at a time.

The-Game-of-filmamking.jpg

This video was Sponsored By

🚀 http://bit.ly/tflrs-creator - Become a social media powerhouse with RocketStock's video element pack, Creator. This collection comes packed with logo reveals, end screens, subscribe animations, and much more.

🎵 🎵 http://bit.ly/pb-finestimports - Click here to download this episode's track. Check out Premiumbeat.com to discover a huge range of exclusive royalty free music!


DISCLAIMERS:

Some of these links are affiliate links, if you purchase gear via these links The Film Look will receive a small commission, but there will be no additional cost to you. Thank you!

100 Filmmaking Tips in 10 minutes

With every film we make we always learn something new. That could be a tip, trick, hack, or piece of advice which we did not know. In this video we are going to share 100 filmmaking tips, tricks, hacks, and things we’ve learnt whilst making films, in under 10 minutes.


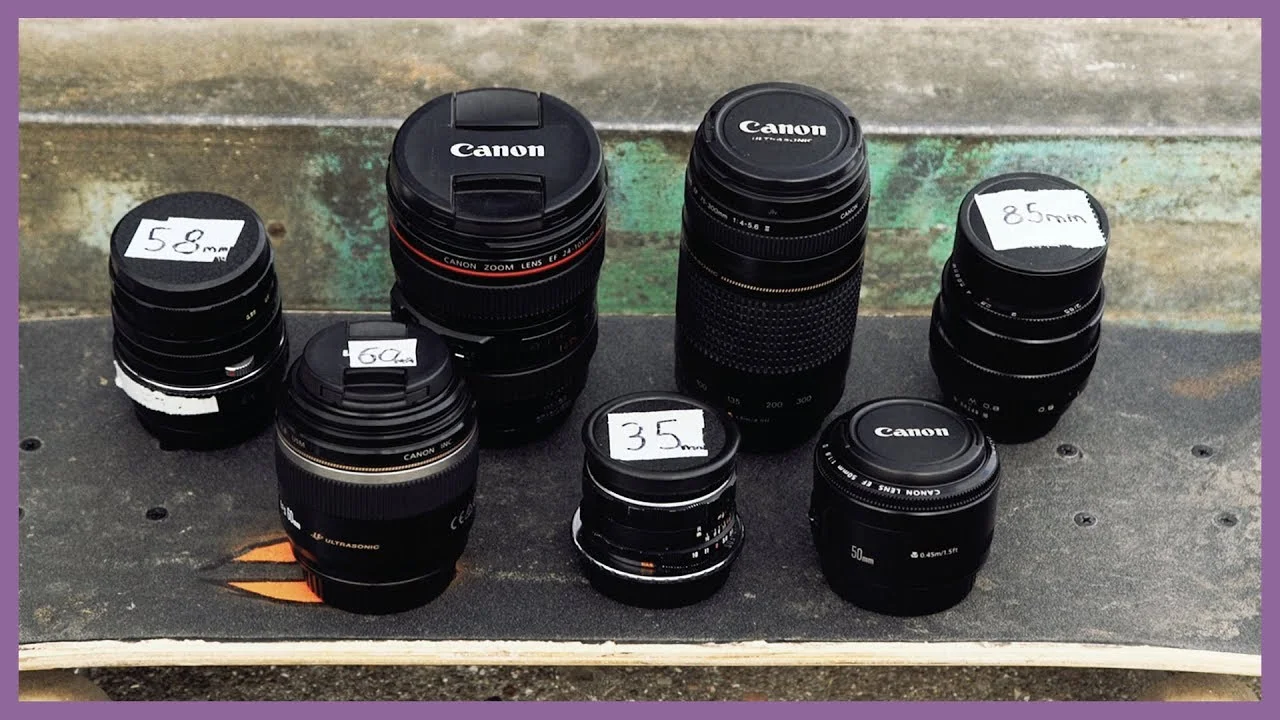
  1. Add labels with the size of lens to each of your lens caps. It makes it much easier to find in your bag.

  2. Can’t draw? take photos to use as your storyboards.

  3. Never place the microphone on the hot shoe of your camera if you are recording dialogue.

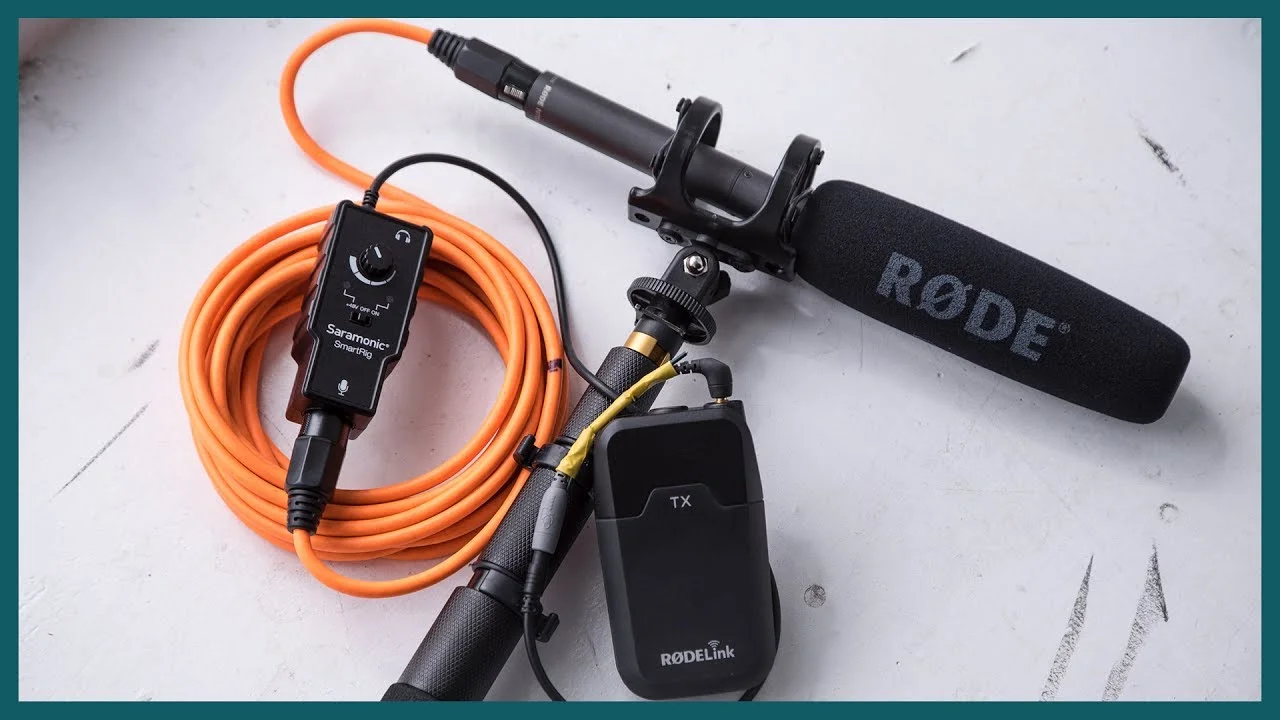
  4. Buy a 3.5mm extension cable so you can still plug it into your camera to get it closer to your actor.

  5. If you have a flip out screen on your camera, create a little tap out of tape to make it easier to flip it out.

  6. Use white baking paper as cheap diffusion paper

  7. If you are making DIY equipment or doing hacks to it, make it look as professional as possible. You don’t what to turn up on set with something that looks janky.

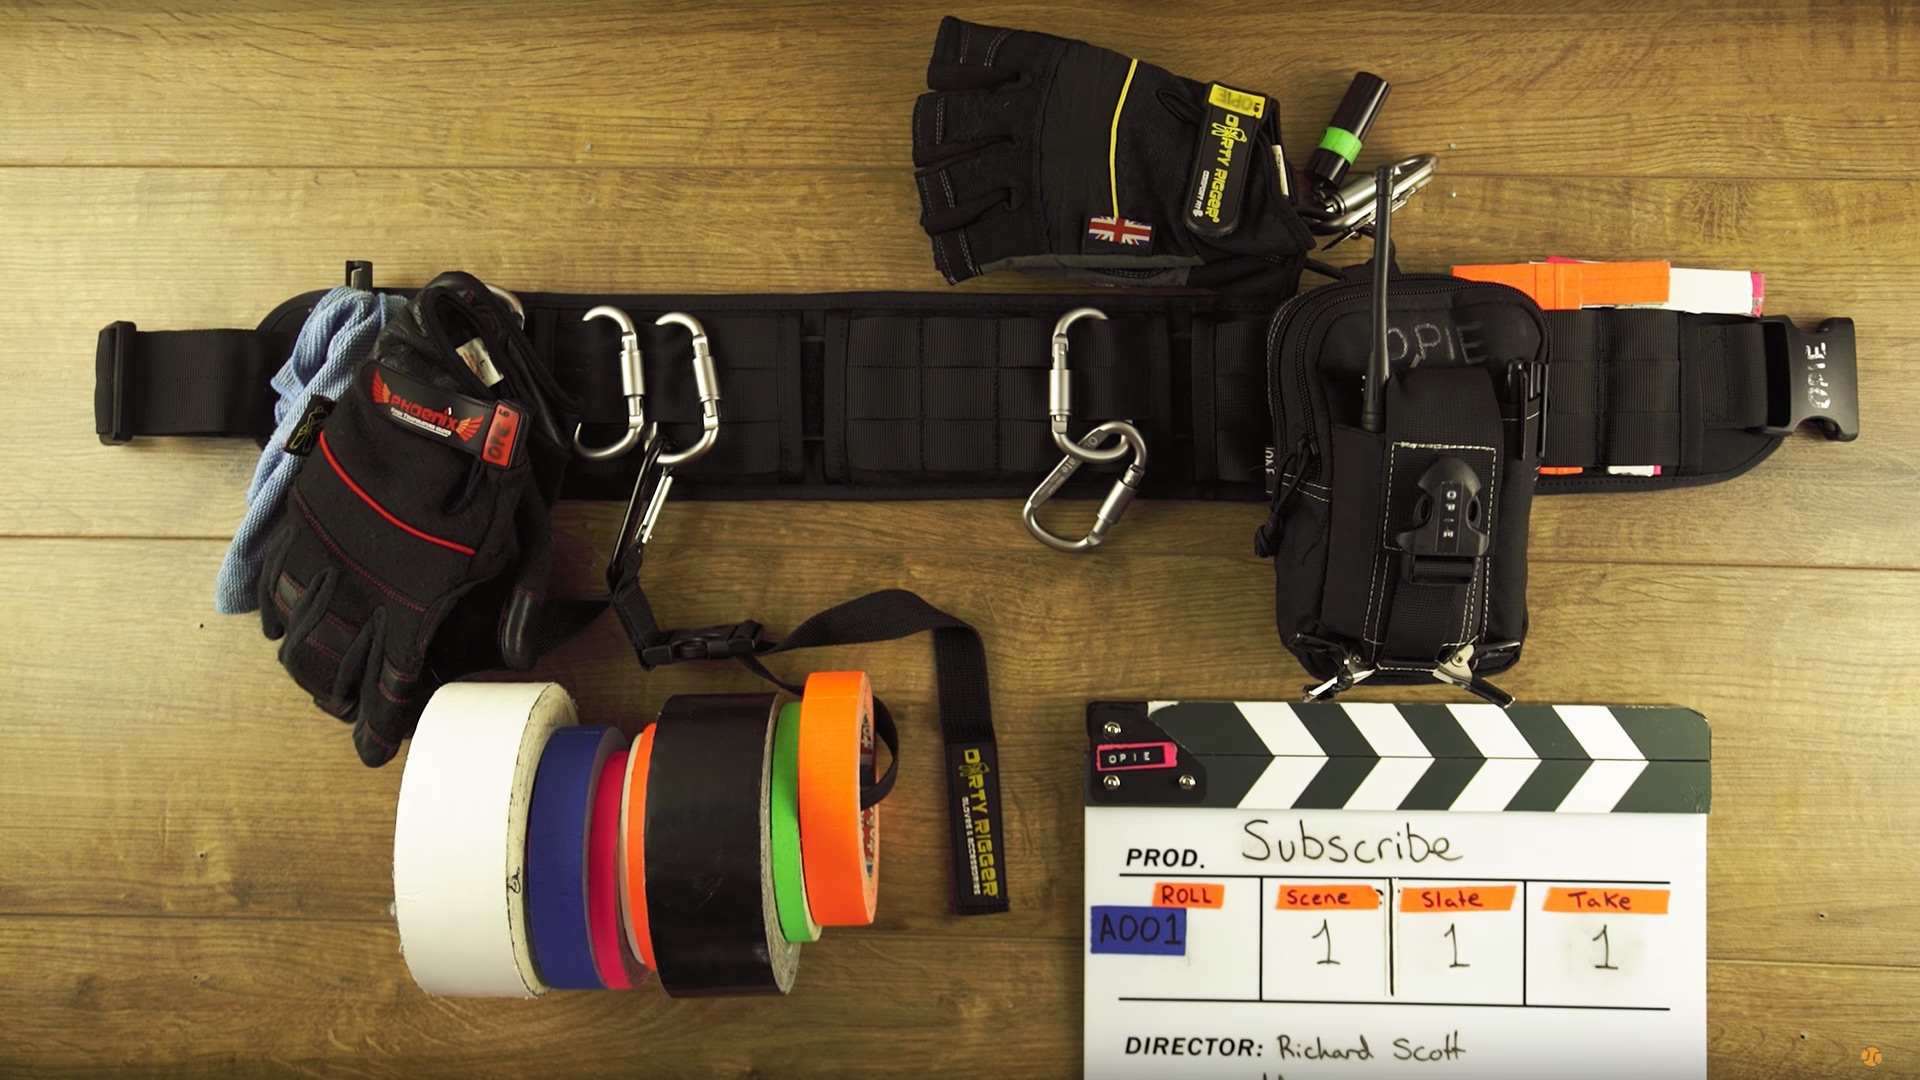
  8. Add velcro to a dry wipe pen and your clapper board so you always have a place to store the pen.

  9. Ask personal questions to your actor whilst they are in character to get to know more about your character's backstory. This is called Hot Seating.

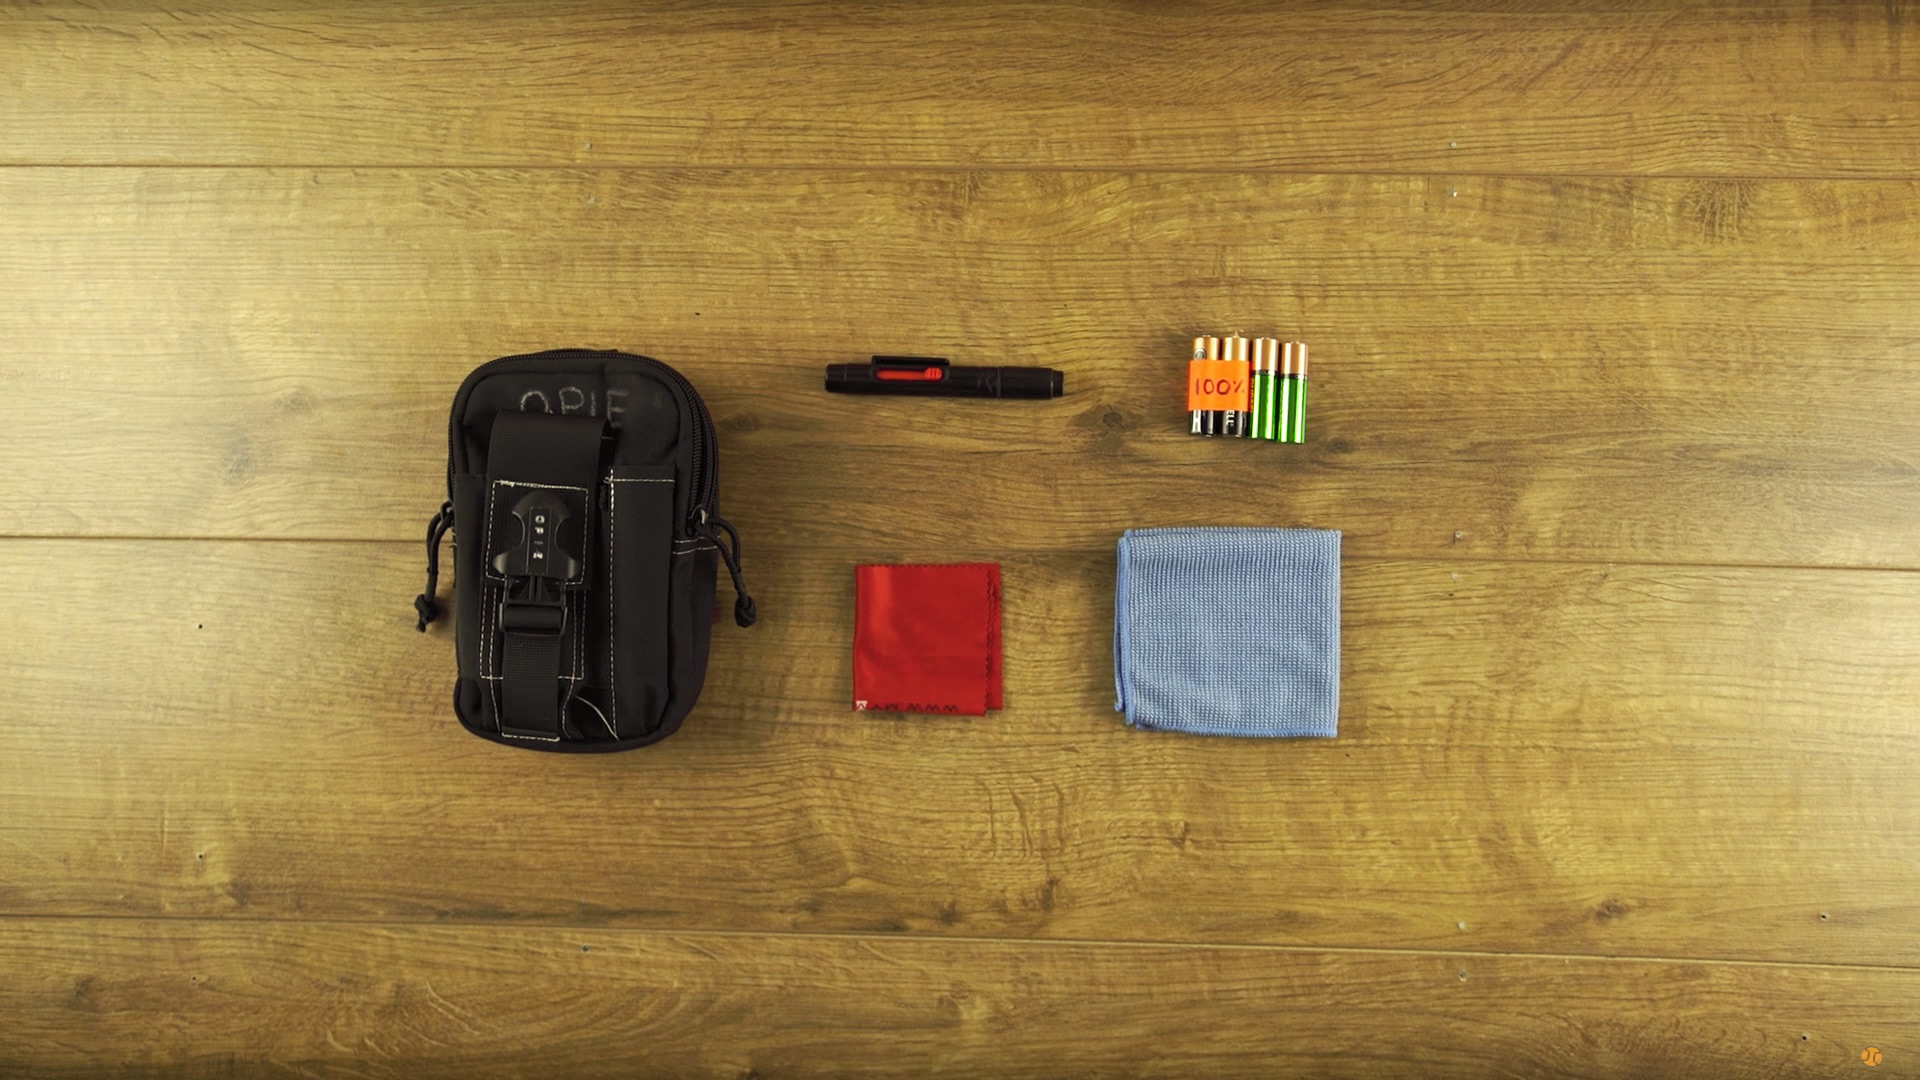
  10. Number your batteries so you know how many you have used and have left.

  11. Get the actor to say their dialogue at their highest level they would when performing, then set your levels so you aren’t peaking.

  12. A 5in1 reflector has a 6th use. You can use the cover to wrap around a hanging light to flag it off the walls and focus the light downwards.

  13. Print off a small shot list and clip it to your belt. It will not get in the way, and it will save time as you always have a shot list next to you.

  14. Play music on set to help people get in the role, especially for your actors.

  15. Shoot at a higher f-stop. It’s better to have your shot in focus than shallow depth of field.

  16. Get your actor to perform the action and dialogue that is a couple of lines before the shot you are shooting. This will give them momentum and lead them into the shot.

  17. Watch lots of films.

  18. Watch short films.

  19. Add LED lights to your camera bag.

  20. Go to the Film Riot YouTube channel, click sort by, oldest date added, and watch all of their videos. Also make notes.

  21. Use a headphone splitter so two people can listen during recording and playback.

  22. When your actor/characters sits down, the drama sits down. So have them doing something in the scene, it’s boring just watching two people sitting or standing talking to each other.

  23. Spend time organising your files before you start to edit, you will thank yourself later.

  24. When you have the first draft of your edit complete, don't look at it for a week.

  25. Show it to others, and ask for feedback.

  26. Work on other peoples short films, you will learn a lot more than watching videos.

  27. Take a notepad and a pen with you to make notes about the shoot, being on your phone does not look professional

  28. Don’t be on your phone, you don’t need to check Facebook and Instagram when you’re making a film.

  29. Ask before you take a set photo for your social media, the production team might want a closed set.

  30. Have someone on set that is taking behind the scenes photos, these are nice to have for promotional and portfolio material.

  31. Learn the rules of filmmaking before you start to break them.

  32. And if you break them, make it for a good reason because if you don't get it right people will know.

  33. Some audio recorders have a dual record mode, one can be set lower just incase your audio does peak.

  34. If you are the sound recordist and the audio peaks or there is an external noise that can be heard whilst shooting, don’t shout cut as you still might be able to use some of that take.

  35. But once cut has been called, say you were not happy with that take. It’s better to record it again now than to try and fix it in post.

  36. Don't struggle to reach a light up high which is on a stand, lower it, adjust it, raise it back up.

  37. Use a frosted shower curtain to create a large diffused light source.

  38. If you need your actor to be out of breath, make them go for a jog as you can't fake out of breath.

  39. Make a playlist for each of your characters to help get them in the role of the character.

  40. Get people to read your script

  41. Learn to take feedback

  42. Ask questions to those who read your script. “Is the dialogue okay? Are the actions clear?” This will invite them to give feedback.

  43. If someone says ‘Martini Shot’ on set, it means it's the final shot set-up of the day.

  44. If you're actor stumbles over a line, just keep rolling and go back a couple of lines. Cutting will break the flow and waste time.

  45. If you forget to mark the start of the take or the clapper board could not be in shot, make sure you clap at the end of the take, which is called second sticks.

  46. If you notice the take wasn’t marked, make everyone aware before the camera and sound is cut.

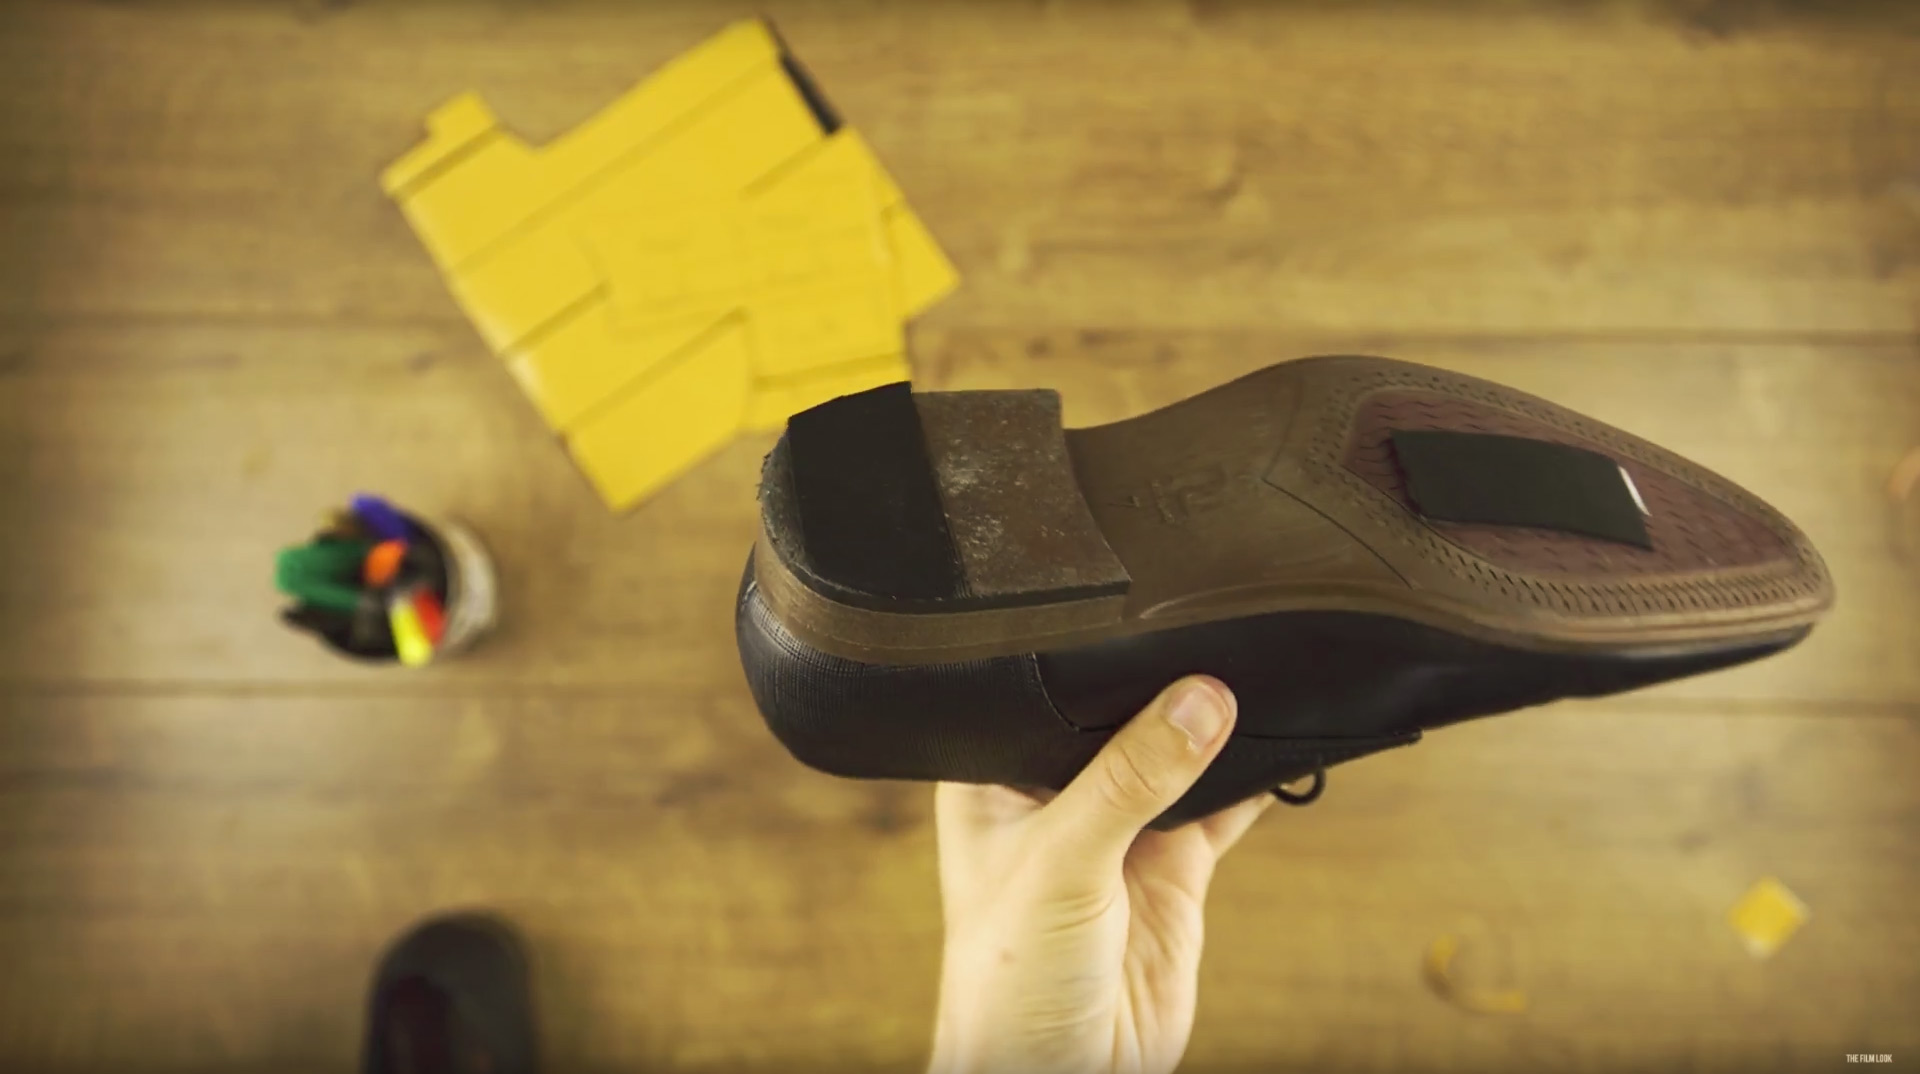
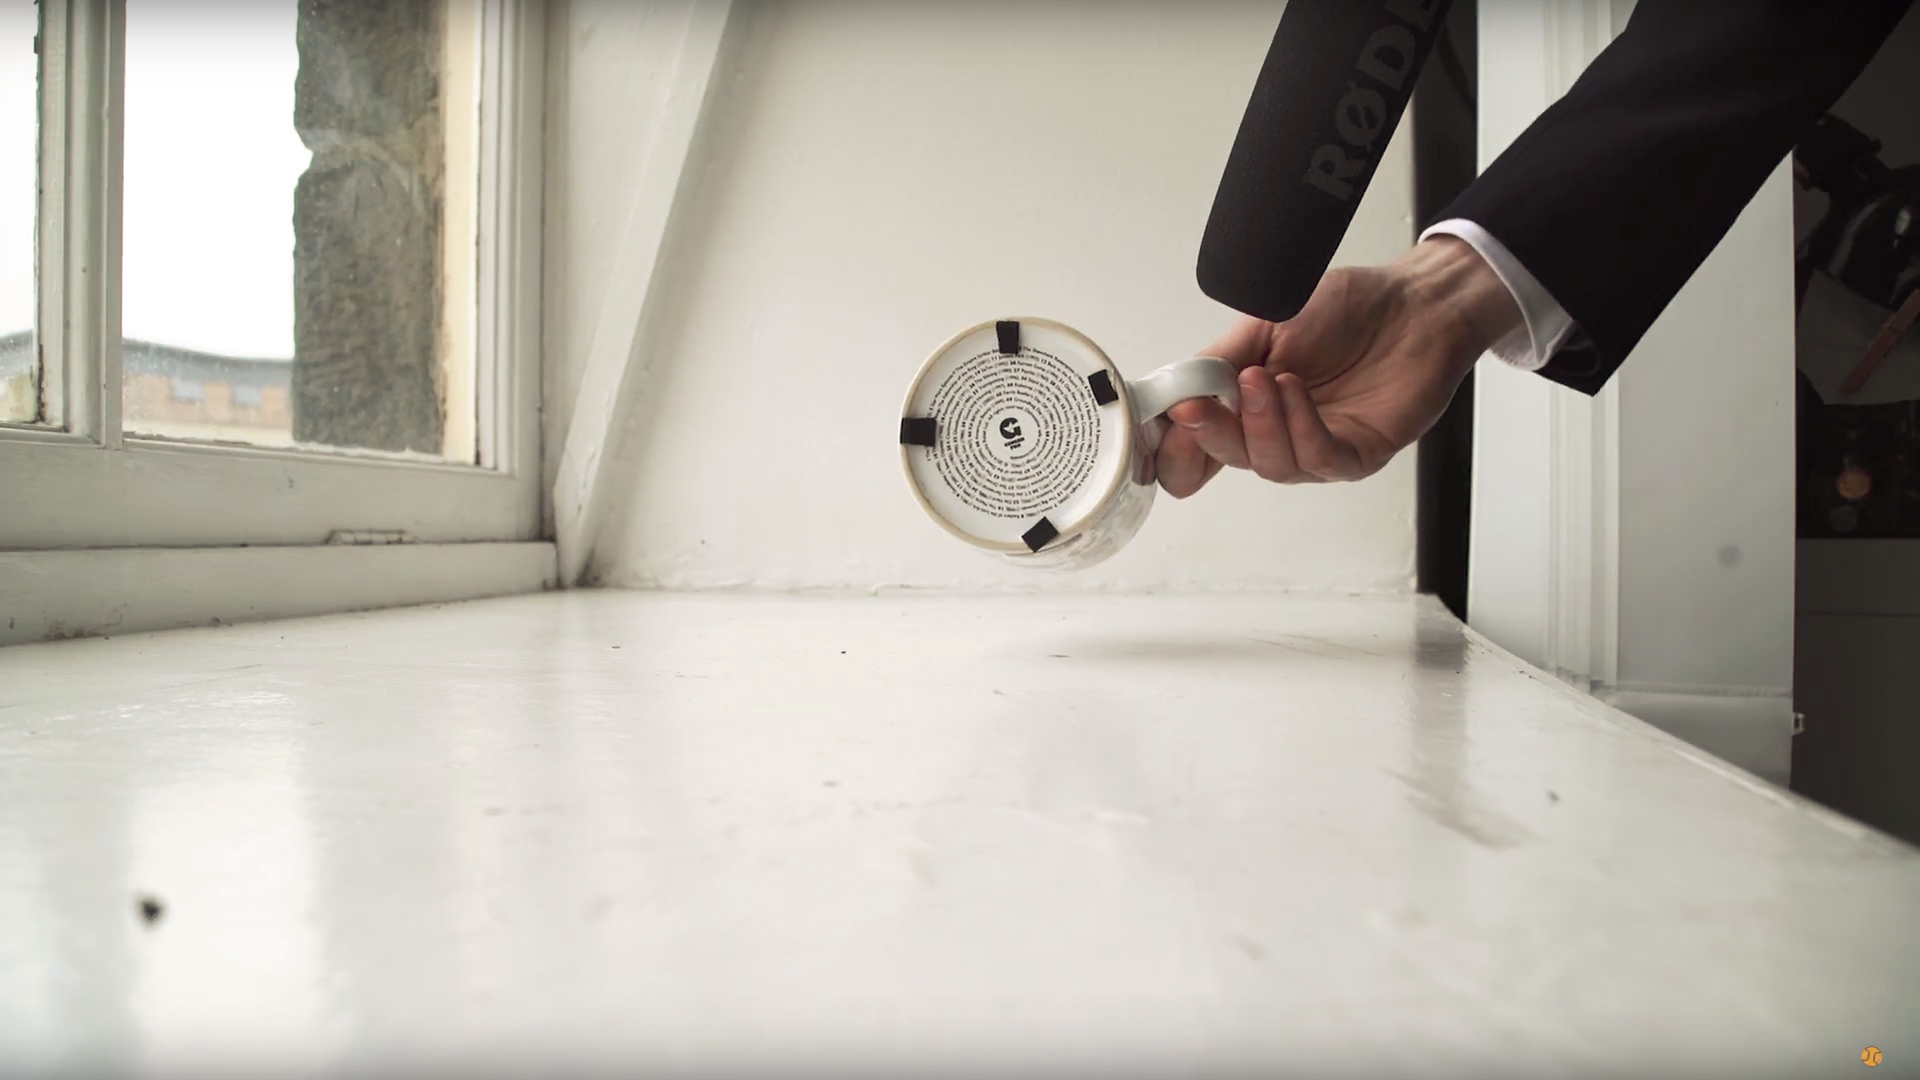
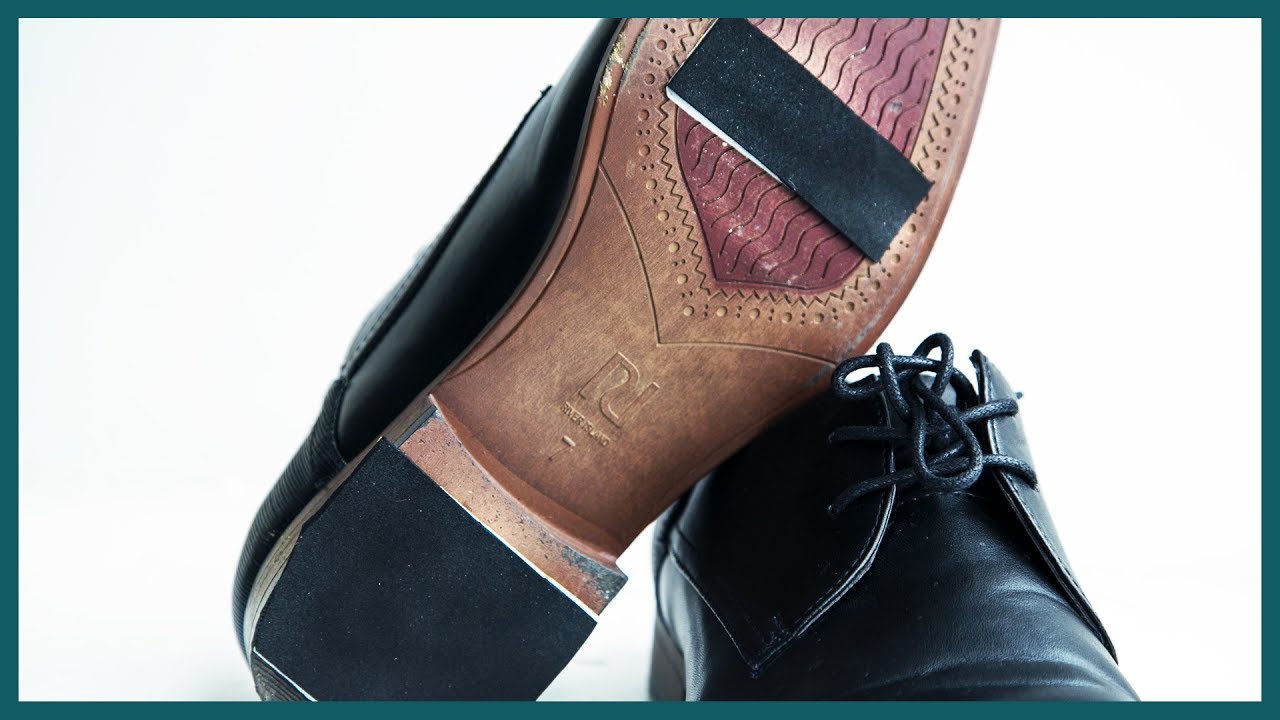
  47. Add Neoprene pads to the bottom of shoes or objects to deaden the noise they make.

  48. Place a CD, Piece of Plastic, Torch, Glass, anything with a reflective surface in front of your lens to add weird flares to your image.

  49. But use them as a reason to help tell your story, not just because they look cool.

  50. Make Films

  51. Whilst we are on the subject, learn to trust others to help make your film, people will be willing to help.

  52. Pre-line your script so you know exactly when to start and finish covering a shot.

  53. Date your camera batteries so you know how long you have had them. Batteries lose charge over time and this way you will know how long you have had them.

  54. The type of equipment you shoot on does not matter, but it also does depending on the type of film you are making.

  55. Learn how to use new equipment before you get on set. If you have to learn it whilst shooting it's an unnecessary stress you do not need.

  56. Work with the camera team to find out how low you can boom before you dip it in shot.

  57. And don’t get your microphone in the shot. I’m counting that as another tip.

  58. Get a camera slider.

  59. Don’t over use slider shots, use the movement to help tell a better story not just because the shot looks cool.

  60. Make a movie poster for each of your short films, print it out, and put it up to remind you what you have achieved.  

  61. Always have a few large coins in your bag for tripod plate screws.

  62. Or buy a flat headed screwdriver which stays in your bag and is just for tripod plate screws.

  63. Make sure your microphone is no more than 3 feet away from your subject.

  64. Have your camera slate in the shot before the camera starts to role. This means the first frame will have all of the shot information which will save time when naming and syncing up your shots as you will not have to go looking for the information.

  65. Freesound.org has thousands of free sounds effects and foley. They have everything from someone eating and apple……..to gun shots.

  66. When you are packing your equipment for your film, test your camera, turn on every light, test extension cables, microphones, audio cables, make sure your batteries are charged. Basically test everything before the shoot.

  67. You can never have to many extension cables

  68. A tripod can be called legs or sticks.

  69. If you have to adjust your tripod legs to make your camera level, buy one of these neewer leveling bases. You’ll wonder how you lived without one.

  70. Buy old prime lenses. They are cheaper, sometimes sharper and have different characteristics that you will not find on newer lens.

  71. Try taking a couple of frames off the start and end of each shot. It may work well to tighten up your edit.

  72. Before editing your audio, play your favourite song and adjust your volume to a comfortable level. Make a note and always monitor your audio at this level.

  73. Your dialogue should lie between -6dB and -24dB in the mix.

  74. Condense your shot list. Find way to join the shots together with pans and tilts. Movement is always more cinematic than a cut.

  75. Before the shoot, sit down with your cast and crew and go through the entire plan to get everyone on the same page.

  76. At the end of the shoot, once all of your equipment is out of the location, do one last check to see if you have missed anything.

  77. When you are handing someone a piece of equipment, don’t let go until they say ‘Hands on’ then you can say ‘hands off’. Safety is key on set.  

  78. Before you turn on a light shout ‘Lights going hot’ this will give people a warning and time to avert their eyes.

  79. Get a small LED torch like this one. It can fit in your pocket and costs about £3. You wouldn’t believe how useful it can be.

  80. Use bungee cords to stop lights stands and tripod from falling over when stored.

  81. Remember, achieving the film look is not about camera setting, fancy shots, and the LUT you apply to your footage. It’s everything you see in the frame, props, costumes, acting, locations, everything.

  82. You don’t always have to shoot using a flat profile like S-Log 2 or 3. Learn how to shoot using other profiles as well, it will save you time if the project needs to be turn around faster, or if you do not have a lot of experience color grading flat footage.

  83. Have brightly coloured audio cables. You can see them on the floor and if the cable drops into frame.

  84. If your actor is performing an action whilst delivering dialogue, try to minimise the noise of the action so it doesn’t infect your dialogue.

  85. Don’t have a shoulder rig? Use your Tripod

  86. Unclip the bottom tripod legs first, it will be easier to access the next leg as they are in the middle of your tripod and not at the bottom.

  87. If you have a plastic lightweight tripod do it the other way.

  88. Feed your cast and crew

  89. A fishing seat box trolley is a cheap and good way to move your equipment around.

  90. Watch your film and make a list of the sounds that you should be hearing. Clothes rustling, chairs creaking, cups clinking on the table. Fill your sound space.

  91. Hot swap between your film and your favourite movie when mixing audio. Your audio should be a similar level. You’ll know if its too loud or too quiet.

  92. Understand that people will not turn up and drop you in it at the last minute.   

  93. Before your final export, watch your film on a phone, tablet, and TV to see what it looks like. Every device will look different.

  94. Also listen to your film on a phone, tablet, TV, with cheap headphones and on studio monitors if you can. Can you hear all of the sounds on each device? If not, trying to make changes and listen again.

  95. Clip the script and shot list to the back out our clapperboard. This works great if your clapper loader and your 1st AD are the same person.

  96. Recording clean dialogue is your highest priority, don’t worry about recording foley yet, you can record all of that after if needed.

  97. If you can not apply aspect ratio bars to your camera or monitor, work out where they need to be and stick card to them.

  98. Spray Paint your lens caps Orange, they’re easier to find.

  99. When you rip of a piece of tape, leave a little tap on the roll so it is easier to get the next piece of tape.

  100. Making films is the coolest thing, so remember to have fun.

This video was Sponsored By

🎵 http://bit.ly/pbheat-tfl - Click here to download this episode's track. Check out Premiumbeat.com to discover a huge range of exclusive royalty free music!


DISCLAIMERS:

Some of these links are affiliate links, if you purchase gear via these links The Film Look will receive a small commission, but there will be no additional cost to you. Thank you!

Writing Apps to keep you Focused

Links to app mentioned in the video


Trello - http://trello.com

Flux - http://justgetflux.com

Rainy Mood - http://rainymood.com

Script Speaker - https://scriptspeaker.com/

If you're anything like us, when you sit down to write you need to make sure you are sitting in the perfect location. You need your notebook with your favourite pen. All your notes need to be set out correctly, and you can not start writing without a cup of tea.

We can’t help you find out what you need to start writing, but here are a few apps to keep you focused when you get passed the hurdle of sitting down to start.

Trello

Trello.jpg

Trello is a website and app which allows you to organise projects. It is built so you can add lists, and in those lists you can add cards. In each card you can add notes, photos, videos, create checklists, set deadlines, and sync Google Drive documents.

When writing you can make a list for your characters and make individual cards for each person. In each card you can make notes for each of your characters, attach photos of the type of person you would cast or even costume choices.

The list can also be used to help organise the structure of your story. You can have a list for Act 1, 2, and 3. In those lists you can treat each card as a scene, the same way you would use index cards.

By using Trello you can quickly and easily move the cards around if the structure changes in your film or if a scene works better elsewhere. Adding notes to each scene card will help you keep organised and each card can be customised with its own colour to help identify it.

Basically Trello works like using post it notes, but you can quickly move them around, and attach more information.

Trello has many other features that you might like, the ones we have mentioned are just the ones we use the most. It’s great if you are working as a team as many people can have access to the same board.

This is what we use to help organise The Film Look YouTube channel.

Flux

Flux.jpg

Flux is a program which adapts the color of your computer's display. During the day your screen will be running at a cool temperature of 5500k. When the sun starts to set, night mode will gradually change the colour temperature of your screen to a warm 2300k.

If you are a night owl and do most of your writing when everyone else has gone to bed, get flux.

Writing-apps-Flux.gif

Your eyes will adjust to the colour change without you noticing. Reducing the blue light coming from your screen will protect your eyes from light strain and will allow you to write more comfortably.

RainyMood

Rainy Mood.jpg

We find white noise can help distract us from what is happening around us and the best white noise out there is Rainy Mood. Rainy Mood is exactly that; it plays the sounds of rain and thunder.

When you’ve been listening to rainymood for over an hour you become very relaxed, and it definitely feels weird when you take off your headphones and you can’t hear it anymore.

Music

Alternatively, put on a soundtrack to a film or TV show similar to the idea you are wanting to write.

If you’re writing a horror, listening to horror music will help you get in the mood. In the past we have listened to the song Time from the Inception Soundtrack on repeat for hours and played rainy mood alongside it.

This combination can help you to immerse yourself into your writing.

Writing-Apps-to-Keep-you-focused.gif

Script Speaker

If you are writing scripts you should also be reading them. Finding the time to do this can be difficult, but if you listen to podcasts or audiobooks whilst you are walking or on your daily commute there is an app called Script Speaker which turns a script into an audio book.

Script-Speaker.gif

If you sign up to Script Speaker you can upload your first 3 scripts for free, and after that it is $0.99 each. All you have to do is upload your script and review any changes the app makes. Normally this is just changing INT and EXT to Interior and Exterior.

Then you can choose between Laura, Sharon, Peter, or Will to narrate your script. We’ve found Peter to have the least robotic voice.

Script Speaker.jpg

A 15 page script took around 1 minute to convert. After that you can download it onto your phone and listen to it on the go. It does take a little while to get used to.

Don’t just use Script Speaker to listen to other peoples scripts, use it to listen to yours too. Listening back will allow to approach your work from a different angle and allow you to be independently critical. When writing any script you can become so familiar it is easy to miss mistakes in the story, so listening back rather than reading can help you identify any issues.

If you have any suggestions for programs you use to help you write let us know in the comments below...and stop wasting your time reading this blog post and go and write!


This video was Sponsored By

🎵 http://bit.ly/track-tell-me - Click here to download this episode's track. Check out Premiumbeat.com to discover a huge range of exclusive royalty free music!


DISCLAIMERS:

Some of these links are affiliate links, if you purchase gear via these links The Film Look will receive a small commission, but there will be no additional cost to you. Thank you!

How to Tell Better Vlog Stories

One of our subscribers asked us how they can tell better stories in their vlogs.

Well with a little filmmaking knowledge and some basic storytelling techniques, we can help YOU make your vlogs more entertaining, informative, and engaging - all without spending a single penny more!

First, let's define what a vlog actually is! It’s a broad term, so lets put down some ground rules: a vlog is a piece of video content posted by a creator who features AS themselves in front of the camera and shares their thoughts and knowledge on something.

To put it simply, vlogs are videos of people sharing their world.

“My camera isn’t good enough”

camera-doesnt-matter.gif

Let’s get this first one out of the way. Your kit is the last thing you have to worry about when making vlogs. You don’t need a fancy camera, cool lights, and a top of the line microphone.

As long as the footage isn’t blurry and we can hear you clearly, it’s perfectly good enough for a vlog. Most smartphones are more than good enough for shooting content. So don’t blame your tools!

“I’m not interesting”

core-subject.gif

When something isn’t quite right with your vlogs, the first thing you’ll probably do is blame yourself. “I’m not interesting in front of the camera” you might say. WRONG. It’s not that you aren’t INTERESTING, it’s that you are not INTERESTED.

Successful vlogs are about people who love what they do. They have a passion.

Whatever subject it is you are talking about, you must be invested in it. This is your core subject, and it’s this single core subject which will help give your vlog some structure. More on structure in a bit.

Cody’s Lab is a prime example of being interesting by being interested. He makes videos about mining ore, smelting, and science experiments. He even has a series about Beekeeping. Until I watched his videos, I had literally no interest in Beekeeping, but because Cody is so passionate about his core subject I kept watching.

You don’t have to be the most charismatic and exciting person in the world, but by simply having a real interest in what you are talking about, you will automatically shine on screen.

Have a plan

A mistake a lot of new vloggers make is hitting record on the camera and waiting for something interesting to happen in front of them. Unless you are a rich superstar rapper who ends up in crazy situations every single day, you’ll need to plan your vlog to make it more entertaining.

Write down some subjects, places, things, or topics you want to cover in your vlog; just make sure they are things that interest YOU.

Before you go out for the day, you should have an idea of the type of video you want to make. This will give you a stronger backbone when you shoot, it will give you a focused subject, and it will help you craft the story as you go along.

Storytelling 101

storytelling-101.gif

“Character -> Conflict -> Goal” is an essential storytelling technique. Every great story follows this rule and your vlog should too if you want to stand out from the crowd.

Who is the character? YOU are! Interesting characters have strengths AND weaknesses, so don’t be afraid to show what you are AFRAID OF, CAN’T DO, AND DON’T LIKE, as well as the positives.

What is your goal? Tell us about what you want to achieve inside the vlog. In the filmmaking world this is called exposition. It’s the information the audience needs to know in order to follow along with the plot.

For example, in the movie Inception, they need to explain the whole thing about dreams, implanting memories, and stealing thoughts in order for the audience to be able to follow along.

So tell your audience your goal, document your journey, and show us the obstacles that get in your way.

Arrive Late - Leave Early

arrive-late---leave-early.gif

In filmmaking there is a term called “Arrive Late - Leave Early”. You see this executed in film and TV all the time. It’s that cut between the Police Officer grabbing his jacket off his chair and arriving at the scene.

You don’t need to see everything in between to understand the change of time and location - your brain works it all out.  YOU can use this technique to help improve the pace of your vlogs.

If you want to show the passage of time, for example, you can actually do this in very few shots. End your scene by picking up your jacket, insert a quick shot of your watch, then close the door at the next location.

We understand in just a few seconds that you’ve left one place and arrived at another without masses of filler material. Your shots give the audience visual information, so don’t give them too much useless information just to fill up the timeline. Use your time wisely, and try to cut the fat from your edit.

If you are simply telling the audience that you’re moving location, you don’t need to show: tying your shoes, grabbing your food, closing the door, shots of your feet, getting in the car, putting on your seat belt, a timelapse of you driving, parking, getting out…

This is not very entertaining, nor is it informing the audience to further the plot of the film.

Some people might not agree with what I’m saying. Some people might prefer the organic, no-format, whimsical style of a vlog. And that’s totally fine! But if you want to compete with the best, using some storytelling and filmmaking techniques will certainly help you stand out.


This video was Sponsored By

🚀 http://bit.ly/tflrs-creator - Become a social media powerhouse with RocketStock's video element pack, Creator. This collection comes packed with logo reveals, end screens, subscribe animations, and much more.

🎵 http://bit.ly/pbbluenotes-tfl - Click here to download this episode's track. Check out Premiumbeat.com to discover a huge range of exclusive royalty free music!


DISCLAIMERS:

Some of these links are affiliate links, if you purchase gear via these links The Film Look will receive a small commission, but there will be no additional cost to you. Thank you!

Palette Gear Review

In the last 2 years we have uploaded around 200 videos to this channel. This means we have spent a lot of time editing so any new shortcut we find to make the process quicker is like winning the jackpot.

The team over at Palette have sent over their Palette gear to try,  and see if it can improve our editing workflow. 

What is the Palette Gear

Palette Gear Review.jpg

Palette is a modular hardware device that allows you to set program shortcuts by using the buttons, sliders, and dials.

For example, instead of using the mouse to click on the volume and move it up and down, you can use the slider or dial to do this.

Using a physical button is quicker, easier, and it just feels much nicer to carry out such a task.

The Palette Gear can do much more than just change the volume of your computer’s sound, but we will get into that later on in the video.

There are a few different kits you can buy, and the one we have is the expert kit which goes for $300.

How to Set Up

I am not going to go into all of the details of how to set up the Palette as there are lot of videos already on YouTube from Palette that explain that, and also it is super easy to do.

It’s really just plug and play. Dive into the functions and work out what layout works for you.

If you are used to using programs like Adobe Premiere, Photoshop, or Lightroom, this will be a breeze to set up. It just takes time to get used to it.

Palette Gear Review Layout.jpg

The Design

You will not be disappointed with the design of the of the Palette Gear, it’s actually made filming the b-roll for this video very easy because it looks so cool.

The arcade style buttons feel like arcade buttons, the sliders are smooth but have a nice hard stop, the dials turn with ease and have a nice click when you press them down.

The LEDs come in handy to customise your setup, and it helps you colour code your setup.

Palette Gear Review LED Lights.jpg

For my editing profile in Premiere Pro I have them set to purple, with the two buttons set to green as they control something else.

When I switch to my colour correction profile I have the buttons set to red, and when I am using Spotify I have the two controls set to green.

And the rest are black out as they have no controls assigned to them, which was my choice.

Changing the colours is super easy and there are thousand different design and workflow combinations.

Palette Gear Review Desk Setup Top.jpg

I have the Palette setup right above my keyboard. I did have it to the side at first but that meant I could only really use one hand to access it, and having it above the keyboard means I can work with the buttons from left to right which feels a lot more natural.

Palette Gear Review Desk Setup Side.jpg

Everyone's desk setup will be different, you just need to spend a little bit of time to work out what is best for you, and like I said earlier it’s easy to change the setup.

At first I selected one of the many pre built profile which are supplied with the Palette, but you can also download other user profiles from their website.

Start with these and learn what you do and don’t need, then it’s time to customise.

This is my setup.

The first two buttons are set to simply skip forwards and backwards between the different profiles, this will be come clear in a minute.

I have a number of different profiles installed with my most used being for Adobe Premiere Pro where I have 5 different profiles.

The first profile is for when I am just editing a project together, with controls to zoom in and out of the timeline, jog through the timeline, and change the audio track height which makes doing this simple task much easier.

The next two profiles are for when I am using the Lumetri colour grading plug in. I have it set up so grade 1 can change the temperature, tint, exposure, contrast controls.

Then grade 2 has the controls for highlights, shadows, whites, blacks, and saturation just like the basic colour correction in the Lumetri panel.

Palette Gear Review Colour Greading.jpg

This is why I have the first two buttons set to switch forwards and backwards between the profiles so I can quickly access all of the setting I use the most.

You can just use one of these buttons to skip through the profiles, but it does mean you can only skip forwards until you get back to the start.

Other profiles I have for Premiere Pro are controls for the creative tab in Lumetri to change the percentage of the LUT, add a film fade, and change the vibrance.

Then a profile to change the scale, X and Y position of a clip.

I did try to use the Palette to edit audio as there is a profile already setup which has all of the shortcuts to add keyframes and edit, but I felt it was slowing me down.

Using the mouse and keyboard shortcuts does this same task a lot quicker.

The other profiles i use are for Lightroom, which has a similar set as the colour grading options from Premiere Pro, and also for Spotify which is a nice bonus to have as I use it every day.

You can also use the Palette for other programs like After Effects, Audition, InDesign and many others are being added.

My Recommendations

Like I said we have the Expert Kit which is the middle kit, but what's good about the Palette gear is that you can buy everything separately.

So if you find out that you need more buttons you can just buy the buttons.

For my current workflow which is mainly using the Palette for colour, I think I would get rid off the sliders completely and add more of the dials.

The reason is because the dials can perform 3 actions, they can dail left and right which can change a number value higher or lower, and you can also press them down to perform a different action, like reset the setting it controls.

Palette Gear Review Sliders.jpg

Also if the slider is not in the center when you start to move it, the controlling value jumps to where the slider is so you have to move it back to the center to start from 0. The dials always start from 0.

Final Thoughts

So, should you get a Palette Gear?

If you are like me and use Lumetri to colour correct and colour grade or use lightroom to do the same with your photos on a daily basis, I think it is a must.

You can definitely do all of this without the Palette, but it does make it a lot easier and quicker.

The Palette is not a replacement for your mouse and keyboard, it is an extension and helps you fine tune your control over your workflow to allow you to be more creative.

Palette Gear Review The Film Look.jpg

This video was Sponsored By

🚀 http://bit.ly/rs-aspect - Give your video a clean look with Aspect by RocketStock. It features over 200 logo reveals, intros, lower thirds, overlays, icons, and transitions.

🎵 http://bit.ly/track-tell-me - Click here to download this episode's track. Check out Premiumbeat.com to discover a huge range of exclusive royalty free music!


Equipment Links

🎥 This episode's kit/gear/equipment:

https://palettegear.com/


DISCLAIMERS:

Some of these links are affiliate links, if you purchase gear via these links The Film Look will receive a small commission, but there will be no additional cost to you. Thank you!

Tangle Free Cable Magic Trick

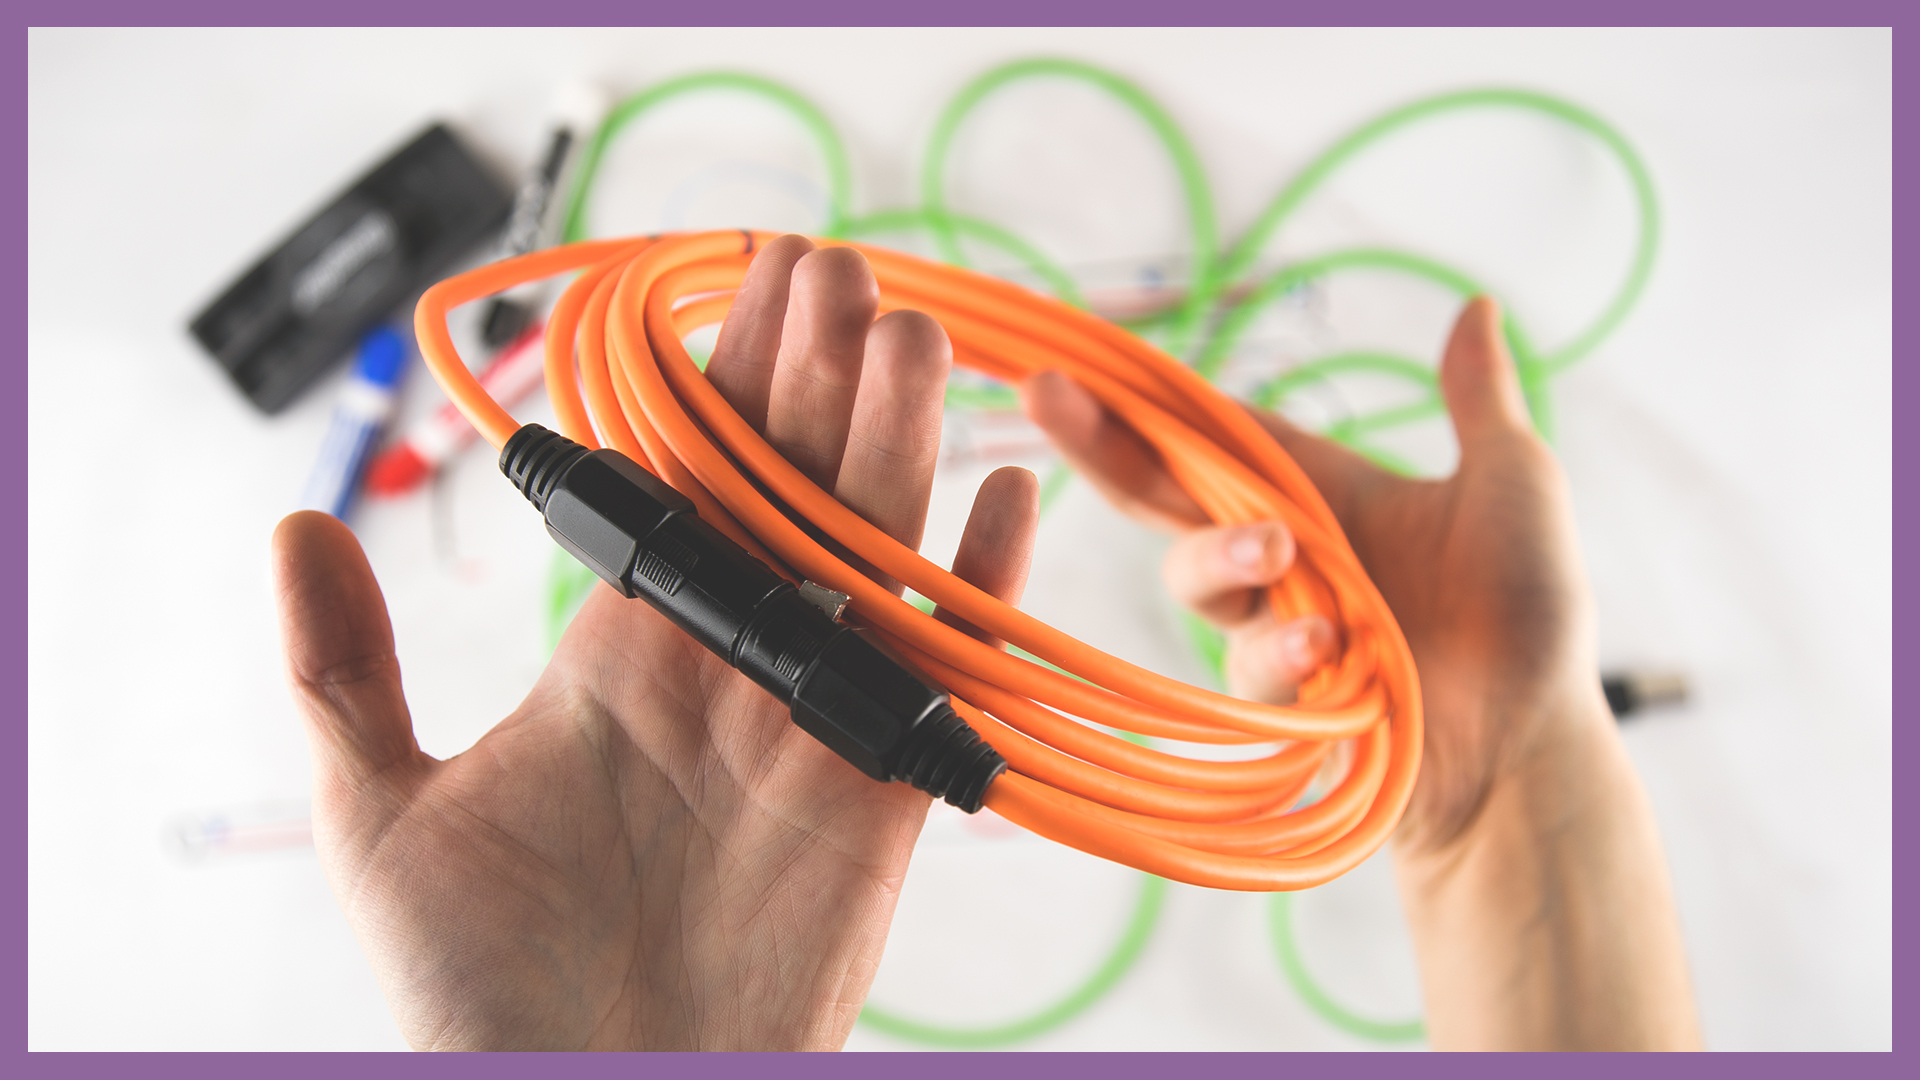
Cables: not the most exciting bit of kit, but still super important. Knowing how to wrap them correctly is crucial if you want them to last a long time and have them unravel without knots or tangles.

Let me show you the first common mistake.

First-Mistake.gif

Don’t wrap your cables like this ^. This will tangle it all up and twist the inside of the cable which will eventually cause it to break.

Second-Mistake.gif

And definitely don’t wrap your cables like this ^. All you’re doing is stretching the cable, and again, it’s gonna break.

To prevent your cables from internally twisting and breaking, slow yourself down and try this:

Instead of forcing the cable into loops, let it do the work. All you need to do is hold the cable out in front of you, give it a gentle twist with one hand, then bring your hands together. This will loop the cable without twisting the inside.

Let me tell you how and why this works. Imagine you’ve just jumped inside the cable and it’s now hollow like a tunnel. You’re inside the tunnel and it has a floor to stand on. You can walk along to the other end in a straight line no problem because of the floor. But what if the cable winds around and down and loops like a winding staircase? You still want the floor of the tunnel to remain on the ground.

By adding a gentle twist and letting the cable loop itself when you bring your hands together, you are keeping the floor to the ground.

Science-ish.gif

If you did it like this ^ the floor will eventually ride up the wall and onto the ceiling. This will twist and break the inside of the cable.

Okay, that’s part one! Your cables will now last a lot longer. Now for a tangle-free method!

You might notice that even with this gentle-twist technique your cables will still get a bit tangled after you pull them out of storage. This is because the loops will not always stack in perfect sequence. In storage, they will likely fall into each other and start to tie up the loops.

Mega-Spin.gif

The trick here is to add a reverse loop on every other loop. This will make the cable unravel completely tangle free by creating a stop-gap between the loops, preventing them from accidentally hooking into each other.

So begin with a gentle-twist and let the cable loop. Then on the second loop, bring the cable into itself to create a loop which will stack inside itself rather than on top. You will want to do this with every other loop. It’s ridiculous but it honestly works.

It’s time to stop treating your cables like rope and give them some care. It takes a little more time and care when you wrap them, but it means ultra-fast deployment when you need them quickly.

Wrapping Cables

This video was Sponsored By

🎵 http://bit.ly/pbtrack-finestimports - Click here to download this episode's track. Check out Premiumbeat.com to discover a huge range of exclusive royalty free music!


DISCLAIMERS:

Some of these links are affiliate links, if you purchase gear via these links The Film Look will receive a small commission, but there will be no additional cost to you. Thank you!

SmallHD Focus Alternative? | AndyCine A6 5.7 inch Monitor Review

We’ve used a bunch of budget camera monitors, mainly 7 inch monitors. But there are times when a 7 inch monitor attached to your camera is just too bulky.

The guys over at ANDYCINE sent us their 5.7 inch field monitor to try out. So let's find out if a 5.7 inch monitor is the Goldilocks-size we’ve been looking for!

BUILD QUALITY

AndyCine-a6-Review2.gif

The ANDYCINE A6 field monitor has a tough plastic construction. Don’t expect this to survive too many drops, but on the bright side, it’s really lightweight which is great for smaller rig setups.

In the twist test it does a good job with hardly any flex.

The included articulating arm is of full metal construction and is very smooth when changing the angle. It’s not perfect; there is a bit of play when you slack off the monitor, but once you tighten it back up, it’s going nowhere. It also comes with a cold shoe mount for adding a small on-board microphone.

It includes 8 buttons on the top for on/off, navigating menus, and some act as function buttons which you can set from a list of features. More on features soon.

The monitor includes ¼ 20 threading on the top and bottom as well as the right-hand side, so you can attach the monitor in a hanging position and a standing position with something like a magic arm if you prefer.

This magic arm is not included but I will add it into the description below.

I/O

AndyCine a6 IO.jpg

The monitor features HDMI input with support of up to 4K UHD recording. It has a DC 12 volt input for power from a wall socket, and even includes a DV output of 8 volts so, with the correct DC coupler and dummy battery, you can power your camera with the battery from the monitor.

It includes a port for a USB upgrade for firmware updates, and it even has a headphone jack; just don’t expect to accurately monitor audio from the headphone jack as the latency is just slightly too late for comfortable use. But for video playback, it’s totally fine.

SCREEN

AndyCine a6 Arm

The best thing about this monitor is the screen. The resolution is a solid 1920x1200, which will give you full 1080p at 5.7 inches which means this monitor is really sharp. Great for nailing focus, even without zooming in to double check.

The screen is bright and the colour accuracy is much better than most budget monitors. Everything looks like it should from out of the box. It’s not winning colour accuracy awards, but white is white, black is black, and skin isn’t green.

LATENCY

AndyCine a6 Latency

This isn’t the fastest monitor in terms of latency, but certainly not the slowest. There is a slight delay as you would expect from a budget monitor. But honestly, once you get the monitor on the camera and begin shooting with it, you forget about the latency and it really doesn’t affect shooting.

SOFTWARE FEATURES

AndyCine a6 False Color

For a full list, check the item link below. As for the ones I think are useful, here it goes:

It includes image flip which is a great addition if you are using the articulating arm. Simply programme image flip to a function button and you can hot swap to a tilted view.

This monitor includes false color for managing exposure and lighting ratios which is a huge plus for aspiring cinematographers.

It has an on-screen histogram, a 3 step zoom feature, up to 16x, and all of the display markers you need including centre markers, aspect ratios, and safe frames.

This monitor also includes zebras for monitoring over-exposure, and it even has a battery gauge!

POWER

The monitor can be plugged into the wall with a DC 12 volt plug, sold separately, but I’ll put a link down below if you want to buy one.

It also takes Sony NPF batteries, which is a massive plus. We use Sony NPF batteries for pretty much every battery powered device we have, so kudos to ANDYCINE for using a common power device. Again, sold separately, but i’ve put a link if you want to buy some.

ACCESSORIES

AndyCine a6 Accessories.jpg

The ANDYCINE A6 comes with a few accessories. The articulating arm is a huge plus in my eyes. It makes configuring the monitor really easy, its built very well, and has a cold shoe for a small on-board microphone.

You also get an HDMI to mini HDMI cable. No use to me as the Sony a7s uses Micro HDMI, but still a nice addition. It includes a sunshade which velcros on, super lightweight and really handy. And the whole package comes with a reasonably tough shelled zip bag.

WHO IS THIS FOR?

Firstly you’ve got vloggers and self-shooters. Because of the way it’s designed, with the easy flip screen and function buttons, it’s a great tool to frame yourself up and check focus.

Then you’ve got camera operators, especially those on the DIY and independent level. The monitor is cheap, does the job, it’s lightweight, and it’s a brilliant stepping stone to something a bit more expensive down the line.

PRICE

It’s currently priced at £180 and $180 US. It’s a little bit more expensive than some other monitors we’ve used like the Feelworld 759 and Pergear A7s, but i’d have to say it’s totally worth the money.

It has a fantastic screen, some great functions for exposure and framing, and I prefer the size to some of the more bulky 7 inch monitors. All in all, this is a great budget 5.7 inch monitor. And if you squint hard enough, if almost looks like a Small HD focus.


This video was Sponsored By

🚀 http://bit.ly/rs-aspect - Give your video a clean look with Aspect by RocketStock. It features over 200 logo reveals, intros, lower thirds, overlays, icons, and transitions.

🎵 http://bit.ly/track-boundforglory - Click here to download this episode's track. Check out Premiumbeat.com to discover a huge range of exclusive royalty free music!


Equipment Links

🎥 This episode's kit/gear/equipment:

US links:

Monitor - http://amzn.to/2GdOgEg
Magic Arm - http://amzn.to/2rICQ8G
DC 12 volt plug - http://amzn.to/2E8O5JL
Sony NPF750 + Charger - http://amzn.to/2FdEX62

UK links:

Monitor - http://amzn.to/2E7kD6U
Magic Arm - http://amzn.to/2FeEH70
DC 12 volt plug - http://amzn.to/2FeNRQW
Sony NPF750 + Charger - http://amzn.to/2naZHnD


DISCLAIMERS:

Some of these links are affiliate links, if you purchase gear via these links The Film Look will receive a small commission, but there will be no additional cost to you. Thank you!

Boom Pole Quick Release | Triad Orbit IO-R Review

You wouldn’t believe how many times I’ve chewed the threading on my shock mount and boom pole trying to screw it in on-set. I found a solution: it’s a quick-change coupler, and it’s a wicked bit of kit. 

I’m a DIY sound recordist, and because of this, no knowledge has been passed down generation after generation. If this WAS the case, I imagine I’d have discovered one of these many years ago: the Triad-Orbit IO-R quick-change coupler. Let me show you how it works.

I use a Rode micro boom pole and a Rode Blimp. The problem I have with this equipment is the fact they are made of 2 different types of metal, so one contact is naturally softer than the other which makes it prone to chewing up and destroying the screw unless you are super slow and careful putting it together.

Screw-it-on.gif

So instead of risking damage to your equipment every time you want to attach a shock mount, you can use a coupler. You simply screw each part to the boom pole and the shock mount and when you want to attach it, you pull the release back, slot it into place, let go, and it grips it tight.

It’s essentially the same as a quick release plate on a tripod and camera.

You can buy quick-change couplers with a bunch of different sizes heads and mounts. They even do a light stand version which is really handy. And they also sell multipacks in case you wanted to kit out all of your audio equipment for fast and easy use.

This might not be a groundbreaking discovery for some, but i had no idea something like this even existed. It’s going to save a lot of time tediously trying to screw the shock mount onto the boom without it breaking, and it will save all of the money that I was dumping into replacement parts.

If you are just starting out in sound, take a look at our Indie Film Sound Guide. We run through all the basics of recording sound for micro-budget and small indie level productions.


This video was Sponsored By

🎵 http://bit.ly/track-rollthedice - Click here to download this episode's track. Check out Premiumbeat.com to discover a huge range of exclusive royalty free music!


Equipment Links

🎥 This episode's kit/gear/equipment:

US links: 

Triad Orbit IO-R: http://amzn.to/2ruIrPH
3/8-inch Mounting Head: http://amzn.to/2E1nsqp

UK links:

Triad Orbit IO-R: http://bit.ly/2DrRQcf
3/8-inch Mounting Head: https://goo.gl/m3JYuJ


DISCLAIMERS:

Some of these links are affiliate links, if you purchase gear via these links The Film Look will receive a small commission, but there will be no additional cost to you. Thank you!

DIY Light Skirting

90% of our short film Backstage is set in a locker room, and the location we had for this scene was in an old disused school. We spoke about how we dressed the set in a previous video if you want to check it out:

INT. LOCKER ROOM - NIGHT

The room was 5.7 meters by 3.7 meters and had 7 windows. To make sure we could keep the light consistent, as we were going to shoot a night scene during the day, we decided to block all of the windows which also helps to sell the effect that this is a run down venue.

Boarding-up-the-windows.gif

The room had 4 fluorescent lights which were 36 watts each and had a colour temperature of around 3200 Kelvin. They were the only lights we used to light up the scene. We did this because lighting people from above is not the most flattering lighting setup, which fit the grimy tone of the film, and this type of room would have these type of lights.

Since this type of lighting setup creates a very even look throughout the room, we added DIY skirts to each of the lights. By blocking the light from hitting every where, it now creates a vignette around our subjects. As they are standing directly below the light, and the walls are not being hit with as much intensity as our subject. To help bounce more light downwards we painted the inside of the skirts white.

Before-and-After.gif

Our white balance on the camera was set to Fluorescent Warm White, the tube lights had a green tint to them so we adjusted the colour gamut in our white balance setting to take away the green tint, and make sure the whites were white.

In the final grade we did add some of this green tint back into the final image, but because we had strong colours coming from the walls and one of our characters costumes, it was important to shoot everything as clean as possible.

Sony A7S Picture Profiles

By only using the ceiling strip lights it allowed us to move quickly whilst shooting as we did not had to change the lighting setup after each shot. The only lighting change we made on the day was to either add a little bit of bounce light to bring up the dark shadows of the costumes and under our actors chin.

Reflector-Blocking.gif

Also, we had to flag the light from hitting one of ours characters bright shiny costume as it become overexposed when shooting at different angles in the room.

EXT. CAR PARK - NIGHT

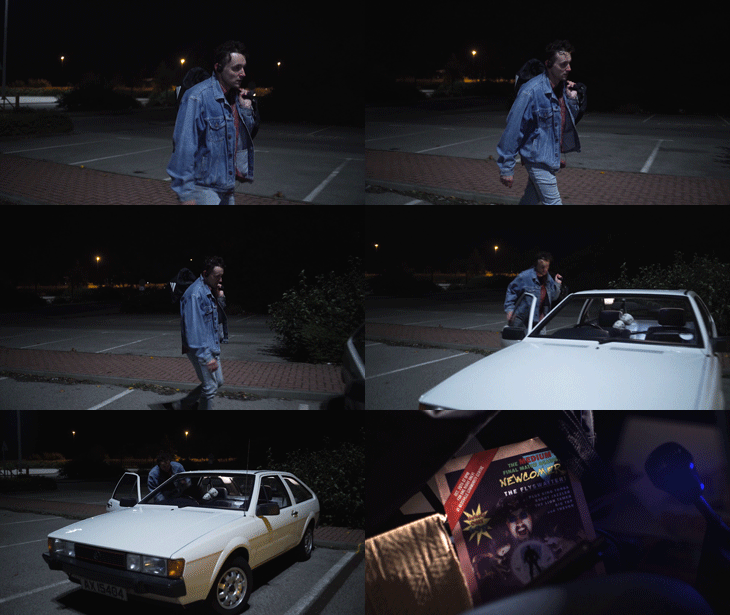
This was the only exterior scene in our film and it was at night. By using a Sony A7s we did not have to worry about our ISO being too high and creating noise, but we still needed to light the scene. We chose a car park which had floodlights which we could use to light the scene.

The tracking shot was filmed by our friend who is a wicked glide-cam operator, and to light this shot we simply boomed a 160 LED other head whilst he was walking. We placed a Aputure HR672c LED panel in the back seat so when the car door opened and used the remote which comes with the light to turn it on, simulating the in car light.

Just as we were setting up for the next shot in this scene which was a over the shoulder shot of our character whilst people walked passed, the floods light in the car park went off. At this point we only had two shots left to shoot for the entire film, we had a prop car, and extra cast members, so we had to find a way to shoot the last two shots.

The over the shoulder shot shows the rest of the car park which is now in darkness, but luckily we had 4 cars so we turned on everyone's car lights to light up the car park.

INT. BACKSTAGE - NIGHT

The final scene of the film was set behind the backstage curtain. On the other side of the curtain would be a wrestling ring and the crowd. We could not afford to show this so we faked it with sound. The location we shot this scene already had large blackout curtains, and we just needed to block up the other walls with more of the black backdrops.

Backstage Curtain Setup.jpg

For the main angle in this scene we used the Aputure HR672c LED set to 5500K as a key light for our subjects, and we also used disco lights which would be used at an event like this. When speaking to our 1st AC Rob before the shoot he said he already had a set of disco lights we could us, and the definitely helped to set the scene.

We did not use many lights in this film, and in our main scene we only used what was already in the room. For us finding this main location with everything we needed saved us time when shooting, but also saved us money as we did not need to buy or rent any lights.

So for the next film you make think about how you will light your scene with the things you currently have access to, you already might have what you need to make your film.


This video was Sponsored By

🚀 http://bit.ly/illuminate-pack - RocketStock’s light leak pack, "Illuminate", is sure to impress your viewers. Shot using digital cinema cameras in 4K, it’s an unbeatable way to lift your video to new, cinematic heights.

🎵 http://bit.ly/track-phenomenal - Click here to download this episode's track. Check out Premiumbeat.com to discover a huge range of exclusive royalty free music!


Lighting-Ep.jpg

DISCLAIMERS:

Some of these links are affiliate links, if you purchase gear via these links The Film Look will receive a small commission, but there will be no additional cost to you. Thank you!

1 Essential Tripod Trick | a Filmmaker's Review

A tripod is one of the most important pieces of camera equipment. I am going to show simple tripod trick you might not of realised you needed to know. 

Let’s start off with your tripod at its lowest position. On most tripods, when you want to raise them you unclip one of the legs and extend it. Then if you want to make it even taller you extend the next leg.

Here is where the trick comes in:

When you extend the first leg, make sure you release the clip which is the closest to the ground. Now the tripod legs look like this...

Release bottom clip first.jpg

...and the next clips are halfway up the tripod, meaning you can stand and easily access the clips in arm’s reach to further extend the height of your tripod legs.

Lets reverse back and release the top clip at the start instead of the bottom one. Now the tripod clips are at the bottom of the tripod, meaning you have to kneel right down to release the tripod legs which are no longer in arm’s reach.

the wrong way.jpg
the-wrong-way-to-release.gif

So that is the trick, and you might not think it is a big deal and you might already do this, but compared to all of the other tripod tricks this is the one you will use every time you use your tripod.

This tip works when your tripod is at it highest and you want to lower it, but you do everything in reverse order. Release the clip which is in the highest position to lower your tripod, now all of the clips are in the middle of tripod.

This is a simple tip but once you start using it, you will soon realise how much easier it is to extend the height of your tripod by choosing the correct clip. It will save you a few seconds of time every time you do it, but over time it will save your knees and back.


This video was Sponsored By

🎵 http://bit.ly/pb-finestimports - Click here to download this episode's track. Check out Premiumbeat.com to discover a huge range of exclusive royalty free music!


Equipment Links

🎥 This episode's kit/gear/equipment:

US links:

Head: http://amzn.to/2GKojMi
Levelling Base: http://amzn.to/2EVbHoX
Legs (newer model): http://amzn.to/2EVRc7u

UK links:

Head: http://amzn.to/2F84P6U
Levelling Base: http://amzn.to/2ozTdPN
Legs (newer model): http://amzn.to/2FAkSsc


Tripod-Trick.jpg

DISCLAIMERS:

Some of these links are affiliate links, if you purchase gear via these links The Film Look will receive a small commission, but there will be no additional cost to you. Thank you!

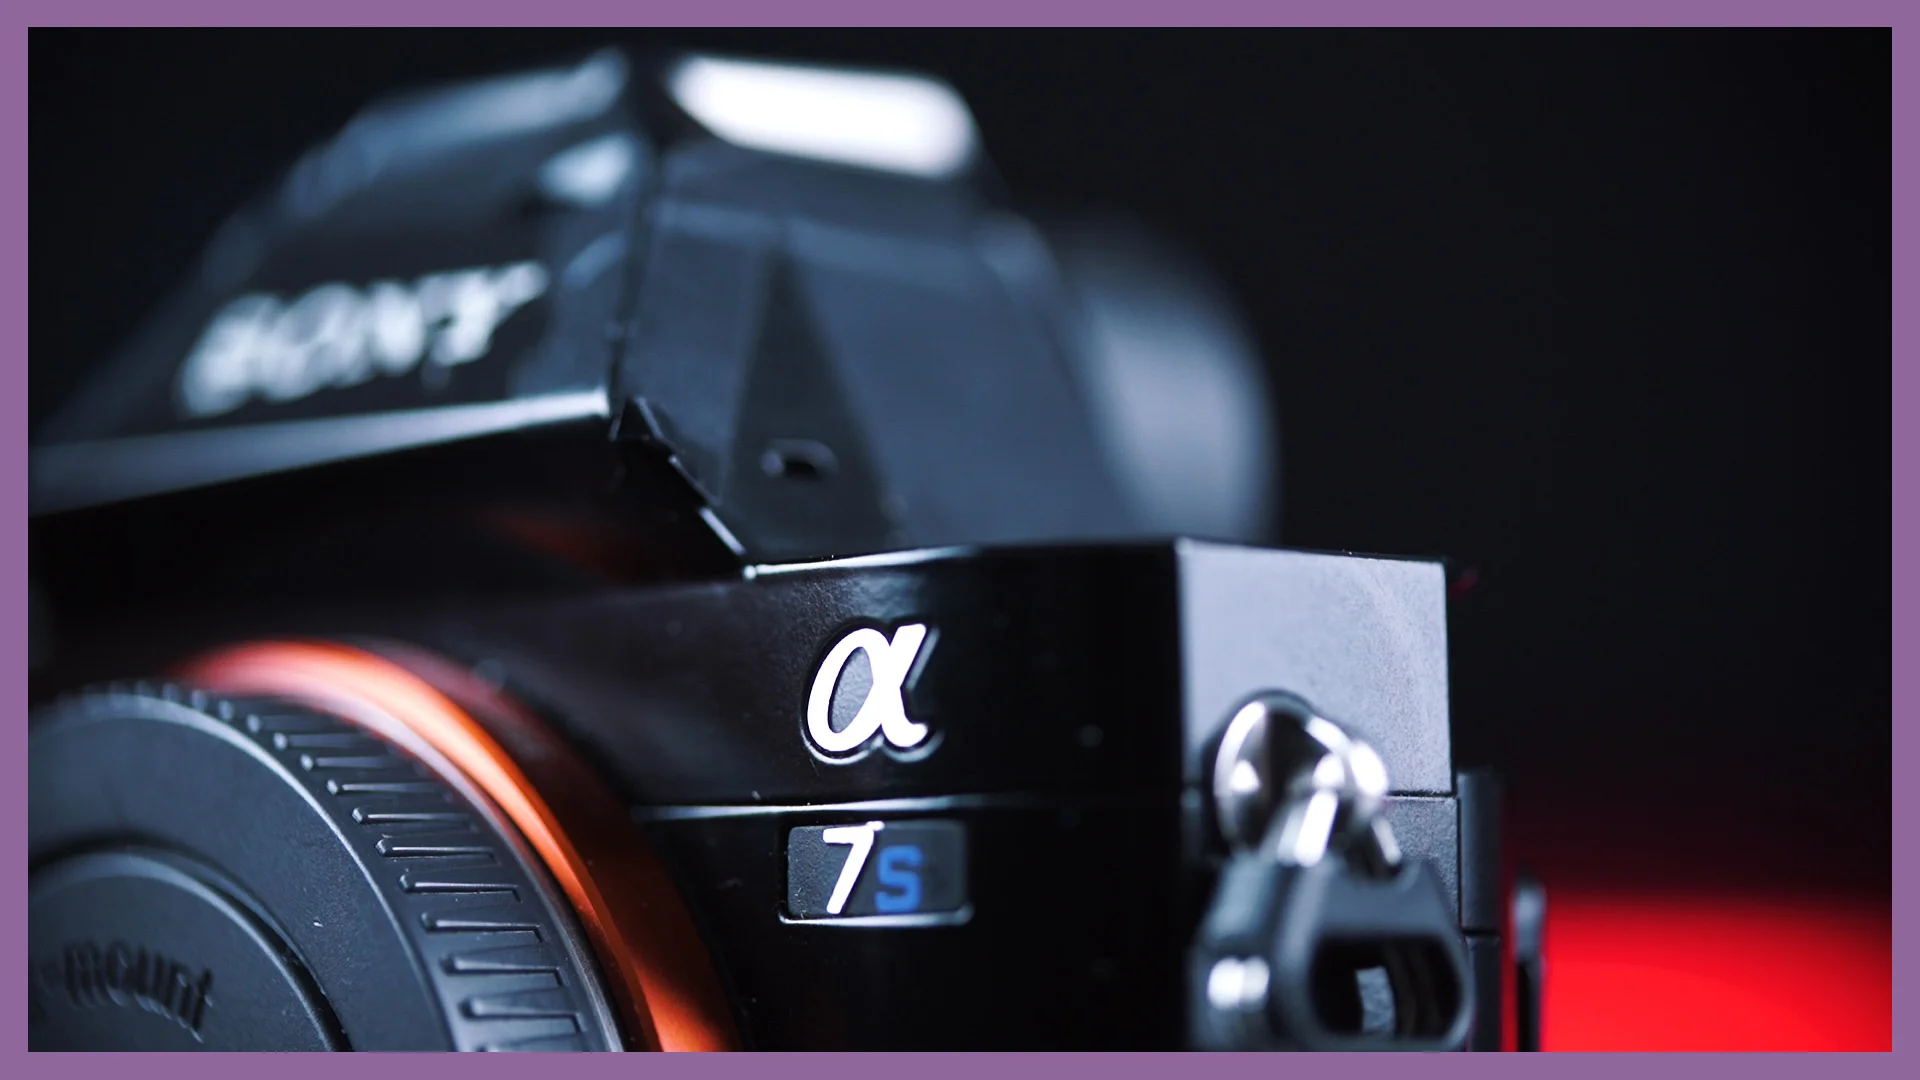
Sony a7s | a Filmmaker's Review

The Sony a7S is the main camera we use to shoot all of The Film Look episodes, and recently we used it to shoot our short film Backstage.

Here's why the Sony a7S gives you the creative freedom to make the film you want to make.

As of this post, the Sony a7S Mark 1 has been out for about 3 years so I am not going to go into all of the specifications of the camera as there are loads of videos and articles talking about it.

Camera Body

This was the main setup we had when shooting our short film, but let's take it back to the bare bones.

Sony-a7s-Built-up-Rig-to-Barebones-Rig.gif

The size of the camera is very small, even compared to our Canon 600d/T3i which we upgraded from. The size is something we really like about it, because it allows us to use the camera in 3 different ways.

Form Factor of Sony a7s and Canon 600d T3i.jpg

The first is this super lightweight stripped down version which we use when we are just out taking photos or travelling. If you use a prime lens you can get something that fits into your jacket pocket.

Sony-a7s-small-enough-to-fit-in-your-pocket.gif

The second setup is the one we use the most when shooting. We put it in a cage which adds more protection and usability with a hand grip and top handle. The cage also allows us to attach more equipment like a monitor, an XLR to 3.5mm microphone converter, and an external camera battery, which we would definitely recommend if you are shooting all day. The Sony a7S batteries are very small and you will only get about 30 to 40 minutes out of them.

Sony a7s Tilta Cage and Wooden Handle.jpg

We have a full video about our external battery setup here:

Finally, this is our third setup, and the one we used to shoot the short film. We took away the XLR converter as we were recording dedicated audio, but we did add extra rails for a wireless follow focus which went to another monitor. This is something we only use when shooting films, and it really saved us time.

Sony a7s Full Rig Setup.jpg

You do have to spend more money to get the camera to this set up but you could just buy something that already has some of this equipment built in like the Canon C100 or Sony FS7. But if you need something that can go from being tiny to massive, the Sony a7S is the best of both worlds.

Image Quality

The image quality of the camera is very sharp even at 1080p. Yes this camera does NOT shoot 4K. If you need that, get the Mark ii. From shooting an entire film set at night to shooting on a set for our short film Backstage, the quality of the image is up there with the best.

Keep The Change - Sony a7s Short Film at Night.jpg

The camera you shoot on does not matter...at least not until the camera stops you from capturing a clean image. For our short film Keep The Change, which was shot all at night, what we shot the film on did matter. The a7S is famous for its low light capability and we really took advantage of this when shooting. We did not have to worry how far we were pushing the ISO to get the correct exposure.

Keep The Change - shooting at night.jpg

A high ISO does not mean you do not need to light your film, you still need to shape your light to fit the tone of your film. It just gives you the freedom to use less powerful lights.

Keep The Change - lighting the scene on an A7s.jpg

Another aspect of having a camera that can shoot at very high ISO’s will give you the creative freedom to shoot at higher F-Stops. Shooting everything at f1.8 achieves a shallow depth of field but it is not always the best option, especially if you can not keep your shot in focus.

Having the ability to shoot at f4 or f8 in a dark situation allows you to keep your image in focus whilst not worrying about how high your ISO is going. Shooting at an ISO of 1600 at F8 is just as clean as if you were shooting at f1.8 with an ISO of 100, but at f4 or f8 your shots will have a better chance of being in focus.

White Balance

The white balance you chose when shooting will all depend on the type of lights you are using, and what you want your image to look like. The Sony a7s allows you to customise your white balance way past the standard settings like you get with every other camera.

Sony-a7s-Custom-White-Balance-Settings.gif

The main light source in our short film Backstage were 4 fluorescent lights which had a colour temperature of 3200 kelvin. Our white balance was set to Fluorescent Warm White but since these type of lights are well known for having a green tint, I wanted to take this away. You can do this in post production easy enough, but with the Sony a7s you can do it in camera.

Sony-a7s-White-Balance-Example.gif

In each white balance setting you can change the colour gamut to add or take away the Green, Blue, and Magenta from your image. Here is an example of the image before and after we added more Magenta to the image to take away the green tint.

Sony-a7s-Green-Tint-Before-and-After.gif

Having the extra flexibility to correct your image in camera allows you to capture a clean looking image, creating less work in post.

Picture Profile

The picture profile you chose to shoot with all depends on your work flow and experience, but the a7s will give you many different options.

For our short film Backstage and all of the episodes we shoot for this channel we set the picture profile to off, as the standard picture profile is quite flat. Not as flat a Slog 2, but you don’t need to shoot on Slog2 all of the time to get a flexible image for colour grading.

Sony-a7s-Picture-Profile-Off-and-Color-Grade.gif

The picture profile settings on the camera are vast, and very overwhelming, but there are many guides out there to help. One of the best videos about setting up your Sony a7S is from Philip Bloom, he goes into the fine details of not just setting up the picture profile setting of this camera, but all of the settings. It’s definitely worth watching a few times.

Learn how to shoot and colour grade on the Standard profile, the Slog2 profile, and any other custom profile setting you find out there. Use the right one for the right job, they all have their advantages and disadvantage and the Sony a7S gives you the freedom to choose.

Usability

The camera you shoot with needs to help you tell your stories; and the easier it can do that the better.

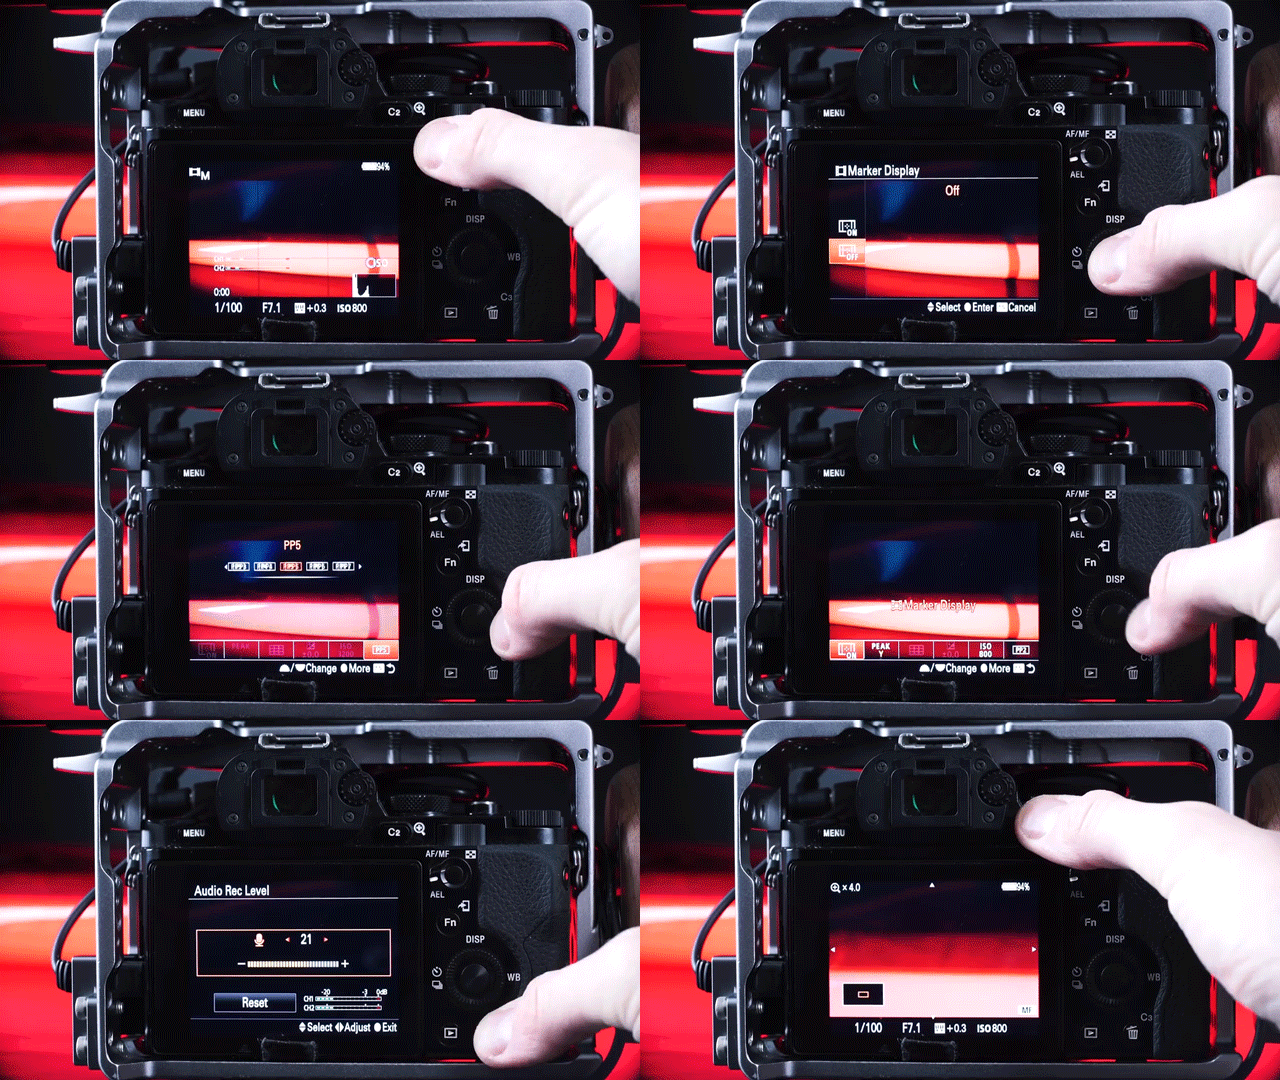
The camera is very small, but it surprisingly has many function buttons which help you to access settings quickly. Over time you learn which settings you need quick access to, and you can customise them to suit you.

Sony-a7s-Function-Buttons.gif
Sony a7s Record Button.jpg

The only downside to the camera is where the record button is placed, it’s very hard to get to. This is why I went for the Tilta cage as there is a record button on the handle. We have a video about the cages we use for the a7s if you want to check them out:

The Sony a7S gives us all of the creative freedom we currently need we make short films, but it is not the camera we will use forever. If a project requires us to shoot 4K 6k or even 8K we won’t just shoot on what we've got, we will think about what we need to help tell the best story possible.


This video was Sponsored By

🚀 http://bit.ly/corruption-pack - With glitchy overlays, distorted logo reveals and more, RocketStock’s "Corruption" is an ideal way to give your project a dramatic edge.

🎵 http://bit.ly/pb-brooklyn-bridge - Click here to download this episode's track. Check out Premiumbeat.com to discover a huge range of exclusive royalty free music!


Equipment Links

🎥 This episode's kit/gear/equipment:

US links:

Sony a7s: http://amzn.to/2DrEdLb

Tilta Cage: http://amzn.to/2Dn20LY

Pergear a7s: http://amzn.to/2hQYkvS

NPF750 Batteries: http://amzn.to/2hIJZOi

Saramonic SmartRig XLR: http://amzn.to/2DpJMK3

Dji Follow Focus: http://amzn.to/2Dqxelt

UK links:

Sony a7s: http://amzn.to/2DrEdLb

Tilta Cage: http://amzn.to/2D5Ecj0

Pergear a7s: http://amzn.to/2jI1Xon

NPF750 Batteries: http://amzn.to/2jJNckM

Saramonic SmartRig XLR: http://amzn.to/2D4BCtx

Dji Follow Focus: http://amzn.to/2D4b63n


DISCLAIMERS:

Some of these links are affiliate links, if you purchase gear via these links The Film Look will receive a small commission, but there will be no additional cost to you. Thank you!

Pergear a7s Review | The Best Budget 7 inch Monitor?

A year ago we made a video on the Feelworld 759: a really decent budget 7 inch monitor which we thought was a great introductory bit of kit.

But now we’ve found something around the same price that blows the 759 out of the water.

PerGear a7s Monitor Review.jpg

This is the Pergear a7s. It has a really stupid name, but for the price, it’s packs one hell of a punch. Welcome to The Film Look.

Before you ask, yes, the Pergear monitor does work with any camera using HDMI, not just the Sony a7s like it’s daft name might have you believe. 

Today we are going head to head to see just how much better it is compared to our current budget 7 inch monitor, the Feelworld 759. Let’s get started!

The points for {Build Quality} go to Pergear:

Per Gear - Build Quality.jpg

Both of these monitors have a budget look and feel to them. They both have a plastic body, but both are pretty solid in the twist test. There is almost no flex to them.

The Pergear is a bit sleeker-looking once you move the protective gel cover because of it’s lack of face buttons - instead they are sunken on top.

It also has a jog wheel on the side, which is a lot faster and easier to navigate the menus than using the buttons on the Feelworld.

Per Gear - Buttons.jpg

The Pergear comes with a thread on it’s top as well as the bottom, incase you want to mount it in a hanging position.

{I/O} - Pergear wins again:

Both of these monitors use HDMI in, a 3.5mm headphone jack, and a DC 12volt socket for plug-in power.

The Feelworld includes a socket for an OSD controller, an AV socket, and a USB port for firmware upgrades - none of which I have any use for.

The Pergear trumps these features with an HDMI out, which means you can daisy chain this monitor to another. This is useful if you are using an additional monitor off the camera for pulling focus or for a director's viewing screen.

The Screen - Another point to Pergear:

At 1200p you get a full HD monitor when shooting at 16:9, which really does make the difference when checking your focus.

The Feelworld is only 800p, and at first I didn’t think it would make much of a difference.

But look at the difference when trying to focus on some text in the distance.

The colour accuracy isn’t great for both of these monitors. But the Pergear IS sharper, brighter, has a better contrast ratio, and a better viewing angle.

Software Features - again, a point to Pergear, and this is where the difference is staggering:

PerGear-a7s-Monitor-Review.jpg

They do both come with a load of similar features, some of the more useful ones being: centre markers and image flip.

They both have focus assist, but I will say now the focus assist on the Feelworld is terrible. Instead of identifying your focus field with a coloured line it just makes everything super sharp, which doesn’t help at all.

The additional features that come with the Pergear that I think are invaluable are:

Zebras for exposure checking, false colour for exposure and lighting ratios, it has a histogram, on-screen audio levels, and the safety markers and letterbox overlays are customizable too, so you can choose the thickness and colour of the lines, and the darkness of the letterbox overlay.

Per Gear - False Colour.jpg

The Pergear even has a battery gage, so you know when you’re about to lose power!

When I started this review I thought I’d be tallying up the scores and dividing it by the price to get an average value of each product. But considering the Pergear has won in every category and is only an extra $20, it’s safe to say it’s the winner.

If you are looking at getting your first camera monitor, or you want to pick up something with a few more features, grab yourself a Pergear.

The ones I saw advertised didn’t come with any batteries, so if you do order one get a bunch of NPF750s. I have linked the Pergear and batteries in the description.

And if you haven’t already, consider subscribing. We do reviews like this and a load of other filmmaking videos to help you get closer to achieving the film look.


This video was Sponsored By

🚀 http://bit.ly/pack-emulsion - Make your video look like it was tailor-made for the silver screen with RocketStock’s film grain overlay pack, Emulsion!

🎵 http://bit.ly/track-losinggames - Click here to download this episode's track. Check out Premiumbeat.com to discover a huge range of exclusive royalty free music!


Equipment Links

🎥 This episode's kit/gear/equipment:

US links:

Pergear a7s: http://amzn.to/2hQYkvS

NPF750 Batteries: http://amzn.to/2hIJZOi


UK links:

Pergear a7s: http://amzn.to/2jI1Xon

NPF750 Batteries: http://amzn.to/2jJNckM


DISCLAIMERS:

Some of these links are affiliate links, if you purchase gear via these links The Film Look will receive a small commission, but there will be no additional cost to you. Thank you!

Light up your Camera Bag for less than $16 (or £16)

Today I’m going to show YOU a really cheap and simple way to add LED strip lighting to your camera bag without glue, tape, or nasty adhesives.

Instead we are going old school - we are going to grab a needle, some thread, and hand sew the lighting strip into place!

Finding equipment in your camera bag at night or in a dark environment can be difficult - especially considering everything is pretty much painted black. We’ve toyed with spray painting things bright colours in the past, such as our infamous orange lens caps.

But when you’re on a night shoot, something even as bright as this can get lost in your bag. So what can we do? It’s time to customise.

Lights-for-your-camera-bag-With-LED-lights.jpg

You can pick up a battery powered LED strip light on amazon for £7 (or $7.89 for our american cousins watching). And grab yourself a hand sewing kit while you are at it for 8 quid (or 8 bucks for the yanks). You can find links to the items we used in the description below.

This is all you’ll need to start, now just pick the bag you want to light up!

I’m going to be converting this Porta Brace camera bag as it’s always the bag which seems to create a dark void of oblivion.

First of all, work out where you want to attach the LED strip.

Choose somewhere in your bag where it doesn’t puncture the outer surface, such as an inner ridge or seam where a sewing line is already visible, like this spot here. This will avoid spoiling the outer protective surface of the bag, especially if it is waterproof.

Lights-for-your-camera-bag

I found that sewing 10 loops around the strip at a time, then moving an inch along and repeating the process worked pretty well. It was secure whilst not blocking the light from the LEDs. Find a pocket or sleeve for the battery pack to sit and you are all done!

By sewing the strip in rather than gluing it in place or using something like velcro, it just means you won’t get a horrible residue in your bag. It also means you can simply cut off the thread if you want to remove it.

Now you won’t have to hunt for your torch or use your phone as a light. Simply flick the switch to see inside your bag at night. And if you really want to, you can always activate disco mode.

Lights-for-your-camera-bag-With-LED-lights1.jpg

This video was Sponsored By

http://bit.ly/track-funk-fever - Thanks to PremiumBeat for providing the music for this week's episode. Check out Premiumbeat.com to discover a huge range of exclusive royalty free music!


Equipment Links

🎥 This episode's kit/gear/equipment:

US links:

LED strip: http://amzn.to/2fQ67ZF

Sewing kit: http://amzn.to/2yo1Rbz


UK links:

LED strip: http://amzn.to/2xRGHSq

Sewing kit: http://amzn.to/2fPUlP7


Light up your camera bag

DISCLAIMERS:

Some of these links are affiliate links, if you purchase gear via these links The Film Look will receive a small commission, but there will be no additional cost to you. Thank you!

8 Filmmaking Lenses from $50-$500

We’ve built up a small collection of camera lenses over the years. Some are great, some are rubbish, some are cheap, and others more expensive. And they all do something a bit different.

Today we’re going to talk about our camera lenses. 

We have 8 different camera lenses that we use for film projects. Some we use a lot - and some are for very special occasions. We’ve had other lenses in the past, but we sell any lens that we simply don’t use - they can be expensive paper weights after all.

We’ve been purchasing lenses over the past 5 years or so, and the majority of our lenses are 2nd hand. Let's start off with the lens we use the most.

The Canon L series 24-105 @ f4.

[New: £649.99 - Used: £350]

This is the lens we have on the camera the majority of the time. Because of its wide focal range, it’s perfect for run and gun set ups because of it’s ability to go from a wide shot to a close up in a split second.

This lens also includes image stabilization, which means you can use this lens in hand held situations and not suffer from micro jitters. This is a great work horse lens for commercial and promotional video shoots and a quick turnaround film.

You get a very clean sterile look from this lens. It comes with a lens hood to prevent flaring, but if you want to get some sexy lens flares you can always take it off and embrace the flaws.

This lens does only stop down to f4. If you are looking for a low light lens or super shallow depth of field, this isn’t going to cut it. But it does bring me to the next lens in the line up!

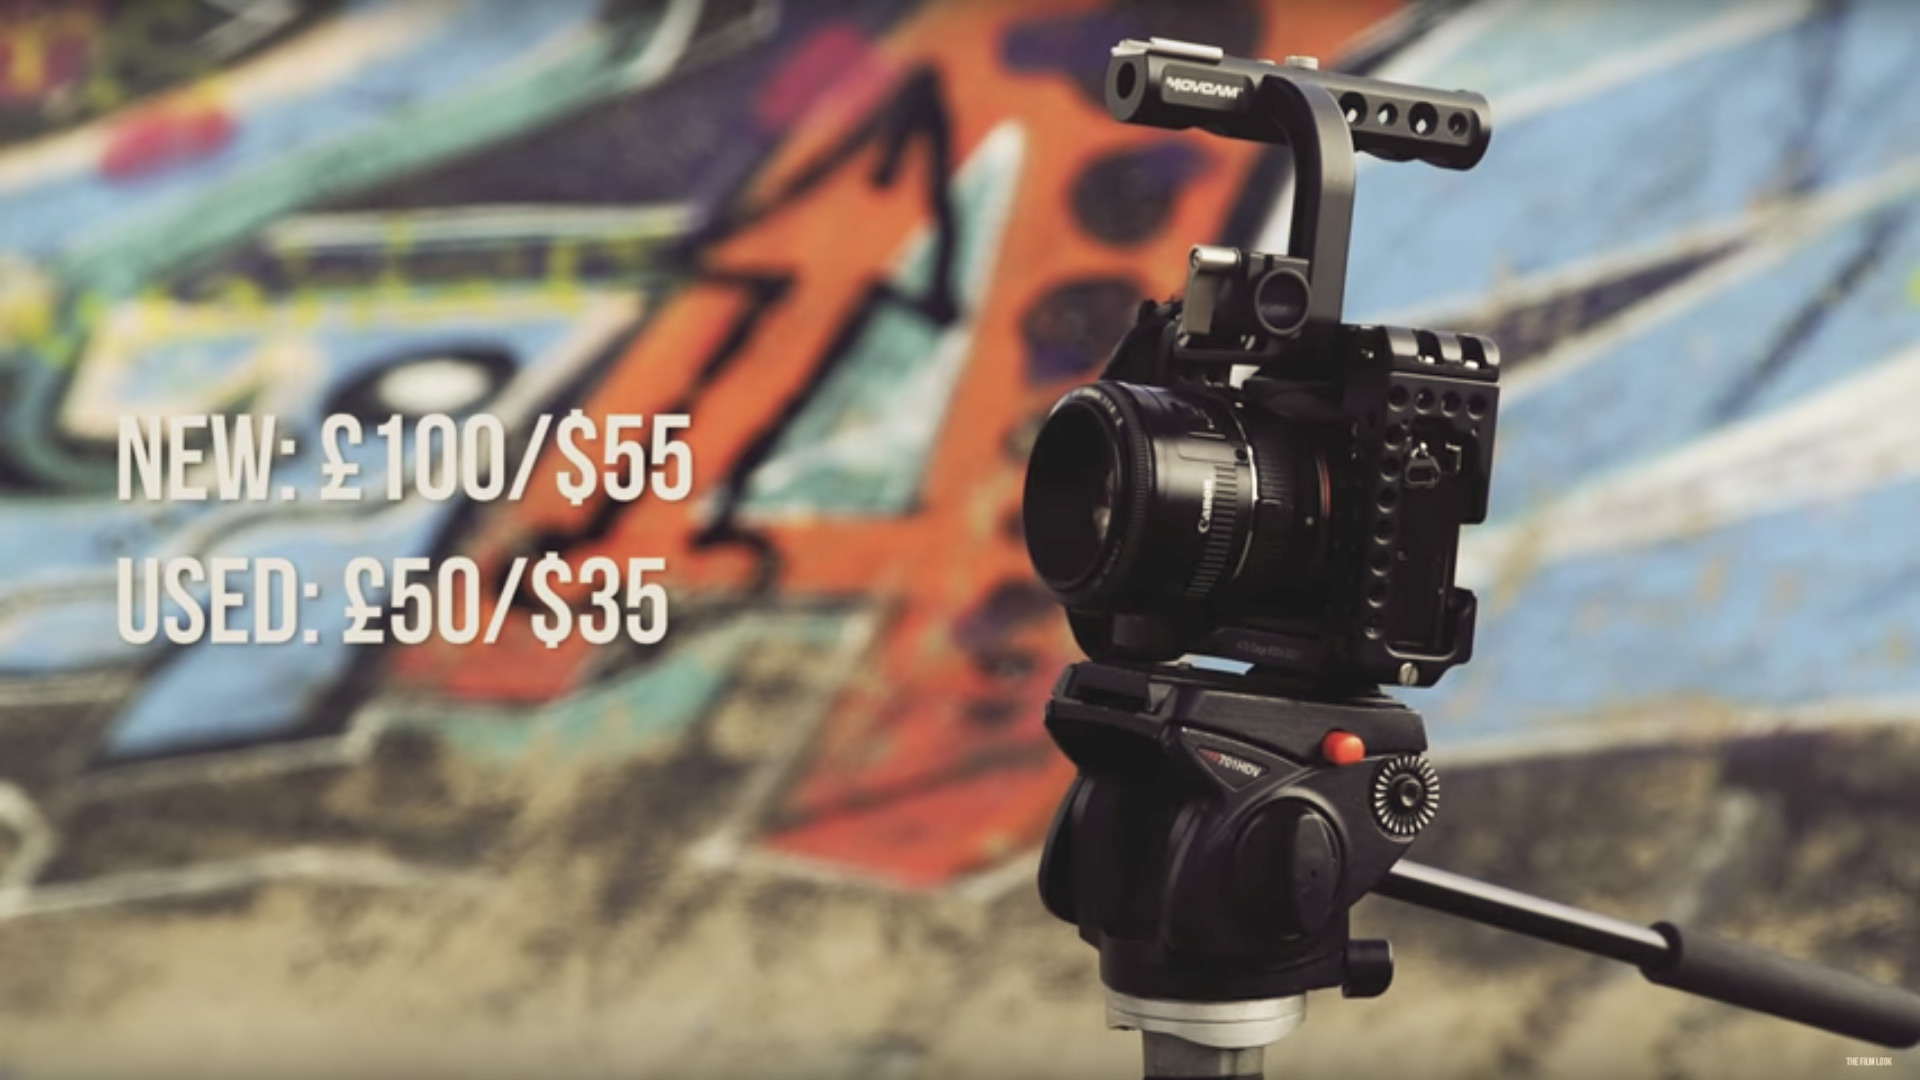
The Canon 50mm @ f1.8.

Canon-50mm-F1.8

[New: £100 - Used: £50]

Also referred to as the nifty fifty, this is a great 2nd lens to have in your kit bag. It’s a prime lens, which means it can’t zoom in or out, but has incredible low light capabilities. This lens can stop down to f1.8 meaning it can let in a lot more light than other lenses. This feature also gives you an incredibly shallow depth of field which is ideal if you want to shoot something very arty and atmospheric.

At 50mm this lens is very pleasing to the eye. 50 millimetres is considered very close to the perspective of the human eye which helps retain natural sizes and shapes on a subject, especially on the human face. You don’t get a squashed or squirrel face like wide and telephoto focal lengths.

The bad thing about this version in particular is it’s lack of image stabilization. Put this in your hands and it will suffer from micro jitters. So get this locked onto a tripod if you want to avoid shaky footage.

It is also very fragile. The plastic body will mean it won’t last many drops or knocks. The focus ring on this model is also not silky smooth like more premium lenses, so pulling focus on this will be a bit more tricky.

This lens isn’t for every situation. But for it’s cheap price, it’s a great secret weapon if you want to give your shot a bit more style and if you need to shoot in a low light situation. This is also the lens are we using right now!

Next on the list is another Canon.

This time it’s the 60mm Macro @ f2.8.

Canon-60mm-Macro-F2.8.jpg

[New: £450 - Used: £250]

This lens isn’t a workhorse -  it’s definitely for particular situations. Because of it’s incredible macro capabilities, this lens can get super duper close to a subject and stay in focus. You’ll find with most lenses that you will need to keep a significant distance in order to stay in focus, but with this lens you can focus onto the end of a pin, great for shooting phone screens, words on a page, or extreme macro close ups.

This lens also stops down to f2.8 which means it can give you razor thin depth of field and is more than capable of performing well in low light situations.

This version of the lens doesn’t have image stabilization. So, like the nifty fifty, get this on a tripod and lock it down to avoid any micro jitters.

This lens is also made for APS-C sensors, which means it will vignette if you put it on a full frame camera. We combat this by changing the setting of our A7s to APS-C and cropping the image in.

Next is our wide angle lens - the Tokina 11-16mm @ f2.8.

Tokina-11-16mm-@-f2.8.jpg

[New: £280 - Used: £200]

This is technically an APS-C grade lens which means if you put it on a full frame camera like our Sony A7S and zoom it out to 11mm, you will see some major vignetting. The good thing is that if you zoom it into 16mm this will disappear, so just treat it like a prime lens!

We don’t shoot on this lens a lot, but it’s there in case we ever need to get a super wide angle. We have used this in the past on our vlogs so we can get the whole studio in shot, and we love to use this lens when shoot time lapses.

The Tokina also stops down to f2.8 so it lets in a lot of light.

Just be careful when shooting with this lens. We used it to film a segment of our Podcast and because of the perspective, we ended up turning Rob into a Hobbit.

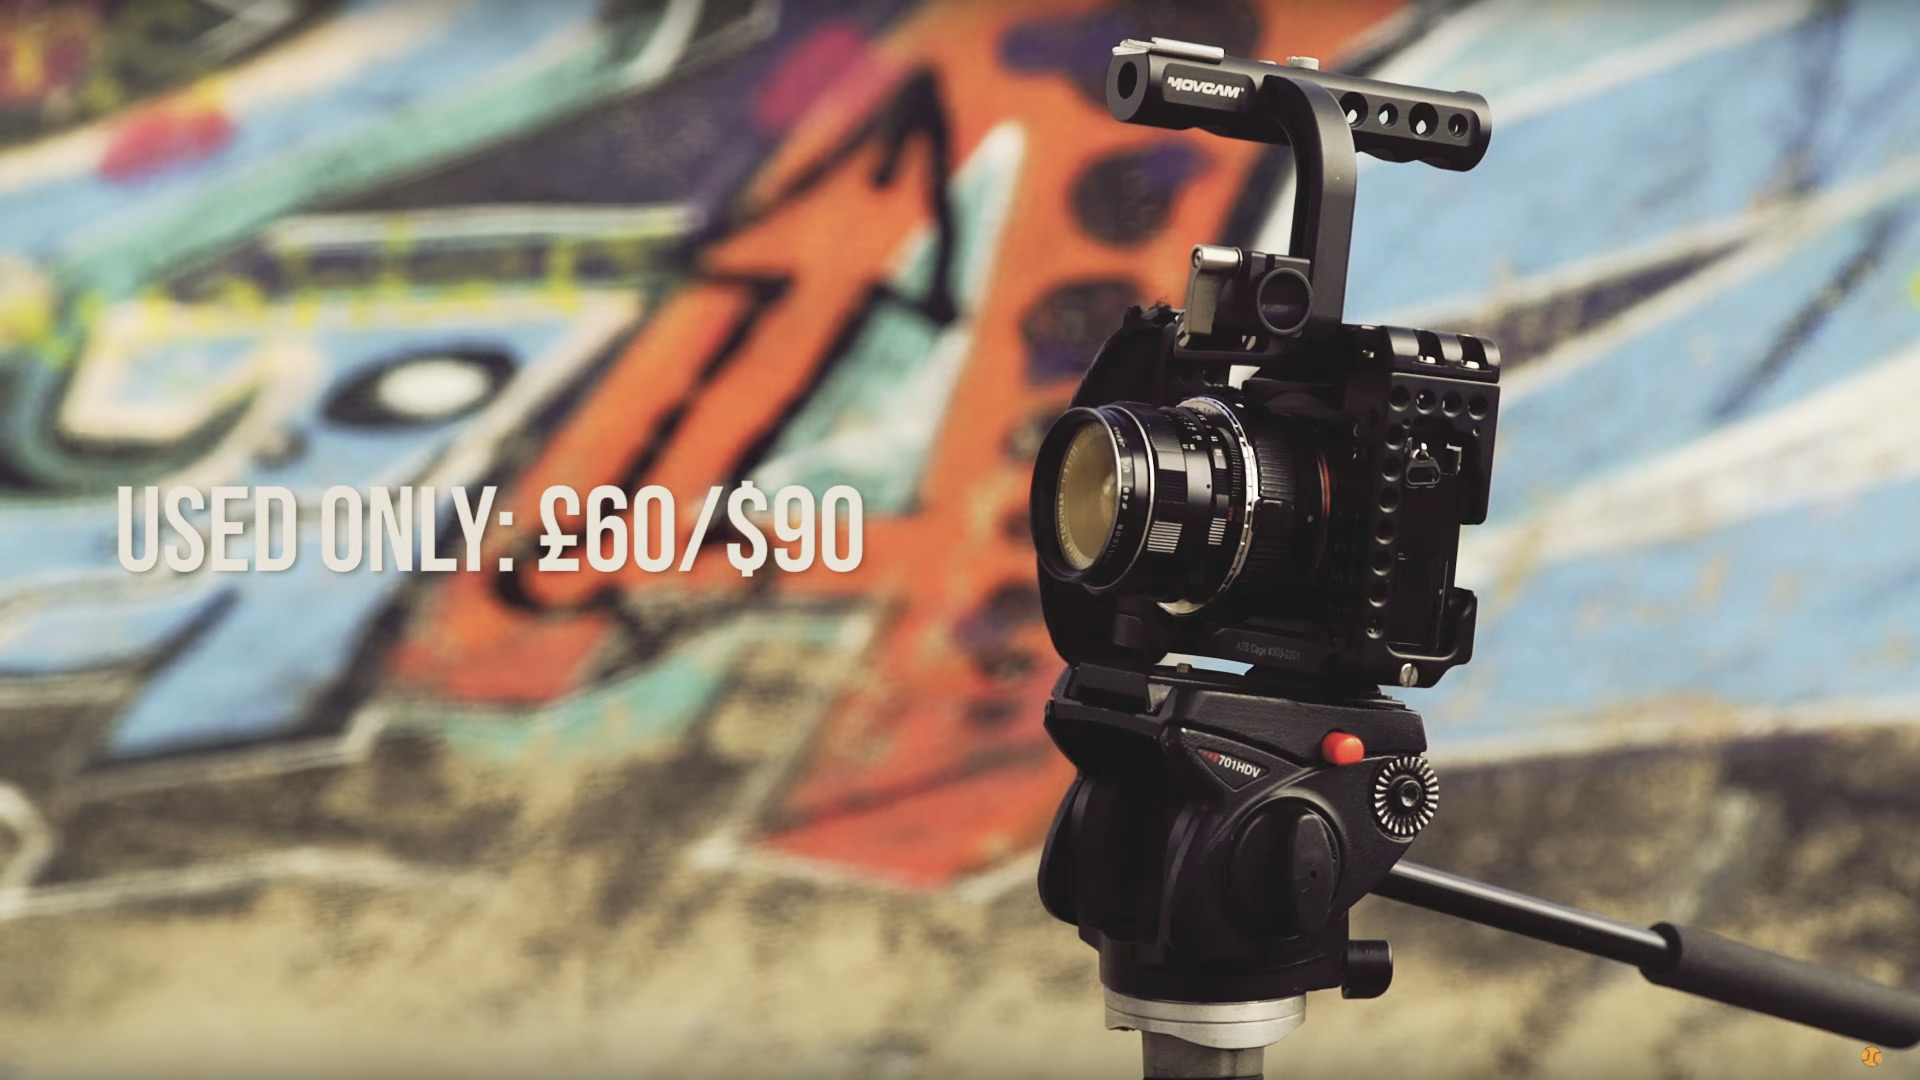
Next we have the first of our vintage lenses. The Takumar 35mm @ f3.5.

Takumar-35mm-@-f3.5.jpg

[Used only: £60]

You might be wondering why you’d go for a vintage lens rather than a new lens. We have a video all about vintages lenses here that goes into detail, but basically vintage lenses tend to be sharper, built better, and they usually come with some unique visual flaws which add some real style to your shot.

The Takumar is a fiercely sharp vintage prime. It’s focal length gives a nice wide angle without distortion, and it gives your shot a really nice faded vignette. Vintage lenses tend to offer something a bit more in terms style - they are far from sterile.

Next we have our vintage telephoto prime. The Jupiter Nine 85mm @ f2.

Jupiter-Nine-85mm-@-f2.jpg

[Used only: £120]

With this lens, you’ll either hate it or love it. It’s a vintage lens, which means it’s built really well, the glass is superb, and it’s nice and sharp. It also stops down to f2 so it’s great in a low light situation and gives you really soft shallow depth of field.

But it comes with some flaws which you either have to tackle or embrace. The Jupiter Nine has some serious lens flares, and at lower f stops it does add a slight vignette. If you’re looking for a smooth, dreamy look, this is the lens for you. If you need something that shoots a super clean image, you will have to spend some time learning how to tame this beast.

We purchased a lens hood that reduces most of the major lens flares, but for the best results you will have to place some flags just out of frame like we do in this video here about our “no lights” lighting setup.

This is my favourite lens. It’s got some serious character.

So, we have a wide vintage prime, a telephoto vintage prime, and now we have a mid-range vintage prime. The Helios 44m 58mm @ f2.

Helios-44m-58mm-@-f2.jpg

[Used only: £25]

Like the other vintage lenses we have, you can see straight away that this lens is built a heck of a lot better than something in the similar focal range like nifty fifty but at a fraction of the price. The unique flaw in this lens is it’s famous swirly bokeh. The bokeh balls seem to wrap around a subject when shooting at a low f stop, giving it a very unique look.

Last on the list is our most telephoto lens in the collection. The Canon 75-300mm @ f4-5.6.

Canon-75-300mm-@-f4-5.6.jpg

[Used only: £80]

I’ll talk about the downsides to this lens to begin with, just to get it out of the way. First of all, it’s got a shoddy plastic construction. The zoom and focus ring are a bit loose, and the picture you get out of this is a little bit milky compared to something a bit more expensive.

It features a massive macro distance of 1.5 metres to get in focus, and it doesn’t feature image stabilization so you NEED to lock this lens down onto a tripod. It also features a variable f stop, which means that it will change from f4 when you shoot at 75mm to f5.6 when you shoot at 300mm. This may seem like it isn’t a big deal but it’s definitely something to be aware of.

The one good thing about this lens is simply it’s focal length. At the maximum focal distance of 300mm, the shot you get out of this looks like no other. It’s great for simulating binoculars and giving the shot an “espionage” feel.

All of the lenses have their own character and language. Just remember to choose the right tool for the right job.


This video is sponsored By 

http://bit.ly/pack-emulsion - Make your video look like it was tailor-made for the silver screen with RocketStock’s film grain overlay pack, Emulsion!

http://bit.ly/track-losinggames - Click here to download this episode's track. Check out Premiumbeat.com to discover a huge range of exclusive royalty free music!


Equipment Links

🎥 This episode's kit/gear/equipment:

US links:

Canon 24-105mm: http://amzn.to/2fWen7v

Canon 50mm f/1.8: http://amzn.to/2fVVzoQ

Canon 60mm Macro: http://amzn.to/2ycaGFg

Tokina 11-16mm: http://amzn.to/2fW0aHu

Takumar 35mm: http://amzn.to/2yLjPBU

Jupiter Nine 85mm: http://amzn.to/2xKRDQR

Helios 44m 58mm: http://amzn.to/2x1GKf2

Canon 75-300mm: http://amzn.to/2yMis5R


UK links:

Canon 24-105mm: http://amzn.to/2woCL7F

Canon 50mm f/1.8: http://amzn.to/2wnWK6y

Canon 60mm Macro: http://amzn.to/2xBOxj4

Tokina 11-16mm: http://amzn.to/2fFwt0p

Takumar 35mm: http://amzn.to/2wojkfc

Jupiter Nine 85mm: http://amzn.to/2wokiYS

Helios 44m 58mm: http://amzn.to/2ywzPXm

Canon 75-300mm: http://amzn.to/2woqj89


8 Filmmaking Lenses from $50-$500

DISCLAIMERS:

Some of these links are affiliate links, if you purchase gear via these links The Film Look will receive a small commission, but there will be no additional cost to you. Thank you!

What to Buy after your Camera

Your camera is the single most important piece of equipment you need to make your film, but what do you need next.

So you’ve just bought your first camera, but that’s not the only piece of camera you need to make your film.

At the start there are so many pieces of camera equipment to look at it can be a little overwhelming. So we have put a list together of the top 5 things you should buy after your camera.

[Top down of camera equipment going on table white board]

50mm Lens

Canon 50mm F1.8

50mm is a really good looking focal length to shoot at, and most 50mm lenses will allow you to stop down to f1.8 if not lower.

This will allow you to achieve a shallow depth of field which always just looks good.

Try not to shoot eve  rything at F1.8 though, it can be difficult to keep everything is focus especially if your subject is moving.

I’d rather see your subject in focus then a completely shallow background, and F2.8 or F4 still can look good when using a 50mm lens.

Tripod

What to Buy after your Camera - Tripod.jpg

It sounds daft saying this but get a tripod, and try and get something that is going to last you a long time.

I bought this tripod about 5 years ago for about £150.

When I had a little spare money I upgraded the tripod fluid head to something that could take more weight and then added a leveling base to make using the tripod easier.

You can find tripods that cost £30, but you want something with a little weight and strength to it even if you are just using a DSLR side camera.

Get a good pair of legs which are going to last and you can always upgrade your head in  the future.

Slider

What to Buy after your Camera - Slider.jpg

A tripod will allow you to lock your camera down and help you think about the composition of your shots.

You can add movement with pans and tilts but if you want to add dynamic movement the next piece of camera equipment you could by is a slider.

Sliders will allow you to achieve shots like this: Slide from left to right revealing your subject. Slide from left to right whilst panning to keep your subject in the middle of the frame. You can push in. Push out. We have a video all about camera sliders if you want to learn more about them.

Mic

What to Buy after your Camera - Microphone.jpg

Video is nothing without sound and your cameras on board microphone just won't cut it, so get something like a Rode video microphone to start with as it will definitely improve your audio.

But to really improve your audio get the mic off your camera and as close to your subject as possible, if you get a Rode videomic get a 5 meter 3.5mm jack extension cable so you can still plug the mic into your camera.

Reflector

What to Buy after your Camera - Reflector.jpg

You can pick up a 5 in 1 reflector for less than £20 depending on the size you want.

We have a 110cm one and it is great to add a little more bounced light onto your subject with the white, silver or gold side.

The black side creates a negative fill so light will not bounce off it onto your subject. The middle section of the reflector will help you diffuse your light also.

Lights

Yes this is the six item on the list, but “top 6 things to buy after your camera” does not sounds as good.

Your camera's sensor needs light, at first start with just using daylight then move on to using lights and bulbs you have around in the house.

We recommend not to buy cheap work lights, the colour you get from them is not great and if you are planning on shooting videos for other people they don’t look very professional. 

You can get light fixtures like these which use household blubs, you can upgrade them in the future by add a can light attachment to help shape your light, then get different types of bulbs.  The edge/backlight on me right now is that light.

What to Buy after your Camera - Lights.jpg

When you need more light you can pick up a set of 3 800w lights that are dimmable, have light stands and come with a bag for £112.  We have had this set of lights for about 3 years and they work great.

You can also start with these £30 160 LED. The colour is not great from them but they work well as an edge light.

There are lots of over things you can buy to help shape or change the colour of the light, but buy them when you can.

This all might seem a lot but you don’t have to buy the model of equipment we have suggested, and you don’t even have to buy it brand new.

Filmmakers are constantly upgrading their kit and selling on there old kit which they have properly kept good care off.

So see if you can buy second hand and it will definitely save a little bit of money. 

This is the basic kit you need to shoot most things, so now you have it go out there shoot with it and tell stories until you feel you need more equipment to tell better stories.


This video was Sponsored By

http://bit.ly/illuminate-pack - RocketStock’s light leak pack, "Illuminate", is sure to impress your viewers. Shot using digital cinema cameras in 4K, it’s an unbeatable way to lift your video to new, cinematic heights.

https://bit.ly/track-easy-roller - Click here to download this episode's track. Check out Premiumbeat.com to discover a huge range of exclusive royalty free music!


Equipment Links

🎥 This episode's kit/gear/equipment:

US links:

Canon 50mm Lens: http://amzn.to/2wxSohj

Tripod Legs: http://amzn.to/2wGNHgz

Tripod Head: http://amzn.to/2wGXRh8

160 LED: http://amzn.to/2yqxEWg

800W Lights: http://amzn.to/2fjlJF3

Blub Holder: http://amzn.to/2yrdwTZ

Reflector: http://amzn.to/2jN6SUO

Rode Video Mic: http://amzn.to/2jMmtnh

3.5mm Extension Cable: http://amzn.to/2fiWMcv


UK links:

Canon 50mm Lens: http://amzn.to/2hh9F7E

Tripod Legs: http://amzn.to/2jN3zgm

Tripod Head: http://amzn.to/2jLiKX1

160 LED: http://amzn.to/2jLjyev

800W Lights: http://amzn.to/2w6Y3Xt

Blub Holder: http://amzn.to/2xhfKFd

Reflector: http://amzn.to/2hfMNFx

Rode Video Mic: http://amzn.to/2fBfTvy

3.5mm Extension Cable: http://amzn.to/2xwDO99


What to Buy after your Camera

DISCLAIMERS:

Some of these links are affiliate links, if you purchase gear via these links The Film Look will receive a small commission, but there will be no additional cost to you. Thank you!

Filmmaker's Utility Pouch

This is Adam Opie: Filmmaker, Camera Operator, & Glidecam Extraordinaire. He’s put together a filmmaker’s accessory kit which we think even Batman would be jealous of: This is the Filmmaker’s Utility Pouch

First off, you have the pouch itself: £13.98. 

  • This one is by OneTigris. It’s got pockets in pockets, outside buckles, and molle-style straps perfect for attaching to your belt.


Inside the front pouch you have filmmaking stationary:

  • A  cloth for cleaning monitors and screens

  • A lens pen, also for cleaning camera lenses

  • AA batteries for emergencies (these are labelled non-rechargeable at 100%)

  • And a lens cloth for cleaning lenses

Filmmaker's-Pouch2.jpg

Then you have the back pouch. Inside here we have:

  • A multitool used for tightening tripod plates, cutting things open, and emergencies such as removing over threaded screws.

  • A allen key tool for all of your allen key needs

  • A torch. This one zooms in. You can use this in dark situations and double checking the location after a wrapped shoot.

  • Business cards, because you never know when you need to take off your filmmaker hat and put on your business hat.

  • Velcro straps for cable management and emergency attachments.

Filmmaker's-Utility-Pouch1.jpg

On the outside we have:

  • Fingerless gloves: If you are doing a lot of outside shooting, especially in the winter, it’s always a good idea to protect your hands from the elements. These gloves by Dirty Rigger are fingerless for retained dexterity, and will assist your grip during camera operation and lifting equipment. They also have a hold at the wrist for clipping to the pouch.

  • Ear protection. Perfect for a loud shooting location such as a concert or gig. These ones by EarPeace even come in a handy canister

  • Radios, because you never know when you need to get in contact with someone beyond earshot. The antenna even fits in this pouch really tidy.

  • Some pens, because at some point someone will always ask “Any got a pen?”.

  • To attach everything to the outside of the pouch are some handy miniature screw gate carabiners.

  • And to finish it off, some spring clamps.

Filmmaker's-Pouch

Everything in and on this pouch, including the pouch itself, comes in at a total of £.

You might not need everything in this pouch so just get what you need when you need it.

In addition to the pouch, Adam has started putting together a 2nd AC’s utility belt including:

  • Miniature T marks made from t brackets and bright coloured tape. Great for outdoor use.

  • A slate, a dry wipe pen, and a microfiber for cleaning the slate.

  • An absolute shed load of assorted tape, held together with a rigging strap.

  • Heat resistant gloves for handling hot lights.

  • The belt also has a MOLLE strap system, which is a universal webbing system employed by thousands of container harnesses and belts. It also means that you can attach the utility pouch to the belt.

So if you want to be a walking swiss army knife, check out the shopping list Adam has put together in the description below. And if YOU have any suggestions for Adam and what he can add to his utility belt, leave us a comment or talk to him directly, I’ve put his social media links in the description too.


This video was Sponsored By

http://bit.ly/track-brooklyn-drive - Thanks to PremiumBeat for providing the music for this week's episode! Check out Premiumbeat.com to discover a huge range of exclusive royalty free music.


Equipment Links

🎥 This episode's kit/gear/equipment:

US links:

Pouch: http://amzn.to/2vwGOSZ

Fingerless Gloves: http://amzn.to/2xCur5r

Ear Protection: http://amzn.to/2vPDIor

Sharpies: http://amzn.to/2goF4ky

Ball Point Pens: http://amzn.to/2wsOXFe

Clamps: Carabiners: http://amzn.to/2euH3H0

Radios: http://amzn.to/2wozhVd

Lens Cleaning Kit: http://amzn.to/2xCCP4P

Rechargeable Batteries: http://amzn.to/2vPUunn Microfibre

Cloths: http://amzn.to/2goqv06

Multi-tool: http://amzn.to/2xCNyMI

Torch: http://amzn.to/2vQiKWI

Hey/Allen Key Tool: http://amzn.to/2wswk4B

Velcro Straps: http://amzn.to/2euCTPr

Belt: http://amzn.to/2wt5IAm

Heat Resistant Gloves: http://amzn.to/2euKopC

Rigging Strap: Unavailable in US? Weird! T Marks (just add tape!): http://amzn.to/2xD2Wc6


UK links:

Pouch: http://amzn.to/2goyqe6

Fingerless Gloves: http://amzn.to/2iL4tJD

Ear Protection: http://amzn.to/2xCyO0v

Sharpies: http://amzn.to/2eKfIgU

Ball Point Pens: http://amzn.to/2xCWdyS

Clamps: http://amzn.to/2gozCOC

Carabiners: http://amzn.to/2gocgJ0

Radios: http://amzn.to/2iNlAuo

Lens Cleaning Kit: http://amzn.to/2goECmn

Rechargeable Batteries: http://amzn.to/2gowrpW

Microfibre Cloths: http://amzn.to/2iNfCd3

Multi-tool: http://bit.ly/2wodgpq

Torch: http://amzn.to/2wsa9eU

Hey/Allen Key Tool: http://amzn.to/2gomIjp

Velcro Straps: http://amzn.to/2goyHO5

Belt: http://amzn.to/2goAsuE

Heat Resistant Gloves: http://amzn.to/2goeoAh

Rigging Strap: http://amzn.to/2iOyEzN

T Marks (just add tape!): http://amzn.to/2iMvMDp


Filmmaker's Utility Pouch

DISCLAIMERS:

Some of these links are affiliate links, if you purchase gear via these links The Film Look will receive a small commission, but there will be no additional cost to you. Thank you!

3D Printed Camera Equipment

Since this is the future and we can now 3D print things of all shapes and sizes, we wanted to see what camera equipment we could get printed.

Since we don’t have a 3D printer we headed over to our local FabLab.

There are loads of these all over the world so see if there is one near you.

If you are like us and don’t have a lot of experience in creating 3d models we used a website called Thingverse. On this website you can download 3D models for everything from phone cases, shoelaces, masks, and your favourite movie props.

we wanted to print camera related equipment, so we searched camera equipment on the site and these are the items we got 3D printed.

Mini Tripod

3D-Printed-Tripod.jpg

This mini tripod was the first thing we got 3D printed as it is crazy you can print such a thing. It comes in 5 different parts and you need to buy nut and bolts to secure all of the parts together, but they tell you on thingiverse which ones you need.

3d-printed-camera

To attach the tripod to the camera you need to use a standard quarter 20 screw like this one, or if you have a spare quick release plate like we did you can attach your camera using that.

The tripod can hold a DSLR sized camera with a lens and works great if you need to set up your camera for a static shot or even timelapse.

One of the best things about this tripod is that is folds down and does not take up much room in my camera bag.

Sony NP-FW50 Battery Holder

3d-printed-camera-equipment.jpg

The Sony A7 NP-FW50’s are really small and they don’t come with a case so it’s impossible to know which ones have been used, this is unlike our Canon 600d camera batteries.

But using this 3D printed battery clip you can store 4 of them together.

The way we store them is when the battery connector is facing outwards the battery is charged, then when a battery is flat they go in the other way, so you know how many you have left.

There is nothing out there you can buy that does the same job of storing these Sony batteries in this way, it has to be 3D printed.

Studio Battery Dispenser

3D-Printed--BatteryHolder.jpg

This studio battery dispenser is another way to store your batteries. This one stores double AA batteries but on Thingiverse you can also get the 3D models for triple A batteries, 12v batteries and many more.

We have found this to be really handy as it helps not to mix up flat batteries with your charged ones. This is another one of those items I have not seen for sale in a shop.

Battery Case

3D-Double-A-Battery-Holder.jpg

Just like the Sony A7s battery holders, these double A and Triple A battery holders have come in handy to store charged batteries in my camera bag. They no longer roll all over and I know if the batteries are facing down, they have been used. When you 3D print these you have to buy magnets to secure the lids on, which makes it quick and easy to store the batteries.

SD Cards Holder

3D-SD-Card-Holder.jpg

This is an SD card holder which allows you to store your SD cards obviously.

This is the only print I would not recommend as you can not see the front of the SD card so you have to search through them until you find the one you need.

There are many different SD card holders you can buy for a few pound, so just get one of those.

The quality of these 3D prints are really good, and I didn’t expect the plastic to be so tough and they are definitely going to last a long time.

We have been using the Sony A7s battery holder for about a year now and it still works great, and it is such an important item in my camera bag as it keeps the batteries for my main camera organised in such an easy way.

Being able to print the items in bright colours comes in really handy.

When you are looking in your camera bag for the battery clip, the bright yellow just stands out making easier to find since most other camera equipment is black.  

So go to Thingiverse and see what you can find that suits your camera equipment setup. There are loads of different battery holders, GoPro mounts, follow focus rings and you can even 3D print Lens Caps. I know I will be keeping an eye out for new camera equipment designs.

You can find links to all of the 3D designs below.

Mini Tripod: https://www.thingiverse.com/thing:1460181
Sony FW50 holder: https://www.thingiverse.com/thing:1094889
AA Battery Mount: https://www.thingiverse.com/thing:1720118
AA/AAA Battery Case: https://www.thingiverse.com/thing:51376
SD Card Organiser: https://www.thingiverse.com/thing:989624


This video was Sponsored By

http://bit.ly/corruption-pack - With glitchy overlays, distorted logo reveals and more, RocketStock’s "Corruption" is an ideal way to give your project a dramatic edge.

http://bit.ly/track-blue-blood - Click here to download this episode's track. Check out Premiumbeat.com to discover a huge range of exclusive royalty free music!


DISCLAIMERS:

Some of these links are affiliate links, if you purchase gear via these links The Film Look will receive a small commission, but there will be no additional cost to you. Thank you!

Map Flyover Title Sequence

When we made our short film Corpse we created this map flyover for the tile sequences at the start of the film. We did not actually use it in the film as we thought it was not needed, but wanted to show people how to create it.


This video was Sponsored By

http://bit.ly/pack-emulsion - Make your video look like it was tailor-made for the silver screen with RocketStock’s film grain overlay pack, Emulsion!

http://bit.ly/track-funkycarpet - Click here to download this episode's track. Check out Premiumbeat.com to discover a huge range of exclusive royalty free music!


Map Flyover Title Sequence.jpg

DISCLAIMERS:

Some of these links are affiliate links, if you purchase gear via these links The Film Look will receive a small commission, but there will be no additional cost to you. Thank you!

Silence your Footsteps and Props

So it’s time to record dialogue for your next scene. But footsteps and prop noise keep getting into your dialogue takes. What can you do? This is your answer...neoprene and some double sided tape.

A video from our indie film sound guide is all about minimising noise so you can record clean dialogue whilst actors are delivering lines. Nothing is worse than a coffee cup clinking when someone is speaking because you can’t unbake those sound effects. I’ve put a link down below if you want to learn more.

So what can we do to prevent footstep noise from cast and crew and suppress the noise of props being handled during delivered dialogue?

There is actually a product online called Hush Heels that do the trick. They are pre-cut selects of neoprene material that you can attach to the soles of the cast and crew’s footwear to dampen the noise of footsteps. Easy to use but they are a bit pricey as they only come in packs of 10 for £35.

This got me thinking. Surely neoprene isn’t that expensive! With a pair of scissors and some strong double sided tape, can we whip up some custom sized DIY noise pads?

I looked on ebay and found this A4 size sheet of neoprene for £3.05. Obviously, the bigger the piece you buy, the better value it gets. Together with some double sided sticky tape for £2.50 this has come to a total of £5.55. As we are only using 15% of the whole roll of tape, the cost of materials is closer to £3.43.

Now that we’ve got maths out of the way, let's see if they work!

I taped over the back of the neoprene and drew out some templates based on one of Rob’s fancy shoes; for the heel and the ball of the foot as this is where the foot makes contact with the ground.

minimise-foot-steps

Rob is going to strut his stuff with and without the neoprene pads on a few different surfaces. I’ll place the Decibel metre on screen beside it so you can hear for yourself how well they work.

Obviously, they aren’t silent but they certainly make a difference. When the boom is aiming towards a person's mouth and not their feet, it’s going to be really quiet!

It works with props too.

  • Footage, cups, plates, and pans, with and without the neoprene pads.

Again, we are seeing a big difference in loudness which is ideal if you need a silent set to record super clean dialogue!

  • Footage, cups, plates, and pans, with and without the neoprene pads.

Silence-your-Props-With-Neoprene-Pads.jpg

They work if you need stealthy crew members too. Just add the neoprene pads to their feet and away you go!

The downside to our DIY method is the time is takes to prepare, cut, and unstick the bits from the back of the tape. It’s quite tricky to remove it, and this may waste precious time on set.  

If you need emergency pads of neoprene for the rare case of silencing footsteps and props, take the DIY method. You can always give the backing of the tape a dog-ear for easier peeling during the shoot.

But, if you’re a professional who needs a dozen pairs of heels hushed in just a few seconds, the professional option is probably better in the long run.


This video was Sponsored By

http://bit.ly/track-blue-blood - Thanks to PremiumBeat for providing the music for this week's episode. Check out Premiumbeat.com to discover a huge range of exclusive royalty free music!


Silence your Footsteps and Props

DISCLAIMERS:

Some of these links are affiliate links, if you purchase gear via these links The Film Look will receive a small commission, but there will be no additional cost to you. Thank you!

Wireless Shotgun Mic Hack

Today we are going to convert a wired boom mic into a wireless boom mic with a few things you might already have in your kit!

So you may have already seen a really cool video by filmmaker KnopTop on how he converts a Video Mic Pro into a wireless mic by plugging it straight into a lavaliere microphone transmitter which sends the signal to the camera via a paired up receiver. If you haven’t, go check out it, links down below.

Well this idea got us thinking. Can you do this with a bigger microphone, like a one that uses XLR input, and get similar results? Let's do some digging!

Okay, so to begin with, we have the microphone. This is a Rode NTG2 shotgun mic. Unfortunately, it can’t plug straight into a lavaliere microphone transmitter because it doesn’t have the right connections.

The Rode Lavaliere transmitter I’m have here needs a 3.5mm jack. This is fine if you are plugging in something like a Video Mic Pro because it fits, but something like the NTG2 uses XLR and it also needs a bigger pre-amplification to boost the signal.

Basically, the NTG2 needs more juice than this  VidMic, and this RodeLink can’t give it what it needs.

So this is where the Saramonic SmartRig comes in. This is going to be our bridge between the 2 foreign connections as well as the power boost the microphone needs. It has an XLR socket on one end, a 3.5mm jack on the other, and the 9v battery it uses is enough to power a bigger microphone.

Shotgun-Mic-Hack.jpg

Lets hook it up and get it all working!

So now it goes: Microphone, XLR, SmartRig, Transmitter, Receiver, sound.

He has the Lavaliere Transmitter hooked to his pocket with the smartrig attached. The XLR lead is plugged into this which goes up the boom and to the microphone which is currently being boomed onto me as we speak. It’s all held together with a few clips and carbines for fast assembly and disassembly.

It’s technically not “wireless”. There is still a cable running down the boom pole that goes into the smart rig and transmitter. But we aren’t tethered to the camera, so I can move back a lot further than the length of your average XLR cable.

There are some downsides to this setup. Because of the way it’s configured, it is the camera operator who will be monitoring the audio, and not the sound recording.


This video was Sponsored By

http://bit.ly/corruption-pack - With glitchy overlays, distorted logo reveals and more, RocketStock’s "Corruption" is an ideal way to give your project a dramatic edge.

https://bit.ly/track-blue-lounge - Click here to download this episode's track. Check out Premiumbeat.com to discover a huge range of exclusive royalty free music!


Wireless Shotgun Mic Hack

DISCLAIMERS:

Some of these links are affiliate links, if you purchase gear via these links The Film Look will receive a small commission, but there will be no additional cost to you. Thank you!