Gain & Room Tone | Episode 4: Indie Film Sound Guide

The Indie Film Sound Guide is a step by step series teaching you all of the basics to achieve better audio for your films. This includes preparation, recording, and mixing. The guide uses a scene shot specifically for the guide, and follows a proper workflow from start to finish. This is everything you will need to know to start recording great sound for your short film!

Most audio devices will have a way of manually choosing how sensitive your microphone is to sound. But where do you set your levels?

So far we have talked about getting in the right position, recording clean dialog takes, and removing any unwanted noises from your scene. If you want to catch up, episodes 1-3 are in the description.

Let’s talk about where you should be setting your sound levels. The loudness of actors and their actions differ from scene to scene, and even take to take. So what I like to do is run through the scene with the director and the actors, sound kit at the ready, and study the sound levels.

Set your levels so you are getting loud and clear dialogue with a little bit of room from the top peak line just encase the sound gets a little louder. If you are risking your sound clipping during the dialog, your gain is probably set just a tad too high.

Once you find a comfortable loud and clear level, you shouldn’t have to adjust the gain above this for the rest of the scene. Make a mental note of the number your audio recorder is reading out – this is your scene’s gain cap. Going above this will only introduce more noise with no real benefit.

If an actor shouts in the scene, such as this example of Stu, your microphone will very likely be overdriven and the audio will distort. This is known as clipping.

Clipping your audio is just as frowned upon as overexposing your footage. You aren’t only recording something that sounds bad, but the information is now destroyed and can’t be recovered. No amount of tweaking will fix the distortion.

The solution to this is to lower the gain until you can record the shouting without it clipping. 

Because you’ve brought the gain down in order not to clip the audio, it will have also lessened the amount of natural noise compared to the other takes which are set higher. So we will need to add that natural noise back in. You can do this using room tone.

Room tone is a recording of up to 2 minutes of nothing but complete room ambience, recorded at your scene’s gain cap.

Room tone is there to fill in any patches of silence when editing dialogue and sound effects. It is also used like a Band-Aid, to cover up any unwanted noises or if the director gives direction mid-take.

A good time to record your room tone is at the start of the shoot, just after you have found a good gain cap.

Recording it before you start rolling picture helps in a few other ways too. Firstly, you won’t forget it as its top of the list. Second, you aren’t making people wait around at the end of the day to capture it. And third, if there are any more unwanted noises you didn’t pick up on, you will likely hear them when you record it.  

So, step four, set your gain cap and don’t go beyond it. Either lower the gain or move your microphone away if it clips. And don’t forget to record room tone!


Anything we didn't cover? Leave us a comment and we'll create a wrap up episode at the end of the guide, answering any questions we missed!

The Indie Film Sound Guide is a step by step series teaching you the basics of recording sound on set.

Episodes released weekly:

Introduction: https://youtu.be/NzmDV5Z9c_o

The Scene: https://youtu.be/dGD8pIOx2ls

Positioning: https://youtu.be/1Ki442J5hUk

Dialogue: https://youtu.be/X8YPFNYgu8s

Minimise Noise: https://youtu.be/e6MEJd_rGvI

Gain & Room Tone: https://youtu.be/U5MJvJ9_guQ

Wild Takes: https://youtu.be/Ci9RIH5d1ew

Organise & Sync: https://youtu.be/ZyVvwsWQIwk

Mixing: https://youtu.be/7x5SnoftgUw


Gain & Room Tone  Episode 4 Indie Film Sound Guide.jpg

DISCLAIMERS:

Some of these links are affiliate links, if you purchase gear via these links The Film Look will receive a small commission, but there will be no additional cost to you. Thank you!

Story in a Can #4 | "The Drug Dog"

In each can there are 20 locations, 20 objects, 20 characters, and 20 scenarios. We pick one from each of the cans and try to come up with a film idea on the spot. Sometimes they are bad, but sometimes we turn the idea into a film.

In Story In a Can #9 Rich and Kristian have to make a story about a Character who is a Drug Addict, a location of a House in the Suburbs, an object of a Feather, and a scenario of a Walking a Dog?

Watch the video to see what story was made.


DISCLAIMERS:

Some of these links are affiliate links, if you purchase gear via these links The Film Look will receive a small commission, but there will be no additional cost to you. Thank you!

Minimise Noise | Episode 3: Indie Film Sound Guide

The Indie Film Sound Guide is a step by step series teaching you all of the basics to achieve better audio for your films. This includes preparation, recording, and mixing. The guide uses a scene shot specifically for the guide, and follows a proper workflow from start to finish. This is everything you will need to know to start recording great sound for your short film!

As the sound recordist, you have the power of the microphone and headphones. If you can hear any unwanted noise, such as the air conditioning unit, a clock ticking, or a plane flying overhead, you need to speak up and get it shut off. Welcome to episode 3.

So far we have talked about the best position to record and prioritising dialog. Now it’s time to talk about reducing unwanted noises for really clean and crisp audio.

Unwanted noises are a pain to remove in post-production. You want to record in the quietest possible environment, so turn off any whirring computers, buzzing fridges, and silence anything which hums, buzzes, or beeps.

Once this is done, you will have a nice quiet location to record in. But it doesn’t stop there!

Sometimes in a scene an actor will be performing an action while delivering a line. If the action creates a very loud sound mid-dialog, you’ll want to minimise the loudness of the action as best you can.

Here we have a scene: Stu and Frank are discussing how they are going to dispose of a body, and Stu goes to take a drink. This is where the issue occurs. Stu speaks at the same time he places the cup down onto the saucer.

This means we now have 2 sounds baked into one audio track; the dialog of Stu and the coffee cup sound effect.

There are 2 ways we can deal with this. Firstly, we can change the blocking. If the timing can be changed so Stu delivers the line THEN places it down, problem solved.  But sometimes this slows down the pace of the scene. So instead, we can try to minimise the sound of the cup and saucer colliding.

If the teacup and saucer aren’t in the shot when it is being placed down, you can remove the saucer completely and cushion the contact between the table and the teacup using something like a towel or a sweater. Then it’s a case of recording the sound effect of the cup and saucer and mixing it back into the scene.

It might seem like you are doing twice as much work, but think of it like this:

With all of your sound elements as independent single tracks you are able to alter those sound effects without affecting any of the others. If your sound elements were on a single track grouped together, you won’t be able to change one sound without changing all the others. It’s like trying to unbake a cake.

This goes for dialogue too. In production, try prevent any overlap of dialogue between actors. You can always edit overlap of lines in post-production.

So step three, remove any buzzing and humming from the scene, and limit the loudness of sound effects by dampening or removing them all together.


Anything we didn't cover? Leave us a comment and we'll create a wrap up episode at the end of the guide, answering any questions we missed!

The Indie Film Sound Guide is a step by step series teaching you the basics of recording sound on set.

Episodes released weekly:

Introduction: https://youtu.be/NzmDV5Z9c_o

The Scene: https://youtu.be/dGD8pIOx2ls

Positioning: https://youtu.be/1Ki442J5hUk

Dialogue: https://youtu.be/X8YPFNYgu8s

Minimise Noise: https://youtu.be/e6MEJd_rGvI

Gain & Room Tone: https://youtu.be/U5MJvJ9_guQ

Wild Takes: https://youtu.be/Ci9RIH5d1ew

Organise & Sync: https://youtu.be/ZyVvwsWQIwk

Mixing: https://youtu.be/7x5SnoftgUw


Minimise Noise - Indie Film Sound Guide

DISCLAIMERS:

Some of these links are affiliate links, if you purchase gear via these links The Film Look will receive a small commission, but there will be no additional cost to you. Thank you!

One Year on YouTube! Q&A and Giveaway Results | Vlog #26


To celebrate the channel's 1st birthday we hosted a Facebook LIVE event with a Q&A and a giveaway of some prizes. We recorded the whole thing, and created a fat-free version for you to watch!


DISCLAIMERS:

Some of these links are affiliate links, if you purchase gear via these links The Film Look will receive a small commission, but there will be no additional cost to you. Thank you!

Dialogue is Priority | Episode 2: Indie Film Sound Guide

The Indie Film Sound Guide is a step by step series teaching you all of the basics to achieve better audio for your films. This includes preparation, recording, and mixing. The guide uses a scene shot specifically for the guide, and follows a proper workflow from start to finish. This is everything you will need to know to start recording great sound for your short film!

There’s a lot of sound going on during a shoot. You might be wondering what you should be recording first. Welcome to episode two.

So far we have talked about positioning your microphone to get the best results. Now it’s time to talk about WHAT you should be recording. If it’s a narrative film you’re making, I imagine it will have some sort of dialog. This is your highest priority.

Don’t worry about recording footsteps, pats on the back, coffee cups clinking, or any other sound effects just yet. All of these sound effects are a lot easier to reproduce.

But if you don’t get your dialogue, you’ll spend a lot of time trying to either fix it in post or dubbing it back in.

Right now, as the sound recordist, you just need to make sure you are getting clean dialog takes. If your audio is compromised before action is called, such as buses going past, or rowdy pedestrians outside, make the crew aware and you can wait it out, these things usually only last a few minutes at most.

In the meantime, the rest of the team can record some reaction shots, inserts, or anything else which doesn’t require audio being recorded.

If the sound is compromised during a take, however, it’s a good courtesy to continue rolling.

A short interference of sound can be edited out just as long as you have a few cleaner takes to work with. I will talk about this more in a later episode about mixing.

When recording dialogue, it is essential to mark the take and record a clap using a clapperboard or your hands. A clap will generate a spike in the waveform so you can use it as a pin point to synchronise your good audio to your camera’s scratch audio.

If you are recording your audio straight into the camera, it isn’t as necessary, but it is a good habit to have anyway.

If you forget to mark the start of the take or the board wasn’t visible in the shot, you can always mark it at the very end, known as second sticks.

If you notice the take wasn’t marked with a clap, make everyone aware before the director yells cut. Syncing audio which doesn’t have an audio spike is a pain to mix.

Speaking of the director yelling cut! The camera operator and sound recordist should only cut picture and sound when the official call has been made. When you start making films, this is a habit you might have to force yourself to break.

If the director wants to continue rolling, and you cut sound, the shot will have to be marked again, slowing down production. So just keep rolling until they say cut!

So step two. Your priority is good, clean, loud dialogue!


Anything we didn't cover? Leave us a comment and we'll create a wrap up episode at the end of the guide, answering any questions we missed!

The Indie Film Sound Guide is a step by step series teaching you the basics of recording sound on set.

Episodes released weekly:

Introduction: https://youtu.be/NzmDV5Z9c_o

The Scene: https://youtu.be/dGD8pIOx2ls

Positioning: https://youtu.be/1Ki442J5hUk

Dialogue: https://youtu.be/X8YPFNYgu8s

Minimise Noise: https://youtu.be/e6MEJd_rGvI

Gain & Room Tone: https://youtu.be/U5MJvJ9_guQ

Wild Takes: https://youtu.be/Ci9RIH5d1ew

Organise & Sync: https://youtu.be/ZyVvwsWQIwk

Mixing: https://youtu.be/7x5SnoftgUw


Dialogue is Priority Indie Film Sound Guide
Dialogue-is-Priority-Indie-Film-Sound-Guide.jpg

DISCLAIMERS:

Some of these links are affiliate links, if you purchase gear via these links The Film Look will receive a small commission, but there will be no additional cost to you. Thank you!

Our Posters Arrived! | Vlog #25


To celebrate completing the Indie Film Sound Guide (and to help cover up more of our studio's horrible white walls) we made a poster for our 4th (and currently blank) poster frame!


DISCLAIMERS:

Some of these links are affiliate links, if you purchase gear via these links The Film Look will receive a small commission, but there will be no additional cost to you. Thank you!

Position is Key | Episode 1: Indie Film Sound Guide

The Indie Film Sound Guide is a step by step series teaching you all of the basics to achieve better audio for your films. This includes preparation, recording, and mixing. The guide uses a scene shot specifically for the guide, and follows a proper workflow from start to finish. This is everything you will need to know to start recording great sound for your short film!

The position of your microphone is the most important element to achieve good quality sound: welcome to episode one.

Let me show you a prime example of why the position of your microphone is crucial to a good recording. Here I have a scene: Stu and Frank are chatting about how they are going to hide a body.

Take 1 was actually recorded using my mobile phone, placed on the table.

Take 2 was recorded using a Rode NTG-2 shotgun mic. Problem is the mic wasn’t shooting close enough to the subject. This is a prime example of why the position of your microphone is so important.

If my old mobile phone can outperform a quality shotgun microphone, it’s evident that closing the distance between the microphone and subject is key to better audio.

Rode Video Mics are a common piece of equipment for amateur productions, and for the price they capture a solid sound. But because it conveniently has a hot-shoe attachment, people assume that placing it on top of the camera is where it is supposed to go.

If you are a one man crew shooting vox-pops, or a self-shooting vlogger, a set up like this will work well only because the subject is so close. Any more distance than a foot, and the sound of your subject will quickly lose quality.

You can greatly improve the quality of a Rode Video Mic by picking up an extension cable for your mic and attaching it to a boom pole using the thread on the bottom of the hot shoe. 

Positioning a microphone overhead, and aiming it towards the subject is the most common method for recording good quality audio.

If you are in windy conditions, positioning it under the frame can cut some of that noise out. For the best results you can use a dead cat or a blimp, which will trap the wind before it hits the microphone.

You can actually use anything furry and it will do a similar job. Even something like a wooly hat will help. In fact, I’ll demonstrate using this fan heater directed against my face.

So just find something fluffy or furry and wrap your microphone in it!

Work together with the camera operator and figure out when your microphone is in shot. Then raise it out of frame an inch or two. These few inches will give you room to move and sway without it getting back in frame by mistake.

When the camera changes its position and focal length, the framing will change too which means you will have to adjust your position in order to not get the microphone in frame.

When you start recording, you want to limit how much you move your hands. If you adjust your grip during a take, it can create noises which travel up the boom pole and records into the microphone.

So find a comfortable position and instead of readjusting your grip with your hands, use your wrists and elbows instead. A cross grip is my preferred grip. If both of my hands were facing the same way and I rolled down, it’s a lot harder for me to hold onto the boom.

So crossing your grip will give you a strong, steady grip for longer periods of time. But, do whatever is the most comfortable for you. Now, let’s talk a bit about loose cables!

The easiest way to get rid of loose cable is to simply wrap it around the boom. You can buy boom poles that you can feed cables into, so they exit at the bottom. You can even find little clips to keep your cables neat on the outside

I like to use the wrapping trick because it means if I need some slack on the cable, I just spin the boom the opposite way and unravel it.

So, step one, if your sound is rubbish, it’s probably just not close enough!


Anything we didn't cover? Leave us a comment and we'll create a wrap up episode at the end of the guide, answering any questions we missed!

The Indie Film Sound Guide is a step by step series teaching you the basics of recording sound on set.

Episodes released weekly:

Introduction: https://youtu.be/NzmDV5Z9c_o

The Scene: https://youtu.be/dGD8pIOx2ls

Positioning: https://youtu.be/1Ki442J5hUk

Dialogue: https://youtu.be/X8YPFNYgu8s

Minimise Noise: https://youtu.be/e6MEJd_rGvI

Gain & Room Tone: https://youtu.be/U5MJvJ9_guQ

Wild Takes: https://youtu.be/Ci9RIH5d1ew

Organise & Sync: https://youtu.be/ZyVvwsWQIwk

Mixing: https://youtu.be/7x5SnoftgUw


Position is Key - Indie Film Sound Guide
Position-is-Key-Indie-Film-Sound-Guide

DISCLAIMERS:

Some of these links are affiliate links, if you purchase gear via these links The Film Look will receive a small commission, but there will be no additional cost to you. Thank you!

The Scene | Indie Film Sound Guide

The Indie Film Sound Guide is a step by step series teaching you all of the basics to achieve better audio for your films. This includes preparation, recording, and mixing. The guide uses a scene shot specifically for the guide, and follows a proper workflow from start to finish. This is everything you will need to know to start recording great sound for your short film!


Anything we didn't cover? Leave us a comment and we'll create a wrap up episode at the end of the guide, answering any questions we missed!

The Indie Film Sound Guide is a step by step series teaching you the basics of recording sound on set.

Episodes released weekly:

Introduction: https://youtu.be/NzmDV5Z9c_o

The Scene: https://youtu.be/dGD8pIOx2ls

Positioning: https://youtu.be/1Ki442J5hUk

Dialogue: https://youtu.be/X8YPFNYgu8s

Minimise Noise: https://youtu.be/e6MEJd_rGvI

Gain & Room Tone: https://youtu.be/U5MJvJ9_guQ

Wild Takes: https://youtu.be/Ci9RIH5d1ew

Organise & Sync: https://youtu.be/ZyVvwsWQIwk

Mixing: https://youtu.be/7x5SnoftgUw


The Scene - Indie Film Sound Guide.jpg

DISCLAIMERS:

Some of these links are affiliate links, if you purchase gear via these links The Film Look will receive a small commission, but there will be no additional cost to you. Thank you!

Want to Get Better Sound? | Episode 0: Indie Film Sound Guide

The Indie Film Sound Guide is a step by step series teaching you all of the basics to achieve better audio for your films. This includes preparation, recording, and mixing.

The guide uses a scene shot specifically for the guide, and follows a proper workflow from start to finish. This is everything you will need to know to start recording great sound for your short film!


Anything we didn't cover? Leave us a comment and we'll create a wrap up episode at the end of the guide, answering any questions we missed!

The Indie Film Sound Guide is a step by step series teaching you the basics of recording sound on set.

Episodes released weekly:

Introduction: https://youtu.be/NzmDV5Z9c_o

The Scene: https://youtu.be/dGD8pIOx2ls

Positioning: https://youtu.be/1Ki442J5hUk

Dialogue: https://youtu.be/X8YPFNYgu8s

Minimise Noise: https://youtu.be/e6MEJd_rGvI

Gain & Room Tone: https://youtu.be/U5MJvJ9_guQ

Wild Takes: https://youtu.be/Ci9RIH5d1ew

Organise & Sync: https://youtu.be/ZyVvwsWQIwk

Mixing: https://youtu.be/7x5SnoftgUw


Want to Get Better Sound - Indie Film Sound Guide

DISCLAIMERS:

Some of these links are affiliate links, if you purchase gear via these links The Film Look will receive a small commission, but there will be no additional cost to you. Thank you!

Story in a Can #3 | "The Pharmacist"

In each can there are 20 locations, 20 objects, 20 characters, and 20 scenarios. We pick one from each of the cans and try to come up with a film idea on the spot. Sometimes they are bad, but sometimes we turn the idea into a film.

In Story In a Can #9 Rob and Liam have to make a story about a Character who is a Pharmacist, a location of a Dive Bar, an object of a Lip Balm, and a scenario of a Car Won't Start?

Watch the video to see what story was made.


DISCLAIMERS:

Some of these links are affiliate links, if you purchase gear via these links The Film Look will receive a small commission, but there will be no additional cost to you. Thank you!

Lighting Setups for Presenting


Presenting like this is a big part of our videos. Now we've experimented with different lighting setups and there's a few that we really like so we thought we'd share with you how we create these setups.

We don't like to shoot on green screens when we're presenting, firstly our studio isn't big enough to light it correctly and secondly we've got some pretty cool things on the walls so why not use them.

We have 5 main setups here at the film look The Film Look, The Film Look standard, The Film Look standard blue, window setup, sit down high key and sit down low key.

We have gaf tapes T positions on the floor so we know exactly where to stand for each setup. Let's start off with The Film Look standard setup this one here.

The-Film-Look-Presenting-Setup-1

It wasn't the first set that we had but once we tried it out we liked it so much that it became our standard Tuesday presenting setup.

So this is how it's done. Firstly the background Rob's collage of Instagram photos gives the shot a blast of colour, our shelving unit has a bunch of cameras we've collected or retired and it splits the frame in half. To get the moody look we block out the window and start lighting from scratch. We use a soft box filled with a set of five 115 watt bulbs placed behind a frosted shower curtain to create a really soft skin balance light. This is set to 5500 K watching the colour temperature saying on the camera.

For some colour difference we used a diffused car light above our heads using a warm household bulb set at 2700 K. This is used as a hair light as well as a background light. The main thing to remember with this setup is to soften the light as much as it can, with the light being so close it needs to wrap around the subject spotlighting it doesn't look so great.

Next we have the film looks standard blue.

The-Film-Look-Presenting-Setup-2-Blue

We altered The Film Look standard setup to add a blue accents to the shot. This is to match the colour design of our series coming out soon called the indie film sound guide. In replace of the soft box and shower curtain we use a china Lantern fitted with a single 115 watt bulb and the colour temperature of the camera is set to 5500K. The can light up in the corner is gifted a blue gel to really sell the blue accent. The household bulb has also been swapped with 115 watt bulb. Since this set up is more stylistic we placed a DIY anamorphic adapter in front of the lens which creates some nice soft lens flares and changes the shape of the bokeh from circular – oval.

To complement the blue light we use a 160 LED, kitted with an orange gel positioned down below and facing forward. This gives us blue and orange lens flares on either side of the frame. Finally we use a reflector in front of the subject angled up from the floor to fill in some light under the chin.

Next we have the window setup.

The-Film-Look-Presenting-Setup-3-Window

We've got this nine foot Victorian window which is great for presenting because it lets loads of light in and it's got these really nice symmetrical frames.

Because of the vast amount of light coming in we have to stop down the exposure with an ND filter to keep the sky from blowing out. As this severely under exposes the subject we have two soft boxes on either fitted with 5 115 watt bulbs each we've position as close as possible to the subject without getting in frame. We also used a reflector in front of the subject angled up from the floor to fill in some of the light under the chin.

Finally we have the sit down setup.

The-Film-Look-Presenting-Setup-4-High_Key

This set up is used more for our Sunday show The Film Look vlogs and is pretty straight forward. Two soft boxes fitted with 5, 115 watt bulbs each. One in front, one in the back. Both are angled at 45 degrees to create some nice shadows some fill and edge highlighting.

For low key version we get rid of the soft boxes and instead place desk lamps on the table behind this is the setup. We used this for an episode of story in the car with me and Rob both in shot. The lamps have been diffused using grease proof paper and that’s it.

The-Film-Look-Presenting-Setup-5-Low_Key

Lighting Setups for Presenting.jpg

DISCLAIMERS:

Some of these links are affiliate links, if you purchase gear via these links The Film Look will receive a small commission, but there will be no additional cost to you. Thank you!

Studio Life | Vlog #23


We messed up the running order this week - apologies! This week Dan Lemon visits to finally sign the Corpse poster and talk about the next film, Rob shows his setup for getting sweet b-roll, and Ed's introduction to the channel starts here!


DISCLAIMERS:

Some of these links are affiliate links, if you purchase gear via these links The Film Look will receive a small commission, but there will be no additional cost to you. Thank you!

Structure Your Film Like The Pros!

Before I properly sit down and type out the first draft of a script, I make notes of the key events from start to finish. It usually looks like this; a beat list, which is essentially the film written in bullet points.

This has worked out well so far for writing shorts. But since I started writing a feature, I wanted to see if there were any feature film structure templates, just to keep me on the right track.

I came across this. It’s a list of plot points you can fill in for your film. To check if it worked, I decided to throw in some classic films and find out if they followed that structure. They did…all of them did.

Every single film I tested followed the same pattern in some form or another. So let’s talk about it!

Act 1

Ordinary World

This is where your film starts. It will show your main characters going about their usual lives, sometimes quiet boring. In Back to the Future, Marty is a high schooler in the 1980s. In The Matrix, Neo’s ordinary world is actually inside The Matrix, which is a fun twist on the structure.

Incident

This is an event which changes the character’s ordinary world. It shakes up what they are used to. In Back to the Future, Marty sees Doc get shot. That’s not ordinary! In Breaking Bad, Walter White finds out he has terminal cancer.

Call to Action

Now that their ordinary world has been flipped, our character must decide to take action, going against their natural instinct. Walter White in Breaking Bad can’t pay for his cancer treatment. His call to action involves making a lot money, fast, to leave to his family after his death. This causes him to get into cooking meth. The call to action can be as simple as starting a band to impress the girl, like in Sing Street.

Refusal of the Call

But your character may refuse their call to action. They might not be ready for the world to change. In The Lion King, Simba refuses to go back to pride rock to stop Scar until a second incident sparks his destiny.

Refusal of the Call doesn’t have to be a straight up refusal either. Sometimes it is undiscovered or misdirected. Peter Parker got his superpowers and his first call to action was to try and win money wrestling. He didn’t discover his true call to action until his arrogance got his Uncle Ben killed, which brings me onto the next thing.

2nd Call to Action

With Uncle Ben dying because of Peter’s actions, his personal blame gives him his reason for putting on the mask and becoming Spiderman.

Act 2

Arrive in new World

Just like the ordinary world in act 1 this can mean many different things. The new world to Neo is the dystopian future, “the real world”, where humans are fighting machines. To Walter White, it is the drug world. To Will in Good Will Hunting it is the academic world. Within this new world they are committed to the task at hand, for now.

Meet the Locals

In this new world your character will be introduced to new people. In Gladiator this is when Maximus meets the other slaves for the first time. In Back to the Future, Marty is meeting his Mother and Father in the 1950s. And in Cars, Lightning McQueen meets the folk of Radiator Springs.

Hairy Mentor

The hairy mentor is someone who will guide your character through the next stage of their story. In Rocky it is Mickey, then Apollo. In The Matrix, it is Morpheus, Batman it is Alfred, Dumbledore, Gandalf, Red in The Shawshank Redemption…the list goes on. They don’t always have to be hairy, but they are likely older and wiser than the protagonist.

Practice Battles

Your character needs to be challenged internally and externally throughout the film. Some battles they will win, some they will lose, but it’s all preparing them for what is to come.

This could be the point where the new people in your characters life meet the people from their old world. In Silver Linings Playbook Tiffany introduces Pat to her sister which does not go so well.  

In a sports film these are not just the game’s leading up to the championship game, it’s all of the training montages beforehand, and the school and family challenges they are having.

Approach Bad Peak

The pressure is now building up on your character and things are spiralling out of control. In The Lord of the Rings the burden of the ring is getting too much for Frodo. In Back to the Future time is simply running out.

Life or Death

This is a point in the story when a character is backed into a corner and has two options – fight or flight. In Stand by Me, this is when Gordie and Chris finally stand up to Ace. In Toy Story, this is when Buzz has been strapped with a rocket and Woody teams up with the freaky toys to save Buzz and scare Sid away.

Seize the Trophy

This is the part when the characters achieve what they originally set out to get. A lot of the time, their original goal isn’t what they want in the end as they grow through the journey of the film.

In Stand by Me, they find the dead body of Ray Brower, but soon realise it wasn’t what they were expecting.

In Back to the Future, Marty seizes the trophy by making his parents fall in love so he doesn’t disappear.

Act 3

Chased Back Home

At this point your character has given up and revert back to their original life, or is forced to re-live their previous life before their call to action. They are given an epiphany moment and grow back stronger than ever before.

In Inception, Cobb is forced to return to Limbo where he and his Wife Mal once built their own world. In La La Land Mia gives up and heads back to her parent’s home after her stage play fails.  

Final Battle

This is where your character will win everything they have always wanted, or realise that their life was better off before. In Good Will Hunting, Will realises if he wants to get the Girl he has to leave his current life behind.

In a super hero film, they always save the world. And the final battle in every sports film is either them winning or losing the championship game.

In Toy Story, the final battle wasn’t actually saving Buzz from Sid. It was when Woody and Buzz needed to catch up to Andy’s moving van, or otherwise they would be lost forever.

In Back to the Future, after Marty gets his parents to fall in love, he must get back to the DeLorean before the lightning strikes to get back to 1985.  

Ordinary World?

Your character has returned to their original life, but they have grown through the journey of the film. This last scene tails off the film, and gives the audience a black and white contrast of the protagonist, where they came, who they were, and who they ARE now.

Fade to Black

You don’t have to follow these points to the letter. The character in your story may never need meet the Hairy Mentor or get Chased Back Home. This classic plot structure template gives the audience a familiar flow, but once you know the rules, you can always break them.

Structure Your Film Like The Pros!.jpg
Structure-Your-Film-Like-The-Pros

DISCLAIMERS:

Some of these links are affiliate links, if you purchase gear via these links The Film Look will receive a small commission, but there will be no additional cost to you. Thank you!

Buying Second Hand Equipment

Filmmaking equipment can be expensive! A great way to save a bit of money is to buy SECOND HAND equipment. I buy used kit quite often, and I thought I would share my tips for getting a good online bargain!

Most filmmakers keep good care on their kit. Not just because it’s expensive and essential to making films, but also because it retains a lot of its value. So when you decide to sell it, you can make a bit back on your investment.

So it’s safe to say most second hand equipment you find online is in good condition. I’ve bought lenses, lights, and even decided my camera upgrade was going to be a second hand purchase.

Tip 1

Once you’ve decided on the item you want to buy, start researching how much it is selling for on average. Watch eBay listings for equipment currently on sale, but don’t be so hasty to buy them just yet. Create a list of all of the items you can find and write down the total price and condition for each item. I usually make a list of around 10 to 15.

This will give you a good average of the price and condition of the piece of equipment so you don’t end up overbidding.

Tip 2

Now you have this information, you can start looking out for items to buy. Other than eBay, local Facebook groups are a great place to look, and you might be able to see and try them before you buy them.

Tip 3

When you’ve found the one you want to purchase; read the description, look at the photos, and ask the seller some questions. When buying a camera ask for the shutter count. This will indicate how much it has been used.

If you’re buying a lens, ask how it was used. A lens used exclusively for studio use will be in better condition than an outdoor lens because it’s been protected from outside elements.

Tip 4

If you miss out on a great bargain, don’t panic and instinctively buy the next one you see. You might end up getting something isn’t worth the money.

Tip 5

Sites like eBay have a great returns and money back guarantee policy, which means you are just as safe buying second hand equipment as you are buying new kit from a retailer.

Tip 6

Don’t expect the items you buy to be in mint condition. Sometimes you’ll find they have an odd mark or scratch. Most of the time this doesn’t affect the overall quality that it produces, but if you’re the type of person who needs everything to be in pristine condition, second hand camera equipment may not be the way to go.

So if you’re new to buying second hand filmmaking equipment, do your research.

You might have to be a little more patient and wait for the right one to come along, but it’s going to save you some serious cash, which you can put into your next project.


Buying Second Hand Equipment

DISCLAIMERS:

Some of these links are affiliate links, if you purchase gear via these links The Film Look will receive a small commission, but there will be no additional cost to you. Thank you!

More Studio Improvements + Another Polaroid on the Washing Line! | Vlog #21

Mr Adam Opie AKA the Steadicam Maestro visited the studio this week, we did some arts and crafts, and we finally figured out whose turn it is to make the brews!


DISCLAIMERS:

Some of these links are affiliate links, if you purchase gear via these links The Film Look will receive a small commission, but there will be no additional cost to you. Thank you!

Still The Best First Camera to Buy | Canon T3i Review (6 Years On)

The Canon T3i. This camera is over 6 years old now, and I think it’s STILL the best first camera you can buy.

Let me tell you why.

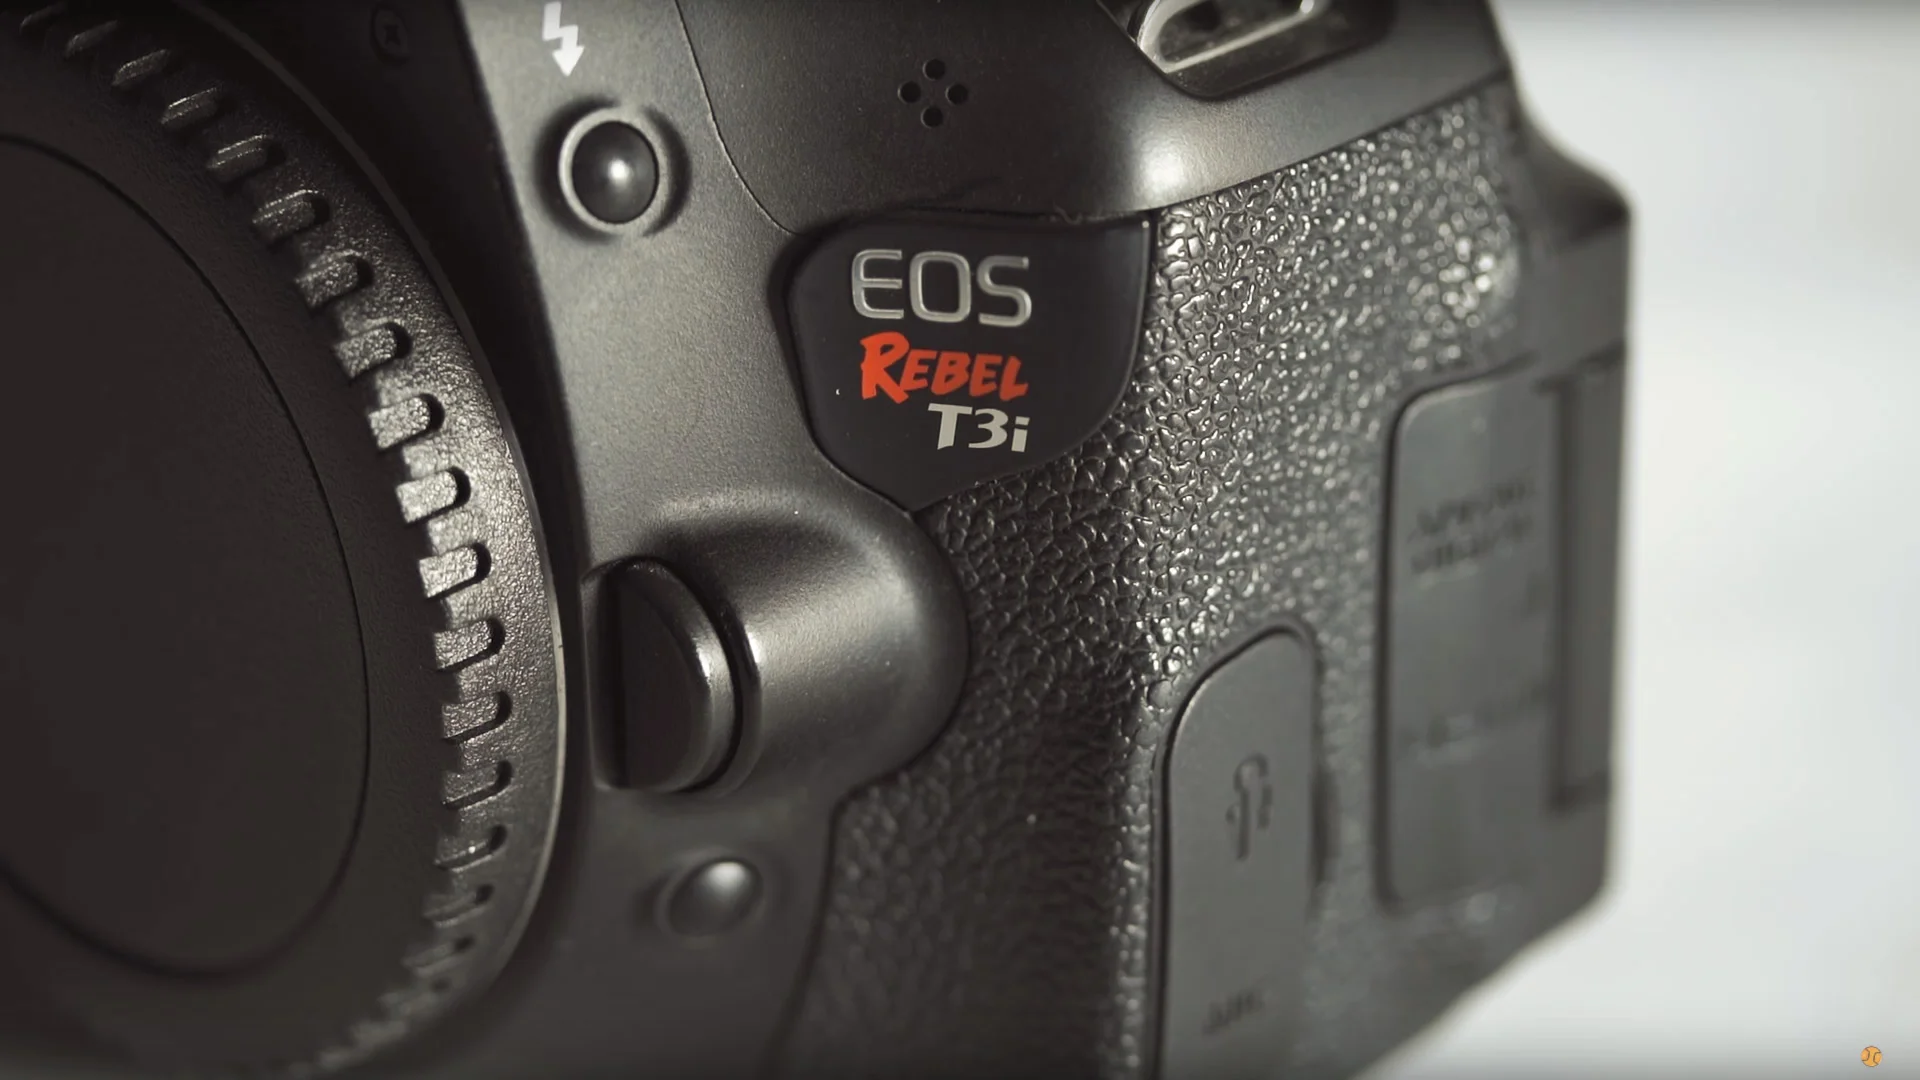
This was my first camera. It’s shot over 31,000 photos and has recorded 7561 videos since I got it in 2012. It’s now beaten up, the wheel sometimes breaks, and even the badge has finally fallen off. I’ve shot live performances, interviews, weddings and short films. I’ve put it through hell, and you know what? This camera is amazing!

Canon-T3i-Best-First-Camera

If you are looking at buying your first camera; whether that is for making short films, taking photos, client videos, or all three, the T3i is still, in my opinion, the one to go for.

It’s currently going second hand for £300 with the kit lens, which an absolute bargain for what it can do. Some of you might be reluctant to buy kit second hand. But filmmakers take care of their kit, and the kit they are willing to sell is the kit they have made sure stays in good condition.

If your just starting to get serious about filmmaking, spending your entire budget on the camera is your film’s death sentence. Instead, get something like this camera, and spend the rest of a decent tripod, a microphone and a couple of lights.

Here’s what it can do:

  • It has an 18 megapixel sensor

  • It records in 1080p at 24fps, and can shoot slow motion at 60fps at only 720p, but don’t let this put you off.

  • It has a flip out screen which is great for framing and focusing when you unable to stand behind the camera.

  • The batteries last longer than most, and if you want even more juice, you can attach a battery grip to it, giving you 2-in-1.

  • It uses EF mount lenses, which means you have instant access to the entire canon lens range, going from really cheap or super premium.

Now that this camera has been out for over 6 years, there are a billion-and-one tutorials, guides, tips, and tricks you can find for using this camera.

Canon-T3i-Best-First-Camera-Magic-Lantern

People have actually wrote a program you can install on this thing called Magic Lantern. It is installed on your SD card and unlocks loads of extra features including:

  • Focus peaking

  • Zebras for exposure

  • A built in intervolometer for shooting time lapses

  • And even frame guides if you want to shoot with cinematic bars.

Compared to a dedicated video camera, being able to change to photo mode and snap photographs is another massive feature, especially for entry-level and post graduate filmmakers. It shoots at 18 megapixels, which is great for web and really decent for printing.

And finally, photography can pay pretty well. So you have the potential to start a photography business or on the side to raise up money for more filmmaking equipment!

I’ve shot on this camera for over 4 years, and I know it like the back of my hand. Now that I’ve covered the features, let me cover the limitations, and ways to combat these limitations.

With the camera being over 6 years old, comparing it’s sharpness to something modern, you’ll notice it can be quite soft. Surprisingly, adding a little sharpness in post-production can help your footage pop. Here is a side by side of using the unsharpen mask plug-in in Premiere Pro.

The low light performance of this camera is its biggest limitation. But because of this, it forces you to add more thought to your lighting and your settings. In a way, this is a good thing for a beginner filmmaker because it’s forcing you to shape your light and improve your cinematography.

From my experience, don’t push this camera above 800 ISO. After that, the noise on your image is horrible. So instead, find ways to add more light.

Canon-T3i-Best-First-Camera-Sharpening

I promise you, you can get some great images from this, even in low light. You just need to feed your sensor what it craves – light!

As technology improves over time, there have been newer editions in this line up like the T4i, T5i, and T6i. The T6i has much better video auto focus and they have added a touch screen but the quality of the video is the same as the T3i.

So if you are a young filmmaker and want an upgrade from your phone, or you’ve just graduated college and want a cheap and cheerful camera to go with the rest of your filmmaking kit, go for the Canon T3i.

Even after 6 years, it’s the best first camera you can buy. 


Still The Best First Camera to Buy  Canon T3i Review (6 Years On).jpg

DISCLAIMERS:

Some of these links are affiliate links, if you purchase gear via these links The Film Look will receive a small commission, but there will be no additional cost to you. Thank you!