DIY Light Diffusion


Diffused light (or soft light) is one of the easiest lighting methods to help achieve the film look. It’s a straight forward technique that you can use to reduce those hard shadows. We have a few ways to get diffused lighting on the cheap, so let’s talk about them.

One of the main lights we use here at Film Look HQ are a set of 800 watt lights. They are super bright and you can even dim them! Problem is, they produce a very powerful hard light.

800w-Lights.jpg

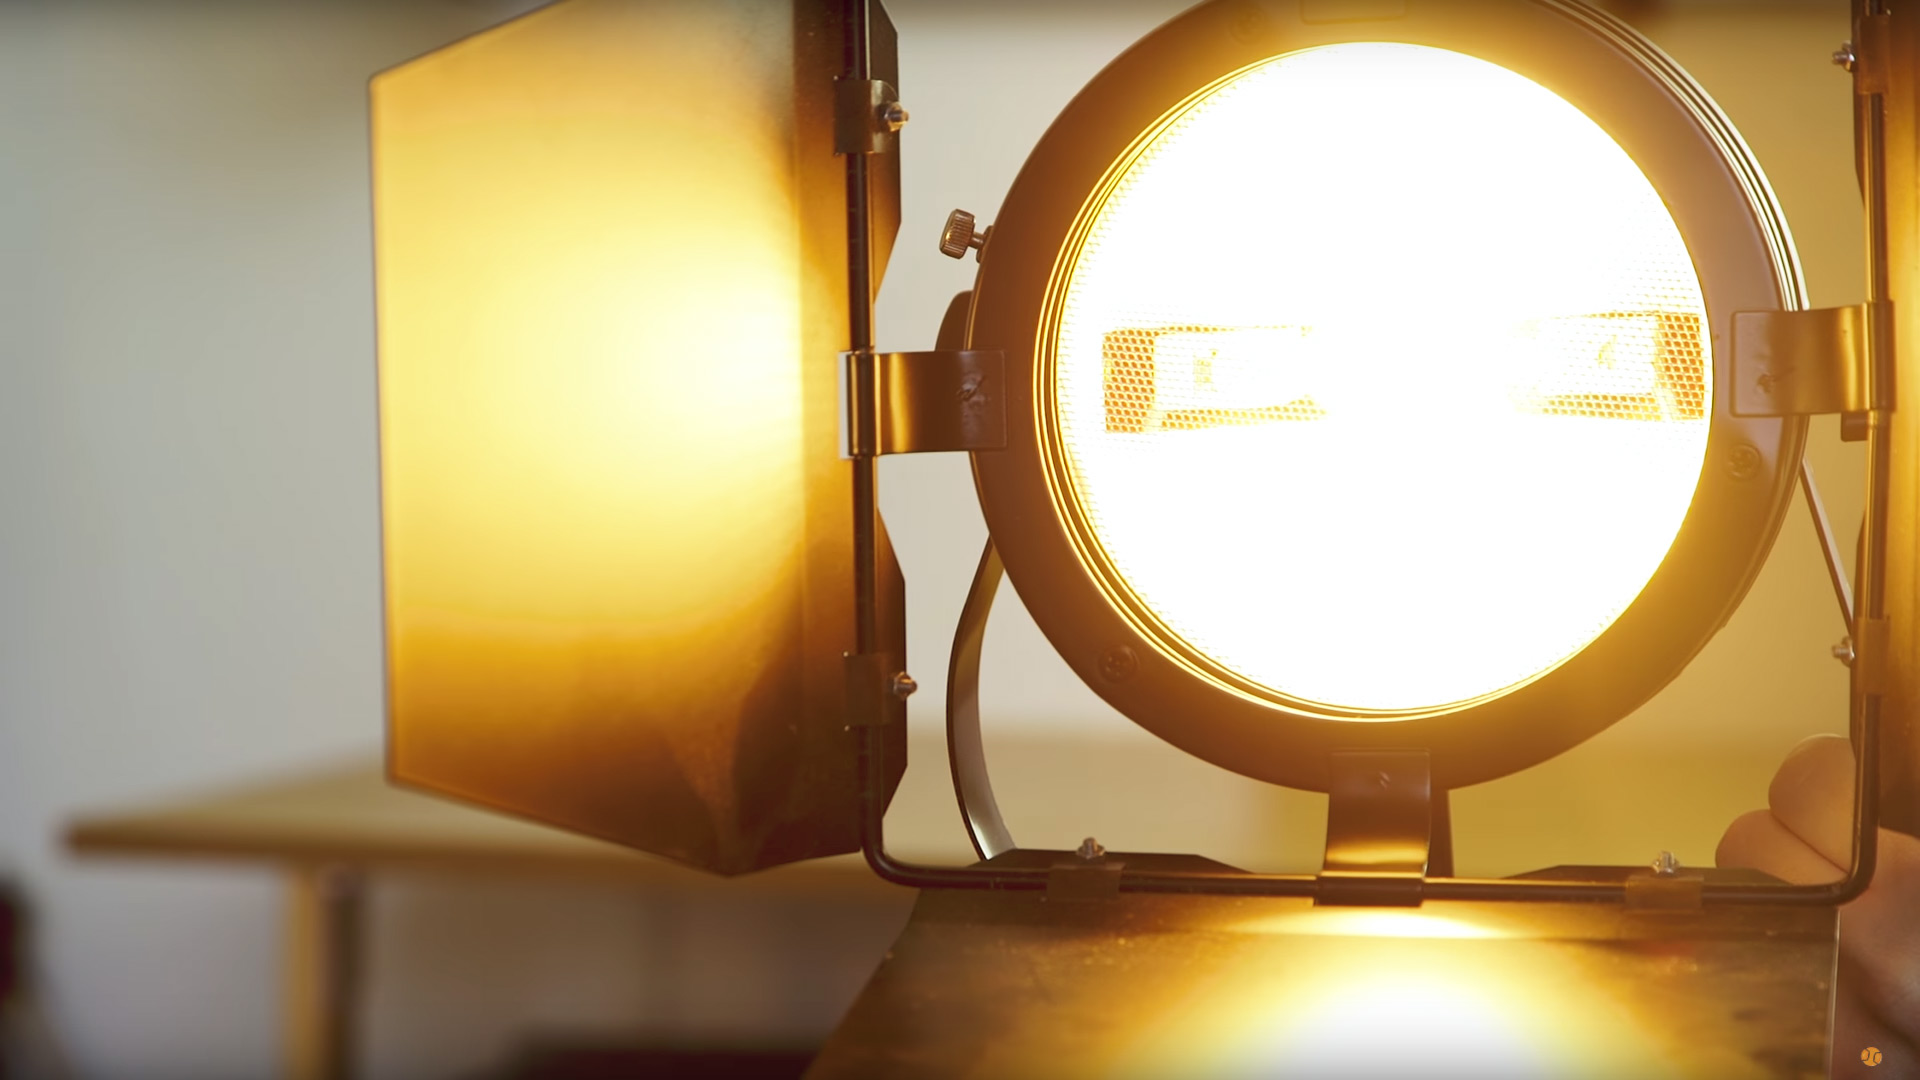
After buying these, I knew straight away the light needed to be softened. This is usually where diffusion paper comes in, but have you seen how expensive this stuff is!? For what is essentially just paper!

At this point I needed to find something that did the same thing but for a fraction of the price.

Easy, printer paper! I have a stockpile for my printer, the light can shine through, and it doesn’t cost an arm and a leg. But wait…those 800 watt lights get hot, REALLY hot! We have to use gardening gloves to touch these lights when they are on, and sticking paper to the front of them was just playing with fire…literally!

So printer paper was out of the question. What I needed was something cheap, easy to get, but something that also withstand a lot of heat. Grease proof paper! It’s made to be used in an oven, so it’s perfect. I picked up a roll for £1.

Cheap-DIY-Light-Diffusion.jpg

Cut it to shape and peg it to your lights. If you have to replace it, it only costs pennies. Just remember to get the white grease proof paper, not the brown stuff. I made that mistake.

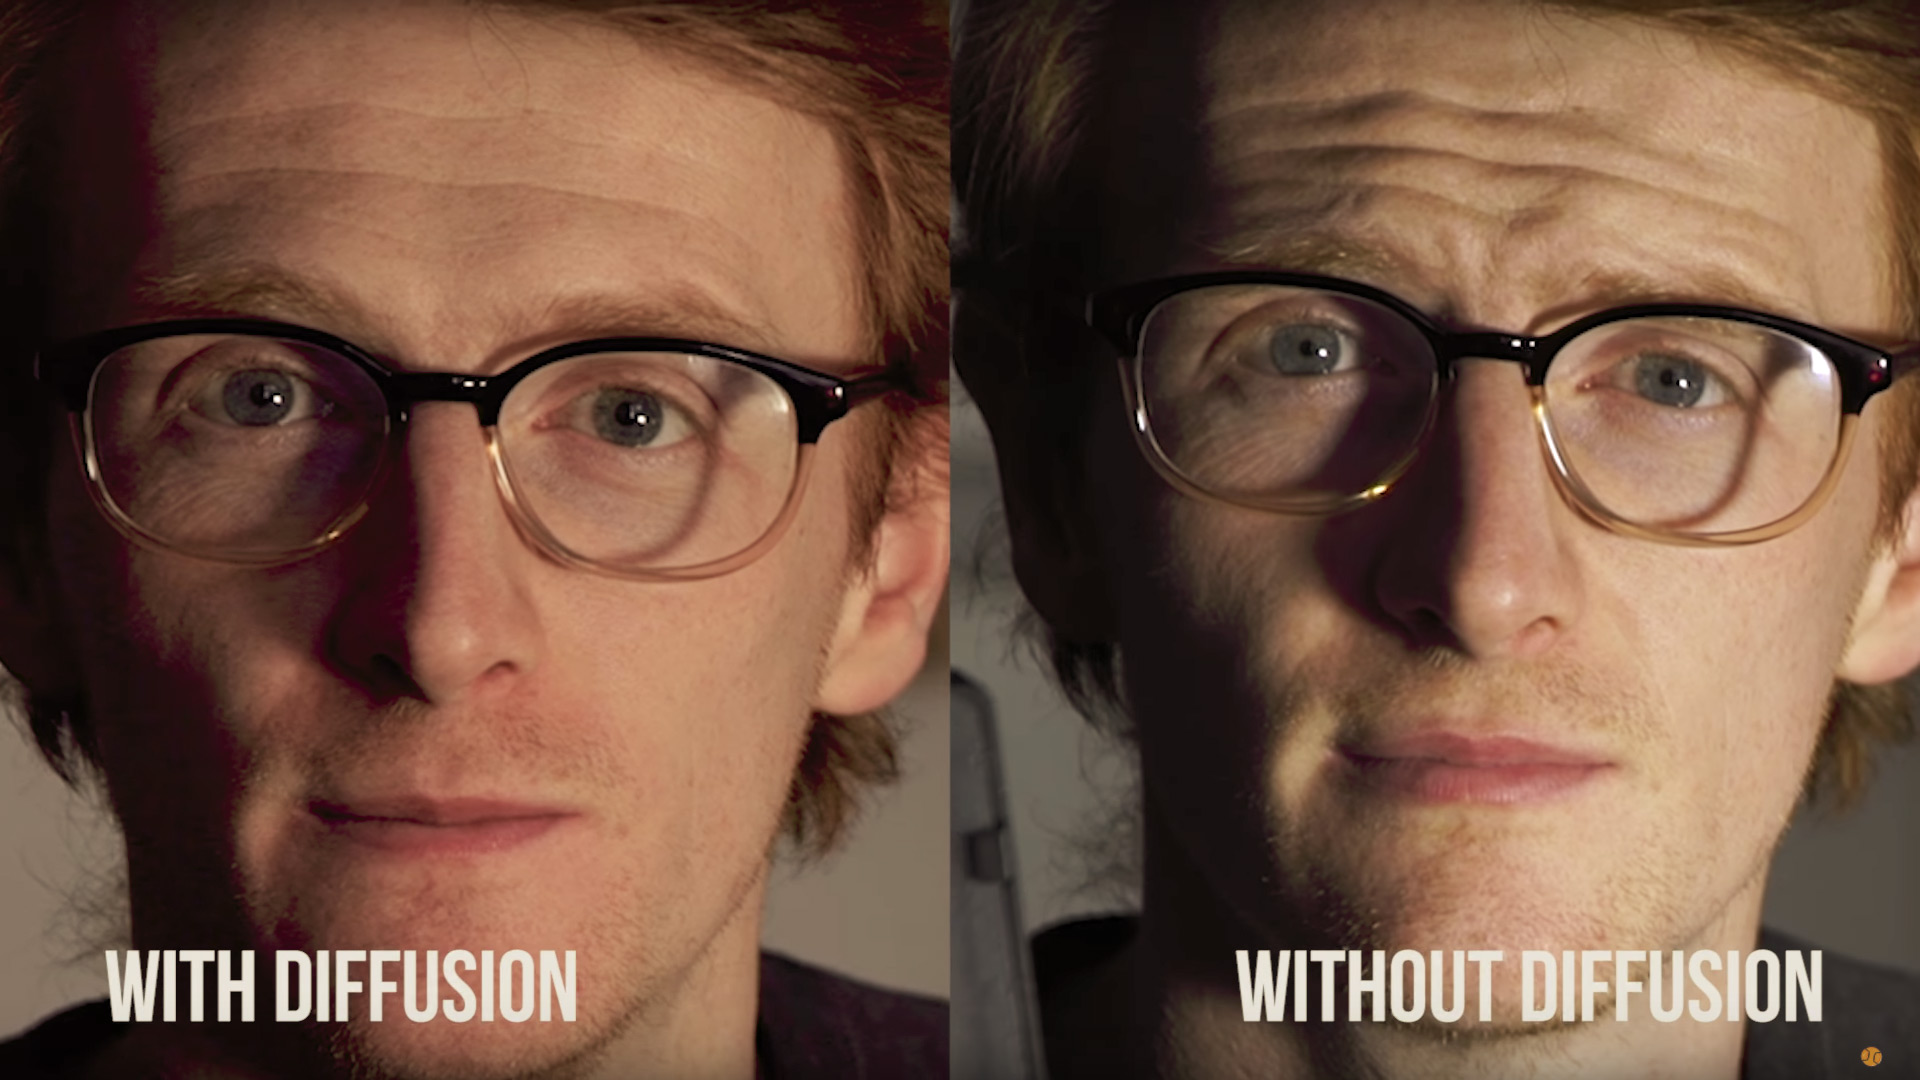
So how well does grease proof paper work? Well here are 3 examples of using it in front of 3 of our lights.

Firstly, the 800 watt light. Here it is without…and here it is with it.

With-and-without-Diffusion-800w-light.jpg

Next is the a 70w blub. Again, here is it on its own…and with the greaseproof paper.

With-and-without-Diffusion70w-blub.jpg

Finally, our little 160 LEDs.

With-and-without-Diffusion-160LED.jpg

Another way we use it is to cover windows in your scene. If you have bright direct sunlight coming through, it can sometimes give you trouble in terms of dynamic range and exposure. If your window is out of frame or out of focus, you can throw some greaseproof paper on the window panes with some sticky tack to soften the light.

Here at The Film Look we often give our equipment nicknames. So what do we call this stuff? Over to Richard.

It’s greaseproof paper. There is a musical and a motion picture called Grease. The main character in Grease is called Danny Zuko. So how about Dannies? “Can we throw a Danny on this!?” Yeah, that’s work.

So what if you need to diffuse a lot more light? The paper isn’t massive, so we have a few other cheap DIY and super low budget methods.

If you don’t already have a 5 in 1 reflector panel, get one. They are really cheap and can be used in a million different ways. It has: White fill, negative fill, silver sheen, and Hip Hop Video Mode.

In terms of diffusion, if you remove the cover you have a large translucent panel. With something bigger you can create distance between the light and the panel, which makes the light even softer.

We also use a blind from Ikea. You can peg it to a light stand or a mic stand, like we do. This one is super lightweight and always in my lighting bag.

With-and-without-Diffusion1.jpg

If you need something even bigger, a shower curtain is the way to go. This one is frosted so it works really well. It does need a bigger area to setup, but you can easily fit 3 800 watt lights behind it and blast soft light into your scene.


DIY Light Diffusion.jpg

DISCLAIMERS:

Some of these links are affiliate links, if you purchase gear via these links The Film Look will receive a small commission, but there will be no additional cost to you. Thank you!

How to Record Stabbing Sound Effects


Today we are gonna record some stabbing sound effects!

Recording your own sound effects does a few things. Firstly, you don’t have to deal with copyright issues! Secondly, you have complete control over the sound you are producing.

Some sound packs can be awesome, I use downloaded sound effects all the time. But if you are able to record your own sounds, you might get something unique and authentic.

So we got a bunch of blankets and wooden boards and set up what I’m calling the ‘pyramid of silence’. We bought some melons, got various weapons, and smashed the crap out of them while recording in the pyramid.

Recording-Stabbing-Sound-Effects.jpg

Unfortunately, because I live so close to a motorway, the sound was poisoned by a horrible white noise throughout the entire take. Basically, it wasn’t usable. I wanted to record outside because of the juicy mess from the melons, but it didn’t work out as well I had hoped.

So, we started again. We bought some more melons, grabbed the weapons, but this time we recorded everything in our studio, in a pop out tent. We covered the tent with blankets and recorded the stabbing sound effects inside there.

Setup-For-Recording-Sound-Effects.jpg

So this is how we recorded it!

You want to get your microphone as close to your subject of sound as possible. This is so you can turn down the sensitivity on your audio recorder which will reduce any background noise and records a nice, clean take.

Your audio sensitivity (also referred to as gain) is like ISO on your camera.

You can push it higher, but you will start to introduce elements you don’t want – with video you get grainy visual noise, and for audio you get audible noise, or hiss. Try to close the distance between the microphone and the subject the best results.

Stabbing-a-Melon.jpg

So where do you set your gain? When you get yourself positioned and ready to record, perform the sound you want to record. In this case it’s stabbing a melon.

Looking at the read out on your audio recorder, and adjust your sensitivity to around 3-6dB under the peak line. This will give you room for the sound to raise and lower in volume without you having to adjust your gain further.

Record-Sound-Effects-Levels.jpg

So once we got set up, we stabbed the melons. When handling something round like a melon, you might find yourself holding it down with your unarmed hand to stop it from rolling. Instead, make a ring or a wedge to do this. You don't want any of your body part anywhere near the stab zone because if the knife slips, you’re gonna have a bad time!

You want to record your sound effects as singles. By this, I mean record one stab, give it a second or so, and go for another. If you record multiple stabs in quick succession, you won’t be able to separate the sounds out in post as they are baked together. If you need to have quicker stabbing sounds, you can group the single stabs together to create a succession.

Speaking of multiple fast stabs, we recorded a bunch of whooshy sound effects by whipping a coat hanger and my lightsaber stunt blade in front of the microphone. You can use these together with the stabbing sounds for emphasis of the stabbers fast moving arm.

And for good measure, both myself and Rob threw a few punches to record clothing foley. So you have the soft sound of my hoodie, and a stiffer sound coming from Rob's waterproof jacket.

You can find all of these sound effects for free in our store.


How to Record Stabbing Sound Effects.jpg

DISCLAIMERS:

Some of these links are affiliate links, if you purchase gear via these links The Film Look will receive a small commission, but there will be no additional cost to you. Thank you!

Sony A7s Cage Battle | MovCam vs. Tilta


Myself and Rob both have the Sony a7s. But, we have 2 different camera cages.

This week we are going head to head to see which is a better cage: The Movcam, or the Tilta.

We recently upgraded from shooting on Canon T3i’s to the Sony a7s. Big upgrade; both in terms of quality and cost. We wanted to add extra protection to them, as well as more functionality, so this is where the camera cage comes in!

I went with the Sony a7s cage from MovCam and Rob went with one from Tilta. Both great cages; if you purchased either of these, you’ll be happy with your purchase. But which one is better?

For this battle, we aren’t comparing like for like versions of each camera cage. We thought it would be better to compare what we consider the best value version of each product. The MovCam base model, and the Tilta with wooden handle grip.

So, we’ve created this chart. It’s a list of all the functionality, pros, and cons of the cages that we can think of which we are able to compare.

Sony-A7s-Cage-Battle-MovCam-vs.jpg

Let’s start off with build quality: Both the MovCam and the Tilta are made really solid. From using these cages for a few months now, they are both just as tough as each other.

Top Handle: Both points go to the Tilta for this one. The top handle on the Tilta is better in several ways. It’s generally just more comfortable, it’s really easy to take off, and you are even able to rotate it. This is perfect if you need extra space in your camera bag. The MovCam is not as great. It’s certainly not uncomfortable, but it does require a screw driver to remove. It’s a good solid handle, but that’s about it.

Cold Shoe Placement: both are in the exact same place and work just as identically. So we’ve given a point to both.

Cable socket protectors: Both do a good job of protecting your doors from getting bashed as well as holding your cables in place to stop them from snagging. The MovCam wins just barely with this one, as compared to the Tilta, you can add grip to your sockets with these hand tightening nuts, whereas on the Tilta you do need an alan key. Not a major difference, but being able to function without tools is always a better choice in our opinion.

Sony-A7s-Cage-Battle-MovCam-Size.jpg

Size: Both cages are almost identical in size. The Tilta is a bit bigger because of the handle, but you can take it off. A point to both.

Speaking about assembly, let’s talk a bit about it: We’ve got a little contest here. We raced to see who can disassemble the camera and put it back together the quickest. As you can see, the Tilta is faster to put together. This is because it’s just one solid bit of metal, whereas the MovCam is connected using 3 separate parts.

Sony-A7s-Cage-Tilta.jpg

Tilta Cage

Sony-A7s-Cage-MovCam.jpg

MovCam

Purchase options: We’ve given both points to the MovCam for this one, as you can get the basic cage just on its own, or buy it with the riser block. Unfortunately, the Tilta has to be bought with the riser block, which adds to its cost. The wooden handle is an optional choice for the Tilta, but if you are not planning on getting the wooden side handle, it’s worth just getting the MovCam instead as it’s a fair bit cheaper to what is practically the same product.

Future Proofing: Unfortunately, for the MovCam it’s lost out on both points here because you can only fit the Mark 1 Sony A7s to it. MovCam does sell an a7sII version, but what’s good about the Tilta is that you can fit The a7s, a7sII, a7r, and a7rII into this single cage. So if you are planning on upgrading to a mark II at some point, you can add this to your price justification.

Sony-A7s-Cage-Tilta-Cage.jpg

Comfort: The Tilta wins this time. Because of its wooden side grip, it’s just a lot more comfortable to use over a long space of time. It also has a record button which plugs into the USB slot so you don’t need to find the awkward record button that we all hate on the Sony Alpha camera range. As we said before, the top handle is also a bit more comfortable.

15mm Rod Mount: And the Tilta wins again. Both cages have a 15mm rod mount, but we had to give the points to the Tilta because unfortunately, the MovCam’s rod mount is attached to the top handle. So you can only use the mount if the top handle is attached. On the Tilta, this isn’t an issue as it’s mounted to the main cage. We use the 15mm rod mount for attaching an external battery, so this feature is really handy.

Weight: The weight difference between these cages is negligible. The MovCam comes in at 840 grams, and the Tilta comes in at 656 grams. But lighter is better, so the Tilta wins.

Colour: We contemplated not adding this because it’s a bit of a daft one, but I suppose the MovCam wins this time. You can get the MovCam in black and silver, whereas with the Tilta, it’s just silver. It’s really not a big deal, but it might be for someone else.

Sony-A7s-MovCam-Cage-Review.jpg

So from the date of upload of this video, the prices are: $520 for the Tilta (this includes the wooden side grip), and $400 for the MovCam (which is the base model).

So if we divide the cost of the cage by the number of points it scored, we will get a number which represents the price performance. The lower the better.

The Tilta got 15 points, so $520 divided by 15 scores the Tilta: 34.7

The MovCam got 13 points, so $400 divided by 13 scores the MovCam: 30.8

So the MovCam is the winner!

Sony-A7s-Cage-MovCam-vs-Tilta-Winner.jpg

So basically, both of these cages are solid. If you want the extra features of the Tilta, go for it. If not, it just depends on your budget.


Sony A7s Cage Battle  MovCam vs. Tilta.jpg

DISCLAIMERS:

Some of these links are affiliate links, if you purchase gear via these links The Film Look will receive a small commission, but there will be no additional cost to you. Thank you!

Video Editing PC Build 2017


They say it doesn’t matter what camera you’re shooting on as long as you are telling interesting stories. But how can I edit stories when my laptop’s halting efficiency and holding back creativity?

My current computer is getting old – it’s time to build a new one!

So Mac or PC? PC. The specs I chose on PC came to £1300. On a Mac, 4 grand!

Now I’m not hating on Apple! I own a Mac Book Air. It travels everywhere with me.

Here’s a rundown of the specs.

Intel i7 6800k. 6 cores, this is a beast for editing.

The Asus x99-A II. I chose this because it fits my CPU. It’s also got USB 3.1, 128GB of ram space, and is built for overclocking.

I’m gonna be overlocking the CPU, so I needed something that was going to take care of all the extra heat. I got the Corsair H110i GTX.

Video-Editing-PC-Build-2017-Corsair-H110i.jpg

I got 32 gigs of Corsair Vengeance RAM. Premiere Pro doesn’t really improve past 16GB so I went safe and got 32 just to be sure.

I’ll be installing Windows 10 on this SSD, along with my programs, so it’s gonna be much quicker than a hard drive!
I have 3 hard drives to storing media, which I already own.

GTX970. This has more than enough juice to edit nice and smooth.

I put a Corsair 850 watt PSU in because the overclocking will need a little bit more power.

I’ve put it all in a Cooler Master Pro 5. It’s got loads of room to work in, easy access hard drive bays, and cable management was simple!

Video-Editing-PC-Build-2017-CoolerMaster_Pro_5_Case.jpg

Altogether, it has come to £1350. I could have spent around £1100 on this build and the system would have been great, for now. But I spend a little more for future proofing.

Why did I only spend £1350. Well you have to set your limit somewhere.

You can find the benchmarks and parts list below.

  • Parts List

  • CPU – Intel 6800K

  • Motherboard – Asus X99-A II CPU

  • Cooler – H110i GTX

  • RAM – Corsair Vengeance DDR4

  • GPU – MSI GTX 970 4GB

  • Power Supply – Corsair CX850M

  • Case – CoolerMaster Pro Case 5

  • SSD – Patriot Blast 240GB

  • Hard Drives – 3x 2TB


Video Editing PC Build 2017.jpg

DISCLAIMERS:

Some of these links are affiliate links, if you purchase gear via these links The Film Look will receive a small commission, but there will be no additional cost to you. Thank you!

Should You Buy a Camera Monitor? | Feelworld FW759 Review


We invested in our first camera monitor a few weeks ago. We didn’t want to spend loads, but at the same time we didn’t want to get something which was a total waste of money.

We settled on this: the Feel World FW759. Question is, is it any good? Let’s find out.

Before I go into my opinion of the monitor, I’ll quickly run through the specs.

• 7 inch screen at 1280x800 pixels
• Display is a backlit LED.
• Built in Speaker, Stereo Headphone jack, Wire Remote OSD Controller
• Uses HDMI
• USB socket for updating firmware
• It is roughly £100. Or $139.

Feelworld-FW759-Sepcs.jpg

Okay, let’s start with the pros!

BATTERIES:

First of all, it can be both plugged into the wall, or powered by batteries. What is great about this monitor in particular is the type of batteries it uses. It uses Sony NP batteries, which are the same batteries we use for our cameras, lights, pretty much anything we use here at the Film Look. So compatibility is great.

Feelworld-FW759-Battery.jpg

SCREEN CLARITY:

I haven’t used many monitors before, so I can’t say if the quality of this screen is better or worse than another particular monitor. What I can say is that it is certainly better than the screen on the back of the Sony A7s, which might seem obvious but it’s worth pointing out to those who are sitting on the fence about getting their first monitor. With a bigger and brighter screen, you can certainly see a lot more detail in your image. The resolution is ideal for this size, 1280x800 is more than enough, you can barely see the pixels, unless you look real hard! It also comes with a sunshade that velcros on. Very handy!

Feelworld-FW759-Screen.jpg

VIDEO LATENCY:

After reading some reviews of the cheaper range of camera monitors, a lot of people had complained about latency issues. Well, this has pretty much none. You can use this monitor as a perfect shooting guide for framing. The very little latency it has (because all video devices have latency, some are just better than others) it will not disturb your shooting.

LIGHT WEIGHT:

So in a way this is a pro and a con. Because it is light, it’s more likely to break if you drop it. I’ll talk about the downside later on, but as a pro, it’s really light, which means it will reduce fatigue on run and gun and handheld shoots.

ON SCREEN FEATURES:

It has some really handy on screen features such as 4 function buttons you can set. We use focus assist, centre markers, and safe frames which is great if you are planning on slapping an anamorphic letterbox on top. Just a quick note, the focus assist isn’t amazing, you can usually just nail focus by eye.

Feelworld-FW759-Buttons.jpg

Speaking about cons!

PLASTICY:

This monitor will not survive many drops. It has a cheapish plastic feel, and I imagine if I really wanted to, I could snap it with enough force (if I really tried, that is!)

But, if you don’t intend of kicking it around, I’m sure this won’t be a problem. We don’t need armoured kit because we usually don’t get into situations which warrant such tough equipment. But I imagine if you are in tougher situations and are prone to dropping things, this isn’t the monitor for you.

We chose the FW759 over the FW759p. The P version comes with a bunch of extra abilities; histograms, under scan, exposure, and false color. But for the extra £40, we really didn’t need those extra features because the cameras we use already have them and we usually shoot with both the monitor on, and the camera screen for extra visuals.

From the money we saved, we bought the combo pack which comes with a battery, charger, and carrying case (which is totally worth it by the way! Great case).

Feelworld-FW759-Monitor.jpg

So far this monitor has come in really handy. We not only use it for framing and keeping focus on the job, but we spin it around and use it as a guide when presenting to the camera. We also hook it up to the top down for framing our overhead shots.

In all honesty, I wouldn’t have thought a camera monitor would be so useful. So if you are in two minds whether to get one, just get it, they really handy!


Equipment Links

🎥 This episode's kit/gear/equipment:

Links to Feelworld FW759 monitor.

Amazon UK: http://amzn.to/2dAtxB7

Amazon US: http://amzn.to/2dDDgDD


Video Editing PC Build 2017.jpg

DISCLAIMERS:

Some of these links are affiliate links, if you purchase gear via these links The Film Look will receive a small commission, but there will be no additional cost to you. Thank you!

Should You Buy a Camera Slider?


Today we are going to talk about camera sliders: when they are great, when they are crap, how to use them, and last of all, if you should buy one.

Over the last few years, the camera slider has become a staple in a freelancers kit after their camera and tripod. They have become relatively cheap, and they offer more advanced and cooler looking shots to your projects, which is great!

Slider-Review.jpg

The problem is, now that everyone has one, they are really being overused.

In a similar way to getting your first fast lens and shooting absolutely everything at f1.8; when you get your hands on a slider, everything you shoot at first moves up and down on this thing. I was certainly guilty of this in the past!

Here at The Film Look, we use sliders for two different types of production. Short films, and client videos.

Let’s, first of all, talk about using sliders for short films. You can utilise sliders in your films in a few different ways.

To reveal something. Sliders are great as movement into a new scene, or to reveal objects in an interesting way. They provide a really smooth and stable lateral movement which makes your shot look more cinematic.

The slider is also great to add tension to a shot. A slow crawl on someone’s face can add instant production value to your film with very little extra set up.

Should-You-Buy-a-Camera-Slider.gif

When using a slider for short films, less is more.

If an audience member notices you used a slider, then you've used it wrong. Immersion is key to good filmmaking, and if I’m sucked out of the film because my brain just went “oh cool, slider shot” then it’s been used incorrectly.

Demonstrating your sweet kit to an audience instead of just trying to tell an immerse story can result in giving your film ‘the amateur look’.

For side-on lateral movements, you will need depth between the foreground and background if you want to create a parallax.

What’s a parallax, you say? You know when you are sitting on a train and you look out of the window, and you notice the hills in the background barely move while the trees closer to you keep zooming past. That difference in perceived movement and speed is a parallax.

Without depth, as in, objects in the foreground and background, a parallax can’t exist. So adding a slider movement to a wide establishing shot without something to separate the background and foreground is pointless. There won’t be any striking movement.

Should-You-Buy-a-Camera-Slider_-_-The-Film-Look.gif

In cases like this, shoot something in the foreground to slider from. Or just stick to a pan or tilt, which can be just as cinematic.

Basically, what I’m saying is, there needs be a reason to use it. For short films, every shot needs motivation. Question all movement. Ask yourself, why am I using this type of shot? What is it going to achieve over something simple?

If you are adding a slider movement because it’s just cool and no other reason, just stick to the tripod.

Everything you choose must add something to your storytelling.

On the other hand! Client work is a bit different. Since sliders are easy to setup, fairly non-intrusive, and since they add so much production value to a shot, they are perfect for client shoots.

Clients love slider shots because it just makes everything silky, and really sexy. It adds instant quality and production value to a client project without stretching the budget to undesirable heights.

How-to-use-a-slider-for-clinet-shoots.gif

The same rules apply to the slider shot on client projects, there needs to be a motivation of movement. But, it’s a little less strict.

The camera slider isn’t there to replace your tripod, it’s like comparing apples to oranges.

So should you buy a camera slider? Yeah, they are pretty cool.


Should You Buy a Camera Slider.jpg

DISCLAIMERS:

Some of these links are affiliate links, if you purchase gear via these links The Film Look will receive a small commission, but there will be no additional cost to you. Thank you!

Customise Your Lens Caps


Lens caps not the most exciting pieces of camera crew equipment but still important. I always seem to misplace mine so how to find a solution for this. It's time to customize.

First thing I had to tackle was the colour. As all film equipment is black so I chose a bright colour that really stands out and for me that's always orange.

Camera-Equipment.jpg

I didn't want to spray the original lens caps, so I bought some cheap ones or maybe I took them apart, sanded them down, so the paint would have something to hold on to.

Then spread them apply multiple coats after each layer dried, then I put them back together so I could start using them.

Orange-Lens-Cap.jpg

The first attempt didn't actually work and the reason for this is because I sprayed all of the different sections of the lens caps. This caused them to stick together as there was not enough room for them to move around.

Thinking about it I should have known this and it's pretty obvious this would happen. So I decided to start work on Mark 2.

I ordered more lens caps, took them apart, this time I masked around all of the edges that touched each other, sanded them down, spread them with a primer and give them multiple light coats with the orange.

Once dry, I took the masking tape off, but them together and hope this time it would work.

Working-Orange-Lens-Caps.jpg

My first impression was they look pretty cool they definitely stand out, but most of all they work

To further customise the lens caps I added labels to each of them so I will know which lens they belong to. Then I add a strip of Velcro to each of the cups so it would stick to this section of my bag.

Now on the lens caps are visible, quick and easy to find. So let's see if this stops me from losing them.

Customise-Your-Lens-Caps.jpg

Customise Your Lens Caps.jpg

DISCLAIMERS:

Some of these links are affiliate links, if you purchase gear via these links The Film Look will receive a small commission, but there will be no additional cost to you. Thank you!

The Lighting in Keep The Change | Season 3: Episode 10

Today, we are going to talk about lights!

To start off, I’ll explain a little bit about the lighting kit we used in Keep The Change:

  • The Aputure HR672C, this is the main light we used throughout the film. You can dim it, change the colour temperature, and it is also battery powered which was essential as most of the film was shot outside, away from any power sources.

  • We used a bunch of these 160 LEDs to fit into small spaces.

  • When we needed considerably more light, we used a set of 800 watt lights. They’re super bright and versatile, but they do get really hot so gloves are a must!

  • Other bits of equipment we used were things like diffusion paper to diffuse the light, coloured gels to change the colour of lights, various DIY flags we made out of cardboard to block any unwanted light, an umbrella to diffuse light, reflectors, and lots of clips and duct tape.

Right, so now that is out of the way, let’s talk about how we used them.

The 2 main lighting setups are the car driving scene and the pizza box scene.

How to light a car driving scene.jpg

For the car driving scene, if you hadn’t noticed, he is not actually driving – we have a video talking about that here.

This scene all starts in my garage. We blocked out all of the natural light coming in from outside.

Then we switched on all of the lights you’d expect to see when someone is driving at night – the dashboard lights, and in this case, the driver’s phone screen.

We used a 160 LED panel with orange gel and diffusion paper to enhance the glow of the dashboard lights in order to brighten up the driver’s face.
We did the same thing to enhance the light from the phone screen but swapped out the orange gel for a blue gel.

Lastly, we put a light on the floor in the back of the car to light up the back seats a touch.

We used this exact set up when we shot the scene outside in the car, but we added 2 extra lights on the outside of the car.

A 160 LED with a blue gel to simulate moon light, and the Aputure panel to enhance the street light on the right hand side.

The pizza box scene.

The lighting of keep the change.jpg

The main source of light in this scene is the light above the table. So we started here.

The idea was to create a beam of light which only casts on the middle of the table, giving a focus point for the character to place the pizza box down.

We originally tried to do this with the 800 watt light, using the barn doors to flag the light and create that focused beam.

The problem with using this light is the light that spills out of the back, through the gaps to let out excess heat.

We could have covered the gaps in black wrap, but fixing an incredibly hot light right above the actor covering the ventilation points was a disaster waiting to happen.

The next best option was the Aputure LED panel. It doesn’t really get hot, but unfortunately we don’t have a set of barn doors for it.

So, what we did, was build a platform for the light to sit on, then made a hole in it so we could use the barn doors from the 800w light.

With a little bit of trial and error we had something that produced this.

Aputure-LED-panel.jpg
Aputure-LED-panel_1.jpg

The setup does not look pretty, but it worked exactly how we wanted it to.

The next light we set up was a back light.

For this we used one of the 800w lights, added an orange gel, and dimmed the light just enough so it would add a harsh edge light.

Edge-Light.jpg

The light coming from the pizza box was achieved by placing a 160 LED panel in the pizza box covered in an orange gel, then we pumped smoke into the box and lifted the lid using fishing wire as a pulley. 

In order to create a harsh light rising up and hitting our actor’s face, the 160 LED we used in the pizza box just wasn’t bright enough.

So we placed the 800 watt light under the table, and using a bunch of cardboard, we were able to block out all of the light hitting the walls and have it only land on our actor.

Then we used another piece of cardboard and lifted it up near our actor’s face to replicate the light coming from the pizza box.


The Lighting in Keep The Change.jpg

DISCLAIMERS:

Some of these links are affiliate links, if you purchase gear via these links The Film Look will receive a small commission, but there will be no additional cost to you. Thank you!

Fake Driving and a Car Breakdown | Season 3: Episode 9

In Keep The Change, we see our character, Stu, travelling from left to right when going from scene to scene, which is the traditional direction for characters to move forward in films.

When he is in the car, however, we ran into some shooting problems.

We made this film in England, and if you don't know, in England we drive on the left hand side of the road.

This means the driver’s seat is on the right hand side of the car. So, having the camera shooting from the passenger side towards the driver’s side would result in our character facing the wrong direction. He'd be facing the left, looking backwards.

Fake-Car-Driving.jpg

Well, that's an easy fix, just have him travelling from right to left throughout the film, right?

The problem with this; it starts messing with film grammar. What's film grammar? Well, films have a language, not a spoken language but a visual one, and when you start changing the 'words' in this language (such as a character's travelling direction), it can impact on an audience member's enjoyment of the film.

It’s not just films that do this either. Most, if not all, platform games run from left to right.

So anyway, this was an issue. And we had 2 options. Option 1, shoot the film with our character moving from right to left, breaking traditional film grammar.

Or option 2: find a way to shoot from the driver's side. Option 2 is a lot more difficult, but it might provide better results in the end. Plus, it's a learning process.

In the end, we took the challenge.

Shooting-whilst-driving.jpg

The next problem was, how do we film our actor Liam driving the car?

Use another car and shoot from the window alongside it? Too dangerous.

Stick it on a trailer? Too expensive.

Put a camera on the dashboard? Not enough room.

So instead, we tried our best to fake it.

We considered a lot of things when trying to fake the driving of a car.

You'll see others achieving this effect by using lights to act as street lights, beaming them across the car from front to back and repeating the process.

We tried this, but because of the small space and the white walls of Rob's garage, we ended up light up the walls and it would spoil the effect. So that method didn’t work for us.

Shooting-at-night.jpg

Instead, we shot an establishing shot of the car driving past at night on a country road that had no immediate street lights. This helped establish the scene and the environment once we cut into the car.

Then we dressed the car with items which would move when the car is travelling. A bobble head and a pine fresh. Then we rocked the car gently to fake the bumps of the road.

Unfortunately, Rob’s car being rocked in his garage didn’t sound like it was driving on a road.

So we grabbed the microphone, got back in the car, and drove around, recording the car at different speeds, and we put the rumbling noise of inside the car back into the film.

Doing it this way was never going to be perfect, but it worked for the short time we see him in the car.

To achieve the pot hole effect, we used the wiggle expression in After Effects to generate a camera shake and added a bunch of different sounds, such as: going over a speed bump, the engine switching off, and radio jitters.

For the limited time and no real budget, this was our best option. Obviously with more cash, using a car shooting rig or a trailer would be a lot better.

And if we had a larger space to work in, using lights to fake street lamps would have sold the effect a lot better too. But, you gotta work with what you have!

Anyway! Now that we had the car driving and hitting a pot hole, it was time to make it look like it was totalled. This is where the smoke machine comes in.

The whole idea for Keep The Change started because we wanted an excuse to use a smoke machine.

We wrote the scenes around the techniques we wanted to demonstrate with the smoke machine, and wrote the over lining story around the scenes, working the opposite way to usual, which was a learning process in itself!

So, here's what you'll need:

Firstly, a car. Luckily, Rob's old Peugeot 106 helped sell the effect of a breakdown because it’s…well it’s not brand new.

Fake-a-car-break-down.jpg

Secondly, you’ll need a smoke machine. I found this one on sale at a costume shop just after Halloween, so it was really cheap.

It runs on 230 volts, so it has to be plugged into a mains socket. We have a caravan battery for wireless power, but an extension cord will work just as well (as long as you can find a socket).

So now that you are powered; position the smoke machine under the engine and angle it pointing up or use some sort of funnel to direct the smoke up through the engine.

We used a nozzle from an airbed pump and duct taped it on. Give the smoke a good 10 seconds to build up under the bonnet, and you’re good to go.

Fake car smoke.jpg

We also used the smoke in the last scene to fill the room with haze. Blast it a few seconds, then waft it to fill the room. This helped achieve the light rays from his phone light and gave the room a hazy glow.

We also pumped a little bit in through the back of the pizza box to create a steamy vapour when it opened up.


Fake Driving and a Car Breakdown.jpg

DISCLAIMERS:

Some of these links are affiliate links, if you purchase gear via these links The Film Look will receive a small commission, but there will be no additional cost to you. Thank you!

The Cost of a Short Film: Keep The Change

So when you are just starting to make films they say you should beg, borrow and steal. I would advise against the stealing part but you get the point.

So how much did it cost to shoot our short film like Keep The Change, which was just under 7 minutes long, had one actor and was shot over 3 nights. Well lets work it out.

Actor - Free
We have worked with Liam for years, one day we will be able to pay for his acting services, but for this project he just wanted to be involved.

The Cost of a Short Film - 1.jpg

Crew - Free
We had a crew of 4, me, Richard, Ed and Opie who like Liam just helped us out for the fun of it. It's not about how many crew members you have, its about having the right type of people and we defiantly had that with Ed and Opie.

The Cost of a Short Film - 2.jpg

Food Supplies - £20
When you can not pay your cast and crew, make sure you feed them. It really doesn't cost that much, but its very much appropriated when shooting. Tea and coffees are a good starts.

The Cost of a Short Film - 3.jpg

Equipment - Free
Yes we could of spent money renting the best camera equipment, but we just used what we had.

The Cost of a Short Film - 4.jpg

Locations - Free
An interesting location really helps to achieve the film look, for us when writing we already had the locations in mind that would cost us nothing.

The Cost of a Short Film - 5.jpg

Travel Cost - £20
Petrol costs money.

The Cost of a Short Film - 6.jpg

Props - £5.75
For the film we need certain props to help tell the story and dress the set, we made a video about it here. Some of them cost money and others we already had or we borrowed.

The Cost of a Short Film - 7.jpg

Pizza - £5
Since the main character is a pizza delivery driver we needed to buy a pizza for certain shots in the film. We did eat the pizza, it is pizza after all.

The Cost of a Short Film - 8.jpg

Costume - £26
We had to make sure the character looked like a pizza delivery driver, so we had to design and order the costume. This was necessary for the film.

The Cost of a Short Film - 9.jpg

Clapper Board - £13
We have decided to us a new clapper board for each film, so one day we can have a whole wall of clapper boards from the films we have made.

The Cost of a Short Film - 10.jpg

Editing - Free
We edited the film so that was free.

Music - £6
For your film you can get free music, cheap music, and expensive music.
These all range in quality, luckily we found something in the cheap music section that worked well for the film.

So it cost us £95.75 to make the film, not a lot when you think about it. The thing that did cost us the most was time, a lot of time went in planing, shooting and editing the film. What value do you put on your time when your making a film, well for us we do it because we love making films.

The Cost of a Short Film - total.jpg

The Cost of a Short Film Keep The Change.jpg

DISCLAIMERS:

Some of these links are affiliate links, if you purchase gear via these links The Film Look will receive a small commission, but there will be no additional cost to you. Thank you!

A Film About Props | Season 3: Episode 7

A film prop can be anything from a ring, a volley ball, or a red or a blue pill. A prop can be assigned to a character, or used as a plot device.

Matrix Light Meter.jpg

Keep The Change is roughly 7 minutes long, and features over a dozen props. This is how we used props to help achieve the film look.

Here are all of our props for our film Keep The Change. Each has a reason to be included in the film.

Just a quick note, we have deliberately included the costume in this list. There is a fine line between a prop and a costume. For example; if you wear a sword on your belt, it is a costume. But if you draw the sword, it becomes a prop. So we are going to speak about both. Let’s get started!

The Order Ticket – this prop was used in the very first shot of the film. It was used to throw the audience straight into the world of “this film has something to do with the service industry”.

1 - Order Ticket.jpg

The hoodie & the cap – Straight away, the hoodie is giving very important information. It’s a pizza shop called Robbie’s Pizza, and their slogan is “if we’re late – it’s free”.

2 - Hoddie & Cap.jpg

We actually designed the logo in Photoshop and used an online store to print it and get it, and the cap, delivered. The cap is a clear sign that our character is a pizza delivery guy. He wears the uniform, he must be a member of staff at Robbie’s pizza.

The pizza bag and box – If someone doesn’t know it by now, they will know exactly what this film is about now that they have seen a pizza box going into a delivery bag. It’s about pizza…pizza.

3. Pizza Bag.jpg

The car – For Keep The Change we wanted to use an old beaten up car. "Thankfully, I drive one!" Using an old car signifies that our character doesn’t have a lot of money, or is very careless with his money. The car is also the device used for transportation at the start of the film. "My car is called Dougal by the way".

4 Car.jpg

Phone – The phone is very important in this film. Firstly, it acts as a GPS for our character to follow along the road. The road it shows indicated that it is in the middle of nowhere, and that there are very limited sources of light and, more importantly, people.

Later on in the film, the phone gives information in the form of voice commands to the character and the audience.

5 Phone.jpg

Pine Fresh – The car freshener is used as an object that would move if the car is travelling. This was placed strategically to help sell the effect of driving the car, which we faked in Rob’s garage.

7. Pine Fresh.jpg

Walter White – Like the pine fresh, this is used to help sell the effect of the car moving when it actually isn’t.

8. Walter White.jpg

Egg Timer – This is quite an important one. The egg timer is there to show the pizza must be delivered in a certain amount of time. Throughout the film it ticks away and gives the audience an estimate on how far along time has passed and how close to the deadline our character is. It is also used as a stressful audio device, ticking away while our character is trying to think.

9. Egg Timer.jpg

The Teddy Bear with Spectacles – This bear is used to further solidify that the children he takes care of are an active part of his life and spend a significant amount of time with our character and in his car.

It’s annoying, staring smile is staring at our character in the most stressed time of his life, and our character obnoxiously speaks to the teddy, giving our character more naivety.

10. Teddy Bear.jpg

Radio – This tells us where the music is coming from as it goes from non-diegetic to diegetic (diegetic meaning a visible source of audio on screen).

11. Radio.jpg

The business card – This prop is used to tell the audience our character is in the right place. 19, red door. He is standing in front of a large red door. Unfortunately, it was so dark the door doesn’t look red! Oops.

12. Business Card.jpg

The sign – The sign reading “Keep The Change” is there to show that someone has personally ordered this pizza, but also shows the significant lack of someone actually being in the scene. It gives our character his orders to take the £10 under the sign and not bother leaving any change. Oh, the £10 is also a prop! Add it to the list!!

13. Sign.jpg

Car Seat and Teddy Bear – These props give the audience the hint towards our character being a father, or a guardian, and that he has responsibility in his life. This helps give the character a sense of dread later on when he realises he will soon lose his job, which in turn gives him the determination to just start running.

The table – It’s a table. Where would the pizza box go if we didn’t have a table, on the floor? We also added a bunch of powdered chalk to outline the shape of the pizza box.

15. Table.jpg

Our original idea was to have some sort of space for our character to carefully place the pizza box into, like a frame or something. But, we went for a chalk outline because it fitted into the whole “Is this a sci-fi film?” ending.


A Film About Props.jpg

DISCLAIMERS:

Some of these links are affiliate links, if you purchase gear via these links The Film Look will receive a small commission, but there will be no additional cost to you. Thank you!

Fix it in Post | Season 3: Episode 6

Keep The Change was not a visual effects heavy project. But, that doesn’t mean we didn’t use any.

Looking back, there was actually a bunch of different VFX shots in the film. They weren’t highly animated CG elements or super polished VFX renders. Mostly, it was hiding mistakes and enhancing shots.

Let's get started. The wing mirror shot. It was only after reviewing the footage on the computer that we realised the entire crew can be seen in the wing mirror as the car door swings shut.

Fix-it-in-Post-masking.jpg

To fix this, I exported the frames that had our heads in, brought them up in Photoshop, used the clone stamp and spot healing brushes and painted our heads out.

Luckily, because this shot is at night and the wing mirror is moving, I didn’t have to refine the paint work too much. But I guess if it was during the day, we would have noticed our heads in the wing mirror!

Characters travelling from scene to scene can be pretty boring. So we wanted to try something a little bit more interesting. We ended up going for a split screen animated sequence.

The sell the effect; the position and height of the camera, focal length, and distance from the actor needed to match for each shot.

Split-Screen-Effect.jpg

To get the same distance from your actor every time, something as simple as a piece of string will work. Just cut it to length and position your actor at the one end and the camera at the other.

For framing, we made sure Liam's head was pretty much right in the centre as he ran, and for the height, we just dropped one set of legs on the tripod and had the camera completely level.

Once we had the shots, it was a case of compositing them on top of each other and animating the position, the masks, and the black bars.

There was a little bit of VFX used in the car breakdown. Just a bit of camera shake when the car runs over a pot hole. Simple stuff.

The pizza box shot. Most of the elements are practical. We pumped smoke into the pizza box and opened up the lid using fishing wire as a pulley.

What did need VFX was hiding the LED panel inside the box. It was 90% there, but just needed some paint work and a little mask animation to help hide it completely.

Fix-it-in-Post-masking1.jpg

The last shot of Liam was lacking something. Because of the shots before and after, the little amount of smoke we used just didn’t sell it.

So I composited some smoke elements in, masked Liam out to create a background and foreground for the smoke to move in, some light elements to exaggerate the light coming from the pizza box, and some camera shake.

For the camera shake in this shot I didn’t want to add a default wiggle because they don’t look great over a long amount of time. So I recorded a few dots on a wall while holding the camera on a shoulder rig, tracked the dots in After Effects, parented the tracking information to the static shot of Liam, zoomed it in to remove the black, and walla! Genuine handheld camera shake.

How-to-remove-a-boom-in-the-shot.jpg

One last one! I got the boom in the shot - oops! I got rid of it by finding a section where it wasn't in and pasting that clean plate over the boom in shot.

Visual Effects don't always have to be big explosions and fancy CG elements. Sometimes, it's just a case of fixing it in post.


Fix it in Post.jpg

DISCLAIMERS:

Some of these links are affiliate links, if you purchase gear via these links The Film Look will receive a small commission, but there will be no additional cost to you. Thank you!