Gear Reviews

Flex Lights: A Filmmaker’s Secret Weapon | Falcon Eyes RX-18TD Review

Imagine if you had a light which could serve as a large soft source…

Was thin enough to fit into small spaces like the briefcase scene in Pulp Fiction…

AND was light enough you could tape to the ceiling...

This versatile flex light from Falcon Eyes gives you loads of creative possibilities. Today we’re going to show all the ways YOU can use this light, getting you one step closer to achieving the film look. 

If you are new here, my name’s Robert, and this is Richard. We make films on this channel and then share everything we learned so you can make YOUR films bigger, better, and create something which you are proud to share with the world. Today I want to talk about the Falcon Eyes RX-18TD.

Flex-LED-Review-1.gif

The Falcon’s eyes 18TD can give you 4 different types of light source. First, we have a barebones setup with no modifiers which will give you a harder light source. Next, we are going to use the dome modifier.

This helps to spread and soften the light. Next, we are going to attach the frame and diffuser.

This is modifier is creating a large soft source, but it is giving you a lot more control as the frame is stopping the light from spilling out of the side. Next, let’s attach the honeycomb grid. 

This is the setup we have been using the most. We are still getting a large soft source, but with further control over the light as the grid is cutting the light from spreading further.

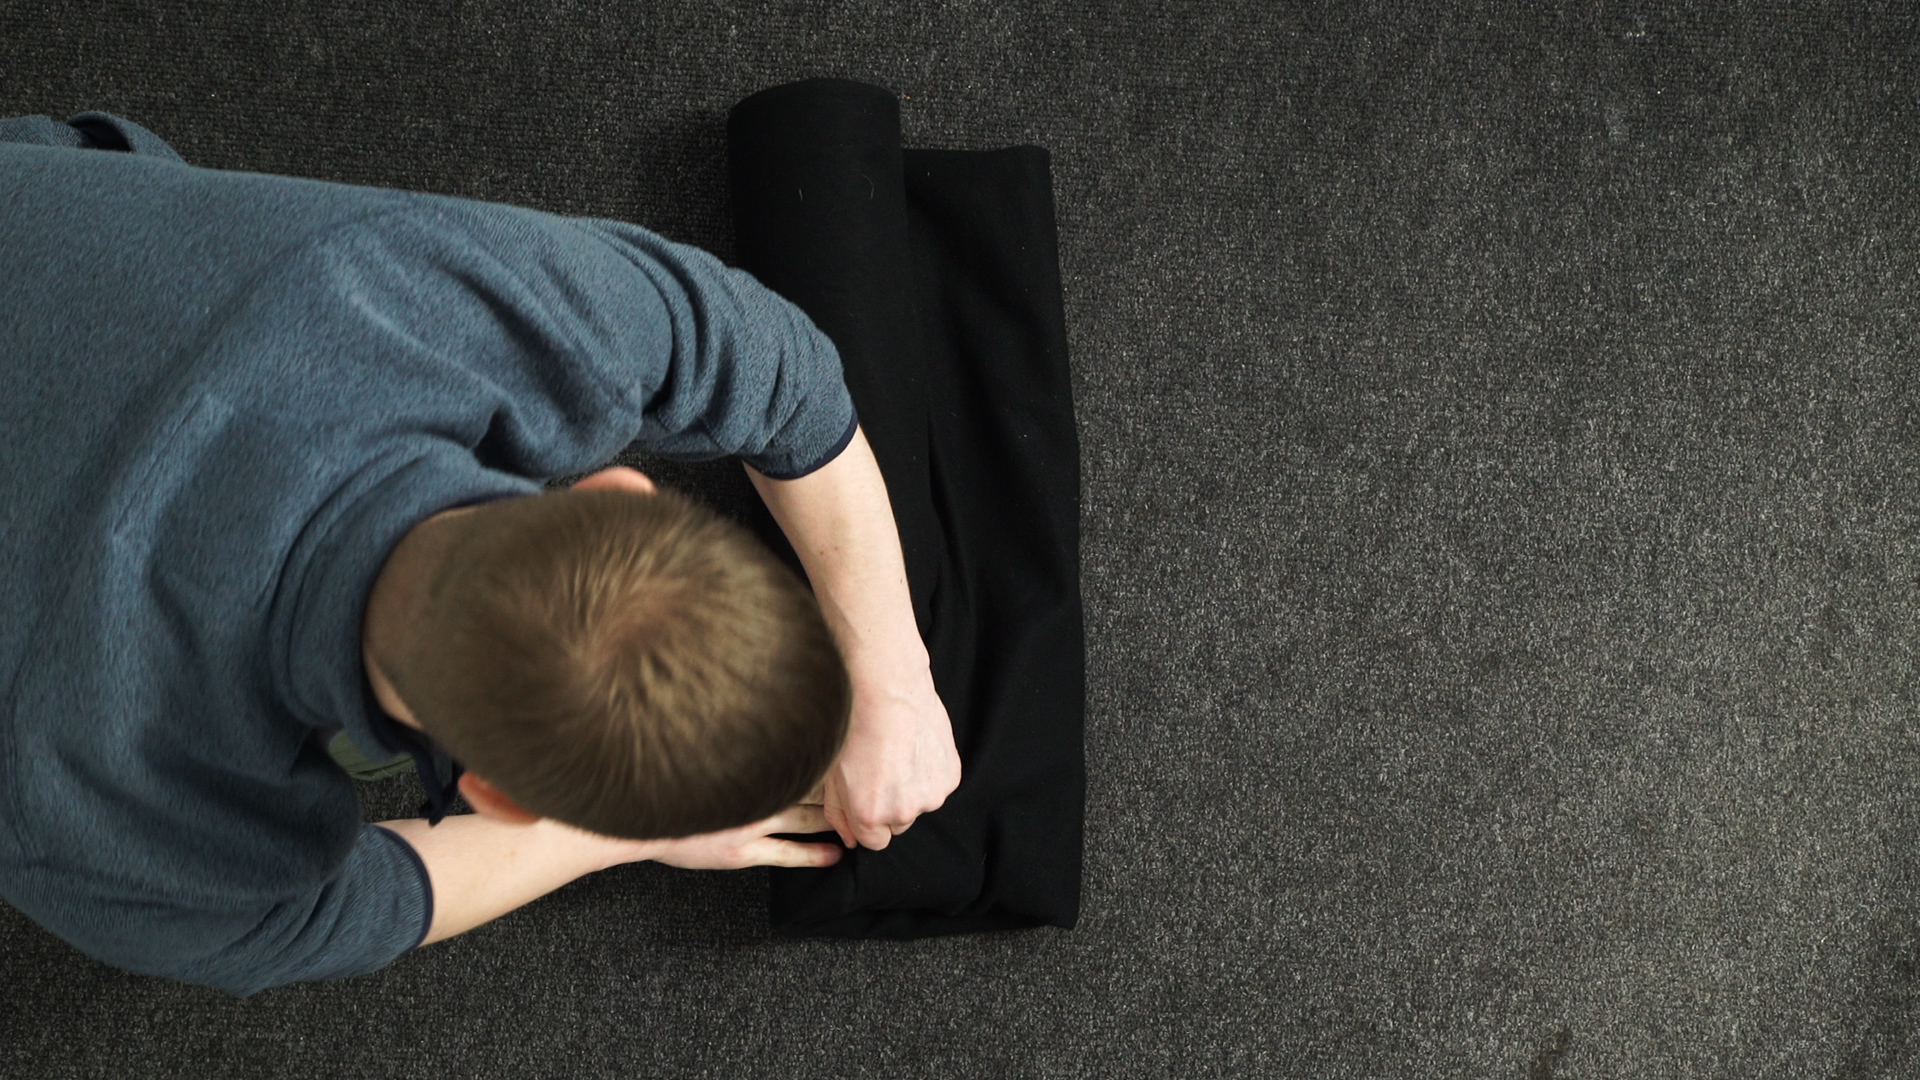
Since the main selling point of this light is that it is thin and you can roll it up with it still working, let’s try and fit it into some small places.

To power the light in the suitcase we used a vlock battery which attaches to the back of the power unit. The light can also be powered via a plug if you have a more permanent light setup. For the scene we also wanted a warmer light glowing from the suitcase so we change the colour temperature from 5600 kelvin to 300 kelvin, and set our cameras white balance to daylight.

Flex-LED-Review-v2.gif

With the light being so thin and flexible it can fit into these small places, but this is only made possible because the power control unit is separate from the light source, which is where you control the colour temperature and brightness. 

Companies like Aputure and LEDGO have a similar system of having the control unit separate, but they all make the power cables to short so you still need to find a place to mount control unit right next to the light. Which kind of defeats the purpose of having them separate. 

Luckily Falcon Eyes does sell extension cables and we have been using the 6-meter one so we could feed the cable along with the ceiling, into the back seat where we can get access to the controls.

Flex-LED-Review-v3.gif

----

We like to give nicknames to our equipment, for example, we’ve got “Stevie”, then [Insert Name], and the newest addition “Leela” for our Insta 360 camera which was suggested by one of your subscribers Kristian Foreman. 

Let us know in the comments below about what you would call this, we’ve come up with Flex Arm Stong and Mr Fantastic, the one with the most thumb up will be the winner. 

-----

Flex-LED-Review-v4.gif

The location for our next short film is an INT. WAREHOUSE - NIGHT which is actually just our studio dressed up to look like a warehouse.

Throughout the film, we have loads of RGB lights that flash different colours, have police car effects, lightning mode, basically, we are going to use every RGB effects light we own to make it look as crazy as we can.

These light will change throughout the film depending on what our characters are doing, but the one light which will stay consistent is the RX-18TD we have rigged up to the ceiling. 

Since the flex light is so thin and lightweight, we used one of these scissor clamps to attach it to our drop ceiling in the studio. Even with attaching the included softbox and honeycomb grid, the light still weighs nothing.

If you don’t have a ceiling like this you can take off the bracket and tape it to the ceiling.

Flex-LED-Review-v5.gif

We have this Astora panel which has a similar output but is much heavier than the falcon eyes,  which you can tell that by just looking at them. 

To get an average panel up there, a couple of crab clamps and a magic arm is going to cut it. To boom the light overhead you are going to need a c-stand, arm, and a couple of sandbags to take the weight, all which costs more money.

----

Having the ability to flex the light isn’t a gimmick it really does work, but it’s not how we have been using it the most. Because the light is so big, and the inclusion of the softboxes and grid you get a really nice soft light, with the added benefit of being able to rig it with ease.

As an indie filmmaker having equipment that can adapt to shoot in many different situations is key, so if you are looking for a light panel we would highly recommend Falcon Eyes RX-18TD, it’s got The Film Look approval.


📼 Check out these handy videos too!

🎬 All the Gear we used for this episode!

Falcon Eyes RX-18TD: https://geni.us/aBvfwS

Falcon Eyes 6 metre Extension Cable: https://geni.us/60hXD9

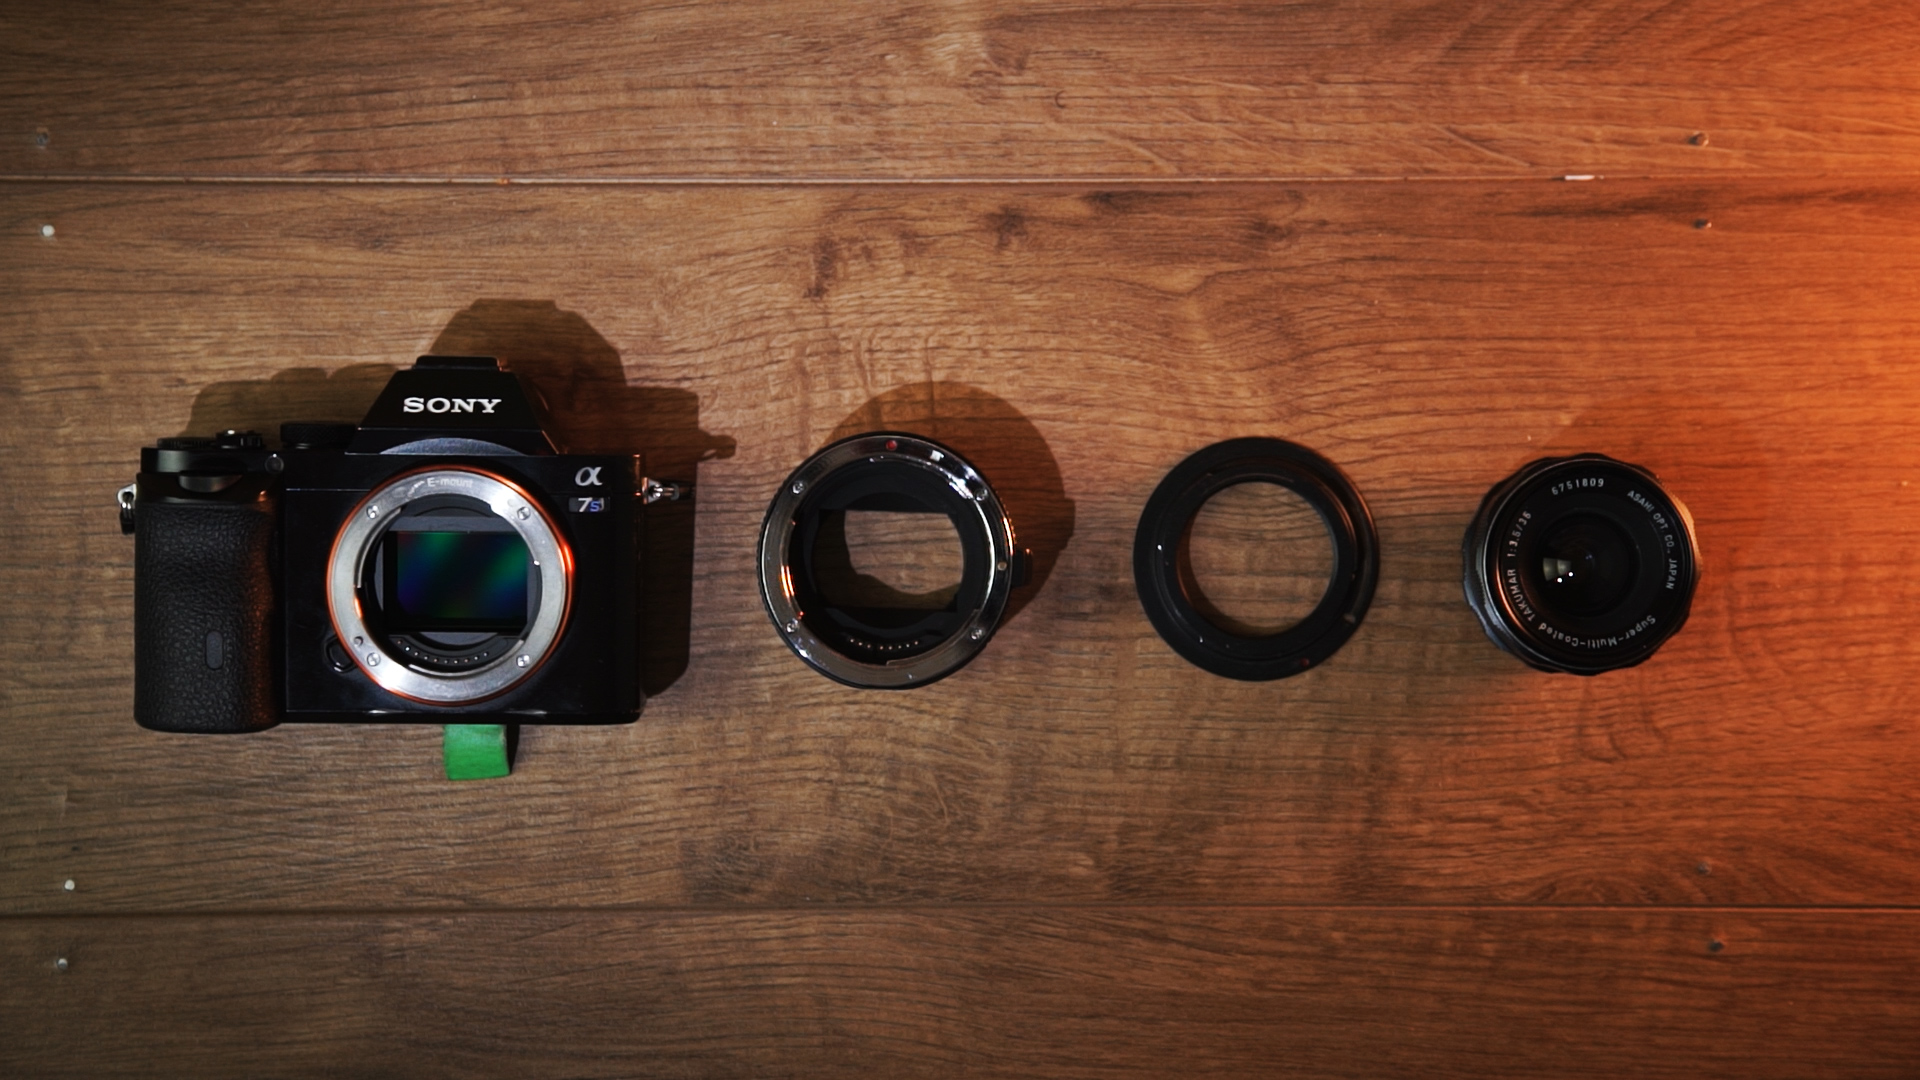
Sony A7s: https://geni.us/TlulUbD

Our Favourite Lights: https://geni.us/OurFavoriteLights

Gaff Tape (black): https://geni.us/dj3JhK

Gaff Tape (coloured): https://geni.us/ysIntJw

Scissor Clamp: https://geni.us/6q2TBzE

Black Wrap/Cine Foil: https://geni.us/GPFzOK

Light Stands: https://geni.us/SsG0n

Aputure Mini 20s: https://geni.us/bA6Fz

Zyhuin Crane 2 [handheld gimbal]: https://geni.us/ZNRV

AndyCine a6 Plus [monitor]: https://geni.us/GGNO

Shower Curtain (diffusion): https://geni.us/davES

Spring Clamps: https://geni.us/BpTIw6f Magic

Arm: https://geni.us/iWuyoyD

Crab Clamps: https://geni.us/iGwXcsx

Astora LED Panel: https://geni.us/TScVT

C-Stands: https://geni.us/9Nel17h


DISCLAIMERS:

Some of these links are affiliate links, if you purchase gear via these links The Film Look will receive a small commission, but there will be no additional cost to you. Thank you!

Getting THE FILM LOOK with a 360° Action Camera | Insta360 ONE X Review

As narrative short filmmakers, we’ve always been in two minds whether to get a 360 action camera. We were never sure if they could be used well for narrative filmmaking.

Most of the footage you see online is all travel videos, vlogs, and tech demos. They all look great, but what about traditional filmmaking with actors, crew, and sets?

When Insta360 asked if we wanted to try out the ONE X, we thought this would be a perfect time to answer the question:

Does a 360 action camera have what it takes to give you the film look? Let’s find out!


📼 Check out these handy videos too!

📺 How to support the channel

🚀 bit.ly/artlistfilmlook - The music you heard in this episode is from Artlist. Click the link to receive 2 extra free months on when you purchase an Artlist subscription!

🎧 Listen to our Podcast!

iTunes: https://goo.gl/hikhGF

Android: https://goo.gl/fmsp4s

📞 The Socials

Website: http://thefilmlook.com

Twitter: https://twitter.com/TheFilmLook

Facebook: https://www.facebook.com/TheFilmLook

Instagram: https://www.instagram.com/thefilmlook


DISCLAIMERS:

Some of these links are affiliate links, if you purchase gear via these links The Film Look will receive a small commission, but there will be no additional cost to you. Thank you!

The Best Lights EVER!? | Aputure Mini-20 Light Review

For the last couple of years, we have been using these 160 LED lights and these can lights which use household bulbs.

We have used these lights to shoot a lot of videos and they have been a great budget option for us, but it was time to upgrade.

In this video, we are going to review the Mini-20D and Mini-20C from Aputure and why they are the best lights we have ever used.

We have the 3-light mini 20 kit, which has two mini-20Ds with a colour temperature of 7500k, a beam angle of 20 to 80 degrees as the light has a built-in fresnel.

The colour temperature of the 20d is at the higher end of the Kelvin scale and gives you a bluer light, but in the kit, Aputure does provides gels to bring the colour temperature down to 5500k and 3200k, but it’s nice to have the option of shooting at 7500k which is something we will be doing for our next short film.

Aputure-Mini-20-Review1.gif

We have a video all about white balance here if you want to check it out.

We also have one mini-20C which has a colour of 3200 kelvin to 6500 kelvin and a beam angle of 20 to 60 degrees.

Both lights can dim down to 20%, but the mini-20c only has half the brightness of the mini-20d in both flood and spot mode. By the time you have gelled the mini-20d from 7500 Kelvin down to 3200 Kelvin, you do get about the same output of brightness.

I’ve said mini-20d and mini-20c way too many times already, so I hope you are still following along.

You get everything you need to use these lights and more in the kit.

Aputure-Mini-20-Review2.gif

First, the case is rock solid and has enough room for everything. As you can see I have labelled ours up with gaff tape so we know where everything is and should go.

The three lights sit in the middle of the case and we leave the ball heads attached to the lights so we can screw them straight to the light stands.

We have many ball heads and they are all rubbish compared to the one you get in the kit, and they make adjusting the direction of the lights so much easier. I wish every light we had used them.

The light can be powered in 3 different ways. First, via a wall plug, second via a USB power supply; your output does drop by 25% if you use this method but it’s always nice to have.

And finally, via the NPF battery plate which is the option we use 90 percent of the time.

Aputure-Mini-20-Review3.gif

The NPF battery plate attaches to a crab clamp, which then clamps to the light stand. From the NPF battery plate, you plug in the d-tap cable into the light. Then the light is ready to be used.

At first, I wondered why the battery plate was separate from the light, but after using them a bunch this setup method helps to distribute the weight of the light and make it easier to operate.

Two quick points before we get into how we have been using them. First, unlike all other Aputure lights, these can not be controlled with a remote, and the lights have a fan which turns on when they get hot.

They’re super quiet and we have not had a problem with them whilst recording audio as most other sounds are louder than the fan and our microphones are never close enough, or directed towards, the light, but it’s worth knowing.

Right, now we have all of the boring spec stuff out of the way. Why do we think these are the best lights we have ever used?

We’ve been using the mini-20s for edge and hair lights, background and to motivate other light sources.

We wanted to see if we could use them as a large soft source, and we found you can when shooting in dark situations.

When you are shooting in a large bright space like when we shoot our short film The Asylum Grove, you will need lights that are a lot stronger like the Aputure 120 or 300d’s to create a large key light.

For our next short film which is called Sixty Seconds, we wanted to have two lights that beam across the room, acting as an edge light for each character, but also shine light onto the wall across the room.

Aputure-Mini-20-Review4.gif

Before we got the Mini-20s we tried using a 160 LED with black wrap around it to help focus the light. We got the look we wanted, just about, but adjusting the brightness and direction took way longer than it should.

With a mini-20d we were able to set up the light, try different looks by adjusting the flood and spot mode, along with the barn doors in seconds and with ease.

We’ve also been using these light a lot in our studio as we can flag the light from spilling off the walls since we are shooting in a small space.

The edge light on my left now is one of our can lights and to flag it from spilling everywhere we have taped black cardboard onto the side of it. It doesn’t look pretty and it has been working, but by using one of the mini-20s I can set up and adjust this light in less time than it would take to mess around with the cardboard, gaff tape, and flag.

Now with Aputure Lights

So the whole debate on, “Does it matter what you shoot with?” goes on.

We can achieve a similar look with the budget-friendly options we have used for about 5 years, and I would highly recommend those budget-friendly options when you are just starting out.

But after using the Mini-20s I wouldn’t want to go back, as these lights give you the creative freedom to adjust how the light is affecting our image with ease, which also gives you the creative freedom to try new things and see if they work.

Aputure-Mini-20-Review5.gif

Who are these lights for?

If you don’t already have a key light source such as an Aputure 120d or 300d, LED panels and ways to diffuse them. Get those first before buying the mini-20s. If you have your keys lights sorted and want to add a creative hair light or background light, the Aputure mini-20s has a great price to quality ratio coming in at around $250 per light.

We have a set of three which are around $720, but you can start off by buying one and see how it does.


In this video, we review the Apututre Mini-20d and The Aputure Mini 20c LED light kit. We have replaced our old LED panels to these as they allow you to be more creative with ease.

🎬 In case you missed it

Cheap RGB Light | AL-360RGB Review - https://youtu.be/iUBJc4qeI98

LEDGO G260 LED RGB Light Review - https://youtu.be/_ML9dFIoKEU

Aputure 300D Alternative? | NiceFoto HA-3300B Review - https://youtu.be/P-id-55KQ4Y

How to Light an Exterior Night Scene - https://youtu.be/foEV4YGXqGU

🎥 This episode's kit/gear/equipment:

🇺🇸 US links:

Aputure Mini 20 Kit - https://amzn.to/2LyVCsR

Aputure Mini 20d - https://amzn.to/2Vf05jY

Aputure Mini 20c - https://amzn.to/2YlgJQZ

Small LED Light - https://amzn.to/2YiNq1y

RGB LED - https://amzn.to/2DXXXHr

Can Light - https://amzn.to/2DZxEAH

🇬🇧 UK links:

Aputure Mini 20 Kit - https://amzn.to/2Hcdg0e

Aputure Mini 20d - https://amzn.to/2LuYabo

Aputure Mini 20c - https://amzn.to/2LJuGXg

Small LED Light - https://amzn.to/2VoODHr

RGB LED - https://amzn.to/2Lv1DGY

Can Light - https://amzn.to/2DXxnOJ

🎧 Listen to our Podcast!

iTunes: https://goo.gl/hikhGF

Android: https://goo.gl/fmsp4s

📞 The Socials

Website: http://thefilmlook.com

Twitter: https://twitter.com/TheFilmLook

Facebook: https://www.facebook.com/TheFilmLook

Instagram: https://www.instagram.com/thefilmlook

(#filmmaking #aputurelights)


DISCLAIMERS:

Some of these links are affiliate links, if you purchase gear via these links The Film Look will receive a small commission, but there will be no additional cost to you. Thank you!

35mm Vintage Lens for $35 | Takumar 35mm Lens Review

This lens is nearly 50 years old and it is one of our favourites which we use all of the time to shoot videos for this channel and also our short film.

In this video, we are going to talk about why we think the Pentax Takumar 35mm F3.5 is still one of the best lenses out there and why you should consider getting one.

Let's start off with a history lesson. The Takumar 35mm was introduced in 1959, and they made a few different version throughout the years. The one we have was manufactured from 1971 and is called the Super-Multi-Coated.

Takumar-35mm-f3.5-Lens-Review-3.gif

We shoot everything on a Sony A7s Mark 1 in 1080p. The camera is full frame, so we get all of that 35mm focal length.

The lens has an M42 mount, so we have an M42 to EOS mount that connects to our commlite adapter which is EOS to sony e-mount.

Takumar 35mm f3.5 Lens Review.jpg

You can get an adapter that goes from an M42 Mount to Sony E-mount, but we already had these adapters and they seem to work well enough.

We use the Takumar 35mm for wide establishing shots, all the way to a Medium shot and sometimes Medium Close up, but for that and our close up shots, we would switch lanes to our Helios 58mm.

Takumar 35mm f3.5 Lens Review 2.jpg

We do this because 35mm on a full frame is quite wide, and when you start to get close to your actor, the shape of there face will look little wider and start to look unnatural. This is just a personal preference and shooting a close up at 35mm can look cool, depending on the look we are going for.

Takumar-35mm-f3.5-Lens-Review-4.gif

What’s good about switching between these two focal lengths is that they are both very close to the cone of visual Attention of the human eye. Time for a science lesson.

A 35mm lens has a field of view of 64 degrees and a 58mm lens has a field of view of 41 degrees.

The human eye has a field of view of around 55 degrees, so to obtain the same field of view as the human eye you would, need a lens which has a focal length of 43mm.

This is why a 35mm and 50mm or 58mm in our case looks so natural because this is what we see in real life.

There is a lot more science that goes into it, but I failed science in school so I don’t really understand it, but hopefully, you get the point.

The Takumar isn't the fastest lens with a maximum aperture of F3.5 and a minimum aperture of F16.

Takumar-35mm-f3.5-Lens-Review-5.gif

This is not really a problem for us as we tend to shoot at F2.8 or F4 for most things. It helps to keep your shot in focus and you still get a nice shallow depth of field.

The Bokeh on this lens is nothing to write home about. You are not going to get the same swirly bokeh as you get from the Helios-44-2 58mm F2 lens.

There are way too many numbers in that in name, but we will be making a video about why we use that lens, so if you haven't already, consider subscribing.

This lens is sharp when shooting at F3.5 in the centre of the frame, but also towards the edges. As you step down the aperture to F4, 5.6, and 8 it gets even sharper from the centre of the frame to the edges.

This lens does have a vignette, it looks very natural, but if want to shoot a clean image you might not like the vignette. For us, this is one of the characters of the lens that we really like and embrace.

It does not suffer from flaring and is very controlled which I think is down to that F3.5 aputure, not like the Helios 58mm or the Jupiter 85mm lens we have. All those do is a flare, but it looks super cool.

The focus is super smooth and has about a half a turn through from infinity to it’s micro focus which just less than half a meter.

When we are shooting a short film we use a wireless follow focus and attach a gear ring to the lens.

Takumar-35mm-f3.5-Lens-Review-6.gif

This lens is very small and we have to add gaff tape to expand the diameter of the focus ring so we can attach the gear ring. We have to do this with all of our vintage lens.

The rest construction of this lens is rock solid and is made all out of metal. Like I said at the beginning of this video, this lens is nearly 50 years old and I reckon it will last another 50 years.

I might still be using it when I’m 80 years old.

If I’m going out shooting, taking photographs, or travelling, this is the first lens I pick up. One because of the focal length and the other is the size.

If you have a Canon 50mm 1.8 it is small than that, but a lot heavier because of the metal construction.

You can pick one of these lenses up from around $30 to $70 which is great if you are on a budget. Because these lenses are so old you need to look at the condition before buying one.


In this video we review the Takumar 35mm f3.5 Lens which is nearly 50 years old. Vintage lenses are a cheap, budget friendly way to get camera lens which have a high quality for both video and photography. We use the Takumar 35mm f3.5 Lens and other vintage lenses to shoot YouTube video and short films.

🚀 http://bit.ly/artlistfilmlook - Click this to receive 2 extra free months on when you purchase an Artlist subscription!

🎬 In case you missed it

Should You Buy a Vintage Lens? - https://youtu.be/OnRhaOmHaZA

Customise Your Lens Caps - https://youtu.be/zanamT1pZds

Canon 50mm F1.8 Review (6 Years On) - https://youtu.be/a2N4_zuAnhk

Upgrade Your Camera Battery + More | Power Junkie Review - https://youtu.be/UZZ-UA4r3js

🎧 Listen to our Podcast!

iTunes: https://goo.gl/hikhGF

Android: https://goo.gl/fmsp4s

📞 The Socials

Website: http://thefilmlook.com

Twitter: https://twitter.com/TheFilmLook

Facebook: https://www.facebook.com/TheFilmLook

Instagram: https://www.instagram.com/thefilmlook


DISCLAIMERS:

Some of these links are affiliate links, if you purchase gear via these links The Film Look will receive a small commission, but there will be no additional cost to you. Thank you!

Upgrade Your Camera Battery + More | Power Junkie Review

Power, power, power. You always need to make sure you have enough power and batteries whilst shooting.

Smaller cameras have smaller batteries, which don’t last very long, and you need to have lots of them when shooting all day.

NPF Batteries Vs Sony A7s Battery

This is why we use NPF batteries to power our cameras, as they give you hours of battery life. The problem is the NPF batteries don’t fit into our cameras.

Blind Spot has sent over their Power Junkie to solve this problem.

Blind-Spot-Power-Junkie-Review-2.gif

The power junkie is a battery plate that allows you to power filmmaking equipment via NPF batteries. You can do this either via the 2 USB ports or a DC output.

With the DC output, you can plug a dummy battery into the Power Junkie and power your camera.

You can get dummy batteries for all types of camera, so just find the one that fits your camera.

You can also get them from Blind Spot when you buy a Power Junkie. You can find links in the description below to all of the products.

Blind-Spot-Power-Junkie-Review-1.gif

We use a Sony A7s Mark 1, and with an NPF 750 battery, we get around 5 times more power than we would if we used a Sony A7s battery.

The USB ports work like any USB port. They can be used to power cameras like a GoPro without a dummy battery, LED lights that take USB power, and also audio recorders like the Tascam DR-70d.

What's also good about it is that you can charge your phone with the NPF batteries. A simple thing, but super useful. I’ve been able to charge my phone 3 times with a single NPF 750 battery.

When you are not powering filmmaking equipment you can also use the Power Junkie to charge the NPF batteries, via USB type C or Micro USB. Again, this is super convenient when you are charging all of your NPF batteries for the next shoot.

Blind-Spot-Power-Junkie-Review-3.gif

The Power Junkie is made out of plastic, but it is super tough and it’s not going to break easily.

There is a battery indicator on the side which shows how much power you have left.

We’ve had a battery in there for over a week, and the indicator lights have not reduced the power of the battery.

To mount the power junkie on to your camera there is a quarter 20 thread and a cold shoe attachment on the bottom. In the box, Blind Spot provides a couple of different screws to help secure it onto your cameras cold show or cage.

Blind-Spot-Power-Junkie-Review-4.gif

The base of the power junkie is rubber so you can get the screw super tight.

The way we have been mounting ours is by using this 15mm rod cheese plate we had going spare. It screws on to the bottom of the power Junkie, then you can mount it on to a 15mm rod.

Both of our cages for the Sony A7s mark 1 have a 15mm rod mount built onto the cage.

Blind-Spot-Power-Junkie-Review-5.gif

Once you have mounted it onto your camera, you can plug in your dummy battery and feed the wire to the power junkie. We taped it up so it doesn’t move around.

Then you are ready to use it to shoot.

We did create a video a while back about our DIY external battery setup, which has been working, but was velcroed on to a cheese plate. The DIY battery plate was only around $10, with the dummy costing around about $15.

So the DIY solution was cheaper, but sometimes the power drops and you have to wiggle the battery and wires to get it working again.

Now I have used the Power Junkie, I wouldn’t recommend building your own DIY version. The Power Junkie can do a lot more than the DIY version can and just works straight out of the box.

Blind-Spot-Power-Junkie-Review-6.gif

With the power junkie, you don’t need to rely on lots of different power sources. You can invest in buying lots of NPF batteries for all your power needs when you have the Power Junkie.


DISCLAIMERS:

Some of these links are affiliate links, if you purchase gear via these links The Film Look will receive a small commission, but there will be no additional cost to you. Thank you!

Every Boom Operator Needs This! | Rycote PCS-Boom Connector Review

Today I want to talk to you about the PCS-Boom Connector from Rycote, and why I think every boom operator would be a fool not to have one!

I’ve been known to have trouble screwing my boom pole to my shock mount. So much so that I chewed up the end and broke the whole system...twice!

Rycote-PCS-Boom-Review.gif

To fix this problem, I was looking for a quick release system for my boom pole. I did find a budget option which did the job; the Triad Orbit IO-R...I did a review on it a while back.

Then the guys at Rycote saw that video and wondered if i’d be interested in reviewing their quick release system, so here I am. They also sent me some free swag.

Rycote-PCS-Boom-Review1.gif

I’m gonna put these two boom connectors against each other. You have the budget option, coming in at around £20, and you have the premium option, coming in at about £80. So the Rycote is 4x the price of the Triad Orbit, but is it 4x better?

Weight

Let's start with the weight. If you are booming for long periods of time, the amount of weight you add to the end of the pole will matter a lot. You already have a microphone, shock mount, and possibly a blimp on the end, so any more weight will only cause more fatigue.

Rycote-PCS-Boom-Review2.gif

The Rycote weighs 53g.

The Triad Orbit weighs over 220g. That’s over 4x the weight of the Rycote.

Rycote-PCS-Boom-Review3.gif

After having both of these in my hands, I can really feel how light the Rycote really is. This thing weighs less than 3 AA batteries. The Triad Orbit is over 12 AAs.

Rycote-PCS-Boom-Review4.gif

Strength

Both appear to be really strong. To test the strength I setup both on C-stands and hung sandbags from the tips. I can’t image you’d put any more than 2 sandbags on the end of your boom, so let's call this one a tie before I break something.

Rycote-PCS-Boom-Review5.gif

Release System

If you are purchasing a quick release system, the thing you want the most is that it can be attached and released with ease.

Attaching the Rycote is satisfying: it locks into place using the grooves on the tip, and its tapered design makes fitting it into the hole really easy. It also has a very satisfying click. Releasing the tip is even more satisfying because it's spring loaded, so you can release it one handed.

Rycote-PCS-Boom-Review6.gif

The Triad Orbit does a similar job, but everything is a little more tricky. The tip is hex shaped and lacks any taper so you need to feed it into the system more carefully. Not a big deal, but every second counts.

Rycote-PCS-Boom-Review7.gif

Design Extras

Both feature mount locking systems to secure them onto a boom. The Triad Orbit uses a Hex key design like the Rycote, but the Rycote wins with its rubber shielding to stop you damaging the tip of your boom.

Rycote-PCS-Boom-Review8.gif

One genius thing the Rycote does that the Triad doesn’t, is the hole they have milled out of the tip which is perfect for using your allen key and getting the tip rock solid on the end of your shock mount. It’s a clever little addition which shows that Rycote has thought about it from a user standpoint.

The Winner

So who is the winner? The Triad does the job, and would be perfect for musicians, for example, who have a bunch of mics on different stands and need to hotswap a setup. But honestly, if you are concerned about weight, like a boom operator would be, the Rycote is the best option, even for the premium price tag.


DISCLAIMERS:

Some of these links are affiliate links, if you purchase gear via these links The Film Look will receive a small commission, but there will be no additional cost to you. Thank you!

10 Ways to use Blackout Curtains for Filmmaking

Recently we bought a load of blackout curtains and you wouldn’t believe how useful they have been when making films and content for this channel.

Today we are going to show YOU how we have been using them, and how to roll them up into a burrito like this to store them.

Welcome to The Film Look.

The first main use we’ve had for them is to block out light. In our studio, we place one in front of the window to block out all of the light when we are shooting videos so we have complete control over lighting.

Black-Back-Drops-1.gif

When on set shooting a film, we’ve used them to block out the light from a corridor, so when the door opened it looked dark as the scene was supposed to be at night.

Black-Back-Drops-2.gif

For the same film, we also used them to cover the background of the set, as the walls in the location did not fit the look that we wanted. This scene was set backstage at an event behind a big theatre curtain, so the blackout curtains fit well in the scene.

When we shot our short film the Asylum Groove we built a blackout fort around a window, then lit our actors from the outside. The reason we did this was to show our character's reflections in a window. By controlling what was behind the window, it stopped other reflections from showing up on camera. We even had to add gaff tape up any reflective parts of the camera.

Large Negative Fill

Black-Back-Drops-3.gif

If you need to add negative fill to your scene to create more contrast, you can hang up one of these curtains just out of frame. If you need something a little smaller, the black side of a 5 in 1 reflector works well.

Black-Back-Drops-4.gif

Sound

When we are recording foley sounds in our studio we have used the curtains to build a DIY sound booth, They help to dampen room acoustics and reverb by absorbing sound from bouncing off the walls of the room.

We have a video coming out soon all about this setup, and tips of how to record foley. So if you’re not already consider subscribing.

We have also used them to cover over me when operating the camera as we were pouring water in the scene.

To store them neatly you can roll them up like a burrito. This is a trick we learnt from our first AC Rob, and here is how you do it.

Blackout Curtain Fold like a  burrito

First, you want to layout your backdrop and then fold it in half. If you have a large backdrop keep folding it in half until you have a width of around 60 centimetres or just over an arm's length.

SEQ_1.00_01_50_14.Still002.jpg

Next, fold one edge over like this. A little more than a hands width will do.

Blackout Curtain Fold like a  burrito

From the edge you started at, fold that into a triangle and start to roll, keeping it as tight as possible.

Blackout Curtain Fold like a  burrito

When you get close to the end, again 60 centimetres or an arm's length. Fold the end of the backdrop towards you in half. Then tuck the rolled end into the pocket you have created.

Blackout Curtain Fold like a  burrito

Start with the thinker side first, which will make it easier to tuck it all in.

SEQ_1.00_02_15_21.Still007.jpg

Once you’ve done this a couple of times you should be able to roll up backdrops in seconds.

Once they are rolled up like this they are easier to store, they can be used to kneel on, sit on, and if you get some downtime on set, somewhere to rest your head.

The ones we bought aren't fire retardant, but we will not be putting these ones in front of any hot lights. If you need blackout curtains which are fire retardant, look out for ones which are made out of Duvetyne - that should do the trick.

We’ve added links to the ones we bought in the description below, along with the other grip equipment we used to hang them, like c-stands and clips.

The blackout curtains we used were just standard blackout curtains you would buy for your home, so check your local home store or eBay. Someone might be getting rid of some old blackout curtains you can have.

It’s crazy how useful having a bunch of them has been when shooting. If you want to help support this channel give us a thumbs up or down in you don't and remember to achieve it one shot at a time.


DISCLAIMERS:

Some of these links are affiliate links, if you purchase gear via these links The Film Look will receive a small commission, but there will be no additional cost to you. Thank you!

A light that does (almost) ANYTHING | LEDGO G260 LED RGB Light Review

A couple of videos ago we reviewed this small 16 watt RGB light, but when we need more light and colour we’ve been using this massive light.

LEDGO-G260-LED-RGB-Stuido-Light-1.gif

Today we are going to be reviewing the LEDGO LG-G260 Watt LED RGB studio light.

Welcome to The Film Look

The size of this light is massive. The light source is 67cm by 38cm and the main body of the light is made out of metal. The corners, handle, and other parts of the light are plastic, but no way does this make this feel like a cheap product.

The output of the light is 260 watts and with the light being so big it creates a large soft source. On the front of the light, there is a frosted panel which diffuses the light. You also get barn doors to help shape the light.

LEDGO-G260-LED-RGB-Stuido-Light-2.jpg

On the back of the light are all of the controls. It’s super easy to get familiar with the interface and control each setting as the buttons, dials and screen layout are simple.

One downside to this light is that it does not come with a remote, and you have to buy an extra control to change the settings over wifi. We’ve used a bunch of Aputure lights in the past which all come with a remote as standard. If your lights are up high, changing the settings will be a pain. The light can be controlled with a DMX board, but very people have one of those.

CTT

LEDGO-G260-LED-RGB-Stuido-Light-4.gif

You can dial the colour temperature of this light from 2700 kelvin to 7500 kelvin which is very blue. The best feature to this setting is the ability to add green or magenta. If you are using other lights which have a green or purple tint, you can match this light with other light sources. Then you can correct the colour in your camera’s white balance settings or in post-production.

HSI

LEDGO-G260-LED-RGB-Stuido-Light-5.gif

The HSI mode allows you to cycle through 360 RGB colours and change the saturation of those colours. The numbers of the 360 colour wheel matches up with the small RGB light we reviewed a couple of weeks back. So if we set both lights to 270 degrees we know both of them will give us the same purple light.

RGBW

The RGBW mode allows you to fine tune in RGB colours, and add more of one colour than another.

Tungsten

If you just want a tungsten light there is a mode for that.

Fluorescent

There is a fluorescent mode which has a warmer, cooler, and neutral preset so you can match this light up with the other lights in your scene. Which comes in very handy if you can not control the colour of the other lights in your scene, for example, if you are shooting in an office.

Lighting Effects

Where this light shines are the pre-built in effects modes. They allow you to create and fake different lighting conditions at a click of a button. In each different effect, there are controls to change and customise the brightness, speed, and colour type.

Storm

The storm effect allows you to create a storm. By changing the frequency and speed you can control how violent the storm is.

Cop Car

Showing a cop car in your film is going to be very expensive, so unless it is completely necessary to show the car, using the cop car lighting effect will save you a lot of time and money.

The flash of the red and blue lights are probably enough of a clue to the audience that there is a police presence in your scene.

Soft and Hard Disco

LEDGO-G260-LED-RGB-Stuido-Light-6.gif

We’ve been testing out the disco modes for our next short film Sixty Seconds. The two main characters are trying to defuse a bomb and things are going a little crazy. The soft disco mode has a longer transition between the colours, where the hard disco mode flashes between the different colours.

Once we’ve made the film we are going to break down the lighting setup, so if you haven't already, consider subscribing.

Candle Light

Other lighting effects this light has is a candle or fire mode which we used to fake this camping setup. The light is slowly flickering and to make it look like a fire we just waved our arms in front of it.

To find out the full specs and the different controls of this light, I've added a link in the description to the manual for the LG-G260.

https://resource.holdan.co.uk/LEDGO/manuals/LG-G260.pdf

We’ve only used this light in our studio and to test shoot our next short film Sixty Seconds. Most of the time this light has been around 10 or 20 per cent brightness and is definitely built to be used on bigger sets and studio sound stages.

In our small studio, we did have difficulty controlling the spill of the light from hitting the walls. You can get a honeycomb grid which attaches to the front to help with that, so if we get one we will include it in a follow-up video.

For a small space like our studio, we would need to use a grid which can be attached to the front of the light to stop the spill of the light from hitting all of the walls.

LEDGO-G260-LED-RGB-Stuido-Light-7.gif

It weighs 11KG, but because of the size of the light you need two people to set it up, and mount it on to a C-Stand. You can also get a hard case for the light with is an necessary to transport it safely.

It’s called a studio light which is the main place we have been using it and it’s been powered from the wall socket. It also has two v-lock mounts on the back of the light, so you can use it anywhere.

The price of this light looks like a scary number, it’s not really for indie filmmakers who shoot run and gun stuff. The LEDGO LG-G260 is for people who have a budget, working on bigger films, and for people who need a light which can do just about everything, therefore saving them time.

The nearest competitor to this light which is of a similar size and functionality are the Arri Skypanels. I’ve never used one, but from the outside, they look like they do just about everything the LEDGO LG-G260 can do but it's more than twice the price and then add a little bit more.

I’ve never used Arri Skypanel, but I am going to say that the LEDGO light looks like it has a much better price to performance.

This light gives you a lot of creative freedom at the turn of a button. There are some DIY solutions to some of the effects this light can produce, and you might look at this light and the price and think, it’s not for you, or I’m never going to be able to get access to a light like this for my films.

Well, we thought the exact same thing 5 years ago. A light like this was totally out of reach, we started using these 160 LED lights which were £30. As you make more films, gain experience, work on bigger productions. Equipment like this will make your job easier, and you will still use the more expensive equipment alongside your the cheap DIY solutions to make your productions even better.

This review was our first thoughts and a run through of what this light has to offer. We are going to be using it to light on our next couple of short films, where we will be doing a full lighting breakdown. So if you want to see more about this light, consider subscribing if you haven't already, and remember achieve it one shot at a time.


DISCLAIMERS:

Some of these links are affiliate links, if you purchase gear via these links The Film Look will receive a small commission, but there will be no additional cost to you. Thank you!

Still The Best First Lens to Buy | Canon 50mm F1.8 Review (6 Years On)

Is the Canon 50mm F1.8 or the nifty fifty any good in 2019?

Well, we still use it even after 6 years and think it is still the best first lens to buy, even if you are not using a Canon camera.

We have been using this lens for about 6 years now and first used it on the Canon 600D, but this lens has actually been out for 28 years. It was first introduced in 1990 a couple of years after Canon brought out the EOS mount system.

Canon-50mm-1.8-Lens-Review-1.gif

The one we have was probably manufactured 7 or 8 years ago, but the design and build are the same as the ones from 1990.

After moving from a crop sensor Canon to a full frame Sony, we adapted all of our Canon lenses to Sony mount with a commlite adaptor.

There aren’t too many new Canon 50mm F1.8 mark 2s out there, but you can pick up a second hand one for around £50.

When you shoot at F1.8, the centre of the lens isn’t that sharp and looks out of focus, as you can see when we’ve shot straight against a flat wall. When you look at the edge of the frame the image has started to become more out of focus from what it is in the centre.

Canon-50mm-1.8-Lens-Review-2.jpg
Canon-50mm-Lens.jpg

This happens with a lot of lenses when you shoot wide open, but when you start to change the F-Stop to F4 or F8, the focus naturally gets sharper from the centre of the frame to the edge.

You’ll find the Canon 50mm sharpness sweet spot is around F4 and F5.6.

But shooting at a lower F-Stop like 1.8 will give you that sweet looking bokeh which we all love, so there is a trade off.

Canon-50mm-1.8-Lens-Review-3.gif

When you are shooting between 1.8 and 2.8 you will get a lot of lens flares and your image will be milky if you are shooting in situations where there is a bright and direct light.

This is a cool effect if you want it, but to avoid it you can simply shoot at an f-stop of 2.8 or higher. This will give you a cleaner image.

Canon-50mm-1.8-Lens-Review-4.gif

When you first get this lens you will likely shoot everything at F1.8 because it looks cinematic, but you will soon realise that shooting everything at F1.8 can make your footage look amateurish if you can’t keep your subjects in focus.

When we first got the canon 50mm 1.8 we shot everything at 1.8, mainly because it’s fun and we had the ability to do so.

But we soon realised that the depth of field at 1.8 will be from the person's eyes to the tip of their nose. This is fine if you are shooting a static subject as you can focus on the person's eyes and they will stay in focus throughout the shoot.

If your subject is moving around however, you will find it very difficult to keep them in focus when shooting at f/1.8.

So when shooting on a 50mm try shooting at F2.8 or F4.

Canon-50mm-1.8-Lens-Review-5.gif

This is where the Canon 50mm performs the best. You get a sharp image with some nice shallow depth of field, but it keeps the focal plane a lot more manageable when focusing on a moving subject.

50mm on a full frame camera is known as a standard field of view as its roughly the field of view as your eyes, giving your image a very natural and pleasing look.

The Canon 50mm does give you the ability to shoot in low light situations because of that F1.8 aperture. This comes in very handy when we were shooting on the Canon 600D as you could not push the ISO past 800 before the image becomes too noisy.

Shooting on newer cameras like the Sony A7s has changed that. In a low light situation, we can shoot at F8 with an ISO of 5000 and the image is still clean.

So depending on the camera you have and the situation you are shooting in, work out a good balance between shooting at a low F-Stop and bumping up ISO so you have a manageable shot and a clean enough image.

The construction of the Canon 50mm lens is all plastic, but this has not really been a problem. We’ve been using it for 6 years now, there are a few marks on it but that is just general wear and tear. Even after all this time, we’ve yet to drop it. The glass is still clean, and there is even a video of someone taking a hammer to the glass and it doesn’t break.

Canon-50mm-Lens-Hammer.gif

Links to that video can be found below but I wouldn’t recommend doing this, especially to the body of the lens.

The focus ring on the Canon 50mm lens is its biggest downside as it is very thin. There is not a lot of room to grip onto the focus ring when manually focusing. It’s not very smooth and it doesn’t sound great when you turn it.

Most lenses we have used have a long focus throw which is simply how much you have to turn the focus ring to go from macro to infinity focus on a lens. A long focus throw gives you the ability to do fine focus adjustments and be a lot more accurate when focusing.

Canon-50mm-1.8-Lens-Review-6.gif

These manual vintage lenses have a very long throw, and if you have even seen cinema lenses, they have a massive throw and are extremely accurate.

The Canon 50mm has a very short throw, so when pulling focus, it is very difficult to be accurate and hit the same focus marks consistently.

Canon-50mm-1.8-Lens-Review7.gif

It does take practice to get used to the small focus ring and it might just take a couple of more tries to nail your focus when shooting.

When shooting a short film, we use a wireless follow focus which is operated by a 1st AC. Unfortunately, you’ll find it very difficult to use this lens with a follow focus because the focus ring it too thin to attach a focus gear properly.

But this isn’t really a problem for most people, especially if you are just starting out.

We have used the Canon 50mm 1.8 on Canon and Sony Cameras, and we would definitely recommend picking one as they are so cheap.

We’ve never used one on a GH4 or GH5, but if you have, let us know in the comments below about what you think about the lens. We’d love to give people advice about using this lens on that camera system.

If you are just starting out I would highly recommend getting this lens. It will allow you to learn about shooting at low F-Stops, focus, image quality, and also get your images looking like a film with the shallow depth of field and the natural, pleasing look you get from a 50mm lens.

Yes, there is a lot that goes into making your image feel and look like a film; you need props, costumes, locations, lights, good sound, and a solid performance from your actors. But when you are just starting out, and you just want to shoot some cool looking footage, this lens will allow you to do that whilst learning all the other things.


DISCLAIMERS:

Some of these links are affiliate links, if you purchase gear via these links The Film Look will receive a small commission, but there will be no additional cost to you. Thank you!

Cheap RGB Light | AL-360RGB Review

For 5 years now we have been using these 160 LEDs. The technology in them is old, the colour of them isn’t great, and the battery connection has started to go. So it was time to upgrade.

We have reviewed two AndyCine products in the past and they reached out at the right time to see if we wanted to review their new 16W LED light which is also RGB and has 360 different colours to choose from.

We obviously said yes, and that’s what we will be reviewing in this week’s video.

CHEAP RGB LIGHT  AL-360RGB REVIEW 1.gif

The AL-360RGB light has a max output of 16 watts. You can cycle from 3200k to 5700k, with the brightness staying at around 16 watts throughout the different colour temperatures.

When using the RGB mode on the light, most colours look like they use the full 16 watts of power, which is very impressive for a light of this size and price. Some colours look a little darker but this is just down to the shade of the colour.

You can change the brightness of the light a percentage at a time, all the way down to 10% and the colour temperature can be adjusted by 50 Kelvin at a time.

To access the RGB mode you simply press in the CCT/HUE button and use the dial to go through the 360 HUE colours.

CHEAP-RGB-LIGHT--AL-360RGB-REVIEW-2.gif

When turning the dials to control the brightness, colour temperature, or RGB colour, you can turn the dial one notch at a time to change the setting slowly. If you want to make a big change to the settings you can turn the dial quickly.

This is a nice feature to have so you are not spending a lot of time cycling through the settings if you know the one you are looking for.

There is a little screen on the back of the light which is quite dim and isn’t the clearest, but it does have a battery indicator and all of the settings information. It’s a nice little feature to have on such a small and relatively inexpensive light.

CHEAP-RGB-LIGHT--AL-360RGB-REVIEW-3.gif

The light can be powered via NPF batteries or via an 8.4v DC cable. One of the main uses we’ve had for this light is to add a coloured edge light when shooting product footage for this channel. Sometimes we can be shooting for an hour or two with the light always on, so having the ability to run the light directly from the wall is a feature we have been taking advantage of.

If you use one of these 970 NPF batteries you will get a run time of around an hour and a half with the brightness staying consistent until the battery hits about 10%.

In the past, we have used coloured gels to get different coloured edge lights. It’s worked well in the past, but with this new light, we have the ability to choose between 360 colours with a turn of a wheel. No need to faff with cutting and attaching gels.  

Each colour has its own reference number displayed on the screen. This allows you to record the colour you have used for future reference or have the ability to dial in the same colour on multiple lights.

CHEAP-RGB-LIGHT--AL-360RGB-REVIEW-5.gif

If you are shooting in a dark situation or have complete control of the light that’s in your scene, you could use this light as a key light. Most of the time this light would be used as an edge or hair light for a subject, and also to paint coloured light on a product or a background.

RGB LED lights are the next trend in lighting with lots of companies bringing out big expensive RGB lights. We have this one from LEDGO which we will be reviewing soon.

In the box you receive a light stand mount which allows you to tilt the light with ease. It is made out of plastic just like the rest of the light, but with the light being super lightweight it should last a long time.

One downside to this light is that it does not come with a battery or a DC cable to power it. It’s an extra expense you will need to make if you are thinking about buying this light. You can’t use it straight out of the box, unfortunately.

I’ve linked to an article in the description below from someone who has taken this light apart and tested it to the max, check it out if you are into that kind of stuff.

CHEAP-RGB-LIGHT--AL-360RGB-REVIEW-4.gif

Seeing the rapid RGB technology filter down into a budget light this small is really good to see as it makes it super accessible for low budget filmmakers like us.

I really like this light; it gives you the flexibility to switch between colour temperatures and is an upgrade from our older 160 LED lights, but the best feature is the RGB mode. Having that feature in such a small light gives you creative freedom with ease. We will not be messing around with gels for much longer.

🎥 This episode's kit/gear/equipment:

🇺🇸 US links:

AL-360RGB - https://amzn.to/2ChD74f

🇬🇧 UK links:

AL-360RGB - https://amzn.to/2H7yyze


DISCLAIMERS:

Some of these links are affiliate links, if you purchase gear via these links The Film Look will receive a small commission, but there will be no additional cost to you. Thank you!

$600 vs $60 Mic | Rode NTG3 vs Rode VideoMicro

The Rode NTG3 vs the Rode VideoMicro. One is $600. One is $60. One is 10x the price than the other - but is it 10x better?

Mic-Battle.gif

Today we are going to find out! Welcome to The Film Look.

We are giving each microphone a like-for-like comparison in some quintessential sound recording situations.

First up, our presenting setup.

When we present an episode, we boom a microphone overhead and plug it straight into the camera. We use the NTG3, and we have an SmartRig XLR phantom power adapter to convert it and plug it straight into the camera.

Mic-Battle3.gif

The VideoMicro on the other hand, uses a 3.5mm jack, so it doesn’t need an adapter, just an extension cable.

When you compare the sound of these microphones side by side, it is clear the NTG3 sounds more full and clear whereas the VideoMicro sounds a little tinny. But considering the VideoMicro is only a tenth of the price, it’s holding up really well.

To give the VideoMicro a fighting chance, I’m going to tweak the EQ and attempt to match it to the NTG3. Let me play those clips again.

Mic-Battle4.gif

This is sounding much better. In all honesty, now the VideoMicro sounds just as good as the NTG3 in this setup.

But what about if we are shooting a wide shot?

Mic-Battle5.gif

Booming the microphone in the same position as earlier will place the microphone in frame, so we must move the microphone further back. Let’s see how both mics handle booming from a distance.

Positioning the microphone from a long distance is the worst way to record sound; you get a lot of noise, low levels of dialogue, and it picks up a lot of acoustic tone in the room. From my ears, both microphones sound very similar. And similar being, both pretty rubbish.

So what about setting up a plant mic?

Mic-Battle6.gif

Because the VideoMicro is so small, it can easily be hidden in the shot, such as in a car, taped to the sun visor.

You just need to get creative and find a place to hide it close to your subject.

The NTG3, on the other hand, has a harder job of being so sneaky.

Mic-Battle7.gif

We have a video about different ways to record dialogue in a wide shot if you want to see some more methods.

Next up, we have foley.

Mic-Battle8.gif

We will record some clothing foley in a quiet room with the microphone really close. The environment needs to be silent and the microphone needs to pick up the nuances in the sound.

I’ll be recording in sync with our film Backstage, recording clothing foley for the Medium.

Mic-Battle9.gif

The NTG3 is an obvious winner. The higher sensitivity means it can record subtle noises a lot louder than the VideoMicro. So when the volume is balanced between both mics, the VideoMicro introduces a lot more noise into the sound.

NTG3.jpg
VideoMicro.jpg

So to conclude: The NTG3 is obviously a better microphone, that comes with the obvious higher price tag. It is more sensitive, so it records a cleaner and more well-rounded sound. It's perfect for recording high quality sound on short films.

But the VideoMicro also has its place. We use it when recording behind the scenes because it's so easy to set up on top of the camera.

Mic-Battle10.gif

It also wins in the “not breaking the bank” category, so if you are looking for a budget option, you CAN still record good sound for a short film with this microphone.


This video was Sponsored By

🎵 http://bit.ly/pbtfl-spinningcircles - Click here to download this episode's track. Check out Premiumbeat.com to discover a huge range of exclusive royalty free music!


DISCLAIMERS:

Some of these links are affiliate links, if you purchase gear via these links The Film Look will receive a small commission, but there will be no additional cost to you. Thank you!

Small Rig Cage for Blackmagic Pocket 4K

To be able to use the black magic pocket cinema camera 4k to its full potential you need an external battery source and an external SSD to be able to record at the highest level of quality.

This means this camera is going to need a cage to hold all of this extra stuff.

SmallRig-Cage-for-the-Blackmagic-Pocket-4K.gif

In this video, we are going to be reviewing the Small Rig cage for the black magic pocket cinema camera 4k.

We reviewed the black magic pocket cinema camera 4k in the last video, so if you haven't seen that you can find the video here to see what we thought about it.

We have been using cages for our Sony a7s cameras for a few years now and without them shooting would be a lot more difficult. The same goes for the pocket 4k. Without a cage, the camera is just about unusable, especially if you’re shooting all day.

To shoot at the highest quality you need to use an external hard drive, but there's nowhere to mount it. Also, the battery life sucks so you need to use an external battery solution, and again there is nowhere to put it.

SmallRig-Cage-for-the-Blackmagic-Pocket-4K-1.gif

This is where the smallrig cage comes in. The cage is one piece of metal and has a bunch of mounting options. ¼ 20, ⅜, Rosette mounts for extra handles, and cold shoe mounts.

It fits the camera like a glove, and when holding it in your hand, the cage is curved and seamlessly joins the camera.

SmallRig-Cage-for-the-Blackmagic-Pocket-4K-2.gif

Next, we have the top handle. Small Rig has a few different top handles which will fit this cage. This one can change position and slide forward by turning these two screws. The best bit about this is that the Allen Key you need is magnetically stored on the handle.

the Allen key that you use to fix the camera in the cage is also magnetically stored on the bottom of the cage. This means you never have to go looking for the correct Allen key. It’s just there.

Having them magnetically stored on the cage is something I wish I had on my Sony A7s cage, as I take it in and out of the cage a lot.

SmallRig-Cage-for-the-Blackmagic-Pocket-4K-4.gif

Small Rig has designed an SSD holder which you mount onto the cage. You feed the cable through the front and tighten the hard drive in place.

This SSD holder is designed for the Samsung T5 SSD’s, but these Angel Bird SSDs also fit into the holder with a little bit of a wiggle.

Finally, you get this cable clamp for your HDMI and USB type C cable you use for the SSD. This just makes sure your cables are safe and secure.

SmallRig-Cage-for-the-Blackmagic-Pocket-4K-5.gif

With the cage, we have mounted our external battery solution which allows us to extend the battery life. Our DIY battery didn’t work great and the battery life kept dropping. So I would look into a different way to power the camera, maybe something that uses the 12v power input on the side of the camera.

But the smallrig cage has loads of room to mount something.

Just like all SmallRig products (and we have a few) everything is built to a high quality and they have a bunch of other accessories for all sorts.

Without the SSD holder and the ability to mount an external battery on to this camera, I don’t think we would use it. So spending an extra $190, which is how much all of these parts cost, is definitely worth the investment if you have a pocket 4K camera.

SmallRig-Cage-for-the-Blackmagic-Pocket-4K-6.gif

If you haven't seen our review on the Pocket 4K camera you can find that video here. Let us know in the comments below if you are thinking about buying one too and remember to achieve it one shot at a time.

🎥 This episode's kit/gear/equipment:

SmallRig Website - https://www.smallrig.com/

Cage - https://goo.gl/yj7w5H

Harddrive Mount - https://goo.gl/26Er3h

Cable Clamp - https://goo.gl/JUYnGx

Top Handle - https://goo.gl/opEJZ8


This video was Sponsored By

🎵 http://bit.ly/pbtfl-chillhopjazz - Click here to download this episode's track. Check out Premiumbeat.com to discover a huge range of exclusive royalty free music!


DISCLAIMERS:

Some of these links are affiliate links, if you purchase gear via these links The Film Look will receive a small commission, but there will be no additional cost to you. Thank you!

Blackmagic Pocket Cinema Camera 4K Review

The black magic pocket cinema camera 4K has an unnecessarily long name, but the camera packs a lot in for the £1100 price tag.

So if you’re looking to upgrade your camera or buy your first camera, is the pocket 4K worth it?

Black-Magic-Pocket-4K-Review-1.gif

We’ve been putting one to the test for the past few weeks and we are going to be reviewing it in this video.

Just to say up top, BlackMagic did send us over the pocket cinema camera 4K, but everything we say in this video is our honest opinion.

Tests

With every piece of filmmaking equip ment that we review, we always like to use it on a production and put it into real world shooting condition. With the Pocket 4K we have used it to shoot episode footage for this channel which is something we do daily, and we have also used to in a screen test for our next short film.

Since we have been shooting on the Sony a7s Mark I for about 2 years, and use it to shoot everything, we will be comparing it to the pocket 4K when we can.

Black-Magic-Pocket-4K-Review.gif

Features

Today’s video is certainly a user review and not necessarily a spec review. I’ll be speaking about the features I think matter when making films. But I have added a link to the black magic website if you want more details.

Interface

The black magic interface has got to be one of the easiest to use. With having a 5-inch touchscreen, the layout and buttons are big, it's easy to flick through and adjust the settings.

Black-Magic-Pocket-4K-Review-2.gif

When shooting with the camera, the record button is big and in a normal place, unlike the Sony A7s record button. In fact, the pocket 4k has two record buttons, but I am not too sure why it is here.

To change the setting on the camera, you select them on the screen and change them from there, or use the jog wheel on the front. On top of the camera, you have the most common buttons to change your ISO, shutter and white balance, and you can change to f/stop with the jog wheel.

Also, you have three custom function buttons which can be set to things like false colour, Zebras, grids, safe areas, also to turn a LUT on and off which is essential if you’re shooting with a flat picture profile.

Black-Magic-Pocket-4K-Review-3.gif

Recording Format and Resolution

With this camera, you have a bunch of recording formats to choose from.

Which is great to have if you are going to be using this camera to record a bunch of different projects like films or YouTube Videos.

If you are shooting a short film you’re most likely going to shoot RAW. You might as well as you have this camera. With RAW you will get the greatest level of control over your image in post-production you can change the white balance, you have more information to recover your highlights, colour grade, and noise reduction.

More on post-production later on.

You can record onto an SD card, C-fast card, and an external SSD. If you want to shoot at the highest quality you will need to buy external SSD to record onto. The SD and C-Fast card cut out after about 30 seconds because of the size of the RAW recording.

Black-Magic-Pocket-4K-Review-4.gif

In fact, the best value for money and capacity is an external SSD, as you can get a 500GB card for around £120. A 128GB C-Fast card will cost you 2 or 3 times that, depending on where you by it.

We have a 512 GB SSD. At 4K RAW Lossless you get 15 minutes of record time. For us this file size and the record time is unmanageable, but the camera can also record 4K RAW at 3 to 1 and 4 to 1 which is a reduced quality but you get a much longer record time and there is not a great difference in quality.

When shooting a film we would probably shoot at RAW 4 to 1.

Like us, if you shoot on a daily basis and make videos for YouTube, shooting RAW is again unmanageable in terms of hard drive capacity and unnecessary levels of image clarity, but the camera has a few different flavours of ProRes codecs and quality levels to shoot at.

For a recent video on our channel, we recorded the footage in a mixture of RAW and ProRes at different qualities and it all mixed together well. I even turned a 4K RAW Lossless clip into a gif for social media.

Black-Magic-Pocket-4K-Review-5.gif

That video was 5 minutes long with a project file size of 131 GB. On average, other videos of that length when shot on our Sony a7s have a total project file size of 20 GB.

For YouTube videos we would probably shoot Pro Res 422, as it has a good balance between quality and file size.

Image Quality Comparison

We pre light our short film 60 Seconds and tested the Pocket 4k. We recorded at a number of different formats and resolutions so flick through them to compare.

Inputs

This camera has a 3.5mm microphone and headphone port. You can plug in a full-size HDMI cable, it has a 12v power port so you can run the camera from a wall socket. A USB-C port for external hard drives, and a mini XLR port.

Black-Magic-Pocket-4K-Review-6.gif

This allows you to plug in a mini XLR to full XLR cable into the camera. This is a great feature to have as you don't have to buy extra equipment like this smart rig converter box which we currently use.

When we tested this out and monitored the audio through headphones whilst recording, the audio was delayed from the video and sounded like this.

The footage was all in sync in the final clip, but it made it impossible to monitor the audio whilst recording. Hopefully, this can be fixed in a firmware update because it is a big problem.

Investment

This camera is an investment. You will need to build up the camera to be able to use it efficiently when shooting, but this is very similar to most cameras out there like our Sony a7s.

The first thing you will want to get after the camera is a cage as this will help you mount the other accessories you need for the camera. The cage we have is from SmallRig, it comes with a top handle, HDMI clamp, and hard drive mount.

Black-Magic-Pocket-4K-Review-7.gif

We have a full review of the cage in the next video, which you can find here if you are watching this in the future.

The battery life of the camera sucks and the LP-E6 battery will last about 30 minutes. So you will either have to buy a bucket load of LP-E6 batteries or work out some form of external battery solution.

We used a dummy battery and our DIY NPF mount, but the results weren’t great. A battery at 100% dropped straight down to 60 or 40%.

This could have just been our battery setup, so if you are thinking of getting the pocket 4k look into other external battery setups. Especially ones that run through the 12v power input which is on the side of the camera.

Like I said earlier, external SSDs are at the best option to record onto and having a cage like this will allow you to mount one and not just have it dangle down.

Black-Magic-Pocket-4K-Review-8.gif

If you are going to be shooting all day you will need to buy a few SSDs to get you through a whole day’s shoot. The other option is to have a computer nearby so you can copy the footage off the card.

If you have to do this whilst shooting a film, you would have someone whose sole job it is to ingest the footage off the card and onto the computer, this person is called a DIT.

Most of the time it’s difficult to find someone who can record sound on your film, so a DIT is a bit of a luxury for us indie filmmakers.

Post Production

If you want to shoot RAW, you’re going to need hard drive space for your computer, but the next investment is having a computer that can handle the workflow of editing RAW.

To process the footage you're going to be going through DaVinci Resolve which is an amazing program for being free.

Black-Magic-Pocket-4K-Review-9.gif

I am not going to go into any more detail about the RAW editing workflow in this video, but I have linked to a good tutorial in the description below.

In the past, I have edited a film which we shot in RAW on a laptop that could not handle the workflow, and it was very difficult to play back the edit and be creative. So some advice, make sure your computer system can handle the workflow before you buy this camera.

We have good computers that can handle the RAW workflow, I’ve linked to two videos below about the 2 computers we use if you want to check them out.

When grading your footage, DaVinci Resolve is the king. Again, it’s amazing that this program is free, and I am not getting paid to say that. There is a big learning curve with the program, especially when it comes to grading. So you want to spend your next investment learning it.

If you are looking for Resolve tutorials, check out Izak Jackson’s channel. He’s got a bunch on DaVinci Resolve and some other great videos too.

Shooting RAW will give you the greatest level of control over your image, compared to shooting at H.264 on the Sony or even ProRes on the Pocket 4K. The image will be sharper, you can correct mistake a lot easier by having the ability to adjust the ISO and white balance in post. There are just fewer compromises you have to make when trying to achieve the film look you want.

Who is this camera for?

So after all of that, who is this camera for? We have used it to shoot episodes for this channel and test shot for our up and coming short film. For our YouTube videos, we wouldn’t really use the camera. As we make 8 videos per month the file sizes are just too high and we would be buying new hard drives every month.

To shoot a film, which we do 2 to 3 times a year, we wouldn’t mind the extra production expense we would need to spend on hard drives VS the quality of image we would get. Since every film is a one-off.

If you need the highest level of image quality because you are shooting video production work for a client and are making money from it, the pocket 4K is a very good option.

Any negatives that I have said about this camera or the extra investment you have to make to be able to use this camera, is all thrown away because of the price of the pocket 4K.

And at the end of the day, that’s what it comes down to, the price.

The image quality you get from it is amazing, and in order to get the same quality from another camera you’re going to need to spend 10 thousand pounds plus.

If you are looking to buy this camera, just remember the extra investment you will need to make in terms of accessories, hard drive storage, and a computer that can handle the workflow.

Black-Magic-Pocket-4K-Review-1.gif

But for £1100, you get a lot of camera for the price.

In the description below I have linked to a few different articles that go into more detail about the specs of this camera, which I would highly recommend reading if you think about buying this camera. If you like this video give it a thumbs up and down if you don't, and remember to achieve it one shot at a time.

Links

Black Magic Website - https://goo.gl/EyXXzE

Raw Editing Workflow - https://youtu.be/clRnEwOcVis

Data Rates - https://goo.gl/zZdGgW

Wolfcrow - https://goo.gl/id2dCA

Izak Jackson Resolve - https://youtu.be/zXOGJaAnwoo


This video was Sponsored By

🎵 http://bit.ly/pbtfl-drivingtowardthesun - Click here to download this episode's track. Check out Premiumbeat.com to discover a huge range of exclusive royalty free music!


DISCLAIMERS:

Some of these links are affiliate links, if you purchase gear via these links The Film Look will receive a small commission, but there will be no additional cost to you. Thank you!

Our YouTube Presenting Setup

We have been presenting like this for almost 2 years, so I think it’s time to break down the setup.

Let’s start with the space we shoot in and the floor plan of our studio.

Studio Layout

To give us as much control over the lighting in the room, we start by blocking out all of the light coming through the window. Since the window is nearly 3 meters high, we use a large blackout curtain which we clip to the window.

Then we use a large fold-out backdrop and wedge it between a tripod head and the ceiling.

Our-YouTube-Presenting-Setup.gif

We didn’t say this was going to be pretty.

Next, we hook up a frosted shower curtain to the ceiling which is 1 meter away from where we present. Then we place a light behind it to create a large soft source.

Our-YouTube-Presenting-Setup1.gif

The light we use is this NiceFoto 330W LED light set to 5600K at 10% brightness and is 2 meters away from the shower curtain.

We have a video review all about the NiceFoto light if you would like to check it out here.

Before we got this light, we used one of our softboxes and placed right next to the shower curtain. We’ve had these softboxes for about 5 years now and they have a green tint to them, so we were always correcting the colour in the white balance setting on the camera and in the edit. More on colour correction later on.

Here is a side by side comparison of the colour difference between the two lights.

Our-YouTube-Presenting-Setup2.gif

Next, we add a background and a hair light by using a household bulb which is attached to our bookcase via our can lights. On the front of the can light is DIY diffusion paper to make the light softer, and also a cardboard flag to stop the light from spilling too much on to the presenter.

We have a video on DIY diffusion here.

Finally, we tape a DIY cardboard flag to stop the light from hitting the background as it is shiny photo paper, and we use this practical light which is a light up clapperboard on the shelf.

Links to all of the equipment will be linked in the description below.

To shoot the presenting we use a Sony a7s mark 1 which is about 1 meter away. We use a Canon 50mm lens set to F2.8, shutter 1/50, and an ISO of 160.

We present right in front of Richard’s desk which we raise to standing height. We do this as we do not have a teleprompter, so we can read the script for the episode off the screen.

Our-YouTube-Presenting-Setup4.gif

When it comes to presenting parts like this one where we are looking at the camera we just have to memorise the lines, but we don’t always get it on the first go.

For sound, we boom a Rode NTG3 on a C-Stand just out of shot above us. We use a smart rig which converts the XLR cable into a 3.5mm cable and provides phantom power to the microphone so we can feed the signal directly into the camera.

When recording the parts in the script where we are not presenting directly to the camera, we still roll video. We do this to keep the audio consistent throughout the whole recording.

Also, it would be a faff setting up another audio recorder just for this setup.

The time it takes to shoot the presenting for each episode depends on the length of the script, but having the same setup helps us save time.

In the edit, we cut it all together with the other footage from the episode and then we colour correct and grade the shot. The standard profile which we shoot with on the Sony A7s has a flat look to it, so we add contrast and bring up the highlights to help make the image pop.

And that is it. The setup is a bit makeshift and DIY, but it works for us.

Full-Plan.jpg

This video was Sponsored By

🎵 http://bit.ly/pbtfl-blissbay - Click here to download this episode's track. Check out Premiumbeat.com to discover a huge range of exclusive royalty free music!

🎥 This episode's kit/gear/equipment:

🇺🇸 US links:

NiceFoto HA-3300B - https://amzn.to/2TN09YC

Frosted Shower Curtain - https://amzn.to/2U65iLu

Lightup Film Clapperboard - https://amzn.to/2rg9bk8

🇬🇧 UK links: NiceFoto HA-3300B - https://amzn.to/2QvnMGk

Frosted Shower Curtain - https://amzn.to/2zyNh00

Lightup Film Clapperboard - https://amzn.to/2RqKn45


DISCLAIMERS:

Some of these links are affiliate links, if you purchase gear via these links The Film Look will receive a small commission, but there will be no additional cost to you. Thank you!

Aputure 300D Alternative? | NiceFoto HA-3300B Review

These COB LED lights, the ones with the big LED chip have become very popular over the last few years with Aputure leading the way with their 300D; something which we have used in the past to shoot our short film The Asylum Groove.

From our experience, the 300d is a very good light, but one of the main reason we have not bought one is because of the price.

So when a company called NiceFoto contacted us saying they have a light which has a very similar design to the 300d, but is brighter and is nearly half the price, we weren't going to say no to reviewing it.

Nice-Foto-Review-Aputure-300D-Alternative.gif

Just to say up top Nice Foto did send us the HA-3300B light to review, but everything in this video is our honest opinion.

Specs

Let's start off with the specs of the light.

We will be comparing this light to the Aputure 300D when we can, but we cannot do a side by side comparison as we don’t own one.

So everything we say about the 300d will be from our own experiences of using the light and some spec information which Aputure provides.

The HA-3300B is a 330W LED light. The output at one meter away with the standard reflector cone is 52000 LUX or a F20 at ISO200 1/50th of a second.

Nice-Foto-Review-Aputure-300D-Alternative1.gif

In the real world, this is well over a 2k light.

The Aputure 300D has an output of 31000 LUX or F11 at ISO 200 1/50th of a second at the same distance and reflector cone.

As you can see at 100% you would need to shoot at a higher f-stop to capture the correct exposure for the Nice Photo light.

Basically, the Nice Foto light is a brighter than the 300D.

The colour temperature is 5600K with the 300D being 5500k and both have a CRI rating of 95 plus.

You can dim the light in 10% increments, down to 10%. This doesn’t give you as much control as the 300D were you can change the brightness a percentage at a time but in practice, 10% increments are enough.

Nice-Foto-Review-Aputure-300D-Alternative2.gif

All of this is controlled on the light or via the wireless remote, and if you have a few of these lights you can control them all from one remote.

To keep the light cool there are 3 fans built in, which work great. We have had the light running for a few hours and it stayed super cool.

If people are concerned about fan noise from any of these types of lights, don't be. If you are recording your audio correctly, your mic should be pointing toward your subject and not the light.

Even if you are standing right next to the light, just position your mic away from it and you're never going to hear the fans over dialogue.

Build Quality

The main body of the light and the arm is made out of metal, but the knobs and handle are made out of plastic.

Nice-Foto-Review-Aputure-300D-Alternative3.gif

This is unlike the 300D, were most of the parts are made out of metal. This is where NiceFoto has saved money to make the light much cheaper.

After using this light a bunch of times it still has the feel of a high-quality product and it is going to last a long time.

The light has a Bowens mount and comes with a reflector cone. The Bowens mount is the same one you get on the 300D, so you could attach all of the Aputure Bowens attachments like the fresnel, softbox, and space light to this light.

There are loads of different Bowens mount attachments out there, which allow you to turn this light into many different types of light.

We are going to be making a video about all of the different Bowens mount attachments and how many different sources of light you can get from one light. So if you haven't already consider subscribing.

Power

The light has a very similar power setup to the 300d. First, you plug the DC cable into the light and then into the power adapter. The best thing about the power adapter is this strap which lets you easily attach it to the light stand.

This was the biggest problem we had when using the Aputure lights, as you had to hang the power and the control panel from the light stand.

Nice-Foto-Review-Aputure-300D-Alternative5.gif

This little strap makes it safer and saves rigging time on the NiceFoto light.

Next, you plug the AC cable into the power adapter, which is 5 meters long.

NiceFoto are releasing a V-Lock battery pack so you can use this light via batteries.

How have we used this light

We have used this light to bring up the general ambient light in a room by bouncing the light off the wall and ceiling.

We have used it at night to shine more direct light into our scene to bring up the exposure of our character, which is something we wouldn't have been able to do before.

We are also using it right now to light up this presenting setup. It is currently on 10% about 3 meters away shining through a shower curtain, creating a large soft light.

Negatives

One negative with this light is that it does not come with a bag. It’s an awkward shape and to protect it when in transport, it really needs a bag.

If we find one in the future that fits this light, we will add it into the description below.

Nice-Foto-Review-Aputure-300D-Alternative6.gif

Positives

You get a lot of light for the price, and that is what it comes down to. At nearly half the price of the Aputure 300D, you are getting a light which is brighter, at the same quality, and it has the same flexibility with the Bowens mount attachments at nearly half the price…

which I know I have mentioned but is worth saying again.

So who is this light for? It's for people that need a light that can replicate the sun, but also the control to turn one light in too many different sources of light.

This light holds up and beats the 300D in some categories, so if you are looking for a cheap alternative to the 300D you can find a link in the description below to the Nice Foto light.


This video was Sponsored By

🎵 http://bit.ly/pbtfl-drivingtowardthesun - Click here to download this episode's track. Check out Premiumbeat.com to discover a huge range of exclusive royalty free music!

🎥 This episode's kit/gear/equipment:

NiceFoto HA-3300B - https://amzn.to/2TN09YC


DISCLAIMERS:

Some of these links are affiliate links, if you purchase gear via these links The Film Look will receive a small commission, but there will be no additional cost to you. Thank you!

6 UNIQUE SHOTS using a Clamp Rig!

Lately, we’ve been experimenting with crab clamps.

Clamps1.gif

Our latest DIY invention is the lightweight clamp rig: it involves combining a clamp, a magic arm, and quick release plate so you can mount a light weight camera to strange and creative places.

Clamps2.gif

Today we are showing you 6 different ways you can get creative with the clamp rig to help you with your next film.

Let me preface this episode with a quick note: these clamps can be tightened very easily, so just make sure you attach them to something strong. You don’t want your camera to fall off, or even worse, damage the surface you are clamping it to! So just be cautious.

Clamps3.gif

Car Cam

The first place we tested out the clamp rig was inside a car to get some driving shots.

We found the headrest rods were a perfect diametre for the crab clamps, and because we had a magic arm attached, we were able to distance the camera from the clamp and get closer to the subject’s eyes.

Clamps4.gif

We drove around and the camera rig stayed in place. It did shake a bit when we hit some bumpy ground, but this could look like tasteful if you were shooting a scene with some fast paced action or drama.

Once we were driving on a flat, smooth road, the shot turned out silky.

Clamps5.gif

We also shot a set of french-overs. With this setup, you would actually be able to shoot 2 cameras at the same time because the headrests, and the clamps, aren’t in shot.

You can get the same type of shot with a camera op in the backseat, but if you have limited crew, this is a good option.

The last shot in the car was a 2 shot from the front. My car is old and cheap, so the dashboard is made of some sort of shiny plastic which made attaching the clamp difficult. So we stuffed in some extra rubber tape to keep it secure.

Clamps6.gif

Bookcase Cam

The next thing we tried was using the clamp rig on a bookcase.

We attached the clamp rig to the top shelf of the bookcase and positioned it looking into the room. With this shot, you can simulate a CCTV camera. This would be difficult to achieve with a tripod because of the lack of height and its spread out legs, so the clamp actually made this shot possible.

Clamps8.gif

Then we pointed the camera looking straight to the floor, achieving a very high, top down frame. This is a very strange type of angle, so using this type of shot in the film would work great if you wanted the audience to pay extra attention to something.

Clamps10.gif

Plate Cam

We wanted to go a bit weird with this next one.

Clamps11.gif

Similar to a snorri-cam setup, we attached the clamp rig to a moving dinner plate. When coupled with the journey from the microwave to the table, this shot becomes quite interesting.

Clamps12.gif

There is a lot of tell about a character by the type of meal they eat. So if you are using food to give a character or scene thematic emphasis, you can give the shot extra presence by turning it into a plate-cam!

Guitar Cam

The next thing we tried was attaching it to an instrument.

Clamps13.gif

This is a perfect shot for an interesting live session or music video. As the musician moves around the stage, the guitar seems to stick to the frame, giving us a shot with, again, a lot of presence.

Clamps14.gif

Just a quick note, before you attach the rig clamp to a guitar, ask the guitarist if it's okay, and try to pad out the clamp to relieve the pressure on the guitar to prevent any damage. We clamped the rig to my guitar, and unfortunately, it did leave a little groove in the wood. The crab clamp clearly isn’t the right tool for the job in this instance!

Clamps16.gif

So here’s a question for you guys: to achieve this shot without damaging an instrument, how would you attach the camera to it?

Toilet Cubicle Cam

Clamps17.gif

In one of our previous films, Backstage, some shots were inside a toilet cubicle. To pull of the shot we had to swap the tripod for a monopod in order to get closer to the door, and stand on an apple box in order to get the correct height.

Clamps18.gif

This is where the rig clamp comes in!

Clamps19.gif

We copied the shot from Backstage but this time we attached the rig clamp to the cubicle door frame and locked off the shot. It does mean you can no longer pan and tilt when the clamp is in place (unless you figure out how to attach a tripod head to it!), but now it’s safely up a height, pointing down, and best of all you can now open and close the door, so you won’t have to lock your talent in the loo anymore.

Discrete Shots & Timelapses

The last few things we tried were based on shooting vlogs. When a gorillapod won’t secure and a tripod is too bulky, you can use the rig clamp to attach it to things like railings if you wanted to get a shot of walking through the frame or even if you wanted to talk to the camera for a moment.

Clamps20.gif
Clamps21.gif

Lastly, we tried attaching the rig clamp to a table while we wrote the script for this very episode!

The camera is secure and out of the way: it can’t be knocked off the table during a timelapse, and there’s no chance of someone walking along and kicking one of the tripod legs.

And if someone tries to steal it, they will have a lot of trouble getting it disconnected!

Clamps22.gif

This WAS a bit of an experiment. The rig clamp isn’t perfect, we know that. But it certainly opened up some possibilities for shooting. The parts we used can be found in the description.

If you want to see more videos just like this one, hit the orange lens cap to subscribe, and remember to achieve it one shot at a time.


This video was Sponsored By

🚀 http://bit.ly/pack-emulsion - Make your video look like it was tailor-made for the silver screen with RocketStock’s film grain overlay pack, Emulsion!

🎵 http://bit.ly/pbtfl-citycruising - Click here to download this episode's track. Check out Premiumbeat.com to discover a huge range of exclusive royalty free music!


DISCLAIMERS:

Some of these links are affiliate links, if you purchase gear via these links The Film Look will receive a small commission, but there will be no additional cost to you. Thank you!

Feelworld Master MA7 Monitor Review

The Feelworld Master MA7, now that’s how to name a monitor, and is what we are going to be reviewing in this video.

This is the 4th Monitor we have reviewed on this channel, so let's see if this one is better than rest.

Build Quality

Feelworld-Master-MA7-Review.jpg

Let's start off with the build quality of the MA7. It is the best out of all of the monitors we own, as this one has an all-metal body and the others are plastic.

I still wouldn’t recommend dropping it but if you do, the MA7 should be able to take a harder hit than the others we own.

There are 8 buttons on the top of the monitor. Power, menu, 4 to navigate through the menus and 2 custom function buttons.

When you’re not using the menu it would be great if the left and right buttons were also function buttons. Currently, they are being used to change the volume as this monitor has a headphone jack.

Feelworld-Master-MA7-Review-1.gif

Having the volume controls set as 2 of the main buttons is a bit of a waste when they could be set to more useful functions you would use when shooting.

This could all change and be updated as the monitor has a USB firmware upgrade port.

I/O

Feelworld-Master-MA7-Review-3.gif

The MA7 has both HDMI in and out, which allows you to daisy-chain the video signal to another monitor. This comes in handy if you have a focus puller who is operating away from the camera or if you have a directors monitor setup.

Power

Just like all of the other monitors we own, this one can be powered via NPF Batteries or via a DC power cable.

Screen

The screen is 7 inches and has a resolution of 1920 x 1200 pixels. So it is super sharper and much is sharper than the Sony a7s camera monitor.

The screen has a 160-degree viewing angle, which means you can literally view the image from any angle.

Feelworld-Master-MA7-Review-5.gif

You will have to calibrate this monitor to make it match your camera. This takes a little trial and error, by changing the colour tones of the monitor and the backlight brightness. I would say I got the colour, contrast, and brightness to about 95% there.

We’ve had to calibrate the 4 different monitors we own, so it’s not just the Feelworld Master MA7 that requires this.

This monitor will work with 4k cameras as well, with the resolution sticking at 1920 x 1200.

Latency

The MA7 does have a latency of around 4 frames, but the other 3 monitors we own all have the same latency. We’ve used these monitors on all types of projects and you really don't notice the latency when shooting. You only notice it when you go frame by frame which you are never going to do.

Software Features

We are seeing a trend with the monitors in this price range. They all have the same software feature and most have the same interface, so let's talk about the ones we use the most.

The first function button is set to false colour, the second is set to zebras and you can even set the IRE exposure level to match up with your camera.

I personally like to always have centre markers on, and sometimes we will use the ratio markers to help frame up if we plan to add film bars in a post.

This monitor also has an audiometer which you can have a screen at all times which is a nice feature to have.

What’s in the Box

The monitor comes with 2 HDMI cables, a mini and micro so you can start using it straight away depending on which HDMI socket your camera has.

Ours also came with a battery, but you will definitely need more.

The monitor comes with a sunscreen hood. First, you have to clip on the frame and velcro the hood onto that. A problem we have found is that when you clip the frame on to the monitor it hides the graphics which indicates which HDMI socket is which, as you have HDMI in and out.

Feelworld-Master-MA7-Review-7.gif

We’ve added a little bit of gaff tape onto the frame so we know which one is which as we like to keep the frame on the monitor.

This is just a design fault and does not affect the operation of the monitor in any way, but it’s worth knowing.

You also get a standard ball head mount, which isn’t the best one we ever had, so if you are looking for a monitor mount check out our video on the AndyCine hot shoe mount.

We think it’s the best one out there. You can find a link to that video at the end of this one.

Depending on where you buy this monitor will depend on what accessories you get in the box.

If you do want to buy it you can find a link in the description, it really helps the channel out if you use it.

Price

So is this monitor better than the 3 other monitors we have? The long answer is if you are looking for a new 7-inch monitor you’ll not be disappointed with the Master MA7, especially for the price.

The monitor has a little bit of setup, but this is no different from the other monitors we have, the viewing angle is great, and it has all of the software features you need.

The most important thing is that the monitor does not slow you down and get in the way when shooting. It just works.


This video was Sponsored By

🚀 http://bit.ly/tflrs-creator - Become a social media powerhouse with RocketStock's video element pack, Creator. This collection comes packed with logo reveals, end screens, subscribe animations, and much more.

🎵 http://bit.ly/pbtfl-glamourparty - Click here to download this episode's track. Check out Premiumbeat.com to discover a huge range of exclusive royalty free music!


DISCLAIMERS:

Some of these links are affiliate links, if you purchase gear via these links The Film Look will receive a small commission, but there will be no additional cost to you. Thank you!

5 Basic Filmmaking Tools for a Faster Shoot

What do you take with you on set when shooting a film? Cameras, Lenses, lights, microphones, these are the obvious tools you would take, but what about the peculiar ones.

In this video we are going to talk about the 5 things we think YOU should be carrying when on set and why this crocodile clip is the most important one. These are the 5 things that make up my daily carry when i’m on set shooting a film. Let's start with the crocodile clip.

Crocodile Clip Filmmaking

Crocodile Clip

Before we shoot a film, we create a shot list. This will be printed off and placed in a production folder along with our storyboards and a script.

We will have a few versions of this production folder hanging around on set, with the main one being with our 1st assistant director and producer who is the person running the shoot.

At any point during the shoot, you can go to your 1st AD and check the script, storyboard or the shot list with them.

As the DP I want to spend as much time next to the camera as possible, so I always create a smaller version of the shot list and clip it to my right front pocket. This means all I need to do is look down, see what shot is next and move on to that shot.

crocodile clip - Shot list

I’ve found this to be a great way to be more efficient on set, and it allows our 1st AD to concentrate on directing other areas of the production, but I always know they are there when I need them.

This also comes in super handy if you have a very small crew or you are your own 1st AD, DP, and director. Having this shot list clipped to you means you spend less time away from the camera finding and looking for the shot list.

Even if you are just a runner or production assistant, ask the producer or 1st AD if they have a spare shot list for you to have. This way you can keep up and be prepared with what is happening on the shoot, and they will be impressed you took the initiative to ask for one.

Torch

Filmmaking Torch

You can use a small torch like this to shine on your clapperboard when shooting in a dark situation. This means you do not need to change the exposure of the camera to be able to capture and read it.

Also during a shoot, when changing rig parts, it has come it handy to shine a light on HDMI sockets when trying to plug a cable in and to shine in a bag when looking for another piece of equipment.

It’s much easier than getting your phone out, unlocking it, finding the torch app and turning it on.

Gloves

dirty rigger gloves

I use these dirty rigger gloves when carrying and rigging up equipment, but also when operating the camera handheld as they give you that extra level of grip.

These ones have a hole already in them so you can put a carabiner through and clip it to your belt holder. I clip mine to one of the back clips so they do not get in the way when I’m not wearing them.

Multi-tool

The two tools I use on this multi-tool are the pliers to help to tighten up camera rig screws and also the flathead screwdriver for camera plate screws. I use the flat head screwdriver the most so I added a little gaff tape tab to it so I can quickly see and access it.

This multi-tool is very cheap but the quality of it is super high and only costs around £11 or $20.

The reason I went with such a cheap one is that I did not know how much I would use it, which turned out to be only when we are shooting films.

A piece of advice we always give to people is before you buy equipment, is to work out how many times you are going to use it, which will tell you if you really need it.

If I went out and bought something like a Leatherman which is anywhere from £70 to £100. That’s a lot of money just sitting there waiting to be used when the cheaper version was the better option, for me anyway.  

Pen - Notebook

Filmmaking Notebook

The last thing I carry is a pen and a small notebook that fits in my pocket. I use this to refer back to notes or make them. The pen also allows me to cross off a shot when it is completed on the shot list.

Links to everything I have mentioned can be found in the description below.

🎥 This episode's kit/gear/equipment:

🇺🇸 US links:

Crocodile Clip - https://amzn.to/2PYxGwB
Multi-Tool - https://amzn.to/2Q90jHS
Torch - https://amzn.to/2JntJzc
Gloves - https://amzn.to/2ENTD0o
Pen - https://amzn.to/2PYwBVz
Note Book - https://amzn.to/2Q3Q8Ea

🇬🇧 UK links:

Crocodile Clip - https://amzn.to/2zaVrul
Multi-Tool - https://amzn.to/2OX4wln
Gloves - https://amzn.to/2OdWnDI
Torch - https://amzn.to/2EKK3eG
Pen - https://amzn.to/2CMnJyS
Note Book - https://amzn.to/2OYstbI

Things I don't carry when shooting on set are my keys and generally my phone which I store in my bag. The reason for this is because I don’t want to have any distractions when shooting and phone notifications can do this.

If you are using a phone on set make sure it is for production or emergencies uses. Otherwise, it can look very unprofessional.

This is just a personal preference and the only thing I would use my phone for is the time, but I have a watch for that so I guess I carry 6 things.  

This is just my daily on set carry, but there are a bunch of other pieces of filmmaking equipment you might need. We actually made a video that shows what our 2nd assistant camera person carries when shooting. His utility pouch puts Batman to shame and it always has everything we need when shooting and is probably the reason I carry so little.

You can find a link to that video via a card in the corner of the screen or in the description below.


This video was Sponsored By

🚀 http://bit.ly/rs-aspect - Give your video a clean look with Aspect by RocketStock. It features over 200 logo reveals, intros, lower thirds, overlays, icons, and transitions.

🎵 http://bit.ly/track-hot-fusion - Click here to download this episode's track. Check out Premiumbeat.com to discover a huge range of exclusive royalty free music!


DISCLAIMERS:

Some of these links are affiliate links, if you purchase gear via these links The Film Look will receive a small commission, but there will be no additional cost to you. Thank you!

Cheap Filmmaking Clamp

Cameras, lenses, lights, and microphones. These are the pieces of filmmaking equipment that get us the most excited when talking about equipment, but what about clamps?

In this video, we are going to be talking about these crab clamps, and how having a bunch of them can help you set up equipment in difficult and creative places.

Welcome to The Film Look.

We’ve had one of these Small Rig crab clamps for a while now.

The amount of uses we’ve had from just one is quite amazing, so we asked SmallRig if they could send us a few more for us to put them into some filmmaking tests!

The crab clamp is an all metal product with rubber grips and has 1/4"-20 and 3/8" thread. The clamp has a maximum opening of 44mm and a minimum of 15mm which is perfect if you are going to attach it to 15mm rods. More on that later!

Crab-Clamp.gif

You CAN buy the crab clamp on its own, but we decided to get the small ball head magic arm which fits into the 1/4"-20 thread on the clamp. It also has a 1/4"-20 thread on the other end of the arm which allows you to attach many different types of filmmaking equipment.

Crab-Clamp-1.gif

Magic arms come in all shapes and sizes and it’s always handy to have a bunch of different ones.

Just like all the SmallRig products we own (and we have quite a few), this clamp is at a high standard of construction.

Crab-Clamp-2.gif

The clamp gets a stronghold with little effect and the adjustable handle makes it easy to get it tight or slack.

One of the main uses we have found for the crab clamp is attaching a small LED panel to it.

We use these LED panels as an edge or hair light, which is what we using right now. We have the clamp attached to the bookcase behind us.

This combination allows us to stick the light in a load of places without the need for a light stand.

Instead of using the house lights in your location, you can clamp your own lights which will give you a great level of control over the brightness, shape and colour.

This type of setup works great if you’re shooting a long take with your character walking through a location.

You could add colour to those lights to help change the tone of your film.

Crab-Clamp-3.gif

The clamps can also be used to attach a light or monitor to the 15mm rods on a shoulder rig. By doing this, you have more mounting options to suit how you would like your rig to be set up.

Also, by adding this AndyCine monitor mount to the magic arm, you can quickly adjust the angle with one hand.

We made a video all about this mini hot shoe mount, which you can find here.

The max load of the clamp and ball head is around 1 Kilogram. We tested the strength of the clamp and magic arm by attaching our larger LED panel, an Aputure HR672c, with two Sony NPF batteries and it held the weight.

The same went for the camera. We took it out of the cage and stuck a 35mm lens on the front. Now we can clamp the camera in places we could not before.

Crab-Clamp4.gif

Just make sure what you are clamping to is safe and secure. Safety is always key.

This clamp is perfect if you have a GoPro or if you are a phone shooter as you could purchase a phone mount like this one which has a 1/4"-20 thread screw mount.

If your light does not have a 1/4"-20 or 3/8" thread BUT you have 2 crab clamps, you can connect two together and create something we are calling The Double Crab Clamp.

Clamp one end to a surface and the other to the non-threaded mount and away you go.

Considering how many uses we have found for the crab clamp and how much it costs, which is around £9 or $11 not including delivery, we think it's a great piece of kit to always have in your grip bag.


🎥 This episode's kit/gear/equipment:

Small Rig Crab Clamp -

US links:

AndyCine Monitor Mount - https://amzn.to/2A18lMZ

Smartphone Tripod Mount - https://amzn.to/2PN9cGP

UK links:

AndyCine Monitor Mount - https://amzn.to/2Ogao8T

Smartphone Tripod Mount - https://amzn.to/2PKD1aQ


This video was Sponsored By

🎵http://bit.ly/track-under-the-spotlight - Click here to download this episode's track. Check out Premiumbeat.com to discover a huge range of exclusive royalty free music!


DISCLAIMERS:

Some of these links are affiliate links, if you purchase gear via these links The Film Look will receive a small commission, but there will be no additional cost to you. Thank you!

The Best Camera Monitor Mount

The guys over at AndyCine sent us a low profile hot shoe mount which we think is worth shouting about!

Today we are going to talk about its features, the many different ways you can use it, and why we like it so much!

Welcome to The Film Look.

It doesn’t look like much, but it packs a punch. We were sceptical about making a review for a product so small and basic, but MAN we were surprised when we started using it!

AndyCine Mini Hot Shoe Mount.jpg

It has 360 degree rotation and 176 degrees of tilt. This is great if you need to flip the monitor for self-shooting, as well as positioning a monitor when shooting at some extreme angles.

AndyCine-Mini-Hot-Shoe-Mount.gif

It’s made entirely out of aluminium (or aluminum), which makes a great change compared to other budget hot shoe mounting systems.

We’ve had a bunch of mounts in the past, and the ones that feature some plastic parts usually break before you can get them tight enough.

It has a ¼ 20 screw on the top to attach monitors, lights, and other bits, and features a cold shoe attachment at the bottom for attaching to cameras as well as a ¼ 20 thread so you can attach it to things like light stands.

AndyCine Mini Hot Shoe Mount 2.jpg
AndyCine Mini Hot Shoe Mount 3.jpg

One thing that this hot shoe mount DOESN’T have is the ability to hand tighten.

Instead, it comes with a small allen key to adjust the tension on the rotation and tilt, so you can get it rock solid or loosen it off if you want some play to it.

AndyCine-Mini-Hot-Shoe-Mount2.gif

What makes this better than other methods, in my opinion, is you can find that sweet spot where it will hold in place, but you can also adjust it without having to loosen it off completely. It makes setting up the shot fast and efficient, perfect for run and gun shooting.

You will need to carry an allen key around with you if you need to tighten it up on location, but I don’t consider it a big issue considering the advantages of this feature.

The hot shoe mount comes with a bunch of extras.

AndyCine-Mini-Hot-Shoe-Mount4.gif

You get a handy padded tool case as well as a bunch of screw bits and a flat-profile wrench ...which even opens beer bottles.

I also love the size and weight of this mount. It weighs only 45g and its dimensions are 4.5cm by 3.5cm by 3cm. So basically, it’s tiny and really light!

We have used things like magic arms in the past to mount camera monitors to rigs before, and although they provide a lot of flexibility, they can be difficult to re-position and keep tight (at least the budget ones we’ve used).

The best mounting option we’ve seen for run and gun filmmaking has been the articulating arm you see on monitors like the SmallHD Focus and AndyCine A6, with its swivel-tilt feature/

But this hot shoe mount seems like the better option considering you can rotate and tilt.

So this mount is light, small, strong, and flexible, but the best thing about it is when you start to connect to it other products.

First thing we tried was connecting it between our shoulder rig and a magic arm. Like I’ve mentioned earlier, repositioning a magic arm can be annoying as you have to slacken it off, adjust it, try to hold it in place, then tighten it up again.

AndyCine-Mini-Hot-Shoe-Mount5.gif

This is even more difficult if you are trying to adjust it while it's on your shoulder as you really need two hands to get it positioned properly.

By adding the hot shoe mount onto the magic arm, it means you can easily re-position the monitor with one hand without assistance from someone else.

AndyCine-Mini-Hot-Shoe-Mount6.gif

The next thing we tried was attaching it to a crab clamp. The clamp we have already includes a ballhead arm which gives you a lot of flexibility, but it's another mount which is either locked or unlocked. By adding the hot shoe mount, it means you can make slight adjustments without having to reset the lock.

AndyCine-Mini-Hot-Shoe-Mount7.gif

We will be reviewing this crab clamp by SmallRig in the next coming weeks. If you want to see all the ways you can use this thing to help you make films, get subscribed!

You might use this one - you might not - but, if you have a video mic on top of the camera, the hot shoe mount will give you the ability to offset the direction of the microphone. This could be handy if you are framing someone out of centre but you want to keep the microphone directed towards them.

In all honesty, if you are recording sound during an interview, placing the microphone on the camera is usually a bad idea. We have a video talking about that. There is a card in the corner and a link in the description. But, in a pinch, you may find this technique useful.


This video was Sponsored By

🚀 http://bit.ly/pack-emulsion - Make your video look like it was tailor-made for the silver screen with RocketStock’s film grain overlay pack, Emulsion!

🎵 http://bit.ly/pbtfl-1970sbrazil - Click here to download this episode's track. Check out Premiumbeat.com to discover a huge range of exclusive royalty free music!


DISCLAIMERS:

Some of these links are affiliate links, if you purchase gear via these links The Film Look will receive a small commission, but there will be no additional cost to you. Thank you!