Production

Still The Best First Lens to Buy | Canon 50mm F1.8 Review (6 Years On)

Is the Canon 50mm F1.8 or the nifty fifty any good in 2019?

Well, we still use it even after 6 years and think it is still the best first lens to buy, even if you are not using a Canon camera.

We have been using this lens for about 6 years now and first used it on the Canon 600D, but this lens has actually been out for 28 years. It was first introduced in 1990 a couple of years after Canon brought out the EOS mount system.

Canon-50mm-1.8-Lens-Review-1.gif

The one we have was probably manufactured 7 or 8 years ago, but the design and build are the same as the ones from 1990.

After moving from a crop sensor Canon to a full frame Sony, we adapted all of our Canon lenses to Sony mount with a commlite adaptor.

There aren’t too many new Canon 50mm F1.8 mark 2s out there, but you can pick up a second hand one for around £50.

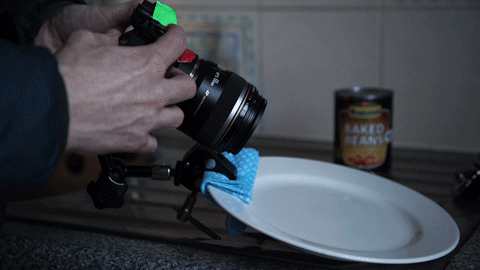
When you shoot at F1.8, the centre of the lens isn’t that sharp and looks out of focus, as you can see when we’ve shot straight against a flat wall. When you look at the edge of the frame the image has started to become more out of focus from what it is in the centre.

Canon-50mm-1.8-Lens-Review-2.jpg
Canon-50mm-Lens.jpg

This happens with a lot of lenses when you shoot wide open, but when you start to change the F-Stop to F4 or F8, the focus naturally gets sharper from the centre of the frame to the edge.

You’ll find the Canon 50mm sharpness sweet spot is around F4 and F5.6.

But shooting at a lower F-Stop like 1.8 will give you that sweet looking bokeh which we all love, so there is a trade off.

Canon-50mm-1.8-Lens-Review-3.gif

When you are shooting between 1.8 and 2.8 you will get a lot of lens flares and your image will be milky if you are shooting in situations where there is a bright and direct light.

This is a cool effect if you want it, but to avoid it you can simply shoot at an f-stop of 2.8 or higher. This will give you a cleaner image.

Canon-50mm-1.8-Lens-Review-4.gif

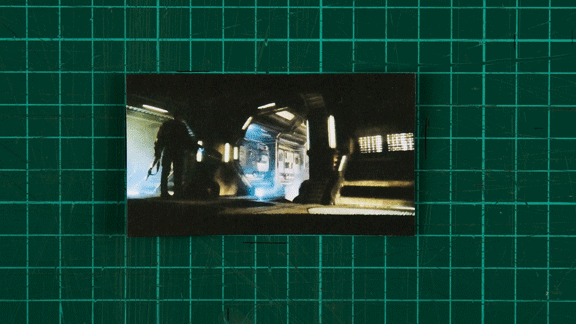
When you first get this lens you will likely shoot everything at F1.8 because it looks cinematic, but you will soon realise that shooting everything at F1.8 can make your footage look amateurish if you can’t keep your subjects in focus.

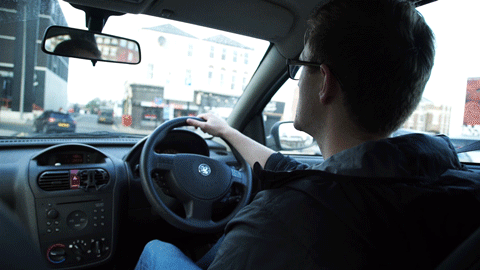
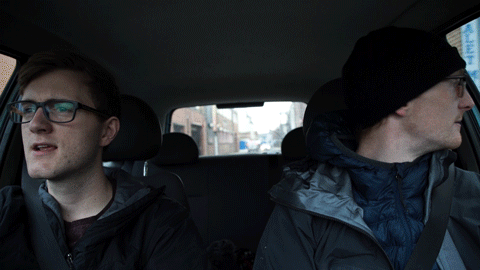
When we first got the canon 50mm 1.8 we shot everything at 1.8, mainly because it’s fun and we had the ability to do so.

But we soon realised that the depth of field at 1.8 will be from the person's eyes to the tip of their nose. This is fine if you are shooting a static subject as you can focus on the person's eyes and they will stay in focus throughout the shoot.

If your subject is moving around however, you will find it very difficult to keep them in focus when shooting at f/1.8.

So when shooting on a 50mm try shooting at F2.8 or F4.

Canon-50mm-1.8-Lens-Review-5.gif

This is where the Canon 50mm performs the best. You get a sharp image with some nice shallow depth of field, but it keeps the focal plane a lot more manageable when focusing on a moving subject.

50mm on a full frame camera is known as a standard field of view as its roughly the field of view as your eyes, giving your image a very natural and pleasing look.

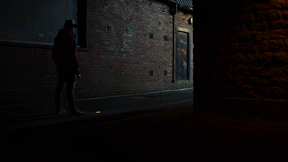
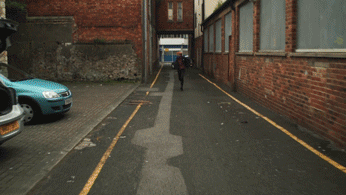
The Canon 50mm does give you the ability to shoot in low light situations because of that F1.8 aperture. This comes in very handy when we were shooting on the Canon 600D as you could not push the ISO past 800 before the image becomes too noisy.

Shooting on newer cameras like the Sony A7s has changed that. In a low light situation, we can shoot at F8 with an ISO of 5000 and the image is still clean.

So depending on the camera you have and the situation you are shooting in, work out a good balance between shooting at a low F-Stop and bumping up ISO so you have a manageable shot and a clean enough image.

The construction of the Canon 50mm lens is all plastic, but this has not really been a problem. We’ve been using it for 6 years now, there are a few marks on it but that is just general wear and tear. Even after all this time, we’ve yet to drop it. The glass is still clean, and there is even a video of someone taking a hammer to the glass and it doesn’t break.

Canon-50mm-Lens-Hammer.gif

Links to that video can be found below but I wouldn’t recommend doing this, especially to the body of the lens.

The focus ring on the Canon 50mm lens is its biggest downside as it is very thin. There is not a lot of room to grip onto the focus ring when manually focusing. It’s not very smooth and it doesn’t sound great when you turn it.

Most lenses we have used have a long focus throw which is simply how much you have to turn the focus ring to go from macro to infinity focus on a lens. A long focus throw gives you the ability to do fine focus adjustments and be a lot more accurate when focusing.

Canon-50mm-1.8-Lens-Review-6.gif

These manual vintage lenses have a very long throw, and if you have even seen cinema lenses, they have a massive throw and are extremely accurate.

The Canon 50mm has a very short throw, so when pulling focus, it is very difficult to be accurate and hit the same focus marks consistently.

Canon-50mm-1.8-Lens-Review7.gif

It does take practice to get used to the small focus ring and it might just take a couple of more tries to nail your focus when shooting.

When shooting a short film, we use a wireless follow focus which is operated by a 1st AC. Unfortunately, you’ll find it very difficult to use this lens with a follow focus because the focus ring it too thin to attach a focus gear properly.

But this isn’t really a problem for most people, especially if you are just starting out.

We have used the Canon 50mm 1.8 on Canon and Sony Cameras, and we would definitely recommend picking one as they are so cheap.

We’ve never used one on a GH4 or GH5, but if you have, let us know in the comments below about what you think about the lens. We’d love to give people advice about using this lens on that camera system.

If you are just starting out I would highly recommend getting this lens. It will allow you to learn about shooting at low F-Stops, focus, image quality, and also get your images looking like a film with the shallow depth of field and the natural, pleasing look you get from a 50mm lens.

Yes, there is a lot that goes into making your image feel and look like a film; you need props, costumes, locations, lights, good sound, and a solid performance from your actors. But when you are just starting out, and you just want to shoot some cool looking footage, this lens will allow you to do that whilst learning all the other things.


DISCLAIMERS:

Some of these links are affiliate links, if you purchase gear via these links The Film Look will receive a small commission, but there will be no additional cost to you. Thank you!

Cheap RGB Light | AL-360RGB Review

For 5 years now we have been using these 160 LEDs. The technology in them is old, the colour of them isn’t great, and the battery connection has started to go. So it was time to upgrade.

We have reviewed two AndyCine products in the past and they reached out at the right time to see if we wanted to review their new 16W LED light which is also RGB and has 360 different colours to choose from.

We obviously said yes, and that’s what we will be reviewing in this week’s video.

CHEAP RGB LIGHT  AL-360RGB REVIEW 1.gif

The AL-360RGB light has a max output of 16 watts. You can cycle from 3200k to 5700k, with the brightness staying at around 16 watts throughout the different colour temperatures.

When using the RGB mode on the light, most colours look like they use the full 16 watts of power, which is very impressive for a light of this size and price. Some colours look a little darker but this is just down to the shade of the colour.

You can change the brightness of the light a percentage at a time, all the way down to 10% and the colour temperature can be adjusted by 50 Kelvin at a time.

To access the RGB mode you simply press in the CCT/HUE button and use the dial to go through the 360 HUE colours.

CHEAP-RGB-LIGHT--AL-360RGB-REVIEW-2.gif

When turning the dials to control the brightness, colour temperature, or RGB colour, you can turn the dial one notch at a time to change the setting slowly. If you want to make a big change to the settings you can turn the dial quickly.

This is a nice feature to have so you are not spending a lot of time cycling through the settings if you know the one you are looking for.

There is a little screen on the back of the light which is quite dim and isn’t the clearest, but it does have a battery indicator and all of the settings information. It’s a nice little feature to have on such a small and relatively inexpensive light.

CHEAP-RGB-LIGHT--AL-360RGB-REVIEW-3.gif

The light can be powered via NPF batteries or via an 8.4v DC cable. One of the main uses we’ve had for this light is to add a coloured edge light when shooting product footage for this channel. Sometimes we can be shooting for an hour or two with the light always on, so having the ability to run the light directly from the wall is a feature we have been taking advantage of.

If you use one of these 970 NPF batteries you will get a run time of around an hour and a half with the brightness staying consistent until the battery hits about 10%.

In the past, we have used coloured gels to get different coloured edge lights. It’s worked well in the past, but with this new light, we have the ability to choose between 360 colours with a turn of a wheel. No need to faff with cutting and attaching gels.  

Each colour has its own reference number displayed on the screen. This allows you to record the colour you have used for future reference or have the ability to dial in the same colour on multiple lights.

CHEAP-RGB-LIGHT--AL-360RGB-REVIEW-5.gif

If you are shooting in a dark situation or have complete control of the light that’s in your scene, you could use this light as a key light. Most of the time this light would be used as an edge or hair light for a subject, and also to paint coloured light on a product or a background.

RGB LED lights are the next trend in lighting with lots of companies bringing out big expensive RGB lights. We have this one from LEDGO which we will be reviewing soon.

In the box you receive a light stand mount which allows you to tilt the light with ease. It is made out of plastic just like the rest of the light, but with the light being super lightweight it should last a long time.

One downside to this light is that it does not come with a battery or a DC cable to power it. It’s an extra expense you will need to make if you are thinking about buying this light. You can’t use it straight out of the box, unfortunately.

I’ve linked to an article in the description below from someone who has taken this light apart and tested it to the max, check it out if you are into that kind of stuff.

CHEAP-RGB-LIGHT--AL-360RGB-REVIEW-4.gif

Seeing the rapid RGB technology filter down into a budget light this small is really good to see as it makes it super accessible for low budget filmmakers like us.

I really like this light; it gives you the flexibility to switch between colour temperatures and is an upgrade from our older 160 LED lights, but the best feature is the RGB mode. Having that feature in such a small light gives you creative freedom with ease. We will not be messing around with gels for much longer.

🎥 This episode's kit/gear/equipment:

🇺🇸 US links:

AL-360RGB - https://amzn.to/2ChD74f

🇬🇧 UK links:

AL-360RGB - https://amzn.to/2H7yyze


DISCLAIMERS:

Some of these links are affiliate links, if you purchase gear via these links The Film Look will receive a small commission, but there will be no additional cost to you. Thank you!

$600 vs $60 Mic | Rode NTG3 vs Rode VideoMicro

The Rode NTG3 vs the Rode VideoMicro. One is $600. One is $60. One is 10x the price than the other - but is it 10x better?

Mic-Battle.gif

Today we are going to find out! Welcome to The Film Look.

We are giving each microphone a like-for-like comparison in some quintessential sound recording situations.

First up, our presenting setup.

When we present an episode, we boom a microphone overhead and plug it straight into the camera. We use the NTG3, and we have an SmartRig XLR phantom power adapter to convert it and plug it straight into the camera.

Mic-Battle3.gif

The VideoMicro on the other hand, uses a 3.5mm jack, so it doesn’t need an adapter, just an extension cable.

When you compare the sound of these microphones side by side, it is clear the NTG3 sounds more full and clear whereas the VideoMicro sounds a little tinny. But considering the VideoMicro is only a tenth of the price, it’s holding up really well.

To give the VideoMicro a fighting chance, I’m going to tweak the EQ and attempt to match it to the NTG3. Let me play those clips again.

Mic-Battle4.gif

This is sounding much better. In all honesty, now the VideoMicro sounds just as good as the NTG3 in this setup.

But what about if we are shooting a wide shot?

Mic-Battle5.gif

Booming the microphone in the same position as earlier will place the microphone in frame, so we must move the microphone further back. Let’s see how both mics handle booming from a distance.

Positioning the microphone from a long distance is the worst way to record sound; you get a lot of noise, low levels of dialogue, and it picks up a lot of acoustic tone in the room. From my ears, both microphones sound very similar. And similar being, both pretty rubbish.

So what about setting up a plant mic?

Mic-Battle6.gif

Because the VideoMicro is so small, it can easily be hidden in the shot, such as in a car, taped to the sun visor.

You just need to get creative and find a place to hide it close to your subject.

The NTG3, on the other hand, has a harder job of being so sneaky.

Mic-Battle7.gif

We have a video about different ways to record dialogue in a wide shot if you want to see some more methods.

Next up, we have foley.

Mic-Battle8.gif

We will record some clothing foley in a quiet room with the microphone really close. The environment needs to be silent and the microphone needs to pick up the nuances in the sound.

I’ll be recording in sync with our film Backstage, recording clothing foley for the Medium.

Mic-Battle9.gif

The NTG3 is an obvious winner. The higher sensitivity means it can record subtle noises a lot louder than the VideoMicro. So when the volume is balanced between both mics, the VideoMicro introduces a lot more noise into the sound.

NTG3.jpg
VideoMicro.jpg

So to conclude: The NTG3 is obviously a better microphone, that comes with the obvious higher price tag. It is more sensitive, so it records a cleaner and more well-rounded sound. It's perfect for recording high quality sound on short films.

But the VideoMicro also has its place. We use it when recording behind the scenes because it's so easy to set up on top of the camera.

Mic-Battle10.gif

It also wins in the “not breaking the bank” category, so if you are looking for a budget option, you CAN still record good sound for a short film with this microphone.


This video was Sponsored By

🎵 http://bit.ly/pbtfl-spinningcircles - Click here to download this episode's track. Check out Premiumbeat.com to discover a huge range of exclusive royalty free music!


DISCLAIMERS:

Some of these links are affiliate links, if you purchase gear via these links The Film Look will receive a small commission, but there will be no additional cost to you. Thank you!

Small Rig Cage for Blackmagic Pocket 4K

To be able to use the black magic pocket cinema camera 4k to its full potential you need an external battery source and an external SSD to be able to record at the highest level of quality.

This means this camera is going to need a cage to hold all of this extra stuff.

SmallRig-Cage-for-the-Blackmagic-Pocket-4K.gif

In this video, we are going to be reviewing the Small Rig cage for the black magic pocket cinema camera 4k.

We reviewed the black magic pocket cinema camera 4k in the last video, so if you haven't seen that you can find the video here to see what we thought about it.

We have been using cages for our Sony a7s cameras for a few years now and without them shooting would be a lot more difficult. The same goes for the pocket 4k. Without a cage, the camera is just about unusable, especially if you’re shooting all day.

To shoot at the highest quality you need to use an external hard drive, but there's nowhere to mount it. Also, the battery life sucks so you need to use an external battery solution, and again there is nowhere to put it.

SmallRig-Cage-for-the-Blackmagic-Pocket-4K-1.gif

This is where the smallrig cage comes in. The cage is one piece of metal and has a bunch of mounting options. ¼ 20, ⅜, Rosette mounts for extra handles, and cold shoe mounts.

It fits the camera like a glove, and when holding it in your hand, the cage is curved and seamlessly joins the camera.

SmallRig-Cage-for-the-Blackmagic-Pocket-4K-2.gif

Next, we have the top handle. Small Rig has a few different top handles which will fit this cage. This one can change position and slide forward by turning these two screws. The best bit about this is that the Allen Key you need is magnetically stored on the handle.

the Allen key that you use to fix the camera in the cage is also magnetically stored on the bottom of the cage. This means you never have to go looking for the correct Allen key. It’s just there.

Having them magnetically stored on the cage is something I wish I had on my Sony A7s cage, as I take it in and out of the cage a lot.

SmallRig-Cage-for-the-Blackmagic-Pocket-4K-4.gif

Small Rig has designed an SSD holder which you mount onto the cage. You feed the cable through the front and tighten the hard drive in place.

This SSD holder is designed for the Samsung T5 SSD’s, but these Angel Bird SSDs also fit into the holder with a little bit of a wiggle.

Finally, you get this cable clamp for your HDMI and USB type C cable you use for the SSD. This just makes sure your cables are safe and secure.

SmallRig-Cage-for-the-Blackmagic-Pocket-4K-5.gif

With the cage, we have mounted our external battery solution which allows us to extend the battery life. Our DIY battery didn’t work great and the battery life kept dropping. So I would look into a different way to power the camera, maybe something that uses the 12v power input on the side of the camera.

But the smallrig cage has loads of room to mount something.

Just like all SmallRig products (and we have a few) everything is built to a high quality and they have a bunch of other accessories for all sorts.

Without the SSD holder and the ability to mount an external battery on to this camera, I don’t think we would use it. So spending an extra $190, which is how much all of these parts cost, is definitely worth the investment if you have a pocket 4K camera.

SmallRig-Cage-for-the-Blackmagic-Pocket-4K-6.gif

If you haven't seen our review on the Pocket 4K camera you can find that video here. Let us know in the comments below if you are thinking about buying one too and remember to achieve it one shot at a time.

🎥 This episode's kit/gear/equipment:

SmallRig Website - https://www.smallrig.com/

Cage - https://goo.gl/yj7w5H

Harddrive Mount - https://goo.gl/26Er3h

Cable Clamp - https://goo.gl/JUYnGx

Top Handle - https://goo.gl/opEJZ8


This video was Sponsored By

🎵 http://bit.ly/pbtfl-chillhopjazz - Click here to download this episode's track. Check out Premiumbeat.com to discover a huge range of exclusive royalty free music!


DISCLAIMERS:

Some of these links are affiliate links, if you purchase gear via these links The Film Look will receive a small commission, but there will be no additional cost to you. Thank you!

Blackmagic Pocket Cinema Camera 4K Review

The black magic pocket cinema camera 4K has an unnecessarily long name, but the camera packs a lot in for the £1100 price tag.

So if you’re looking to upgrade your camera or buy your first camera, is the pocket 4K worth it?

Black-Magic-Pocket-4K-Review-1.gif

We’ve been putting one to the test for the past few weeks and we are going to be reviewing it in this video.

Just to say up top, BlackMagic did send us over the pocket cinema camera 4K, but everything we say in this video is our honest opinion.

Tests

With every piece of filmmaking equip ment that we review, we always like to use it on a production and put it into real world shooting condition. With the Pocket 4K we have used it to shoot episode footage for this channel which is something we do daily, and we have also used to in a screen test for our next short film.

Since we have been shooting on the Sony a7s Mark I for about 2 years, and use it to shoot everything, we will be comparing it to the pocket 4K when we can.

Black-Magic-Pocket-4K-Review.gif

Features

Today’s video is certainly a user review and not necessarily a spec review. I’ll be speaking about the features I think matter when making films. But I have added a link to the black magic website if you want more details.

Interface

The black magic interface has got to be one of the easiest to use. With having a 5-inch touchscreen, the layout and buttons are big, it's easy to flick through and adjust the settings.

Black-Magic-Pocket-4K-Review-2.gif

When shooting with the camera, the record button is big and in a normal place, unlike the Sony A7s record button. In fact, the pocket 4k has two record buttons, but I am not too sure why it is here.

To change the setting on the camera, you select them on the screen and change them from there, or use the jog wheel on the front. On top of the camera, you have the most common buttons to change your ISO, shutter and white balance, and you can change to f/stop with the jog wheel.

Also, you have three custom function buttons which can be set to things like false colour, Zebras, grids, safe areas, also to turn a LUT on and off which is essential if you’re shooting with a flat picture profile.

Black-Magic-Pocket-4K-Review-3.gif

Recording Format and Resolution

With this camera, you have a bunch of recording formats to choose from.

Which is great to have if you are going to be using this camera to record a bunch of different projects like films or YouTube Videos.

If you are shooting a short film you’re most likely going to shoot RAW. You might as well as you have this camera. With RAW you will get the greatest level of control over your image in post-production you can change the white balance, you have more information to recover your highlights, colour grade, and noise reduction.

More on post-production later on.

You can record onto an SD card, C-fast card, and an external SSD. If you want to shoot at the highest quality you will need to buy external SSD to record onto. The SD and C-Fast card cut out after about 30 seconds because of the size of the RAW recording.

Black-Magic-Pocket-4K-Review-4.gif

In fact, the best value for money and capacity is an external SSD, as you can get a 500GB card for around £120. A 128GB C-Fast card will cost you 2 or 3 times that, depending on where you by it.

We have a 512 GB SSD. At 4K RAW Lossless you get 15 minutes of record time. For us this file size and the record time is unmanageable, but the camera can also record 4K RAW at 3 to 1 and 4 to 1 which is a reduced quality but you get a much longer record time and there is not a great difference in quality.

When shooting a film we would probably shoot at RAW 4 to 1.

Like us, if you shoot on a daily basis and make videos for YouTube, shooting RAW is again unmanageable in terms of hard drive capacity and unnecessary levels of image clarity, but the camera has a few different flavours of ProRes codecs and quality levels to shoot at.

For a recent video on our channel, we recorded the footage in a mixture of RAW and ProRes at different qualities and it all mixed together well. I even turned a 4K RAW Lossless clip into a gif for social media.

Black-Magic-Pocket-4K-Review-5.gif

That video was 5 minutes long with a project file size of 131 GB. On average, other videos of that length when shot on our Sony a7s have a total project file size of 20 GB.

For YouTube videos we would probably shoot Pro Res 422, as it has a good balance between quality and file size.

Image Quality Comparison

We pre light our short film 60 Seconds and tested the Pocket 4k. We recorded at a number of different formats and resolutions so flick through them to compare.

Inputs

This camera has a 3.5mm microphone and headphone port. You can plug in a full-size HDMI cable, it has a 12v power port so you can run the camera from a wall socket. A USB-C port for external hard drives, and a mini XLR port.

Black-Magic-Pocket-4K-Review-6.gif

This allows you to plug in a mini XLR to full XLR cable into the camera. This is a great feature to have as you don't have to buy extra equipment like this smart rig converter box which we currently use.

When we tested this out and monitored the audio through headphones whilst recording, the audio was delayed from the video and sounded like this.

The footage was all in sync in the final clip, but it made it impossible to monitor the audio whilst recording. Hopefully, this can be fixed in a firmware update because it is a big problem.

Investment

This camera is an investment. You will need to build up the camera to be able to use it efficiently when shooting, but this is very similar to most cameras out there like our Sony a7s.

The first thing you will want to get after the camera is a cage as this will help you mount the other accessories you need for the camera. The cage we have is from SmallRig, it comes with a top handle, HDMI clamp, and hard drive mount.

Black-Magic-Pocket-4K-Review-7.gif

We have a full review of the cage in the next video, which you can find here if you are watching this in the future.

The battery life of the camera sucks and the LP-E6 battery will last about 30 minutes. So you will either have to buy a bucket load of LP-E6 batteries or work out some form of external battery solution.

We used a dummy battery and our DIY NPF mount, but the results weren’t great. A battery at 100% dropped straight down to 60 or 40%.

This could have just been our battery setup, so if you are thinking of getting the pocket 4k look into other external battery setups. Especially ones that run through the 12v power input which is on the side of the camera.

Like I said earlier, external SSDs are at the best option to record onto and having a cage like this will allow you to mount one and not just have it dangle down.

Black-Magic-Pocket-4K-Review-8.gif

If you are going to be shooting all day you will need to buy a few SSDs to get you through a whole day’s shoot. The other option is to have a computer nearby so you can copy the footage off the card.

If you have to do this whilst shooting a film, you would have someone whose sole job it is to ingest the footage off the card and onto the computer, this person is called a DIT.

Most of the time it’s difficult to find someone who can record sound on your film, so a DIT is a bit of a luxury for us indie filmmakers.

Post Production

If you want to shoot RAW, you’re going to need hard drive space for your computer, but the next investment is having a computer that can handle the workflow of editing RAW.

To process the footage you're going to be going through DaVinci Resolve which is an amazing program for being free.

Black-Magic-Pocket-4K-Review-9.gif

I am not going to go into any more detail about the RAW editing workflow in this video, but I have linked to a good tutorial in the description below.

In the past, I have edited a film which we shot in RAW on a laptop that could not handle the workflow, and it was very difficult to play back the edit and be creative. So some advice, make sure your computer system can handle the workflow before you buy this camera.

We have good computers that can handle the RAW workflow, I’ve linked to two videos below about the 2 computers we use if you want to check them out.

When grading your footage, DaVinci Resolve is the king. Again, it’s amazing that this program is free, and I am not getting paid to say that. There is a big learning curve with the program, especially when it comes to grading. So you want to spend your next investment learning it.

If you are looking for Resolve tutorials, check out Izak Jackson’s channel. He’s got a bunch on DaVinci Resolve and some other great videos too.

Shooting RAW will give you the greatest level of control over your image, compared to shooting at H.264 on the Sony or even ProRes on the Pocket 4K. The image will be sharper, you can correct mistake a lot easier by having the ability to adjust the ISO and white balance in post. There are just fewer compromises you have to make when trying to achieve the film look you want.

Who is this camera for?

So after all of that, who is this camera for? We have used it to shoot episodes for this channel and test shot for our up and coming short film. For our YouTube videos, we wouldn’t really use the camera. As we make 8 videos per month the file sizes are just too high and we would be buying new hard drives every month.

To shoot a film, which we do 2 to 3 times a year, we wouldn’t mind the extra production expense we would need to spend on hard drives VS the quality of image we would get. Since every film is a one-off.

If you need the highest level of image quality because you are shooting video production work for a client and are making money from it, the pocket 4K is a very good option.

Any negatives that I have said about this camera or the extra investment you have to make to be able to use this camera, is all thrown away because of the price of the pocket 4K.

And at the end of the day, that’s what it comes down to, the price.

The image quality you get from it is amazing, and in order to get the same quality from another camera you’re going to need to spend 10 thousand pounds plus.

If you are looking to buy this camera, just remember the extra investment you will need to make in terms of accessories, hard drive storage, and a computer that can handle the workflow.

Black-Magic-Pocket-4K-Review-1.gif

But for £1100, you get a lot of camera for the price.

In the description below I have linked to a few different articles that go into more detail about the specs of this camera, which I would highly recommend reading if you think about buying this camera. If you like this video give it a thumbs up and down if you don't, and remember to achieve it one shot at a time.

Links

Black Magic Website - https://goo.gl/EyXXzE

Raw Editing Workflow - https://youtu.be/clRnEwOcVis

Data Rates - https://goo.gl/zZdGgW

Wolfcrow - https://goo.gl/id2dCA

Izak Jackson Resolve - https://youtu.be/zXOGJaAnwoo


This video was Sponsored By

🎵 http://bit.ly/pbtfl-drivingtowardthesun - Click here to download this episode's track. Check out Premiumbeat.com to discover a huge range of exclusive royalty free music!


DISCLAIMERS:

Some of these links are affiliate links, if you purchase gear via these links The Film Look will receive a small commission, but there will be no additional cost to you. Thank you!

Our YouTube Presenting Setup

We have been presenting like this for almost 2 years, so I think it’s time to break down the setup.

Let’s start with the space we shoot in and the floor plan of our studio.

Studio Layout

To give us as much control over the lighting in the room, we start by blocking out all of the light coming through the window. Since the window is nearly 3 meters high, we use a large blackout curtain which we clip to the window.

Then we use a large fold-out backdrop and wedge it between a tripod head and the ceiling.

Our-YouTube-Presenting-Setup.gif

We didn’t say this was going to be pretty.

Next, we hook up a frosted shower curtain to the ceiling which is 1 meter away from where we present. Then we place a light behind it to create a large soft source.

Our-YouTube-Presenting-Setup1.gif

The light we use is this NiceFoto 330W LED light set to 5600K at 10% brightness and is 2 meters away from the shower curtain.

We have a video review all about the NiceFoto light if you would like to check it out here.

Before we got this light, we used one of our softboxes and placed right next to the shower curtain. We’ve had these softboxes for about 5 years now and they have a green tint to them, so we were always correcting the colour in the white balance setting on the camera and in the edit. More on colour correction later on.

Here is a side by side comparison of the colour difference between the two lights.

Our-YouTube-Presenting-Setup2.gif

Next, we add a background and a hair light by using a household bulb which is attached to our bookcase via our can lights. On the front of the can light is DIY diffusion paper to make the light softer, and also a cardboard flag to stop the light from spilling too much on to the presenter.

We have a video on DIY diffusion here.

Finally, we tape a DIY cardboard flag to stop the light from hitting the background as it is shiny photo paper, and we use this practical light which is a light up clapperboard on the shelf.

Links to all of the equipment will be linked in the description below.

To shoot the presenting we use a Sony a7s mark 1 which is about 1 meter away. We use a Canon 50mm lens set to F2.8, shutter 1/50, and an ISO of 160.

We present right in front of Richard’s desk which we raise to standing height. We do this as we do not have a teleprompter, so we can read the script for the episode off the screen.

Our-YouTube-Presenting-Setup4.gif

When it comes to presenting parts like this one where we are looking at the camera we just have to memorise the lines, but we don’t always get it on the first go.

For sound, we boom a Rode NTG3 on a C-Stand just out of shot above us. We use a smart rig which converts the XLR cable into a 3.5mm cable and provides phantom power to the microphone so we can feed the signal directly into the camera.

When recording the parts in the script where we are not presenting directly to the camera, we still roll video. We do this to keep the audio consistent throughout the whole recording.

Also, it would be a faff setting up another audio recorder just for this setup.

The time it takes to shoot the presenting for each episode depends on the length of the script, but having the same setup helps us save time.

In the edit, we cut it all together with the other footage from the episode and then we colour correct and grade the shot. The standard profile which we shoot with on the Sony A7s has a flat look to it, so we add contrast and bring up the highlights to help make the image pop.

And that is it. The setup is a bit makeshift and DIY, but it works for us.

Full-Plan.jpg

This video was Sponsored By

🎵 http://bit.ly/pbtfl-blissbay - Click here to download this episode's track. Check out Premiumbeat.com to discover a huge range of exclusive royalty free music!

🎥 This episode's kit/gear/equipment:

🇺🇸 US links:

NiceFoto HA-3300B - https://amzn.to/2TN09YC

Frosted Shower Curtain - https://amzn.to/2U65iLu

Lightup Film Clapperboard - https://amzn.to/2rg9bk8

🇬🇧 UK links: NiceFoto HA-3300B - https://amzn.to/2QvnMGk

Frosted Shower Curtain - https://amzn.to/2zyNh00

Lightup Film Clapperboard - https://amzn.to/2RqKn45


DISCLAIMERS:

Some of these links are affiliate links, if you purchase gear via these links The Film Look will receive a small commission, but there will be no additional cost to you. Thank you!

Get CINEMATIC by Connecting YOUR Shots!

The best shots in a film usually involve movement; whether that be camera movement or character movement. With the invention of things like handheld gimbals, achieving a big move is easier than ever! But achieving a good looking, and purposeful, camera move is more than just mindlessly whipping the camera around the scene.

Connect-Your-Shots.gif

Today we are showing YOU how we approach long takes, camera movement, and how we combine shots to make a film feel more CINEMATIC. Welcome to The Film Look.

This process is actually quite straightforward. The first thing you will need is a set of storyboards for your scene. You CAN create storyboards by drawing them out, but if you can’t draw, like us, you can take photos instead.

Connect-Your-Shots2.gif

We have a video going into more detail about storyboarding using photos here. It’s actually really helpful and has multiple benefits as opposed to drawing them by hand!

Once you have an idea of the types of shots you want to cover, lay them out in front of you.

For this example, we are using the photo storyboard created for a scene in our short film Corpse. This photo board includes 36 shots. But if you closely, there are a bunch of shots which we can actually connect together using camera movement, such as these three here.

Connect-Your-Shots3.gif

We have an insert of a character receiving a knife, a close up on one actor, and a close up on another actor. But all three of these actions can be covered in a single moving shot because they are all within a pan or a tilt of one another.

So instead of CUT CUT CUT, let's transform it into MOVE, MOVE, MOVE.

Connect-Your-Shots4.gif

We start off on shot A, using the action of giving the knife as direction for the camera move, which brings us to shot B, hold for a moment, then we continue up to shot C.

Connect-Your-Shots5.gif

If we do this with all of the shots in the scene, we can massively reduce the shot list, which in turn, reduces the shooting time. It looks better, and it's quicker to shoot than before! Two birds, one stone.

We also did this in our film The Asylum Groove during the execution scene. We start on our character, then up to the execution head cap, then down to his restraints, then back to the character for his emotional change.

Connect-Your-Shots6.gif

They started out as inserts, but we turned them into one single moving shot.

Let's use another example. Something a bit more technical.

Next up we have a scene from our film Backstage.

The original shots we had planned for this scene were: a wide establishing shot of the bathroom and the people inside, a shot of Jenny, and a shot of the Medium.

The room itself was quite small. We didn’t want to use a fish eye lens, so instead, we connected the three planned shots together into one camera movement which would hit all the marks.

Connect-Your-Shots7.gif

It starts with the Medium in a reflected close up using the mirror. Then it pans to Jenny as she enters the room - the camera move is motivated by the sound of the door. This move establishes the geography of the room and the space between our two characters.

Jenny commands the two wrestlers to get ready for the fight, so the camera can follow this by panning over to the wrestlers.

We have three shots in this one movement; A, B, and C. It establishes spatial connections between characters, gives us the geography of the scene, and every move has a motivated command.

This helps create a natural flow in a scene. If we cut all the time, we are breaking up the scene, and sometimes it prevents immersion. By keeping with the characters, and seeing the room, we gather a lot more information in the same duration of time.

Connect-Your-Shots8.gif

Finally, let’s talk about using this technique in the ultimate cinematic feat: the “oner”.

The oner: also known as a one take scene or a long take. Basically, the camera doesn’t cut for an extended amount of time, and instead, it moves around the scene with the characters and the action.

We haven’t done a oner yet, so instead, here is Indiana Jones.

At first you might look at this scene as one massive camera shot, but it’s actually the same as the examples we showed earlier. The scene is broken down into key positions.

Connect-Your-Shots9.gif
  • Ext establishing shot

  • Wide shot at the door

  • Wide shot in the living room

  • Wide shot when packing the suitcase

  • Medium close up on Marcus

  • Wide shot of Indy finding his gun

  • Medium wide of Indy & Marcus

  • Close up of the gun

  • Medium shot of the gun thrown into the suitcase

Connect-Your-Shots10.gif

Apart from the close up on the gun and the exterior wide establishing shot, the rest of the scene is covering these key positions and simply moving from one mark to the next.

We made a video essay on Raiders of the Lost Ark if you want to see how else this film gets it so right. I’d say this is the best film ever, but prove me wrong in the comments below!

So, next time you feel you have too many shots in your shot list, or want to give your film a little more cinematic movement, try connecting some shots together.

Connect your shots - connect your story - connect to your audience.


This video was Sponsored By

🚀 http://bit.ly/rs-aspect - Give your video a clean look with Aspect by RocketStock. It features over 200 logo reveals, intros, lower thirds, overlays, icons, and transitions.

🎵 http://bit.ly/pbtfl-blissbay - Click here to download this episode's track. Check out Premiumbeat.com to discover a huge range of exclusive royalty free music!


DISCLAIMERS:

Some of these links are affiliate links, if you purchase gear via these links The Film Look will receive a small commission, but there will be no additional cost to you. Thank you!

5 Tips for Nailing the 180° Degree Rule!

This week we are going back to basics and explaining the 180 degree rule; a fundamental method of filmmaking which can make or break your film.

We have a tip which will help you make sure you are using the rule correctly, how to quickly double check you are inside the line, and identifying when it's time to change it during a scene.

This is the 180 degree rule!

180-Degree-Rule.gif

The 180 degree rule is used for retaining spatial connections between the characters in the scene. The rule is used to make sure the audience knows exactly where everyone is in relation to each other.

180-Degree-Rule2.gif

It’s actually quite simple. You have 180 degrees where you can place the camera. You can draw it out like a semi-circle, and you will usually place the straight edge from one character to another, the straight line between these characters is known as “the line”.

180-Degree-Rule3.gif

When you start shooting a scene, you can choose which side of the line to shoot on. Choosing a side will depend on things like what’s more interesting in the background and if you have limited space on one side of the set.

180-Degree-Rule4.gif

Once you draw out your semi-circle, you can place the camera down and shoot from any angle inside the boundary.

The easiest set of shots to achieve with two characters is a triad: a shot of both your characters in frame (known as a 2-shot) and a set of character singles, either by shooting them clean or over the shoulder (also known as shooting it “dirty” because you are hiding some of the frame).

180-Degree-Rule6.gif

This becomes your standard dialogue triad, but you aren’t limited to just these positions.

180-Degree-Rule5.gif

A good way to think about your shooting space is by having your actors hold a single piece of string between one another. This line is now a barrier which the camera cannot cross. In addition to the string between your actors is a pole in the centre with another piece of string attached to the camera.

180-Degree-Rule7.gif

The camera is now tethered to the line but you can still freely move the camera inside the semi-circle and choose a wide range of shots.

Because you have the string attached to the camera, the moment you touch an actor with that string, you are about to step over the line, breaking spatial clarity.

180-Degree-Rule8.gif

The string method is a good way to double check if you are going “over the line”. So what’s this “line” all about, anyway?

180-Degree-Rule9.gif

The 180 rule is all about spatial awareness. You want each shot to have the actors looking towards each other. So, in shot A the actor is looking to the right of frame, and in shot B the actor is looking to the left.

When cutting between the shots, it looks like they are speaking to each other even if we don’t shoot an over-the-shoulder.

180-Degree-Rule12.gif

Let's break the rule and see what happens.

We will use the same shot of actor A, but we will step over the line to frame up on actor B.

180-Degree-Rule10.gif

If we cut between these shots, both actors look like they are facing the same direction, losing spatial awareness, and very likely confusing the audience.

180-Degree-Rule11.gif

If two actors are looking at each other, they must be looking into different directions of the frame for it to make sense during editing. A 2-shot applies the same rules; they look to each other, resulting in opposite directions, so we must use the same rules for the single character shots too.

180-Degree-Rule13.gif

As well as the string method, you can make sure you aren’t breaking the 180 by using a little gaff tape on your camera.  Make a note of the direction each actor is facing and pin it to your camera so you can double check with every shot.

180-Degree-Rule14.gif

You will know if you are crossing the line if the direction the actor is looking doesn’t match the direction of the arrow on your camera.

We still double check we aren’t breaking the line during every shoot because we know it’s a make or break mistake.

If you are worried you’ve crossed the line, double check by thinking of the string method, check each character is looking to different sides of the frame, and if you need to, stick a gaff tape reminder to your camera.

Breaking the 180 in a film is an clear example of amateur and poor filmmaking. Even if your film has lots of heavy action, and some crazy shots, the line is there to keep spatial awareness for the audience, and it should never be broken.

So don’t worry - and speak up if you think you are getting it wrong!

But this doesn’t mean you can’t move the line or draw a new line during a scene! Let me show an example.

The first way you can change the 180 and re-establish a new shooting space is when the camera travels over the line during a take. If we slide behind a character and frame over the other shoulder, we’ve now crossed the line, which means we must draw a new semi-circle and adhere to this new space for the rest of the scene.

180-Degree-Rule15.gif

This “changing of the 180” is a great example of using the rules of filmmaking to emphasise a moment in a scene.

This “change” of the rule usually happens when something significant happens in a scene like a change of power dynamic or a big reveal.

180-Degree-Rule16.gif

But what about if your characters are walking around and moving over the line during the scene?

180-Degree-Rule17.gif
180-Degree-Rule18.gif
180-Degree-Rule19.gif

In our film Backstage, the 180 line actually changes 3 times during a single scene. This is because our characters step over the line, so we have to re-draw and re-establish spatial awareness of the scene.

180-Degree-Rule20.gif

The first line in the scene is between The Medium and Jenny. We draw a straight line between both of them and stay in this side of the semi-circle. The Medium looks to the left of the frame and Jenny looks to the right. When Jenny leaves the scene, we can draw a new line.

180-Degree-Rule21.gif

The Medium is now looking to the right of the frame, technically breaking the rule from earlier in the scene. But by shooting a wider shot we can show where the character is in the space and establish a new line, retaining spatial awareness.

180-Degree-Rule22.gif

The line is now on the other side, between The Medium and the Flyswatter. The Medium looks to the right of the frame, and The Flyswatter looks to his left.

This is actually a funny example because in this part of the scene The Medium and the Flyswatter aren’t actually making any eye contact because of the cubicle wall between them. But by making sure they both look into opposite sides of the frame, it still retains spatial connectivity between the two characters.

180-Degree-Rule23.gif

Later in the scene, the Medium returns to his original position, but we are now shooting on the new line, which means the Medium must continue to look to his right when speaking to The Flyswatter who is looking to the left.

180-Degree-Rule24a.gif

When The Flyswatter exits the toilet cubicle, we draw a third line. Again, we shoot a wider frame to re-establish the space. The Flyswatter now looks to his right, and The Medium looks to his left, putting the semicircle between the two characters when they stand in front of each other.

We used the first line to take advantage of a few things. It gave us the ability to see into the door when Jenny walks in, we were able to capture the other wrestlers in the room, and we got a clean close up on The Medium.

We established the second line for shooting a clear back and forth between The Flyswatter and The Medium.

And we established a third line so we could shoot back into the room for the end, rather than face the toilet cubicles.

The 180 degree rule is one of the fundamental rules of filmmaking. This isn’t a “once you know the rule, you can break the rules” scenario. You don’t break this one...instead, you change it.

Let us know if you you’d like any more back to basics videos just like this one in the comments below. Vote with your thumbs if you liked or disliked this video, and remember to achieve it one rule at a time.


This video was Sponsored By

🎵 http://bit.ly/track-losinggames - Click here to download this episode's track. Check out Premiumbeat.com to discover a huge range of exclusive royalty free music!


DISCLAIMERS:

Some of these links are affiliate links, if you purchase gear via these links The Film Look will receive a small commission, but there will be no additional cost to you. Thank you!

Aputure 300D Alternative? | NiceFoto HA-3300B Review

These COB LED lights, the ones with the big LED chip have become very popular over the last few years with Aputure leading the way with their 300D; something which we have used in the past to shoot our short film The Asylum Groove.

From our experience, the 300d is a very good light, but one of the main reason we have not bought one is because of the price.

So when a company called NiceFoto contacted us saying they have a light which has a very similar design to the 300d, but is brighter and is nearly half the price, we weren't going to say no to reviewing it.

Nice-Foto-Review-Aputure-300D-Alternative.gif

Just to say up top Nice Foto did send us the HA-3300B light to review, but everything in this video is our honest opinion.

Specs

Let's start off with the specs of the light.

We will be comparing this light to the Aputure 300D when we can, but we cannot do a side by side comparison as we don’t own one.

So everything we say about the 300d will be from our own experiences of using the light and some spec information which Aputure provides.

The HA-3300B is a 330W LED light. The output at one meter away with the standard reflector cone is 52000 LUX or a F20 at ISO200 1/50th of a second.

Nice-Foto-Review-Aputure-300D-Alternative1.gif

In the real world, this is well over a 2k light.

The Aputure 300D has an output of 31000 LUX or F11 at ISO 200 1/50th of a second at the same distance and reflector cone.

As you can see at 100% you would need to shoot at a higher f-stop to capture the correct exposure for the Nice Photo light.

Basically, the Nice Foto light is a brighter than the 300D.

The colour temperature is 5600K with the 300D being 5500k and both have a CRI rating of 95 plus.

You can dim the light in 10% increments, down to 10%. This doesn’t give you as much control as the 300D were you can change the brightness a percentage at a time but in practice, 10% increments are enough.

Nice-Foto-Review-Aputure-300D-Alternative2.gif

All of this is controlled on the light or via the wireless remote, and if you have a few of these lights you can control them all from one remote.

To keep the light cool there are 3 fans built in, which work great. We have had the light running for a few hours and it stayed super cool.

If people are concerned about fan noise from any of these types of lights, don't be. If you are recording your audio correctly, your mic should be pointing toward your subject and not the light.

Even if you are standing right next to the light, just position your mic away from it and you're never going to hear the fans over dialogue.

Build Quality

The main body of the light and the arm is made out of metal, but the knobs and handle are made out of plastic.

Nice-Foto-Review-Aputure-300D-Alternative3.gif

This is unlike the 300D, were most of the parts are made out of metal. This is where NiceFoto has saved money to make the light much cheaper.

After using this light a bunch of times it still has the feel of a high-quality product and it is going to last a long time.

The light has a Bowens mount and comes with a reflector cone. The Bowens mount is the same one you get on the 300D, so you could attach all of the Aputure Bowens attachments like the fresnel, softbox, and space light to this light.

There are loads of different Bowens mount attachments out there, which allow you to turn this light into many different types of light.

We are going to be making a video about all of the different Bowens mount attachments and how many different sources of light you can get from one light. So if you haven't already consider subscribing.

Power

The light has a very similar power setup to the 300d. First, you plug the DC cable into the light and then into the power adapter. The best thing about the power adapter is this strap which lets you easily attach it to the light stand.

This was the biggest problem we had when using the Aputure lights, as you had to hang the power and the control panel from the light stand.

Nice-Foto-Review-Aputure-300D-Alternative5.gif

This little strap makes it safer and saves rigging time on the NiceFoto light.

Next, you plug the AC cable into the power adapter, which is 5 meters long.

NiceFoto are releasing a V-Lock battery pack so you can use this light via batteries.

How have we used this light

We have used this light to bring up the general ambient light in a room by bouncing the light off the wall and ceiling.

We have used it at night to shine more direct light into our scene to bring up the exposure of our character, which is something we wouldn't have been able to do before.

We are also using it right now to light up this presenting setup. It is currently on 10% about 3 meters away shining through a shower curtain, creating a large soft light.

Negatives

One negative with this light is that it does not come with a bag. It’s an awkward shape and to protect it when in transport, it really needs a bag.

If we find one in the future that fits this light, we will add it into the description below.

Nice-Foto-Review-Aputure-300D-Alternative6.gif

Positives

You get a lot of light for the price, and that is what it comes down to. At nearly half the price of the Aputure 300D, you are getting a light which is brighter, at the same quality, and it has the same flexibility with the Bowens mount attachments at nearly half the price…

which I know I have mentioned but is worth saying again.

So who is this light for? It's for people that need a light that can replicate the sun, but also the control to turn one light in too many different sources of light.

This light holds up and beats the 300D in some categories, so if you are looking for a cheap alternative to the 300D you can find a link in the description below to the Nice Foto light.


This video was Sponsored By

🎵 http://bit.ly/pbtfl-drivingtowardthesun - Click here to download this episode's track. Check out Premiumbeat.com to discover a huge range of exclusive royalty free music!

🎥 This episode's kit/gear/equipment:

NiceFoto HA-3300B - https://amzn.to/2TN09YC


DISCLAIMERS:

Some of these links are affiliate links, if you purchase gear via these links The Film Look will receive a small commission, but there will be no additional cost to you. Thank you!

How to Light an Exterior Night Scene

In this video, we are going to be breaking down the lighting setup for this shot, which we used in the last video about building up the tension in your film.

Let's start off by playing the whole scene.

Building-up-Tension-1.gif

First, we blocked out the scene to make sure the camera move would work in this location. We tried this shot a couple of different times during the day at two different angles.

The move is a track and pan and works best when you have a wall that obscures the audience's view from what the character can see. This helps us build up the tension in the shot and reveal what is there.

You can find a link right here to the video, that goes into a lot more detail about the camera move.

When we had everything blocked out, and it was dark. We could see what available light we had to work with. Our main source of light is this white LED street light; it’s a newer type of light than most street lights in the area, so it’s a lot more white than the typical orange bulbs.

shot-designer.jpg

We did need to add more light to the scene to bring up the exposure on our main character and fill the alley with a little more light.

To retain the direction of the practical street light and motivate it with more light, we would have had to rig a light up high to keep it consistent. Luckily for us, our studio window is right above the location and the street light.

This meant we could shine the light through the window, down onto the street and onto our actor. Matching the direction of the light makes it seem like it’s all coming from the street light.

The light we used is this NiceFoto HA-3300B set at 100% brightness which is a 330 watt LED or over a 2k light.

NiceFoto-HA-3300B.gif

We will be reviewing the light in next week’s video so make sure you check that out.  

We added a blue gel to the light to help it match the colour of the street light and a little bit of black wrap to help shape the light and stop it from shining onto the rooftops of the buildings opposite.

Next, we added a light onto this wall here, as at the current exposure it is completely black. So we took our Aputure hr672c light panel, attached it to a c-stand and boomed it around 10 feet high.

C-Stand-Aputure-LED.gif

We set the colour temperature to 3200 kelvin and inserted an orange gel to give us a very vibrant orange light to make it contrast between our blue key light.

Then we added black wrap to the panel to cut the light into a sharp cone to mimic a street light and so it wouldn’t shine past the end of the wall.

We shot the whole scene on a handheld gimbal, using a Sony a7s Mark 1, with a 35mm lens. We shot with a daylight white balance with a ISO of 2500 and everything was shot at F8 to give us a greater focus distance as we could not pull focus whilst using the gimbal.

To grade the shots we used Lumetri in Adobe Premiere. We added contrast as the Sony standard picture profile has a flat look to it. We dropped the highlight brightness mainly for the wall which was closest to the light as it was too bright. Then dropped the shadows to create a greater vignette which helps lead our eye towards the light.

Next, we added the Fuji f125 Kodak 2393 LUT to help make it pop.

There is probably a reason it is called that, but I don't know what it is, so let us know in the comments below if you do.

We set the intensity to 20% as pushing any further would lose the essential detail in the image.

As you can see we only made slight adjustments to the image as the colour and texture of the walls give us a look that we already liked.

The-Film-Look-Colour-Grading.gif

Finally, we added a 35mm course film grain to the image which we got from the the Emulsion pack from RocketStock. We tried a couple of the different film grains you get in the pack, but the 35mm coarse grain looked good for this image. Links to the emulsion pack can be found the description below if you want to check them out.

Also, If you want to watch more lighting breakdown videos we have a bunch on our channel. This one is all about how we used the Aputure 300d to light this shot. You can find that video here.


This video was Sponsored By

🚀 http://bit.ly/pack-emulsion - Make your video look like it was tailor-made for the silver screen with RocketStock’s film grain overlay pack, Emulsion!

🎵 http://bit.ly/pbtfl-glamourparty - Click here to download this episode's track. Check out Premiumbeat.com to discover a huge range of exclusive royalty free music!


DISCLAIMERS:

Some of these links are affiliate links, if you purchase gear via these links The Film Look will receive a small commission, but there will be no additional cost to you. Thank you!

Slowly Building Tension | Motivated Camera Moves

A film should always rise in tension until you get to the tipping point where your character has to make the most important decision in the film.

So is it possible to build up the tension with one shot, let's find out?

Building-up-Tension-1.gif

For this video, we have created this small scene. Let’s check it out:

Just like our coming to a halt video, this scene was inspired by a camera move from the book Master Shots by Christopher Kenworthy.

Building-up-Tension-2.gif

If you want to check out the book and watch the last video we made, you can find it here.

Let’s set the story for the shot:

Throughout the film, our character has been running from a creature, monster, or some form of an antagonist. They get to a point in the film where they either have to keep running or stand up and fight.

Building-up-Tension-3.gif

Staring down a long corridor, our character can hear the creature, which is tense enough. But to raise the tension even higher, at the beginning of the shot we frame the corridor out of the view of the audience. The camera slowly slides along and we finally reveal the corridor and see what our character can see.

At this point, you can do one of two things. Either reveal the creature or just leave the corridor empty. Your character deciding to step down a scary corridor and accepting the unknown could be a lot more impactful than if the monster is standing there. Plus you can add a lot of tension by adding sound effects of the creature.

Building-up-Tension-4.gif

If you do want to show the monster at the end of the shot looking at your main character, this could work as a standoff between the two characters. Your antagonist is telling the audience, if your hero wants to advance in the story, he is going to have to get past me first.

Building-up-Tension-5.gif

The move itself is simple, it’s just a track and pan, but to help build up the tension you want a slow and smooth shot and achieve this shot we used a handheld gimbal.

Building-up-Tension-Gimbal.gif

We did try and record this shot using a hand-held camera, but the movement didn’t look as good as it wasn’t as smooth. Also, we filmed the same shot only using a tripod, but the lack of movement didn’t allow us to build up the tension as much.

Knowing when and how to build up the tension in your film is an important trick, and this shot is just one of the ways you can do it and can be applied to other types of scenes.

In this shot, our character has arrived at his bosses party and is anxious to enter. The creeping looking building doesn’t help either.

Building-up-Tension-7.gif

If you want to check out the master shots book we took this camera move from, you can find a link in the description below. This is the shot referenced in the book, the character in this film is geared up, ready to fight, and can hear the monster at the end of the corridor.

If you know what film this shot is from, let us know in the comments below.

Building-up-Tension-8.gif

Check out our other camera movement video which is called the coming to a halt, that can be found here. If you haven’t already, consider subscribing by hitting that orange lens cap and remember to achieve it one shot at a time.


This video was Sponsored By

🚀 http://bit.ly/pack-emulsion - Make your video look like it was tailor-made for the silver screen with RocketStock’s film grain overlay pack, Emulsion!

🎵 http://bit.ly/pbtfl-blissbay - Click here to download this episode's track. Check out Premiumbeat.com to discover a huge range of exclusive royalty free music!


DISCLAIMERS:

Some of these links are affiliate links, if you purchase gear via these links The Film Look will receive a small commission, but there will be no additional cost to you. Thank you!

6 UNIQUE SHOTS using a Clamp Rig!

Lately, we’ve been experimenting with crab clamps.

Clamps1.gif

Our latest DIY invention is the lightweight clamp rig: it involves combining a clamp, a magic arm, and quick release plate so you can mount a light weight camera to strange and creative places.

Clamps2.gif

Today we are showing you 6 different ways you can get creative with the clamp rig to help you with your next film.

Let me preface this episode with a quick note: these clamps can be tightened very easily, so just make sure you attach them to something strong. You don’t want your camera to fall off, or even worse, damage the surface you are clamping it to! So just be cautious.

Clamps3.gif

Car Cam

The first place we tested out the clamp rig was inside a car to get some driving shots.

We found the headrest rods were a perfect diametre for the crab clamps, and because we had a magic arm attached, we were able to distance the camera from the clamp and get closer to the subject’s eyes.

Clamps4.gif

We drove around and the camera rig stayed in place. It did shake a bit when we hit some bumpy ground, but this could look like tasteful if you were shooting a scene with some fast paced action or drama.

Once we were driving on a flat, smooth road, the shot turned out silky.

Clamps5.gif

We also shot a set of french-overs. With this setup, you would actually be able to shoot 2 cameras at the same time because the headrests, and the clamps, aren’t in shot.

You can get the same type of shot with a camera op in the backseat, but if you have limited crew, this is a good option.

The last shot in the car was a 2 shot from the front. My car is old and cheap, so the dashboard is made of some sort of shiny plastic which made attaching the clamp difficult. So we stuffed in some extra rubber tape to keep it secure.

Clamps6.gif

Bookcase Cam

The next thing we tried was using the clamp rig on a bookcase.

We attached the clamp rig to the top shelf of the bookcase and positioned it looking into the room. With this shot, you can simulate a CCTV camera. This would be difficult to achieve with a tripod because of the lack of height and its spread out legs, so the clamp actually made this shot possible.

Clamps8.gif

Then we pointed the camera looking straight to the floor, achieving a very high, top down frame. This is a very strange type of angle, so using this type of shot in the film would work great if you wanted the audience to pay extra attention to something.

Clamps10.gif

Plate Cam

We wanted to go a bit weird with this next one.

Clamps11.gif

Similar to a snorri-cam setup, we attached the clamp rig to a moving dinner plate. When coupled with the journey from the microwave to the table, this shot becomes quite interesting.

Clamps12.gif

There is a lot of tell about a character by the type of meal they eat. So if you are using food to give a character or scene thematic emphasis, you can give the shot extra presence by turning it into a plate-cam!

Guitar Cam

The next thing we tried was attaching it to an instrument.

Clamps13.gif

This is a perfect shot for an interesting live session or music video. As the musician moves around the stage, the guitar seems to stick to the frame, giving us a shot with, again, a lot of presence.

Clamps14.gif

Just a quick note, before you attach the rig clamp to a guitar, ask the guitarist if it's okay, and try to pad out the clamp to relieve the pressure on the guitar to prevent any damage. We clamped the rig to my guitar, and unfortunately, it did leave a little groove in the wood. The crab clamp clearly isn’t the right tool for the job in this instance!

Clamps16.gif

So here’s a question for you guys: to achieve this shot without damaging an instrument, how would you attach the camera to it?

Toilet Cubicle Cam

Clamps17.gif

In one of our previous films, Backstage, some shots were inside a toilet cubicle. To pull of the shot we had to swap the tripod for a monopod in order to get closer to the door, and stand on an apple box in order to get the correct height.

Clamps18.gif

This is where the rig clamp comes in!

Clamps19.gif

We copied the shot from Backstage but this time we attached the rig clamp to the cubicle door frame and locked off the shot. It does mean you can no longer pan and tilt when the clamp is in place (unless you figure out how to attach a tripod head to it!), but now it’s safely up a height, pointing down, and best of all you can now open and close the door, so you won’t have to lock your talent in the loo anymore.

Discrete Shots & Timelapses

The last few things we tried were based on shooting vlogs. When a gorillapod won’t secure and a tripod is too bulky, you can use the rig clamp to attach it to things like railings if you wanted to get a shot of walking through the frame or even if you wanted to talk to the camera for a moment.

Clamps20.gif
Clamps21.gif

Lastly, we tried attaching the rig clamp to a table while we wrote the script for this very episode!

The camera is secure and out of the way: it can’t be knocked off the table during a timelapse, and there’s no chance of someone walking along and kicking one of the tripod legs.

And if someone tries to steal it, they will have a lot of trouble getting it disconnected!

Clamps22.gif

This WAS a bit of an experiment. The rig clamp isn’t perfect, we know that. But it certainly opened up some possibilities for shooting. The parts we used can be found in the description.

If you want to see more videos just like this one, hit the orange lens cap to subscribe, and remember to achieve it one shot at a time.


This video was Sponsored By

🚀 http://bit.ly/pack-emulsion - Make your video look like it was tailor-made for the silver screen with RocketStock’s film grain overlay pack, Emulsion!

🎵 http://bit.ly/pbtfl-citycruising - Click here to download this episode's track. Check out Premiumbeat.com to discover a huge range of exclusive royalty free music!


DISCLAIMERS:

Some of these links are affiliate links, if you purchase gear via these links The Film Look will receive a small commission, but there will be no additional cost to you. Thank you!

Sony to V-Lock/D-Tap Adaptor

In our review for the PD Wireless Follow System we used this to power the follow focus which is a cheaper option to buying a V-Lock battery.

The PD Wireless follow focus needs to be powered by a battery that has a D-Tap connection.

A D-Tap connection is widely used to power cameras, lights, and other filmmaking equipment and is found on a V-Lock battery.

D-tap.gif

The problem we had with buying a V-Lock battery is they are very expensive. We don’t have a cameras or lights that need to be powered by V-Lock batteries, and since we are only going to use the follow focus on a few projects a year,

And having a battery sitting there for most of the year which is worth over £150 is not really a option.

After some research we found this alternative battery source to solve our problem. It is still a V-Lock battery and it has a D-Tap output, but it uses Sony NP batteries to power whatever is plugged in. Since we own loads of NP batteries this saved us a lot of money, and it works great.

D-tap1.gif

The next problem is mounting the power source to the camera ring. There are 15mm rod rail mount system you can buy for a V-Lock Battery, but again they are very expensive. In Fact they are more expensive than the batteries, and you still have to buy a battery.

So we attached this 15mm rod mount we have laying round which is from a company called SmallRig.

Links to everything will be in the description below.

At first we attached it to the bottom of the power supply and mounted it like this to the rods. We soon realised to save space it would be best to mount it like this. It also meant you can still attach it to a V-Lock mount and power a piece of equipment with Sony NP batteries, not just via the D-Tap power connection.

Having it mounted to the back of the shoulder rig like this also helps to balance out the rig as there is more weight on the back of the rig.

There is another solution to our problem and that is to buy a cable which converts the PC barrel cable that connects to the motor of the follow focus to a DC cable instead of a D-Tap connection.

With this you will need a DC power supply which is similar to the one we use to power our camera, which you can find links to here.

This cable was not out when we purchased the first option, but works out about the same price once you purchased all of the parts.

V-Lock Batteries have there place, and are very much needed. They are super reliable and give you enough power to run your camera, monitors, and lights all day.


This video was Sponsored By

🚀 http://bit.ly/tflrs-creator - Become a social media powerhouse with RocketStock's video element pack, Creator. This collection comes packed with logo reveals, end screens, subscribe animations, and much more.

🎵 http://bit.ly/track-hot-fusion - Click here to download this episode's track. Check out Premiumbeat.com to discover a huge range of exclusive royalty free music!


DISCLAIMERS:

Some of these links are affiliate links, if you purchase gear via these links The Film Look will receive a small commission, but there will be no additional cost to you. Thank you!

Do you need a Follow Focus? | PD Movie Remote Air 3 Review

It doesn’t matter if you are shooting on the sharpest camera and lens, if your shot is not in focus, it’s not going to look very good.

Shooting retakes because of inconsistent focusing will cost you time which you should be putting to better use.

There are 3 tools, at different prices, which you can buy to help keep your shots in focus, and they all have different levels of accuracy when focusing.

90% of the time we focus by rotating the barrel of the lens with our fingers, and 90% of the time this works just fine.

Follow-Focus-with-Tape.gif

If you are shooting a film where your actor is moving from position 1, to 2, back to 1, then to position 3, keeping the movement and focus consistent will be very difficult to pull off.

To help add a little more accuracy when focusing, you can add tape to your lens which represent the different focus marks you need to hit. This will dramatically improve your accuracy and is a great budget option.

The only problem is you will have to stick tape to your lens, replace it after every shot, and because your fingers are touching the lens, you will be restricting the movement of the camera and may cause micro jitters from your fingers.

The next option is to buy a follow focus that mounts onto 15mm rods. You can set and easily wipe off the focus marks, it gets your hands away from the lens, and it makes it easier for someone else to operate.

Follow-Focus.gif

A follow focus will certainly improve your focus accuracy over the tape method.

When it comes to shots which have a lot of movement such as handheld shots, and shots using steadicams and gimbles, a wireless follow focus is preferred as the weight needs to be perfectly balanced, and someone holding onto the follow focus may throw off the balance.

PD Movie sent over their Remote Air 3 Wireless follow focus to review, but before we reviewed it, we used it to shoot our short film The Asylum Groove. We used it for shots which were static on a tripod, handheld and steadicam shots, and also shots on a slider.

There are two main advantages we found when using the wireless follow focus.

Firstly, it helps to improve the accuracy and consistency of your focus as there is someone whose sole job it is to set marks and pull focus.

This person will be the 1st AC, and if they nail focus on every take, it’s going to save a lot of time on set.

The technical side of shooting will be accurate and consistent, meaning fewer re-takes caused by technical issues, such as over-shooting focus in a shot.

This follow focus system comes in two parts. First, you have the focus motor which attaches to 19mm or 15mm rails. In our case, we attached it to our 15mm rail setup.

Depending on your lens, it may or may not come with gear rings. Our’s don’t, so we attach gear rings to the lens so we can line up the Remote Air 3 Motor with the lens.

The focus motor is then powered via a d-tap connection which you can find on a v-lock battery.

We have a video coming out on Sunday about the alternative d-tap power source we used, so if you haven't already, consider subscribing to find out about it.

Next you can attach the mini antenna to the motor which wirelessly connects to the second part of the follow focus, which is the controller that has an internal battery and can be charged via USB.

To connect the controller to the focus motor you must set them both to the same channel.

Then if you hold down the focus, zoom, and iris button for 3 seconds, it auto calibrates and finds the focus end points on your lens.

PD-Movie-Remote-Air-3.gif

This means when you turn the focus wheel, it will turn the lens no further than infinity, and to whatever the minimum focus distance is on your lens.

Having this function makes it quick and easy to set up different lenses.

Next you can set the strength you want the motor to turn the focus wheel on the lens as every lens will require a different amount of torque.

This 50mm lens we have rotates by using very little pressure so it would require less torque to turn.

These vintage lenses require more pressure to turn so you can set the motor   to a high torque.

You can put your focus marks on the focus rings on the controller which are rubber.

When you need to reset markers you can simply rub the dry wipe pen off, or replace it with the other focus ring that comes with it.

The motor and the controller are built really strong, and every cable and attachment is very high quality.

The controller is not too heavy but has a slight weight to it, and the modelling of the unit is slim and has lots of quarter threaded screw mounts so you can attach it to a light stand or to the lanyard that comes in the box.

The wheel rotation of the controller has a nice resistance to it when turning and again it feels very much like a premium product.

Like with everything, using a wireless follow focus will have a learning curve, and this is definitely something you have to get used to with the Remote Air 3.

The menus and UI can take a while to understand and you will definitely want to keep the manual close at first.

There are lots of indicator lights on the controller which mean different things depending on their colour.  

The control unit status indicator lights have 4 different colours. Red means the unit is powered on.

Green means it is powered on and synced via bluetooth, which will only happen if you use the app, Blue means the unit is changing, and Cyan means the unit is synced via bluetooth and is being charged.

If you need to change the settings for focus, you need to use a combination of button presses. If you want to change the speed of the motor, you have to press the button on the bottom of the motor 5 times.

There is a little graphic on the motor which tells you how many presses you need to do, which is great because it saves you time looking in the manual.

When you want to enable the auto calibration function you have to hold down the focus, zoom and iris button for 3 seconds, which is a little bit awkward to do.

This is not a big problem and once you get familiar with how it works it will just become normal.

One thing we did have a problem with was the follow focus no longer responding during different setups.

We were unsure how the problem occurred, maybe a button was pressed and a setting change. This held up the shoot but we managed to get it working in a couple of minutes.

Becoming more familiar with the unit and the menus would help to solve this problem.

We only really use the wireless follow focus on bigger projects like making short films.

When you have someone whose sole job it is to keep focus throughout a whole film, it will help you save time as this technical side of filmmaking will have a higher level of accuracy.

Not everyone can afford a wireless follow focus like the PD Movie Remote Air 3, but it is definitely worth considering when you can. The timed saved vs the price you pay is something think about.

If using a wireless follow focus saves you an hour a day for example, that is an extra hour you have to improve other aspect of your image or do more takes to make the performance the best it can be.

That hour could also save you money in other areas of the production too.

If you are renting a location which requires you to pack up at a certain time, or a member of your cast needs to leave early, that hour you’ve got back could save you from having to rent the location again or getting the actor back for another day.

If you need to keep doing retakes because you kept over and under shooting focus, your actor may have delivered a better performance in one of the out-of-focus takes.

The three options we’ve spoke about to help keep focus all work, but have a different level of accuracy, so chose the one you need for your production.

Before we got the PD Movie Remote Air 3 we did not expect how much it would improve the quality of the final image, and how much time would be saved by using it.

If you’ve never used one, go and check out the PD Movie website.

They have lots of different wireless follow focus systems, and lots of information about how they can improve your production.

In this video we did say you need a 1st Assistant Camera to operate it, so if you like to know more about the role of the 1st AC let us know in the comments below and we’ll make a video about it.

If you want to help this channel grow give us a thumbs up or down if you don't, hit that orange lens cap to subscribe, and remember achieve it one shot at a time.


This video was Sponsored By

🎵 http://bit.ly/pbtfl-wildestdreams - Click here to download this episode's track. Check out Premiumbeat.com to discover a huge range of exclusive royalty free music!


DISCLAIMERS:

Some of these links are affiliate links, if you purchase gear via these links The Film Look will receive a small commission, but there will be no additional cost to you. Thank you!

5 Tips for Directing Actors

Today we are talking about directing the performance and some tricks and techniques we used to direct our latest short film The Asylum Groove. If you want to watch the film, you can find it right here:

Rehearsals

It might sound silly to even include rehearsals in this video on directing tips but sometimes when you make a short film you have to make sacrifices, and rehearsals are one of the first things which are cut out of the schedule, but DON’T underestimate them!

Episode.00_00_25_03.Still002.jpg

Rehearsals with your cast, and even technical rehearsals with your crew, will save you a lot of time during the shoot and get you A LOT closer to achieving the film look.

First of all, it helps you practice the performance and mold it into something great. But it also helps you work out the kinks. A lot of times, the lines on the page and actions written down don’t perfectly translate when performed, so they need some re-working.

It’s worth rehearsing through everything and seeing what does and doesn’t work, blocking out the scene and cleaning up the movement between beats, trying lines, and experimenting. Your cast and crew are members of your band; it’s worth having a few jamming sessions before you go on stage for the gig.

Just remember not to rehearse the scene to concrete. Give it some breathing room and be ready for changes on the day. A good rule of thumb is working up to 90% in rehearsals and going 100% on the day.

Keywords

Adding keywords to your storyboards and will give you the chance to really think about the meaning of your shots, what those shots tell the audience, will help you connect the shots to the story.

For The Asylum Groove, we wrote down key phrases for every shot in the film. Whether this was just an insert or a cut away, every shot had a title which gave it its purpose. Job, work, impress, caress, showing off, fear, terror, hate.

Episode.00_01_23_22.Still003.jpg

On set, this meant Chris was prompted very easily. Instead of rambling on about this, that, and the other, try to boil the shot down to something simple and let the actor do the thinking. During the take, you can always give redirection and mold it into something perfect.

You don’t always need to explain the shot with an essay.

Emotional Beat Map

The Asylum Groove revolved around a single piece of music which was sourced online. One way you can emphasise emotion in a song and connect it to the emotion in the film is by creating an emotional beat map.

Listen to the song and try to image the film playing out. Fit the emotional beats of the film into the song and use the different parts of the song to pinpoint an emotion and tie them together.

Episode.00_02_22_09.Still004.jpg

Then you can label emotional beats to the music. You can play the music on set, and let the actor feel the music during the scene.

Obviously you can’t play the music if you are recording dialogue, but you can use the emotional beat map when editing to make your music choice sound like it was written for the film!

Character Music Playlist

Once you and your actor have talked about the character; their traits, characteristics, and their journey through the film, ask your actor to create a playlist of music which the character would listen to.

Episode.00_02_49_10.Still005.jpg

You can select music which resembles the purpose of the scene in the film. This can give the actor some time to themselves, to get into the zone, and may heighten their emotions for an amazing performance on screen.

Using music can also give the actor a cue back into their character if they have taken a break, for instance.

Sometimes You Just Can’t Fake It

You really can’t fault a great actor and their ability to pretend to be someone else on screen. But there are a few things which are very difficult to get looking genuine, and those usually revolve around involuntary reactions.

First of all, you can’t fake out of breath. At least, you don’t need to. If you actor is out of breath in a scene, have them jog around the block for a few minutes to get their heart rate up, their face red, and their brow sweating. It’s looks and sounds a lot better than pretending.

Episode.00_03_20_23.Still006.jpg

Another thing which is difficult to fake is being startled, and involuntary facial twitches. To create a genuine reaction of sudden shock from our actor Chris, we popped a balloon beside him. We didn’t count down or give him a warning: that way he didn’t know when it was coming, so when it was popped, he was genuinely startled.

This is the same technique Ridley Scott used to frighten the cast in Alien during the chestburster scene. The cast had no idea it was about to pop out of his chest, creating a genuine reaction.


This video was Sponsored By

🎵 http://bit.ly/pbtfl-newfrontier - Click here to download this episode's track. Check out Premiumbeat.com to discover a huge range of exclusive royalty free music!


DISCLAIMERS:

Some of these links are affiliate links, if you purchase gear via these links The Film Look will receive a small commission, but there will be no additional cost to you. Thank you!

How to Give Your Film Visual Rhythm

Sometimes as a filmmaker you just have to experiment with an idea and hope it will work.

One thing we wanted to test out with our latest film The Asylum Groove was using shot patterns and symmetry within the sequence to see if it would help drive the story forward.

Today we are going to talk about giving your film visual rhythm.

We’re breaking down our latest short The Asylum Groove. So if you haven’t seen it yet, you can find it right here:

First and Final Frames

A lot of our previous films have been open ended, have involved cliff hangers, or have just finished abruptly. With the asylum groove we wanted to improve on that - we wanted to make something which had a clear start and a clear end.

A piece of symmetry which a lot of films incorporate is the connection between the first and final frame in the movie. These can be mirror images, clones, or a perfect opposite, and they help give the film clear bookends with distinct contrast from the start and end of a character’s journey.

We connected the first and final frame of The Asylum Groove with the use of curtains.

The film begins with Sam cleaning the assembly hall for the bedsville disco, so by having him literally open the film by drawing the curtains, we hoped it would give the impression that he is inviting the audience into the world, kind of like the curtains opening at the start film or a play.

Episode.00_01_12_04.Still001.jpg

The final shot in the film is when he is about to be electrocuted. The curtains close and we are left with his mother’s hand pressed against the window before it slowly fades to black.

At the end of the film, we see a different side to Sam: his rage. At this point we wanted the audience to distance themselves from the character and flip their perception of him from a protagonist to an antagonist. This is why we placed the camera on the other side of the glass.

Episode.00_01_13_03.Still002.jpg

We hoped using symmetrical first and final frames would give the audience a clear indication that the film has started and ended. No cliffhanger, post-credits sequence, or teaser to the sequel.

The Rule of Three

Another principle we wanted to incorporate to help drive the story, retain the pace, and create visual rhythm was the use of the rule of three.

The rule of three is a writing principle which suggests a sequence of exactly three is the smallest amount of information needed to create a pattern. This is a way to keep the information short and snappy but to also help emphasise the point being given.

The rule of three is used all over:

  • The slogan “Stop, Drop, and Roll” or “Blood, sweat, and tears”

  • The Three Little Pigs

  • The Three Musketeers

  • A feature film usually uses a three-act structure

  • And photography composition often uses the rule of thirds

We wanted to experiment with the rule of three by incorporating it into the film.

Each shot during the opening montage, after the curtain shot, is grouped into sets of three.

First of all you have the TASKS. We wanted the audience to know he was cleaning straight away. Instead of a single shot of him cleaning we used THREE to solidify the information while keeping the shot count to a minimum.

Episode.00_02_52_21.Still005.jpg

Anymore than 3 shots would be boring. Any less might not emphasise his TASK enough.

Next you have the BLUE shots. Blue balloon, blue paint brush, brush dipped in water.

These THREE shots show that the work he is doing is not JUST moving furniture around. He’s painting and hanging up balloons which gives the audience clues to the party and the disco.

Again, anymore than 3 shots would be a waste of time, any less might feel random.

Episode.00_03_07_14.Still006.jpg

We bridged the furniture shots with the painting shots by including blue paint on his fingers in the final furniture shot. This was to help bridge the gap between the sequences and help it flow.

The last set of THREE are the shots of the record player. Again, we included a bridging shot by using the jar of blue water in the first shot of the record player sequence to help with pace and continuity.

So with the record player sequence you have: pulling out the record from the sleeve, placing the record down, and the needle slowly falling into place.

Episode.00_03_38_06.Still007.jpg

The last shot in the montage, the slow fall of the needle, was chosen for a few particular reasons.

We wanted the fast pace of the montage to slow right down in order to match the pace of the character as he walks to the mop and bucket.

The needle falling onto the record player, and the long cross dissolve between the two shots, gave a smooth transition between the speeds and would hopefully give a clue to the audience that the rule of THREE has come to an end.

Episode.00_03_58_18.Still008.jpg

Using techniques like First and Final Frames & The Rule of Three aren’t something which will instantly give your movie The Film Look.

Things like casting, camera, costume, lighting, set, and story line are the most important parts of making a great film. But once you have those, its worth experimenting with alternative and subconscious tricks for your film and see what comes of it.


This video was Sponsored By

🚀 http://bit.ly/tflrs-creator - Become a social media powerhouse with RocketStock's video element pack, Creator. This collection comes packed with logo reveals, end screens, subscribe animations, and much more.

🎵 http://bit.ly/pbtfl-wildestdreams - Click here to download this episode's track. Check out Premiumbeat.com to discover a huge range of exclusive royalty free music!


DISCLAIMERS:

Some of these links are affiliate links, if you purchase gear via these links The Film Look will receive a small commission, but there will be no additional cost to you. Thank you!

Technical Blocking using T-Marks & Tape

Blocking a scene is an essential part of filmmaking, but to help keep your shots consistent and make sure your actors and camera are hitting the correct marks.

You can use some inexpensive tape and t-marks to allow you to work more efficiently on set.

Blocking is the process of working out where your actors need to stand and move throughout each scene of your film to help tell the story.

Some questions you need to ask yourself when blocking a scene is: Where are the actors in the scene? Do they move? Where do they move? Is the shot achievable?

We have a video that goes into more detail about the theory about blocking here if you want to check it out.

Blocking is done in three different stages. Firstly, you can pre-block the scene before the shooting day. This will allow you to work out if the location is suitable to shoot the scene, and if it is, work out the best way to use it.

If you can not get into the location before the shoot, don’t worry. Most blocking is setup on the day and is one of the first things you should do when you turn up to set. This is also the second stage of blocking.

Depending on the length of your scene, you can walk through the whole scene with your actor and DOP so they know how it is going to playout.

This will allow your actor to know how they need to move physically throughout the scene and where they need to be when delivering certain lines of dialogue.

It allows your camera team to know where the camera and lighting equipment needs to be, but also flag up any issues they have regarding where they can place the camera.

This also allows for others to have a creative input about the blocking.

The first two stages of blocking are there to work out the general movement of your actor and camera, but the third stage of blocking is where you set the specific marks for where you need you actor, camera, and focus to hit in order to capture the footage.

Our actor had their starting point and moved towards the camera, keeping the position of his feet on frame right.

2.gif

The camera tilts down whilst the 1st AC keeps the focus tracked on the feet. The actor lands on his end point and places the mop down.

This may not look like a complicated shot, but there are a lot of points for both the actor and camera team to hit.

To achieve this shot, we placed the camera low down on the floor and asked our actor to perform the action from point 1 to 2. Then we asked the actor to stay at this position as we adjusted the camera angle, and placed a number of different marks on the floor.

Firstly we placed a blue piece of gaff tape at the bottom of the frame to indicate if the shot has over-shot the tilt of the camera.

Blocking with T-Marks and Tape

Next we placed a t-mark just off screen to the left of frame. This shows the actor where his end mark is and where his feet need to line up with and where he need to place the mop down. This also allows the 1st AC to set their focus marks on the follow focus.

The reason T shapes are used is because it tells your actor how far left and right they need to be, but also how far forward or back they need to be.

You can place t-marks down by making them out of tape or by using these metal t-shaped brackets you find in DIY shops.

1.gif

Then you can use gaff tape to tape them up so they are nice and bright so people can see them. You can now reuse them, and place them on surfaces like concrete where tape would not stick.

The last mark we added was a focus mark which was just off camera right. This mark was set halfway between point one and two so the 1st AC could see the halfway point and determine the speed the focus.

We used t-marks and tape throughout the whole shoot, sometimes for the actor to know where they need to stand or mop to and others for focus marks.

Having T-marks and tape helps to improve accuracy when shooting as the actors, camera and focus puller know where they need to be to hit their marks. If you need to do many takes, the technical side of the filmmaking will be consistent and it will help save time when shooting.

Check out our video on blocking if you want to find out more information about it. If you want to help this channel grow give us a thumbs up or down if you don't, hit that orange lens cap to subscribe, and remember achieve it one shot at a time.


This video was Sponsored By

🚀 http://bit.ly/pack-emulsion - Make your video look like it was tailor-made for the silver screen with RocketStock’s film grain overlay pack, Emulsion!

🎵http://bit.ly/track-tell-me - Click here to download this episode's track. Check out Premiumbeat.com to discover a huge range of exclusive royalty free music!


DISCLAIMERS:

Some of these links are affiliate links, if you purchase gear via these links The Film Look will receive a small commission, but there will be no additional cost to you. Thank you!

Our Filmmaking Camera Rig

We’ve had loads of comments asking about the camera rig we used to shoot our short film The Asylum Groove.

In this video I am going to break down the rig. If you haven't seen the short film yet you can find it here.

The camera we used was a Sony A7s mark 1, which is the camera we use to shoot all of the film look videos.

We shot the film in 1080p using a cine 4 flat picture profile to give us a little more dynamic range.

Everything was contained in a Tilta cage, the one with the wooden handle which makes it easier to press the record button.

The camera is powered by our custom dummy battery setup, which gives us about a full day’s worth of power.

If you want to find out more about the battery we have a video about it here.

For the film we used a set of vintage lenses. We had a 35mm, 58mm, and 85mm.

The entire film was shot at F8 as we wanted people to see everything that was in the background as the location helps to tell the story. If we opened up all the way to F1.8 the background would have been a lot softer, losing the detail you get at shooting at F8.

Shooting at F8 was a decision we made after looking at the reference images from films like Thousands Cheer and one flew over the cuckoo's nest both which have a deep focus.

To help keep focus we used a PDMovie wireless follow focus system which was powered by a D-Tap battery.

We have a video review coming very soon all about the wireless follow focus and how we powered it. 

Everything was mounted via the Titla rail mounts to a pair of 15mm rods. The camera was mounted as far back as possible to help balance the weight, and the rig rested on this Small Rig shoulder mount.

Sticking with the shoulder rig, we had a set of handles mounted to the front, which were also from SmallRig.

Small Rig are not sponsoring this video we just really like their products, but we DO have a video all about SmallRig here.

This setup was very versatile. I used it on my shoulder, low down resting on the floor, also on a slider and a tripod. Everything worked so we did not have to take anything apart during different setups.

We had a PerGear 7 inch monitor mounted to the camera via a magic arm so we could quickly adjust it depending on the setup.

We also have a full review about this monitor here.

The main reason we used this monitor was because it had an HDMI out. This meant we could take the feed from the camera to the monitor, then backout to another monitor which was used by our 1st assistant camera, Rob. This stand was set up with an Atomos Shogun monitor and used to pull focus with the PD Movie follow focus controller.

I’m not going to take credit for setting up the camera on the shoot, this was done by our 1st and 2nd ACs, Rob and Adam. This was made possible by communicating with the camera team before the shoot so they knew exactly what I needed from the rig.

We also used a mixture of other people’s equipment like a Konova slider, a steadicam and various grip and AC equipment.

We haven't always had all of this equipment, we started off shooting on handy cameras, then moved on to shooting with a Canon 600d with one lens, and the same shoulder rig we used on this film.

We’ve built up what we used over the past 6 years of working on many different jobs, and a lot of the equipment we used on the film was borrowed from others who worked on the film.

Not all of this equipment allowed us to capture a better image, a lot of the equipment we used simply let us save time, like the wireless follow focus as there was someone dedicated to that job. Any equipment that can save you time during a day and a half shoot is super valuable but your most valuable asset is your crew, so chose them before your camera.


DISCLAIMERS:

Some of these links are affiliate links, if you purchase gear via these links The Film Look will receive a small commission, but there will be no additional cost to you. Thank you!

Using ONLY Aputure Lights to Make a Film

The final two shots in our short film The Asylum Groove were inspired by this piece of art which we randomly found online when looking for inspiration for this film.

In this video we are going to talk about the setup and how we lit those two shots.

Both shots were filmed in the same location as the first scene of the film. The location was 16.2 by 7.5 meters and had 6 windows which were 1.2 by 3.2 meters high.

To start, we positioned the electric chair in the spot we wanted and screwed it to the floor. Our actor would be strapped into the chair and wouldn’t be able to get out without assistance.

For his performance, we wanted him to to try and force his way out. Screwing it to the floor meant the chair would not tip over.

To make it as comfortable as possible for our actor, we made some soft straps for his wrists and ankles so he could pull as much as he liked and he would not be hurt.

Having so much natural light coming through the windows worked great for all of the other shots in the film, but for these two shots, we needed it to be completely dark.

Unfortunately, we could not shoot the scene at night as we could not get access to the location later in the day, so we shot it during the day. We made the location as dark as possible in two ways.

The location was a old school hall which had a lighting rig built in and had large blackout curtains. The curtains had been damaged over time and did not cover all of the windows, but it was a good start. We also used some of the curtains to block out the entire background for both shots.

Next we used the law of physics and something called inverse square law, let me explain.

The closer your light is to the subject, the brighter it will be, and the fall off will be harsher. The further away your light is from the subject, it decreases in brightness and the fall off is a lot more even.

The sunlight coming through the windows was further away our key light, which was about 1 meter away from our subject.

When we correctly exposed the camera for the closest and brightest light, this made all over light darker.

We have linked to an article from Petapixel and a video from a youtube channel called Wolfcrow which goes into a lot more detail about the inverse square law if you want to check it out.

For the shot we hung an Aputure 300d from the lighting rig that was all ready in the room. We did this by using a rail clamp which was attached to the bars of the rig. Attached to that was a C-Stand arm so we could bring the light further down, getting it about a meter away from our subject, and it also meant we could easily adjust the angle if needed.

We also attached a safety harness to the light just encase the clamp decided to fail. You can never be to careful.

One advantage of using the Aputure lights was the remote it came with which lets you wireless control the brightest and switch the light on and off.

As the light was up high, having the remote meant we didn't have to get the ladder back out to adjust it, which saved us a lot of time on set.

One of the main reasons we rented the Aputure 300d was because you can attach different mounts to the front of the light creating many different types of light sources.

For the first part of the film we used the space light attachment which we spoke about more in last week’s video.

For this shot, we attached a Fresnel lens which helps to focus and create a beam of light. The light was set at 75% brightness, angled just in front of our actor Chris, creating dark shadows on his face.

Before we filmed the shot we got someone to stand in for Chris, so our 1st AC Rob could get focus marks with the PD Movie Wireless Follow focus we were using.

It’s best to do these technical things with a stand-in. That way your actors aren’t standing around in front of lights all day as well as giving a performance.

We had to film this shot a couple of times because we had some technical issues with the straps not being tight about, causing it to fall of Chris’s head during the take.

One decision we made early one was avoid giving our actor an eye light for this shot. This was because we wanted his eyes to look dark and dead, unlike the previous scene where it was very light. In retrospect, this is actually something we would like to change because you can't read his reaction as well because you can’t see his eyes.

The last shot of the film was this one.

Taking inspiration from other films

We took the inspiration for this shot from this image we found online. We knew straight away this is how we wanted the film to end with the reflection of people watching him from the observation room.

So we built an observation room. We randomly had access to a window which was big enough and mounted onto a stand which was already in the room. Then we built a blanket fort around the window with the help of the blackout curtains, c-stands, more blackout material and lots of clips.

Now we had a room which was facing the chair and was completely blacked out all the way around, apart from the window. We did this to help emphasise the reflection of the people. By blocking out the background, this meant we would only get their reflection and nothing else.

To achieve the reflection of the people in the window we used an Aputure 300d with a space light and set it to 100% brightness which is around a 2k light. This was placed outside the fort, shining through the window, as we could not fit it in side.

Lighting-Video-3.gif

Then we boomed an LED panel into the fort as the main key light for Emily who was playing the woman’s hand in the film. For Ed, who was playing the executioner, we had an Aputure M9 light just to bring him up a little.

We are not sponsored by Aputure - we just really like their lights.

One thing we learned from this shot was just the sheer amount of light you need to add in order to achieve a bright enough reflection to see the subjects.

Another thing we decided early on which helped seeing them in the reflection was dressing them in white. And because I was in the fort operating the camera, I made sure to wear black to avoid being picked up by the camera.

With the camera being in the fort on a slider, the reflection was so strong we could see it in the window. So to combat this, any part of the camera that reflected light, was gaff taped up and it solved the problem.

The final part of the shot were the curtains falling which was achieved by clipping blackout material to the outside of the window and having two people let go on action.

These two shots did take around 4 hours to setup and the footage in total lasts for about 40 seconds, but we think it was totally worth it and without the crew, it wouldn’t be possible so big thanks to them.


Equipment Used

🎥 This episode's kit/gear/equipment:

🇺🇸 US links: 

Aputure 300D - https://amzn.to/2L7JZI2
Aputure Space Light - https://amzn.to/2NK8QA8
Aputure Fresnel Mount - https://amzn.to/2mfuOhD

🇬🇧 UK links:

Aputure 300D - https://amzn.to/2L8CnSe
Aputure Space Light - https://amzn.to/2Lctas0
Aputure Fresnel Mount - https://amzn.to/2LcLaCL

This video was Sponsored By

🎵 http://bit.ly/pbtfl-themaster - Click here to download this episode's track. Check out Premiumbeat.com to discover a huge range of exclusive royalty free music!


DISCLAIMERS:

Some of these links are affiliate links, if you purchase gear via these links The Film Look will receive a small commission, but there will be no additional cost to you. Thank you!

Making a £8000 film for £500

Short films cost money to make, but how much money do they cost?

In this video we are going to break down how much it cost to make our short film The Asylum Groove. If you haven't seen the short film yet you can find it here.

The film is just over 3 minutes long, we shot it over 2 days, and had a crew size of 9.

We are going to break down the cost of the film into a few different areas. First will be the things we spent money on like equipment rentals, props and costume. Second will be the cost of the equipment we already owned or borrowed from other people, and finally the cost of people's time.

Set - £35.09

The location we used for the film we were able to get for free, but we did spend money on dressing the set to help tell the story. We created the Bedsville Disco sign, pinned up balloons, bought and weathered the record player and added signs to the doors.

Costume - £52.98

The main cost for the costume was from the scrub set and also the elbow and knee pads which our actor wore during the tripping shots. We also bought the dust rags which hung out of the character pockets and we also bought a bow tie for the executioner to wear.

Props - £71.94

Props that we had to buy for the film were the mop heads, wood to build the chair, the head sponge and chair straps.

Music - £23.99

The music for this film was such an important part in the film, it helps to set the tone and mood. We started off with about 20 tracks we found on various different sites, but settled on this one from audio network.

Food - £27.61

Feeding your cast and crew is super important and if it is the only thing you spend money on do it.

Travel - £30.00

We didn’t want any of our cast and crew to be out of pocket travelling to and from the location.

Equipment Rented - £242.39

For this film we had to rent 3 Aputure 300d lights as we did not have any lights that would be suitable for the production.

Total cash spent was £484

The total cost to make this film was £484 which is actually £24 more than it cost to make our last short film Backstage.

The equipment we used to shoot the film was equipment we have been building up for the past 6 years, and it is the same equipment we use on a day to day basis to make these videos. If someone wanted to go out and shoot this film on the same equipment we used, we have worked out it would cost around £4,850. Now making the total cost of the film £5,334.

This total cost only includes the equipment we owned. Rob our first assistant camera and Opie the second assistant camera both brought their own kit which we used. This included C-Stands, tripods, a steadicam and many other pieces of equipment and lots of tape. We have worked with them a number of times and they bring what they think we need to make the production the best it can be.

To put a value on this equipment we have said it would cost about £500 to rent the equipment that we did not already own. Now making the total cost for the film £5,834.

But that’s not everything, what about people's time? For everyone who worked on the film they did it in kind. Hopefully one day we will have the budget to pay everyone, but we have estimated if we paid everyone a standard filmmaker’s rate in North East England, the total cost of the film would be £7,834.

This is a scary number to us and is something we simply can’t afford.

This film would have been impossible to make at that cost, but getting to know people over time who want to help, building up your equipment little by little, and making sure you cater for everyone who works on your film, then it makes it possible to make a film for £484.

You don’t need all of the equipment we used to make a film, not all of the time anyway. We shot our short film Corpse on a Canon 550D with a 24-105mm lens, and on the same shoulder rig we used to shoot this film and we still think that film looks good.

Go out there and make films on whatever equipment you have, and we hope this video has helped people understand how much it can cost to make a short. It is something we did not know until we started to make bigger films.

Let us know in the comments about your experiences of making short films and the things you’ve spent money on to make your films better, give us a thumbs up or a thumbs down if you liked or disliked this video, hit the orange lens cap to subscribe, and remember achieve it one shot at a time.


DISCLAIMERS:

Some of these links are affiliate links, if you purchase gear via these links The Film Look will receive a small commission, but there will be no additional cost to you. Thank you!