Boom Pole Quick Release | Triad Orbit IO-R Review

You wouldn’t believe how many times I’ve chewed the threading on my shock mount and boom pole trying to screw it in on-set. I found a solution: it’s a quick-change coupler, and it’s a wicked bit of kit. 

I’m a DIY sound recordist, and because of this, no knowledge has been passed down generation after generation. If this WAS the case, I imagine I’d have discovered one of these many years ago: the Triad-Orbit IO-R quick-change coupler. Let me show you how it works.

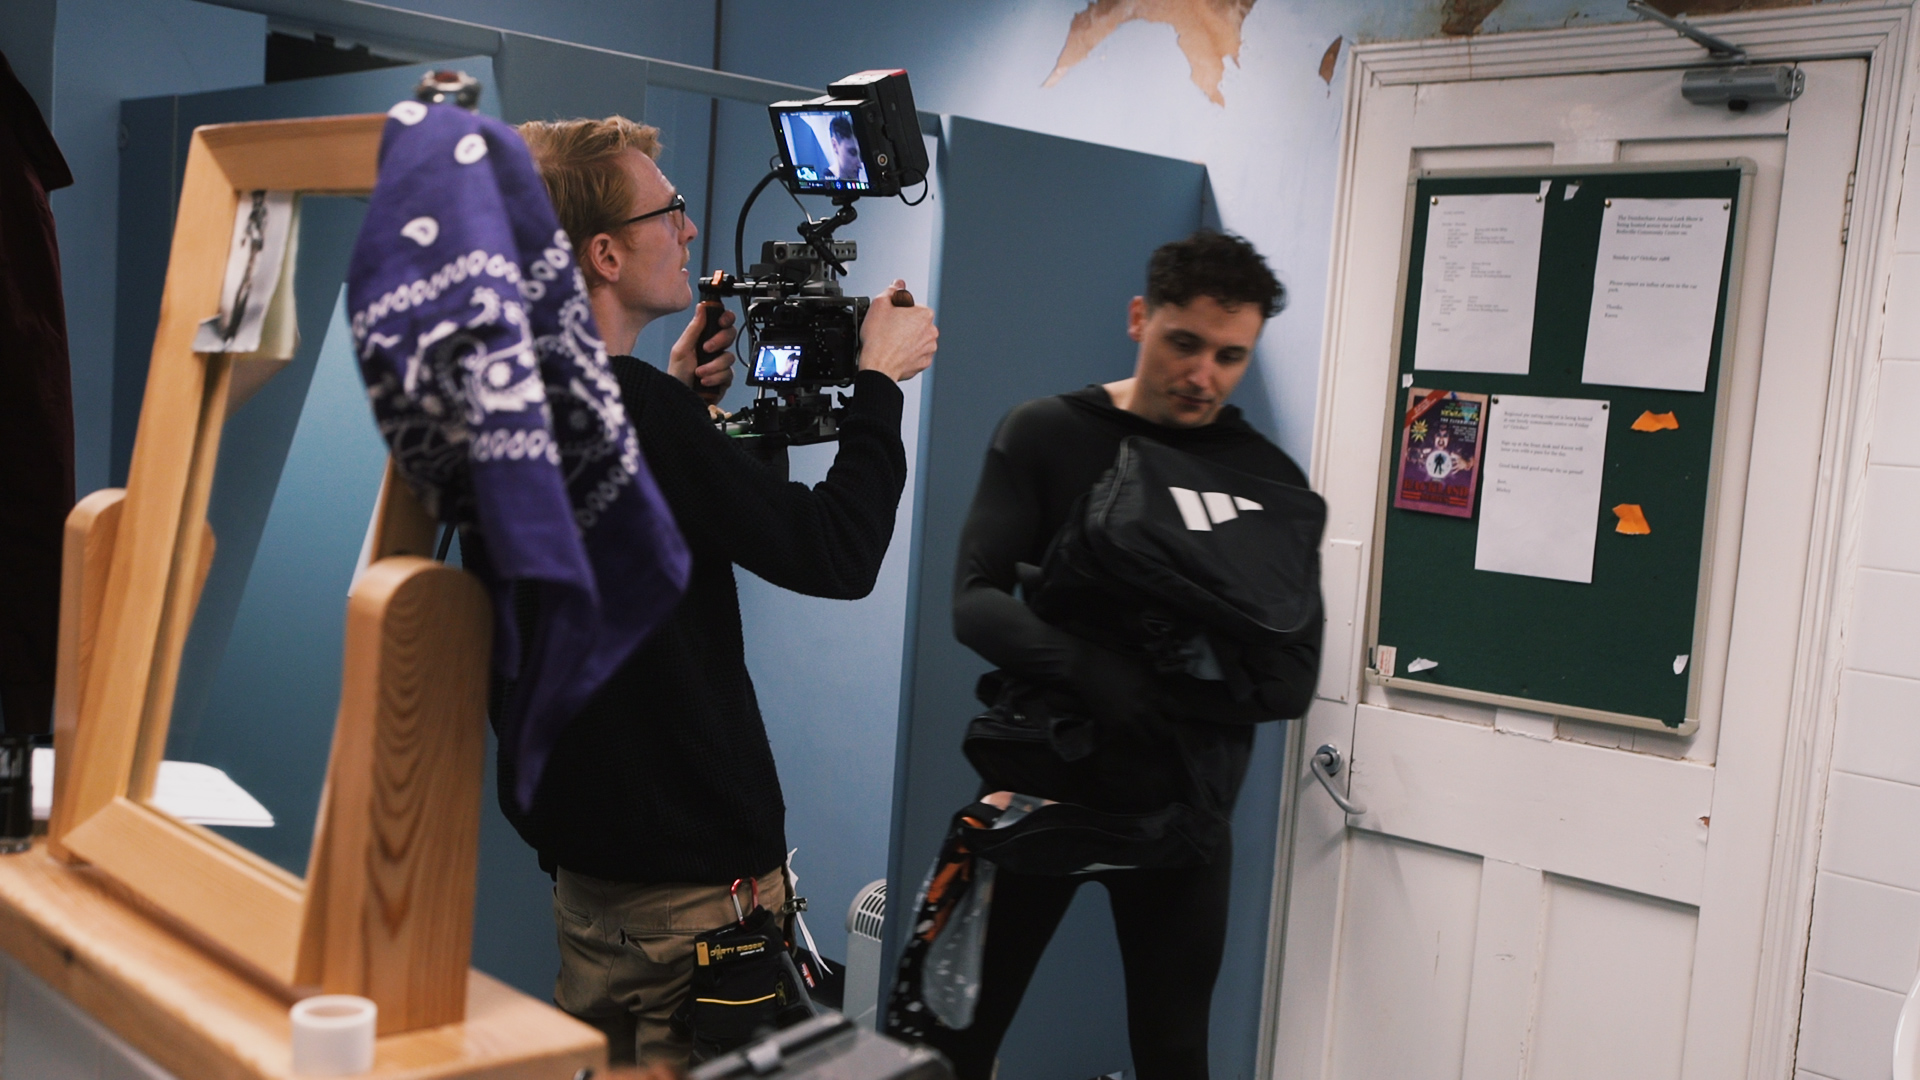
I use a Rode micro boom pole and a Rode Blimp. The problem I have with this equipment is the fact they are made of 2 different types of metal, so one contact is naturally softer than the other which makes it prone to chewing up and destroying the screw unless you are super slow and careful putting it together.

Screw-it-on.gif

So instead of risking damage to your equipment every time you want to attach a shock mount, you can use a coupler. You simply screw each part to the boom pole and the shock mount and when you want to attach it, you pull the release back, slot it into place, let go, and it grips it tight.

It’s essentially the same as a quick release plate on a tripod and camera.

You can buy quick-change couplers with a bunch of different sizes heads and mounts. They even do a light stand version which is really handy. And they also sell multipacks in case you wanted to kit out all of your audio equipment for fast and easy use.

This might not be a groundbreaking discovery for some, but i had no idea something like this even existed. It’s going to save a lot of time tediously trying to screw the shock mount onto the boom without it breaking, and it will save all of the money that I was dumping into replacement parts.

If you are just starting out in sound, take a look at our Indie Film Sound Guide. We run through all the basics of recording sound for micro-budget and small indie level productions.


This video was Sponsored By

🎵 http://bit.ly/track-rollthedice - Click here to download this episode's track. Check out Premiumbeat.com to discover a huge range of exclusive royalty free music!


Equipment Links

🎥 This episode's kit/gear/equipment:

US links: 

Triad Orbit IO-R: http://amzn.to/2ruIrPH
3/8-inch Mounting Head: http://amzn.to/2E1nsqp

UK links:

Triad Orbit IO-R: http://bit.ly/2DrRQcf
3/8-inch Mounting Head: https://goo.gl/m3JYuJ


DISCLAIMERS:

Some of these links are affiliate links, if you purchase gear via these links The Film Look will receive a small commission, but there will be no additional cost to you. Thank you!

Behind The Scenes at The Film Look | BTS #40

We changed the name of The Film Look vlogs to Behind The Scenes at The Film Look, and we are on the Young Filmmakers Podcast hosted By Max from Valley Films, check it out via the link below.


DISCLAIMERS:

Some of these links are affiliate links, if you purchase gear via these links The Film Look will receive a small commission, but there will be no additional cost to you. Thank you!

DIY Light Skirting

90% of our short film Backstage is set in a locker room, and the location we had for this scene was in an old disused school. We spoke about how we dressed the set in a previous video if you want to check it out:

INT. LOCKER ROOM - NIGHT

The room was 5.7 meters by 3.7 meters and had 7 windows. To make sure we could keep the light consistent, as we were going to shoot a night scene during the day, we decided to block all of the windows which also helps to sell the effect that this is a run down venue.

Boarding-up-the-windows.gif

The room had 4 fluorescent lights which were 36 watts each and had a colour temperature of around 3200 Kelvin. They were the only lights we used to light up the scene. We did this because lighting people from above is not the most flattering lighting setup, which fit the grimy tone of the film, and this type of room would have these type of lights.

Since this type of lighting setup creates a very even look throughout the room, we added DIY skirts to each of the lights. By blocking the light from hitting every where, it now creates a vignette around our subjects. As they are standing directly below the light, and the walls are not being hit with as much intensity as our subject. To help bounce more light downwards we painted the inside of the skirts white.

Before-and-After.gif

Our white balance on the camera was set to Fluorescent Warm White, the tube lights had a green tint to them so we adjusted the colour gamut in our white balance setting to take away the green tint, and make sure the whites were white.

In the final grade we did add some of this green tint back into the final image, but because we had strong colours coming from the walls and one of our characters costumes, it was important to shoot everything as clean as possible.

Sony A7S Picture Profiles

By only using the ceiling strip lights it allowed us to move quickly whilst shooting as we did not had to change the lighting setup after each shot. The only lighting change we made on the day was to either add a little bit of bounce light to bring up the dark shadows of the costumes and under our actors chin.

Reflector-Blocking.gif

Also, we had to flag the light from hitting one of ours characters bright shiny costume as it become overexposed when shooting at different angles in the room.

EXT. CAR PARK - NIGHT

This was the only exterior scene in our film and it was at night. By using a Sony A7s we did not have to worry about our ISO being too high and creating noise, but we still needed to light the scene. We chose a car park which had floodlights which we could use to light the scene.

The tracking shot was filmed by our friend who is a wicked glide-cam operator, and to light this shot we simply boomed a 160 LED other head whilst he was walking. We placed a Aputure HR672c LED panel in the back seat so when the car door opened and used the remote which comes with the light to turn it on, simulating the in car light.

Just as we were setting up for the next shot in this scene which was a over the shoulder shot of our character whilst people walked passed, the floods light in the car park went off. At this point we only had two shots left to shoot for the entire film, we had a prop car, and extra cast members, so we had to find a way to shoot the last two shots.

The over the shoulder shot shows the rest of the car park which is now in darkness, but luckily we had 4 cars so we turned on everyone's car lights to light up the car park.

INT. BACKSTAGE - NIGHT

The final scene of the film was set behind the backstage curtain. On the other side of the curtain would be a wrestling ring and the crowd. We could not afford to show this so we faked it with sound. The location we shot this scene already had large blackout curtains, and we just needed to block up the other walls with more of the black backdrops.

Backstage Curtain Setup.jpg

For the main angle in this scene we used the Aputure HR672c LED set to 5500K as a key light for our subjects, and we also used disco lights which would be used at an event like this. When speaking to our 1st AC Rob before the shoot he said he already had a set of disco lights we could us, and the definitely helped to set the scene.

We did not use many lights in this film, and in our main scene we only used what was already in the room. For us finding this main location with everything we needed saved us time when shooting, but also saved us money as we did not need to buy or rent any lights.

So for the next film you make think about how you will light your scene with the things you currently have access to, you already might have what you need to make your film.


This video was Sponsored By

🚀 http://bit.ly/illuminate-pack - RocketStock’s light leak pack, "Illuminate", is sure to impress your viewers. Shot using digital cinema cameras in 4K, it’s an unbeatable way to lift your video to new, cinematic heights.

🎵 http://bit.ly/track-phenomenal - Click here to download this episode's track. Check out Premiumbeat.com to discover a huge range of exclusive royalty free music!


Lighting-Ep.jpg

DISCLAIMERS:

Some of these links are affiliate links, if you purchase gear via these links The Film Look will receive a small commission, but there will be no additional cost to you. Thank you!

1 Essential Tripod Trick | a Filmmaker's Review

A tripod is one of the most important pieces of camera equipment. I am going to show simple tripod trick you might not of realised you needed to know. 

Let’s start off with your tripod at its lowest position. On most tripods, when you want to raise them you unclip one of the legs and extend it. Then if you want to make it even taller you extend the next leg.

Here is where the trick comes in:

When you extend the first leg, make sure you release the clip which is the closest to the ground. Now the tripod legs look like this...

Release bottom clip first.jpg

...and the next clips are halfway up the tripod, meaning you can stand and easily access the clips in arm’s reach to further extend the height of your tripod legs.

Lets reverse back and release the top clip at the start instead of the bottom one. Now the tripod clips are at the bottom of the tripod, meaning you have to kneel right down to release the tripod legs which are no longer in arm’s reach.

the wrong way.jpg
the-wrong-way-to-release.gif

So that is the trick, and you might not think it is a big deal and you might already do this, but compared to all of the other tripod tricks this is the one you will use every time you use your tripod.

This tip works when your tripod is at it highest and you want to lower it, but you do everything in reverse order. Release the clip which is in the highest position to lower your tripod, now all of the clips are in the middle of tripod.

This is a simple tip but once you start using it, you will soon realise how much easier it is to extend the height of your tripod by choosing the correct clip. It will save you a few seconds of time every time you do it, but over time it will save your knees and back.


This video was Sponsored By

🎵 http://bit.ly/pb-finestimports - Click here to download this episode's track. Check out Premiumbeat.com to discover a huge range of exclusive royalty free music!


Equipment Links

🎥 This episode's kit/gear/equipment:

US links:

Head: http://amzn.to/2GKojMi
Levelling Base: http://amzn.to/2EVbHoX
Legs (newer model): http://amzn.to/2EVRc7u

UK links:

Head: http://amzn.to/2F84P6U
Levelling Base: http://amzn.to/2ozTdPN
Legs (newer model): http://amzn.to/2FAkSsc


Tripod-Trick.jpg

DISCLAIMERS:

Some of these links are affiliate links, if you purchase gear via these links The Film Look will receive a small commission, but there will be no additional cost to you. Thank you!

How to Block a Scene

So you’ve got a script in your hand, a camera on standby, and a bunch of actors at the ready. But before you start shooting, you need to figure out where everyone is going to be throughout the scene. Today we’re going to talk about blocking.

Where are the actors in the scene? Do they move? Where do they move? How does the camera show this? Is it static? Is it panning or tracking?

Movement-Blocking.gif

Blocking is the process of working out the all of this out. It’s like dance choreography, but instead of dancers performing dance moves on musical beats, you have the actors and the camera performing actions on script beats.

This is our method for blocking:

We usually start by choosing marks for the actors. These are static positions where the actors will stand during moments in the scene. You can cue an actor to then travel from one mark to another mark creating a movement in the scene.

Reflector-Blocking.gif

One quick note: People rarely stay completely static. So if you want a simple way to help achieve a more cinematic look, or the film look, get your actors on their feet and moving around during the scene. And if they are stood still or sitting, have them move in another way, such as eating, putting on makeup, or drinking a cup of tea.

Once you are happy with how the actors are moving in the scene you can bring in the camera.

We start off by plonking the camera in front of an actor’s mark and framing it up. If they are positioned here for the majority of the scene, this is a good starting point for coverage.

Blocking with Camera.jpg

Then think about how to cover the movement in the scene. You want the audience to know where everyone and everything is to each other in the scene, so make sure to cover their movement so the audience can understand the geography of the room. Cutting back to a wide shot is arguably the easiest method to achieve it.

Once you have this all thought out, you can make adjustments to the blocking of the actors and the camera to help: light the scene better, cover the room easier, and reduce or increase movement.

All of your choices will determine how the film feels. The movement of the actors, their body language, where they are standing or sitting, the lighting at each of their marks; this is all up to you to decide, and each decision will be necessary to convey the story you want to tell.

We used blocking to give the audience information about the character, in replace of dialogue. For example, in our latest film Backstage The Medium slowly walks over to the stall to convey reluctancy in his character. He doesn’t really want to help The Flyswatter.

Jenny the Stage Manager storms into the room to convey she is in a state of power. She even blocks the way out with her arm to further identify that “Hey, I’m the boss. You’ll leave when I let you leave”.

Blocking-to-Identify-Characteristic.gif

You can also use blocking to make adjustments and tailor the set to make it more dynamic. We had the problem of where to place The Medium’s mirror on set.

We needed it positioned in front of him in order to achieve the first shot in one take, but it was too tall on the counter when The Medium gives The Flyswatter a lecture at the end of the scene.

So we made the change to have The Medium pack it away, completely solving the problem AND giving The Medium an activity to perform while The Flyswatter rambles on in the toilet cubicle.

Blocking-for-Adjustment.gif

It might not be a fancy light, or a super expensive camera, but something like well thought out blocking can create dynamic, realistic, and a cinematic image, getting you one step closer to achieving the film look.


This video was Sponsored By

🚀 http://bit.ly/synergy-pack - Get professional assets for your video from RocketStock.com. Their "Synergy" video pack is perfect for video editors and animators looking for versatile elements for any type of project.

🎵 http://bit.ly/pb-funkyblues - Click here to download this episode's track. Check out Premiumbeat.com to discover a huge range of exclusive royalty free music!


How to Block a Scene

DISCLAIMERS:

Some of these links are affiliate links, if you purchase gear via these links The Film Look will receive a small commission, but there will be no additional cost to you. Thank you!

How to Shoot Faster on Set

A way you can work faster on set is by being organised and knowing what you need to shoot before day 1 of principle photography. So what is the process of turning the pages of your script into a production plan?

In a previous episode we spoke about the process of breaking down your script and extracting all of the different props, costumes, locations, cast, and any other things you need in order to make your film.

The process of working out which shots you need is very similar, but instead of extracting this information you need to add it.

Shot List

This is the script for our short film Backstage and once it was complete we went through the script and started to note down some of the shots we thought we needed.

A wide shot then a close up here, over the shoulder shot here. You can start to create a shot list, for now pen and paper will work, or even Word, but if you have access to something like shot lister, it’ll keep you more organised.

Paper-Shotlist.gif

Test Shooting

Now you have a brief list of what you need, test shoot these shots.

If you can go to the location you will be shooting in, this will help you work out if you the shots you have written down will give you enough coverage, and if you need to add some extra shots.

During the test shooting at the location you can work out the blocking and test the lighting:

Storyboards

For our short film Backstage we went to the main location and walked through the script, working out where each actor would stand, where the camera would be, and taking stills to create our story boards. Storyboards do not need to be detailed pieces of art, especially if you can not draw like us, but you now have something visual to show the cast and crew. Here is an example:

Storyboarding-using-Photographs.gif

For the storyboard Richard stood in place where The Medium would be, looked in the correct direction, and since we did not take a tripod I put my hand in front of the camera to create the Over the shoulder shot.

If you can not use the location before you shoot, the next best thing is to test out your shots in your living room or bedroom. We also did this for the last scene in our short film, as the location would be not ready to shoot until the day, but we still wanted to be prepared.

So me and Rich worked out which shots we would need, setup the camera with the correct focal length, and we just stood in place. It may not look fancy, but on the day we knew the types of shots we needed to film.

Lining a Script

Once you have gone through your script you can now create your final shot list. We use shot lister to do this, but there are many other programs out there and a lot of people just use word. From your final shot list and storyboards you can now go back to your script and line it.

Lining your script means putting a line through a section of your script which indicates when each shot should start and when it should cut. Here is an example: 

Shot 1P is at the end of scene 1, and is when The Medium is talking face to face with the Flyswatter for the first time as he has just come out of the toilet cubicle. There would be no point filming this shot of The Medium before this point, so on the script write down when this shot should start.

1P starts with The Medium delivering the line ‘Who Rocky Johnson’, The Flyswatter will pack up his stuff, walk out of the cubicle, The Medium will start to deliver his line, the toilet door will open, King Tonga and Bobby Jazzler enter the room, The Medium will finishes his lines, then shot cuts.

Shot 1J K L M N and O of the film is the same section of the script as shot 1P, all covering different angles.

Pre-lining a script.jpg

One piece of advice would be to get your actors to start a couple of lines before each shot would start, this helps them lead back into the role, in terms of dialogue and actions.

Another reason lining a script is important is because it lets you know how long each shot should last, and from this information you can work out it will take to shoot each shot.

Shot 3C, a WS of Jenny the stage manager which goes through a full page, you will know that the shot will take longer to shoot than 3D which only goes through only a paragraph. With this information you can schedule your shot list in a order that works best for you.

Now you have the information from your test shooting about the shots you need, your storyboards are created, and your script is lined, you should have a clear understanding of what you need to shoot, helping you shoot faster on set.

The script for our short film Backstage was 7 pages long, these techniques will work if your script is 1 or 90 pages long.


This video was Sponsored By

🚀http://bit.ly/illuminate-pack - RocketStock’s light leak pack, "Illuminate", is sure to impress your viewers. Shot using digital cinema cameras in 4K, it’s an unbeatable way to lift your video to new, cinematic heights.

🎵 http://bit.ly/track-boundforglory - Click here to download this episode's track. Check out Premiumbeat.com to discover a huge range of exclusive royalty free music!


how to shoot faster on set

DISCLAIMERS:

Some of these links are affiliate links, if you purchase gear via these links The Film Look will receive a small commission, but there will be no additional cost to you. Thank you!

2018 Studio Tour!

In celebration of hitting 10,000 subscribers, we thought we'd give you a tour of our micro-studio!


Sony a7s | a Filmmaker's Review

The Sony a7S is the main camera we use to shoot all of The Film Look episodes, and recently we used it to shoot our short film Backstage.

Here's why the Sony a7S gives you the creative freedom to make the film you want to make.

As of this post, the Sony a7S Mark 1 has been out for about 3 years so I am not going to go into all of the specifications of the camera as there are loads of videos and articles talking about it.

Camera Body

This was the main setup we had when shooting our short film, but let's take it back to the bare bones.

Sony-a7s-Built-up-Rig-to-Barebones-Rig.gif

The size of the camera is very small, even compared to our Canon 600d/T3i which we upgraded from. The size is something we really like about it, because it allows us to use the camera in 3 different ways.

Form Factor of Sony a7s and Canon 600d T3i.jpg

The first is this super lightweight stripped down version which we use when we are just out taking photos or travelling. If you use a prime lens you can get something that fits into your jacket pocket.

Sony-a7s-small-enough-to-fit-in-your-pocket.gif

The second setup is the one we use the most when shooting. We put it in a cage which adds more protection and usability with a hand grip and top handle. The cage also allows us to attach more equipment like a monitor, an XLR to 3.5mm microphone converter, and an external camera battery, which we would definitely recommend if you are shooting all day. The Sony a7S batteries are very small and you will only get about 30 to 40 minutes out of them.

Sony a7s Tilta Cage and Wooden Handle.jpg

We have a full video about our external battery setup here:

Finally, this is our third setup, and the one we used to shoot the short film. We took away the XLR converter as we were recording dedicated audio, but we did add extra rails for a wireless follow focus which went to another monitor. This is something we only use when shooting films, and it really saved us time.

Sony a7s Full Rig Setup.jpg

You do have to spend more money to get the camera to this set up but you could just buy something that already has some of this equipment built in like the Canon C100 or Sony FS7. But if you need something that can go from being tiny to massive, the Sony a7S is the best of both worlds.

Image Quality

The image quality of the camera is very sharp even at 1080p. Yes this camera does NOT shoot 4K. If you need that, get the Mark ii. From shooting an entire film set at night to shooting on a set for our short film Backstage, the quality of the image is up there with the best.

Keep The Change - Sony a7s Short Film at Night.jpg

The camera you shoot on does not matter...at least not until the camera stops you from capturing a clean image. For our short film Keep The Change, which was shot all at night, what we shot the film on did matter. The a7S is famous for its low light capability and we really took advantage of this when shooting. We did not have to worry how far we were pushing the ISO to get the correct exposure.

Keep The Change - shooting at night.jpg

A high ISO does not mean you do not need to light your film, you still need to shape your light to fit the tone of your film. It just gives you the freedom to use less powerful lights.

Keep The Change - lighting the scene on an A7s.jpg

Another aspect of having a camera that can shoot at very high ISO’s will give you the creative freedom to shoot at higher F-Stops. Shooting everything at f1.8 achieves a shallow depth of field but it is not always the best option, especially if you can not keep your shot in focus.

Having the ability to shoot at f4 or f8 in a dark situation allows you to keep your image in focus whilst not worrying about how high your ISO is going. Shooting at an ISO of 1600 at F8 is just as clean as if you were shooting at f1.8 with an ISO of 100, but at f4 or f8 your shots will have a better chance of being in focus.

White Balance

The white balance you chose when shooting will all depend on the type of lights you are using, and what you want your image to look like. The Sony a7s allows you to customise your white balance way past the standard settings like you get with every other camera.

Sony-a7s-Custom-White-Balance-Settings.gif

The main light source in our short film Backstage were 4 fluorescent lights which had a colour temperature of 3200 kelvin. Our white balance was set to Fluorescent Warm White but since these type of lights are well known for having a green tint, I wanted to take this away. You can do this in post production easy enough, but with the Sony a7s you can do it in camera.

Sony-a7s-White-Balance-Example.gif

In each white balance setting you can change the colour gamut to add or take away the Green, Blue, and Magenta from your image. Here is an example of the image before and after we added more Magenta to the image to take away the green tint.

Sony-a7s-Green-Tint-Before-and-After.gif

Having the extra flexibility to correct your image in camera allows you to capture a clean looking image, creating less work in post.

Picture Profile

The picture profile you chose to shoot with all depends on your work flow and experience, but the a7s will give you many different options.

For our short film Backstage and all of the episodes we shoot for this channel we set the picture profile to off, as the standard picture profile is quite flat. Not as flat a Slog 2, but you don’t need to shoot on Slog2 all of the time to get a flexible image for colour grading.

Sony-a7s-Picture-Profile-Off-and-Color-Grade.gif

The picture profile settings on the camera are vast, and very overwhelming, but there are many guides out there to help. One of the best videos about setting up your Sony a7S is from Philip Bloom, he goes into the fine details of not just setting up the picture profile setting of this camera, but all of the settings. It’s definitely worth watching a few times.

Learn how to shoot and colour grade on the Standard profile, the Slog2 profile, and any other custom profile setting you find out there. Use the right one for the right job, they all have their advantages and disadvantage and the Sony a7S gives you the freedom to choose.

Usability

The camera you shoot with needs to help you tell your stories; and the easier it can do that the better.

The camera is very small, but it surprisingly has many function buttons which help you to access settings quickly. Over time you learn which settings you need quick access to, and you can customise them to suit you.

Sony-a7s-Function-Buttons.gif
Sony a7s Record Button.jpg

The only downside to the camera is where the record button is placed, it’s very hard to get to. This is why I went for the Tilta cage as there is a record button on the handle. We have a video about the cages we use for the a7s if you want to check them out:

The Sony a7S gives us all of the creative freedom we currently need we make short films, but it is not the camera we will use forever. If a project requires us to shoot 4K 6k or even 8K we won’t just shoot on what we've got, we will think about what we need to help tell the best story possible.


This video was Sponsored By

🚀 http://bit.ly/corruption-pack - With glitchy overlays, distorted logo reveals and more, RocketStock’s "Corruption" is an ideal way to give your project a dramatic edge.

🎵 http://bit.ly/pb-brooklyn-bridge - Click here to download this episode's track. Check out Premiumbeat.com to discover a huge range of exclusive royalty free music!


Equipment Links

🎥 This episode's kit/gear/equipment:

US links:

Sony a7s: http://amzn.to/2DrEdLb

Tilta Cage: http://amzn.to/2Dn20LY

Pergear a7s: http://amzn.to/2hQYkvS

NPF750 Batteries: http://amzn.to/2hIJZOi

Saramonic SmartRig XLR: http://amzn.to/2DpJMK3

Dji Follow Focus: http://amzn.to/2Dqxelt

UK links:

Sony a7s: http://amzn.to/2DrEdLb

Tilta Cage: http://amzn.to/2D5Ecj0

Pergear a7s: http://amzn.to/2jI1Xon

NPF750 Batteries: http://amzn.to/2jJNckM

Saramonic SmartRig XLR: http://amzn.to/2D4BCtx

Dji Follow Focus: http://amzn.to/2D4b63n


DISCLAIMERS:

Some of these links are affiliate links, if you purchase gear via these links The Film Look will receive a small commission, but there will be no additional cost to you. Thank you!

The Cost of a Short Film: Backstage

How much does a short film cost to make? You might as well ask how long is a piece of string.

Let's put the film into some context. Backstage is 9 minutes long and it was shot over 3 days. Let’s break the cost of the film.

Backstage Cast.jpg

Cast: £0.00

We had a main cast of 3, Liam, Dan, and Aja. We also had a supporting cast of 3, James, Rich and Me. The 3 main cast and our 1 supporting cast member all worked on the film for free because they just wanted to help make the film.

Backstage Crew.jpg

Crew: £0.00

Our crew size was 8, we had Emily who was the producer and 1st AD, Rob (not me) was a 1st AC, Ed was on sound, Kristian was our script supervisor, Adam filmed this wicked steadicam shot, Jack filmed BTS, and Alex was our clapper loader.

Just like the cast, our crew worked on the film for free.

Backstage Food.jpg

Food: £115

Since the cast and crew worked for free we made sure we provided food and drinks. Even if you are making a no budget film, make sure you provided food for your cast and crew, it goes a long way.

Backstage Travel Expenses.jpg

Travel Expenses: £71.70

Along with the food for the cast and crew we paid for people's travel expenses. You don’t want people to be out of pocket for your film.

Backstage Locations.jpg

Locations: £100

The location we used for the film was an old school which is ran by a local church. They allowed us to use the location for free, whenever we wanted. We did not have to, but we did make a donation to the church for allowing us to have access. If you find yourself in this situation, just work out what you can afford. You don’t have to donate a lot, and whatever you do will always be appreciated.

Backstage Props.jpg

Props: £0.00

The only prop that we really needed in the film was the announcer's microphone. We made this out of cardboard and foam which we had laying around, so it didn't cost anything.

Backstage Costume.jpg

Costume: £93.39

When writing this film we knew we would need to spend a bit of money making sure our characters fit into the world. Some of the costume items we had to buy were the Mediums yellow shirt and waistcoat, the fly swatters Knee pads, headphones, and even this foam hand.

Backstage Set Design.jpg

Set Design: £80.93

The location we had for the set was very flexible, we boarded up the windows and created skirts for the lights with cardboard we already had, but we did spend money on paint. To dress the rest of the set we only used what we already had, and ordered some event posters for the room.

Backstage Music.jpg

Music: £0.00

The music in the film is all original and was created by our friend Jordan who runs Pamplemousse Recording Studio. He did this as a favour as he just wanted to help create the film.

When we started this project we put aside £350 to make Backstage. The total cost of the film was £470. Slightly over our original budget but just by a little.

In the list we did not include the camera equipment we used to make the film. The reason for this is because the camera equipment did not cost us anything for this production as we already own the kit we used, and have for sometime now.

Backstage Equipment.jpg

Anything we personally do not own like the wireless follow focus and disco light that we used to make the film were all borrowed and provided in kind.

Backstage could have been shot on more expensive equipment, but it could have also been shot on camera equipment which was cheaper.

For the purpose for this list we have included a rough cost of the equipment if you were starting for nothing. £4,850. The total cost now comes to £5,320.

If you already own the camera equipment and it is good enough for you to make films, just go out there and make films. We spent £470 making Backstage and in the grand scheme of things this it not a lot of money and you don’t even need to spend that much.


Cost of a Short Film - Backstage.jpg

DISCLAIMERS:

Some of these links are affiliate links, if you purchase gear via these links The Film Look will receive a small commission, but there will be no additional cost to you. Thank you!

How to Develop your Character's Backstory

Sam Mendez says “When you have a cast of 20, this means you have 20 other imaginations in the room with you. Use them.” And that’s exactly what we did on our latest short film Backstage.

Today we are going to talk about further developing a character’s backstory by hot seating our actors.

So this is how hot seating works: an actor will sit down and assume the role of their character. It’s up to you as the interviewer to ask them questions about themselves; their family, their work, their habits, pretty much anything which will build up a backstory.

Aja Improvising her Character Jenny.jpg

It’s a way to expand a character’s biography on the spot by having them improvise answers based on their current knowledge of the character.

You can ask the actors to play the role during the interview, or if improvising isn’t their thing, you can simply discuss the questions and answers together.

The first person we hotseated was Aja who plays the Stage Manager, Jenny. We gave Aja some basic information on the character such as her age, brief personality traits, and the purpose of her role in the film.

Aja as Jenny in Backstage.jpg

After that, it was up to her to fill in the blanks based on the range of questions we asked. Here are some examples:

  • How do you feel about the North East Wrestling Federation?

  • Tell us about your relationship with your parents.

  • Tell us about your relationship with the wrestlers.

  • Are you thinking of quitting? Do you have any other jobs lined up?

Straight away, Aja started to expand the character. She invented the relationship with Erik AKA The Medium and how she has known him since she was a child. Her father used to run the NWF and she would be involved in the activities from a young age, so she’s been around community centre wrestlers her whole life.

We didn't write that. Aja did! On the spot!

Aja Dodd as Jenny in Backstage.jpg

With added backstory information like this, Aja is able to more comfortably place herself in the shoes of the character, and give the character meaningful emotional beats in the film. And because we hotseated the character together, we both had an understanding of the character as a whole, which made directing her performance even easier.

We also hotseated Liam who plays Erik AKA The Medium. With Liam, his character was playing a character, so we actually hot seated both The Medium and Erik as separate personas.

Liam Angus as Erik in Backstage.jpg

Again, we gave Liam some basic information on the character, but left it up to him to flesh out role and make it his own. By leaving a few empty pages in the character biography the actors are able to insert their own information and in turn it helps them play a more convincing role.

Liam Angus as The Medium in Backstage.jpg

You can also use the technique of hot seating as a writer to expand your knowledge of a character you are writing. You may not put a character’s favourite cereal into the script, but it will help create a more rounded and realistic character as you are thinking further into the life of this imaginary person.

So next time you need a bigger backstory for a character, try hot seating.


This video was Sponsored By

🎵http://bit.ly/pb-happyfunkyday - Thanks to PremiumBeat for providing the music for this week's episode. Check out Premiumbeat.com to discover a huge range of exclusive royalty free music!


How to Develop your Character's Backstory.jpg

DISCLAIMERS:

Some of these links are affiliate links, if you purchase gear via these links The Film Look will receive a small commission, but there will be no additional cost to you. Thank you!

Costume Design 101

Getting The Film Look is more than just changing camera settings. Costumes are a massive part of creating a cinematic image and there are several key decisions YOU can make in order to help achieve unique and an interesting costume choice..

One of the biggest impacts you can make to the image of your film is your choice of costumes for your characters. Every fabric, colour, length, and design is telling the audience a very particular visual story which you have control over.

We certainly aren’t massive costume designers to any degree. But with the few projects we have made, we have discovered some key decisions which help aid the reasons for the design of a costume.

Realism is an important one. This doesn’t have to mean realistic in our world, but realistic in the film’s cinematic world.

Zombie film? The clothes need to be stained, weathered, and strictly functional.

Zombie-Film-Costume-Design

A 1980s Community Centre Wrestling Event? Well all of the wrestling costumes will be cheap and nasty, and the fashion choices will steer towards the image of that decade.

Next you want to think of the colour and and texture. Choosing a few strong colours will look better than a mix-mashed pallette.  And pick clothing which will pop from your background and environments too.

Costume Design - The Medium
Costume Design - Flyswatter - Wrestler

In our short film Backstage we choose a bright yellow shirt for our character The Medium, in order for him to stand out from the blue walls of the locker room. The Flyswatter another character in the film needed to contrast The Medium so we inverted his colours and went for majority black, with gold accents.

To go deeper into this, The Flyswatter’s casual clothing is typical 80s fashion, double denim. This gives a stark contrast between his comfort and discomfort in the film. His light blue denim clothing also helps him pop on screen in the dark car park.  

80s-film-costume-design

In films spanning over a large length of time you’ll need multiple costumes. So pick a style for each character and don’t vary it too much. This is evident in real life too.

I’m a sweater-guy. You will see no logos or brands on them, and they will usually be dark and wooly. The sweater is always accompanied by a pair of chinos. This is my costume design.

Rob-The-Film-Look

Richard is even more basic. He is a T shirt guy and it’s usually dark. If fact I am sure he only has 3 different T-Shirts. This is his costume which he rarely differs from.

Rich-The-Film-Look

So next time you are design costumes, put yourself in their shoes and try to figure out what purchases they would make in a clothing store, or how they have acquired their clothes. Then make the cinematic choice; pick contrast colours which help them pop on screen.

This will get you one step closer to achieving the Film Look.


This video was Sponsored By

http://bit.ly/track-the-funk - Click here to download this episode's track. Check out Premiumbeat.com to discover a huge range of exclusive royalty free music!


Costume Design 101.jpg

DISCLAIMERS:

Some of these links are affiliate links, if you purchase gear via these links The Film Look will receive a small commission, but there will be no additional cost to you. Thank you!

BTS: Day Three of Backstage

A fly on the wall experience of the making of our latest film Backstage! We had a load of fun making it and wanted to share with you our process of shooting the film.

If you haven't seen our short film Backstage you can find the link below.


Behind the scenes of The Film Look Day 3 of Backstage
Behind the scenes of The Film Look Day 3 of Backstage - Robert Carr - Liam Angus - Richard Scott

DISCLAIMERS:

Some of these links are affiliate links, if you purchase gear via these links The Film Look will receive a small commission, but there will be no additional cost to you. Thank you!


How to Dress a Set

So you’ve found a location to shoot our film but it doesn’t quite look or feel like how you see it in your head.

In order for it to suit the tone of your film you need to add some things, remove some things, and change some things. This week we are talking about set dressing.

Your choice of location is arguably just as important as the actors you cast. The location is an extension of what is happening in the foreground, and dressing the set to match the tone of the film, or a character's persona, will help you get closer to achieving The Film Look.

This is what the location looked like before we dressed the set for our short film Backstage which is set in a locker room at a local wrestling event in the 1980s.

Location-for-the-film-look-Backstage

The location we had access to was a boys bathroom in an disused school, and we had a lot of freedom to turn it into the set we wanted. Since the film is about a local wrestling event, the backstage locker needed to look old and dirty.

Our idea was that the event is being held at a rundown community centre ran by Mucky Mickey, who does not do a lot of cleaning. Since the school had been closed for about 6 years, it definitely looked old and we actually had to clean it a little.

If we went for a location that was new, say a gym's locker room, everything would have looked relativity new and it would have cost a lot of money to age it. We blocked out all of the windows to control all of the light.

We also did this to make it look like the windows have been broken and boarded up, further creating the idea that this is not the nicest of places.

You don't see it in the film but we added a sign on one of the cubicle doors that says - ‘Out of order - Broken Window’ to help sell the effect even more.

Since this is a community centre there would be posters, leaflets, and notices for other events that would be happening at the community centre.You can see these on the back of the door and the window boards. You can’t read what these say but it adds colour and depth into the background.

The-Film-Look-Set-Dressing

Since this is a wrestling match we added the event posters and flyers all of over the room, again to add depth. Since one of our characters is nervous about wrestling in his first match, we wanted to make sure the event posters are always looking at him.

Finally we added hair gel, deodorant, towels, wrestling costumes, and peoples clothing.

Dressing the backstage set took us about a full day to collect everything we needed, board all of the windows, and actually dress the set. By having such a flexible location we were able to dress and leave the set in a shootable condition a week before we started shooting.

This saved us time on the shooting day as we just needed to turn up and get started. Set dressing, at least from what we’ve achieved, is about telling a story at the location.

You want someone to be able to walk into the room and make a really good guess as to what this film or scene is about by dropping visual hints.

So next time you find a location, ask yourself what the location is currently tell you, and what you can do to make it tell the right story.


This video was Sponsored By

http://bit.ly/pack-emulsion - Make your video look like it was tailor-made for the silver screen with RocketStock’s film grain overlay pack, Emulsion!

http://bit.ly/track-rollthedice - Click here to download this episode's track. Check out Premiumbeat.com to discover a huge range of exclusive royalty free music!


How To Dress a Set

DISCLAIMERS:

Some of these links are affiliate links, if you purchase gear via these links The Film Look will receive a small commission, but there will be no additional cost to you. Thank you!


BTS Day Two of Backstage

A fly on the wall experience of the making of our latest film Backstage! We had a load of fun making it and wanted to share with you our process of shooting the film.

If you haven't seen our short film Backstage you can find the link below.


BTS: Day 2 - The Film Look Team
DJI Wireless setup

DISCLAIMERS:

Some of these links are affiliate links, if you purchase gear via these links The Film Look will receive a small commission, but there will be no additional cost to you. Thank you!


How to scout a location for filmmaking

The location you choose to shoot your film helps to create the world your film is set in, and it’s just as important as casting the right actor.

So how do you know if a location is the right one for your film?

Once your script is complete go through and break it down. Make a list of all the locations that you need - in fact, make a list of everything you need to make your film.

We made a video about breaking down your script which goes into more detail if you want to check out that video after this one.

Now you have written down all of the locations you need, ask yourself how you want each location to look and how much access you need to shoot the scenes in that location.

How do you need it to look?

The main location in the script for our short film Backstage is set in the locker room at a local community centre or boxing gym.

This is how we describe the location in the script -

INT. LOCKER ROOM - NIGHT

The backstage toilet has been used by many performers over the years, but from the graffiti on the walls and the flicking of the neon lights, this is not a classy venue.

When looking for this location we thought about contacting local gyms and sports centers as they would have locker rooms which are already set up.

The first problem we had with these types of locations is that they do not look run down, and it would be very difficult to make them fit the mood we needed for the film.

Access

The reason we could not change the look of these locations is the second problem we had which is access.

Access is very important when making low budget films as you are normally asking to use the location for free, and have to work around external time restrictions.

Local gyms and sport centres are normally used on a 24 hour basis, and if they are closed it’s during the night.

Our access would be very limited, before and during the shoot. If we needed to dress and undress the location after each shooting day, keeping the look of the set consistent would have been very difficult.

Don’t just use the first location that comes to mind, spend a little time searching for alternative locations.

If you need a living room, a friends or parents living room would be the quick and easy option, but if you need the location to look run down you need the time to make it look that way.

Can you set up the room, shoot everything you need, and return the location to its original state in the same day?

Backstage

The location we used for our short film Backstage was in a old school which now gets used by a church, they never use the area we wanted to use which was a boys bathroom, and we could get access to the location as many days as we needed before the shoot.

This was the 3rd location we looked at. The first was too small, the second was too new, and it might not look like it, but the 3rd was perfect.

Having these extra days before the shoot allowed us to clean, dress the set, test the lighting, and block the scene a few weeks before we shot the film.

This meant on the first day of principal photography we only needed to turn up with the camera and shooting schedule, giving us more time to work with the actors and start shooting on time.

We found the location by putting a call out on different local Facebook filmmaking groups.

Emily, the producer of the film, posted out to a bunch of pages and someone she knows, knew someone else, who knew of a place that might suit what we needed.This is why it is so important to collaborate with others as a filmmaker - you never know who knows someone that can help.

Location Scouting

The look of the location and available access are just two of the main things you need to think about when scouting locations for your film.

In the description below you will find a location checklist that has other things you should check when scouting your next filming location. Let’s film in the form.

Location Scounting Form 1.jpg

Script Location - For us it is Locker Room

It’s Scene - 1 of the film which is set at night and it is an interior. The actual Location was an old school and then we add the address which will come in handy later on.

Add the time of when you visited the location as at different times of the day the look and sound of the location may change.And finally add the contact details of the person that give you access to the location.

Next work out the dates you would like to use the location, this includes the number of preperation, shoot and how many days it will take you to reset the location. You can use this information to compare what access is available at the location.Make a note of how far away it is from our production office from the address you wrote down, for most people this is their home.

Location Scounting Form 2.jpg

When at the location draw a rough floor plan of the room and then make a note of what the room looks like.

Also, take photos of the room.

Does the room fit the tone of the film? This question maybe yes or no, but you should always be thinking about how much set dressing you need to do to make it match the tone of the film.

Location Scounting Form 3.jpg

Then work out do you have enough time to dress the set with the information you know from how much access you have.

Listen to the sounds that are in the location. Will you be able to record clean dialogue?

If not can you turn off anything that is making a noise like a clock or a fridge. If there are noises you can not get rid off can like cars going by, can you record your film at this location.

Finally make a note if there are places for people to park at the location. Is there enough room for you to store equipment, makeup artist, and are there bathrooms. This one is very important.

Location Scounting Form 4.jpg

So when you are scouting your next film location, use this checklist to evaluate whether the location is the right one for your film. Ask yourself what you need it to look like, how much access you’ll need, and be open to different places.

You never know, a disused boys bathroom might be the perfect setting for your film, it was for us.


This video was Sponsored By

🎵 http://bit.ly/interface-pack - "Interface", RocketStock's HUD element pack, offers you more than 400 futuristic elements compatible with Premiere Pro, FCPX, and AE. Discover it now!

http://bit.ly/track-rosegold - Click here to download this episode's track. Check out Premiumbeat.com to discover a huge range of exclusive royalty free music!


Location Scouting The Film Look

DISCLAIMERS:

Some of these links are affiliate links, if you purchase gear via these links The Film Look will receive a small commission, but there will be no additional cost to you. Thank you!


BTS: Day One of Backstage


A fly on the wall experience of the making of our latest film Backstage! We had a load of fun making it and wanted to share with you our process of shooting the film.

If you would like to watch our short film you can find it below:


Behind The Scenes The Film Look
BTS The Film Look

DISCLAIMERS:

Some of these links are affiliate links, if you purchase gear via these links The Film Look will receive a small commission, but there will be no additional cost to you. Thank you!


How to Break Down Your Script

Once you have your script complete, the next step is to figure out exactly what you need to make your film. It’s time to break it down!

A script breakdown is essentially extracting all of the necessary information from your script. To do this you need to read through your script and every time a location, prop, costume, or character is mentioned write it down.

This is the script for our short film Backstage. Let’s take a section from the script and break it down. Everything we highlight is something we need to make the film.

Breaking Down the script.jpg

Characters

For this scene we know we need to cast someone to play Jack who is The Flyswatter.

If you haven’t already, start to think about the characteristics your characters have, and then put a call out for to cast your actor. We cast an actor called Daniel Lemon to play Jack.

In this scene we also need a group of people to be wrestling fans that walk past the camera. This is a very small part for people to play, but we still need them to help tell the story. The wrestling fans in our film were just crew members.

Costume

To help identify them as wrestling fans, Ed the sound recordist is wearing the same bandana asThe Medium, a Wrestler in the film.

It shows he is going to the wrestling event to support him, and we threw in the the foam hand as this is a well known costume that people would wear when going to a sporting event.

Breaking down your script - Costumes.jpg

Since this film is set in the 80s all of the costumes need to fit that era, so we needed to dress Jack in washed out jeans and a multicolored jacket.

The final costume looked like this.

We did not go for a multicolored jacket because we managed to get this denim jacket which is actually from the 80s, and nothing says 80s like double denim. Having this list just made sure we had something for our actor to wear, which fit the tone of the film.

Props

The props we needed in this scene were wrestling leaflets, which are shown earlier in the film to help dress the backstage set, and help set the scene that this is a wrestling event. The black sports bag which he is carrying in this scene was also used earlier in the film.

Breaking down your script - Props.jpg

The 1982 Volkswagen Scirocco really helps to ground this film in the 80s. Having access to a vintage car like this upped the production value of the film and really helped put a time stamp on the film. We wrote it into the script because we knew we could get access to it for free, as it is owned by Richard’s Dad.

Breaking down your script - Props 1.jpg

Location

The location we needed was an exterior venue where a local wrestling match might take place. We chose a public car park with very few buildings and signs surrounding it.

We couldn’t point the camera towards anything that showed we were shooting in 2017, so this empty car park worked perfectly. We also chose this location because we were able to place the car under a flood light, reducing the time to set up complex lights.

Once we’ve gone through the entire script we create an excel document to store all of this information. In the document we have 4 columns with the first being the task. This is where you put the name of all of your characters, props and costumes.

Excel - Breaking down your script

The next column is Delegate, this is where you can add the name of the person who is responsible for completing that task.  The 3rd column is for notes with information where you might obtain costumes or props. Finally the 4th column is where you can tick off a complete task.

When all of this section is green you have obtained everything to make your film.

Throughout this breakdown document we break down everything we need into different sections. We start by making a list of all of the characters we need to make the film, and when we have cast them, their name goes in the notes section.

Next are the locations we need, and when we have them complete the address and contact details of that location also go in the notes section. For the costumes, each character gets their own section so we know which character is wearing what item of clothing.

Finally we split the different props and set dressing into the different locations of the film. We do this so we know exactly what we need to take to each different location.

Breaking down your script Form.jpg

Having a document like this let's you and your production team know what you need to make your film on different days and at different locations. We use Google Docs to do this as it is free and everyone can see what they are responsible for.

Breaking down the script gives you a list of all of the pieces you need to make your film, it’s just up to you to put them together.


This video was Sponsored By

🎵 http://bit.ly/illuminate-pack - RocketStock’s light leak pack, "Illuminate", is sure to impress your viewers. Shot using digital cinema cameras in 4K, it’s an unbeatable way to lift your video to new, cinematic heights.

http://bit.ly/track-boundforglory - Click here to download this episode's track. Check out Premiumbeat.com to discover a huge range of exclusive royalty free music!


DISCLAIMERS:

Some of these links are affiliate links, if you purchase gear via these links The Film Look will receive a small commission, but there will be no additional cost to you. Thank you!


The Film Look Plans for 2018 | Channel Update

Here are our plans for the channel for 2018. We want to make 2 short films, create a directing 101 series, create more kit and DIY video, along with making The Film Look Podcast.


DISCLAIMERS:

Some of these links are affiliate links, if you purchase gear via these links The Film Look will receive a small commission, but there will be no additional cost to you. Thank you!