In this video we are going to breakdown the process of using inspiration from other films to help you light your short film.
We did this same process to light our short film The Asylum Groove and If you haven't seen it yet you can find it here.

First of all, you want to look for inspiration. Our short is set loosely in the 70s and in an Asylum, a film we took a lot of inspiration from was One flew over the cuckoo's nest. You can see this in the costume our main character is wearing. We have a video about that HERE.
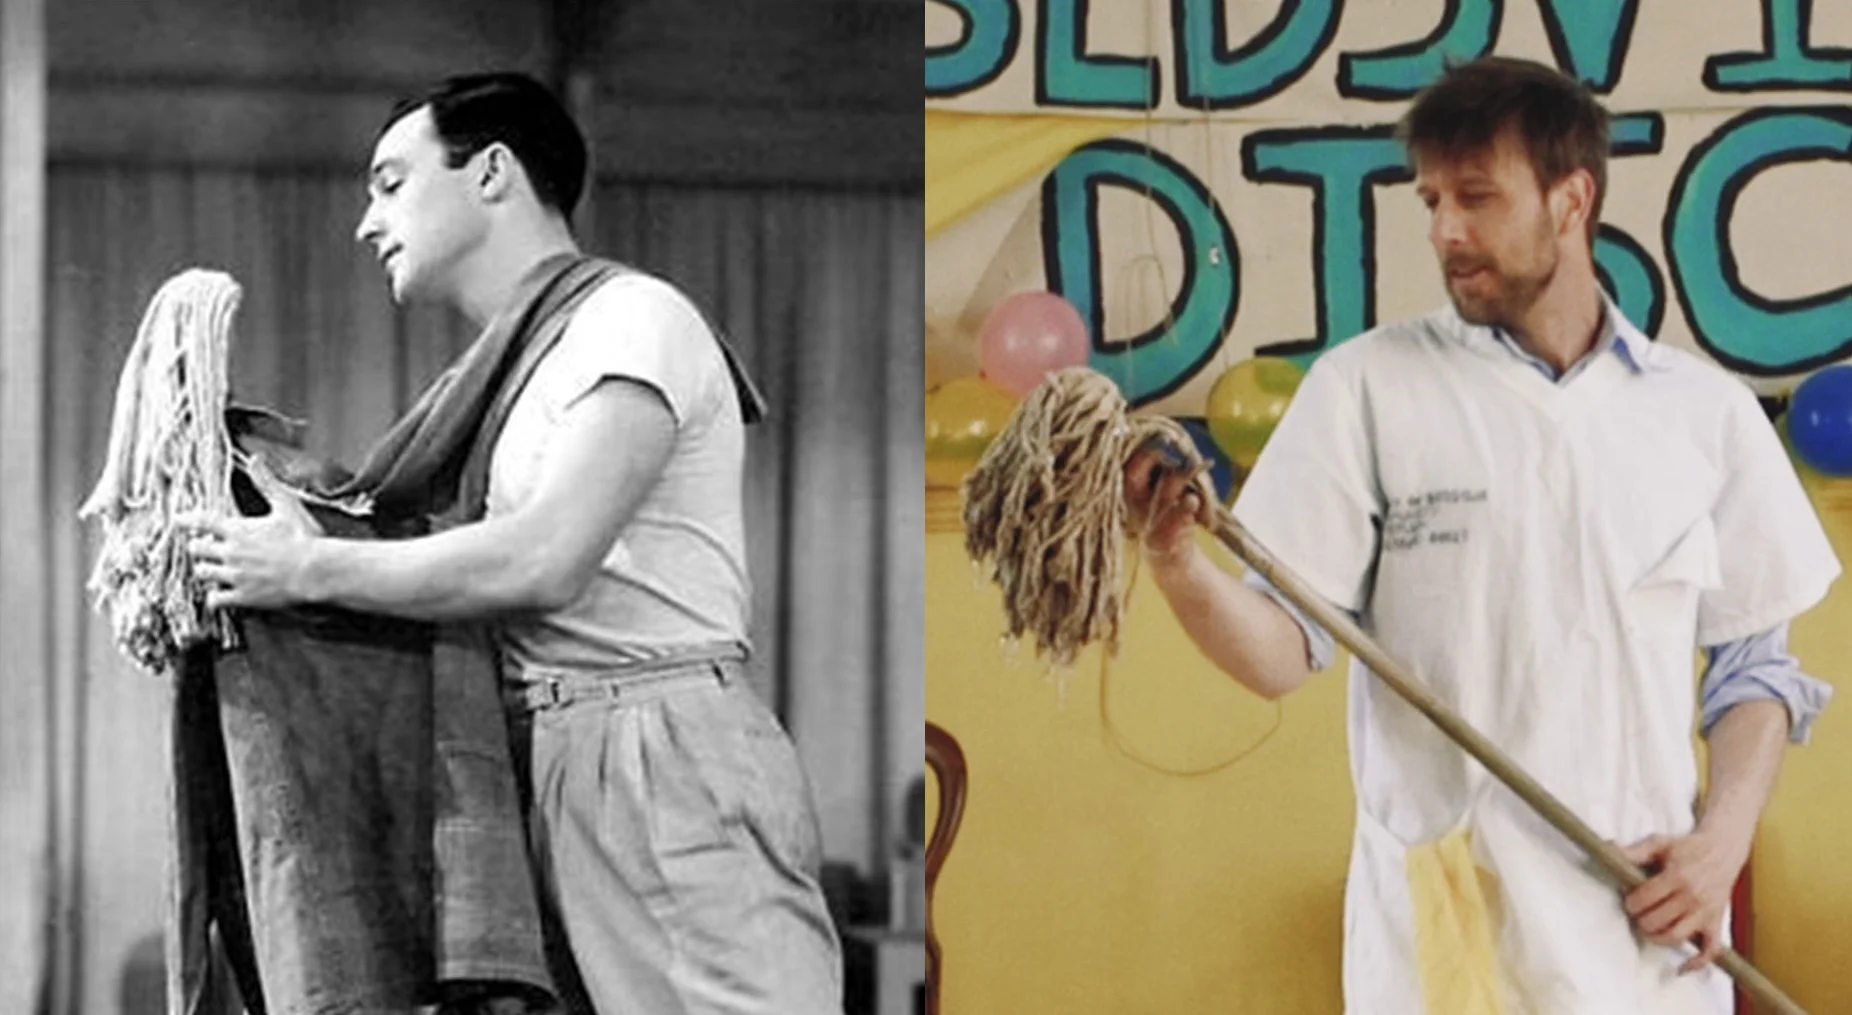
You can create a moodboard of images which have a similar look to the film you want to make. We took inspiration from films and others were pieces of art we found online. This image of Gene Kelly in Thousands Cheer from 1943 inspired this shot, and this image inspired us to create the final shot in the film.
We are going to be talking about how we set up this shot in next week’s video. So if you haven't already consider subscribing.
Example images allow you to focus your attention and dial in the look of the film, so you can start to work out how to light it, the design of your costumes, and how you would like your location to look.
Now you have this inspiration you can start to make the creative choices which will make it your own.
The location we had for our film was an old assembly hall which had large windows that let in a lot of natural light.
This laid down the groundwork for how we were going to light the film and we wanted to embrace the natural light coming into the room.
It’s not always possible but if you can get into the location before the shoot and do some camera tests it will allow you to work out how you can light your film.
One of the main creative choices we made was to shoot at F8. The was because we wanted to show the detail of the location, as it was already old and grimy which suited the look of the film.
This was another decision we made after looking at the reference images from films like Thousands Cheer and one flew over the cuckoo's nest both which have a deep focus.
Shooting at F8 also helped us prevent blowing out the window light, which again allows for the audience to see how old and grimy the location is.
One problem we had shooting at F8 was that our subject was underexposed, so we did a camera test. We placed our subject in the middle of the room with the window behind them on a bright sunny day, which would harshest lighting conditions we would encounter on the shooting day.
By using a light meter it told us if we wanted to expose the outside correctly we would have to shoot at a F-Stop of F16, and if we wanted to expose our subject correctly we would have to shoot at a F-Stop of F5.6. This was a 3 stop difference or a ratio of 8 to 1.
To get a little more dynamic range we decided to shoot in Cine 4 which would give us a little more information to work with in post.
With all of this information we worked out the lights we own would not be powerful and reliable enough to light the scene.
So we rented 3 Aputure 300d’s. These lights are rated to be the equivalent of a 2k light and are set at 5500K, this meant we did not have to gel the lights with CTB as they already matched the colour temperature of daylight.
One of the most versatile aspects of these lights is the bowens mount attachment which is on the front of the light. The light comes with a reflector cone, but you can also attach a Fresnel which we used for this shot.
The main attachment we used was a space light which essentially works the same way a china lantern.

The original idea was to take advantage of the lighting rig we had in the room and hang the lights from there. We soon realised we would need to move the lights a lot more than we planned during the shoot.
Moving the lights helped to keep the exposure consistent and bring the lights closer to our actor, but still allow our actor to be able to move freely throughout the room.
So we put the lights on high up on stands and angled them downwards so the space light could hang down and spread the light evenly. We positioned the lights in front on the windows so the light would come from the same direction of the day light.
Now the light was evenly spread, it brought the exposure up in the room and created enough light so our subject was correctly exposed.
Everything at this point was very even, so to add a little contrast, the space light kit comes with flags which can be clipped onto the space light. We used them to block the light from hitting the background, therefore creating contrast between the subject and background which helps make him pop on screen.
Throughout the shoot we either moved the lights closer to the actor, or dimmed them down to get the correct exposure. The Aperture lights come with a remote which allows you to control each light from the one remote, meaning you can dim or turn off a light wirelessly.
The lighting setup we used on the film was super versatile, we could move the lights where ever we needed them, and they gave off a lot of soft light. Being so flexible allowed each setup to be setup quickly and save time on set, which was important as we shot this film in a day and a half.
Taking inspiration from other films and art work really inspired us when lighting this film, and it can do the same for you. Find images that closely represent how you would like your film to look, and use them to drive your creativity to create new images.
This video was Sponsored By
🚀 http://bit.ly/illuminate-pack - RocketStock’s light leak pack, "Illuminate", is sure to impress your viewers. Shot using digital cinema cameras in 4K, it’s an unbeatable way to lift your video to new, cinematic heights.
🎵 http://bit.ly/pbtfl-newfrontier - Click here to download this episode's track. Check out Premiumbeat.com to discover a huge range of exclusive royalty free music!
DISCLAIMERS:
Some of these links are affiliate links, if you purchase gear via these links The Film Look will receive a small commission, but there will be no additional cost to you. Thank you!