Get Better Looking Gunshots in the Dark

Gunshots: one of the most popular visual effects techniques used on YouTube. Getting gunshots to look great can take some tweaking - and achieving a realistic gunshot effect in the dark is even more difficult. But there are some things YOU can do to help achieve a realistic gunshot in the dark.

Shooting gun.jpg

A gunshot is essentially a small explosion. And an explosion primarily produces light and sound. The sound part of this technique is pretty straight forward. You download a gunshot sound effect, sync it to the muzzle flash, tweak the sound a bit, and away you go.

If your gunshots are sounding too similar and you are starting to hear some repetition, we have a video about how to make them sound better:

The explosion from the gunshot produces a massive amount of light in a split second, and in a dark scene this will be amplified.

You CAN add some fake light spill in post-production for your daytime shots. You can do this by duplicating your layer, mask around the subject where you want it to brighten, brighten it up with something like a curves or exposure adjustment, and feather out the mask to blend it all together. It only shows for a single frame so it works well enough. But this won’t work for a dark environment because you simply can’t fake a realistic fall-off of light.

fake light.jpg

In this case, you’ll need to produce a real-life flash during the gunshot. This is what we learned from the process:

Using a Flash

flash#.jpg

The initial idea was to use a portable camera flash. It has a button on it to test the flash so the plan was to hit the flash whenever the subject fires. After trying this out we soon realised that because of the small differences in shutter speed, frame rate, and rolling shutter, the flash was giving us shutter interference, resulting in a frame that looked like this. No good.

Gunshots in the Dark.00_01_45_21.Still001.jpg

Flashlight

flashlight.jpg

Next on the list was a flashlight. This was getting us closer to the result but it simply wasn’t bright enough.

Aputure LED panel

LED panel.jpg

Finally we tried this LED panel from Aputure. The great thing about this light for this effect in particular is that it has a light switch separate from the intensity dial. Some cheaper lights have a dial which clicks on then turns up. But if you can get a light which switches on and off with a simple click, it will make this effect a lot easier. 

Gunshot in the Dark.jpg

Our findings

So the light must be super bright. You want it to highlight your subjects face and light up some of the background for maximum effect. We dialled it in so it didn’t completely blow out but produced a very hot highlight.

Now the most important part of making this effect look good are the steps you’ll take to capture the light flash.

A muzzle flash from the gun happens directly after pulling the trigger, but BEFORE the recoil from the explosion. The recoil is the pressure of the gun jolting your wrist back, so the steps are very important to make it look realistic.

LED wide.jpg

Pull the trigger, then freeze in place. Flick the light on, then flick the light off. Then simulate the recoil. Rinse and repeat.

In your editor you will make a cut on the frame the trigger is pulled. Then go to where the light is at its brightest, make a cut, delete the footage in between and join it together. Then scroll along and find the moment of recoil. Make a cut and take out the gap here too. The light should be on screen for only a single frame, and this is where you will add your muzzle flash and smoke elements.

One downside to this effect is that we were only able to produce it from a static camera angle. We tested a few different ways to simulate the light in a moving shot: one by shooting a take without the light, then shooting a take with the light on, and trying to match up the takes. But unless the takes are near identical, the cut looks far too jarring. So if you guys think you have a solution for producing this in a moving shot, let us know in the comments below, or better yet, show us how you did it in a video!

Visual effects work most effectively when they EMBED into the physical scene. Compositing effects onto footage without ANY physical interaction will result in tacky-looking VFX. So if you want your visual effects to shine, think about what those effects would produce in the real-world and try to replicate it.


This video was Sponsored By

🚀 http://bit.ly/tflrs-ricochet - Give your action scenes extra impact with RocketStock’s muzzle flash and gun smoke VFX library, Ricochet. This high-caliber pack features over 450 stunning elements.

🎵 http://bit.ly/track-rollthedice - Thanks to PremiumBeat for providing the music for this week's episode. Check out Premiumbeat.com to discover a huge range of exclusive royalty free music!


🎥 This episode's kit/gear/equipment:

US links: 

Aputure HR672S: https://amzn.to/2s15wY2

UK links:

Aputure HR672S: https://amzn.to/2GICoJu


DISCLAIMERS:

Some of these links are affiliate links, if you purchase gear via these links The Film Look will receive a small commission, but there will be no additional cost to you. Thank you!

Turn Your Script into a Powerful Blueprint

A screenplay is not only the plot of the film written on paper - it is the blueprint which the whole production team and the actors will follow, breakdown, research, and prepare when making the movie. Because of this, everything you see in the script, you must be able to shoot.

For example: “Gary is nervous before his interview with Derek.” Nervousness is an emotion Gary is feeling internally. We can’t simply shoot “nervousness” because nothing is actually being outputted.

Imagine you are on a film shoot and you read the line “Gary is nervous before his interview with Derek”. You then have to ask yourself “How do I show Gary is nervous?”. You have to find a way to then SHOW that Gary is nervous.

Episode.00_01_06_18.Still002.jpg

Instead, try this: “Gary nervously taps on his knee.”. This is clearly an ACTION which suggests Gary is nervous. We can physically shoot Gary’s nervousness from the tapping on his knee because it is a clear indication of nervous body language.

To go one step further with this rule: How much emphasis do you put on this emotion? How important is Gary’s nervousness in this scene?

Episode.00_01_46_21.Still003.jpg

If his nervous feeling before meeting Derek is a critical plot or character development moment then you might want to scale up the nervous action to something bigger than tapping on his knee.

The stronger you express this emotion in the script, the more the audience will pay attention to it. If his nervousness is is crucial to Gary’s character, you may want to go with Number 5. If it isn’t as important, maybe lessen the impact. Or if it isn’t important at all, don’t even write it.


This video was Sponsored By

🚀 http://bit.ly/corruption-pack - With glitchy overlays, distorted logo reveals and more, RocketStock’s "Corruption" is an ideal way to give your project a dramatic edge.

🎵 http://bit.ly/pb-happyfunkyday - Click here to download this episode's track. Check out Premiumbeat.com to discover a huge range of exclusive royalty free music!


DISCLAIMERS:

Some of these links are affiliate links, if you purchase gear via these links The Film Look will receive a small commission, but there will be no additional cost to you. Thank you!

Match your Audio to a Hollywood Film

Before you hit the final export, there are some things you should be doing to make sure your film’s sound is audible, clear, and comfortable for your audience. Let me show you TWO tricks that will help your sound stand out from the crowd! 

Just like testing the picture of your film on a bunch of different TVs, phones, and computer screens, you should also be DEVICE TESTING the sound before you export the final mix.

If you are in the recording, editing, or mixing process: check out our indie film sound guide here for all the basics of sound. 

First of all, try listening to your mix on the best quality audio device you have access to. In our case, this is a set of studio audio monitors owned by our friend Jordan, a musician and producer. But not everyone has the space to set up an acoustic-proof studio with mega expensive equipment.

Jordan Miller

For most of us, and that’s us included, a set of headphones is what we have access to for the majority of the sound editing and mixing process.

If you are serious about your sound, it’s worth investing in a strong and great-sounding pair of headphones which give you great dynamic range, rich tone, and are built to last.

For Rob, this wasn’t the case. I bought these headphones 15 years ago and gave them to rob when I upgraded 3 years ago. They’ve lasted, but the audio quality isn’t great and they are quite literally falling apart.

Rob's dodgy headphones

The team over at 1more heard Rob’s cries and have sent over their Triple Driver Over-ear headphones for us to try out.

After using them for sound mixing, listening to music, and watching films, myself and Rob both pretty much said the same thing “It’s not like it makes things just louder or even just more clear, you can literally hear sound which you can’t with other headphones”, which is funny when we found out that 1more’s tagline is “hear more”.

1more triple driver headphones

But honestly, they’re a great bit of kit: sound great, built really well, comfortable, and at a price which a zero-budget filmmaker can actually afford.

So if you are on the market for a new set of cans, follow the link: 


So once you’ve listened to and are happy with your your mix on the good sound kit, it’s time to work your way down the audio-clarity scale.

Think about where your film is going to be listened to the most. If you’re putting your film on YouTube for example, you’ll want to listen to your film on a phone, a laptop, through earbuds, and on a TV. These are the most common devices used for watching YouTube videos, so cater the sound mix to the majority of your audience.

Laptop phones earbuds TV.jpg

You may find that some sound effects or lines of dialogue that are clear using headphones aren’t being picked up on a TV, for example.

Go back to your mixing application and boost the sounds you feel have been washed out, but don’t push it so far that it sounds bad on your default headphones. Try to find yourself a happy medium.

Another mistake we zero-budget filmmakers can make is exporting the film without VOLUME REFERENCING the sound.

We came under this problem with our last film, Backstage. The audio was mixed so the sound effects, foley, dialogue, and music were working together and were clearly defined in their own soundspace, but when we played it on a TV, we had to push the volume up a lot more than usual.

So even though everything was mixed together correctly and sounded loud enough on the PC through headphones, it was simply too quiet on everything else.

Mixing Backstage.jpg

In order to make sure the loudness of your film is matched with that of TV shows and films, you can do something called VOLUME REFERENCING.

For a quick and easy way to accomplish this; find an episode of your favourite TV show or Film on Netflix or a Blu-ray, set your volume to a comfortable level you’d usually set it to and listen to it for a few minutes.

Then pause the film and listen to your own film. If you needed to grab the remote and turn the volume right up to match the previous film, your mix is simply too quiet.

By doing this, the volume of your film will match (to a decent degree) that of films and TV.

When you are mixing audio on one device it can sound as loud as needed. But until you reference your film’s audio to something else, you might not realise it's too quiet or sometimes even too loud.

The audience shouldn't have to adjust the volume of the film mid-way through. It’s not like you have a remote in your hand in the cinema! And if you are planning on taking your film to festivals, you don’t want YOUR film to be the one which nobody can hear!

Match your Audio to a Hollywood Film

This video was Sponsored By

🎵 http://bit.ly/track-rollthedice - Thanks to PremiumBeat for providing the music for this week's episode. Check out Premiumbeat.com to discover a huge range of exclusive royalty free music!


DISCLAIMERS:

Some of these links are affiliate links, if you purchase gear via these links The Film Look will receive a small commission, but there will be no additional cost to you. Thank you!

Filmmaking is a Game!

From the initial idea to the final export of your film, there are lots of steps you need to do which will help you achieve The Film Look. It’s kind of like playing a game of Monopoly.

Let me explain.

The-Game-of-Filmmaking1.gif

Idea/Writing

Every film starts of with an idea. Some ideas will be good, some bad, and sometimes you just have to make them to find out.

An idea is nothing unless you have a script.

The first properties on a monopoly board are not the most desirable at the start of the game, but in the case of filmmaking these are the most valuable.

Investing time is all you will need to do at this stage of the game, and developing your idea by writing the 1st, 2nd, 3rd or how many drafts of your film should be done now.

Once you have a draft you are happy with, take a chance and let others read it. Take their feedback onboard, make changes where needed, and work on it until you have a final draft you are happy with.

Having a solid script will definitely be your get out of jail free card when you are on set shooting it.

Pre-Production

You want to be spending more time in pre-production that you do in production. Having a thought-out production plan will help make the shoot go a lot smoother.

First you want to invest in someone who can help you produce the film.

Depending on the level of film you are trying to make, this person could have a lot of experience or none at all, but they need to be as passionate as you are.

Next you can work out the budget for the film. Whatever it is, start to assemble your cast and crew. Invest as much time and energy as you can here; these are the people who will be helping make your film a reality.

Scout around and find the locations for your film. We have a video about how to do that if you want to check it out.

Build a production plan that is made up of your shots list, storyboards, and shooting schedule. Be organised but don't advance to shooting just yet.

Spend time and money on the production design of your film. The right-looking costumes, props, and set dressing will allow you to be ahead of the game and achieve The Film Look a lot sooner.

This is where all those hours spent planning your film come into play. Things will not always go to plan, so be flexible and work with your team to make the film.

Don’t take a chance with sound; get someone whose sole job it is to record sound. And let your picture and sound people do there job, but if you are the picture and sound person, don’t forget to direct your actors.

The-Game-of-Filmmaking3.gif

The more roles you can give to others, the more each person can concentrate on their own job.

From the planning stage, your camera operator will understand the look you are going for, and he or she can direct the 1st AD, Grip, and Gaffers to help achieve that look.

After hours, days, weeks, or even months of shooting, you will now have all of the footage you need to edit your film.

Post-Production

But don’t jump ahead and start editing just yet. Time is back on your side so spend it Organising and syncing your files. Once the edit gets complex, you’ll be glad you spent time organising it as you can’t buy this time back.

Get your rough cut done; but don’t worry about how the colour grading looks, how the effects shots are not complete, or even how the audio sounds at this point.

Share it with others, ask them about the edit and what does and does not work. It’s better to find this out now.

From the feedback you receive, make changes, colour grade your film, finish the effects, and add your Foley and sound effects.

Then don’t look at it for a week!

That separation from the project will allow you to see the edit with fresh eyes; you will see your mistakes and way you can improve it. Do as much as you can to make it the best you can, but tax yourself to get it complete.

Having a final film you can show others and learn from will be your most valuable asset.

There are many steps to filmmaking that I haven't described. Plus it’s not as easy as a board game, but you CAN play the filmmaking game like you're playing monopoly.

Take every opportunity, buy every property, take every chance.

At first your films might not turn out the way you thought they would, but you will have learned about the process of how to make a film. The more times you go around the board, the more your skills you’ll take with you onto the next film.

Once you’ve gone around the board a few times, look at the skills you have developed. You might find there is an area of filmmaking which you want to invest more time and energy into because you enjoy it the most. The more you learn, the more you can invest, and before you know it you have won the game.

Play the game of filmmaking as much as you can, and hit the orange lens cap to subscribe, and remember achieve it one shot at a time.

The-Game-of-filmamking.jpg

This video was Sponsored By

🚀 http://bit.ly/tflrs-creator - Become a social media powerhouse with RocketStock's video element pack, Creator. This collection comes packed with logo reveals, end screens, subscribe animations, and much more.

🎵 🎵 http://bit.ly/pb-finestimports - Click here to download this episode's track. Check out Premiumbeat.com to discover a huge range of exclusive royalty free music!


DISCLAIMERS:

Some of these links are affiliate links, if you purchase gear via these links The Film Look will receive a small commission, but there will be no additional cost to you. Thank you!

We've Been Challenged to Make a Film! | Behind The Scenes

We sat down with Nate of Nate's Film Tutorials and discussed the film challenges we set each other. Nate challenged us to make a film with only a single word of dialogue - we challenged him to shoot a dialogue between 2 people with the initial line being "What do you mean, you don't have the money?".

We also answered a question by one of our subscribers involving playing music on set, and have begun to work on some Film Look merchandise!


DISCLAIMERS:

Some of these links are affiliate links, if you purchase gear via these links The Film Look will receive a small commission, but there will be no additional cost to you. Thank you!

3 Tricks to Recording Dialogue in a Wide Shot

You’ve just set up an great-looking wide shot during a pinnacle moment of your film. You want to hold the wide shot for the majority of the scene because you want to utilise the close up for the climax.

Problem is, your lav mic is cheap and doesn’t sound great and the boom pole for your shotgun mic is too short to to capture your actors lines! There are few ways to tackle this problem!

There are a few different ways you can capture audio in a wide shot without having to purchase more equipment like extra long boom poles or more expensive radio mics.

Turn your talent around

Close ups are your best opportunity to record clean dialogue because you can position the microphone really close to your actors without getting it in the frame.

More on positioning your microphone here! It’s the first step to great sound!

If you can find a different angle where you can no longer read the actor’s lips such as from behind, from the side, or so far away you can’t barely even make them out, you can edit in the audio from the close ups and the audience will be none-the-wiser! Just make sure you aren’t changing the overall vision and direction of the scene.

From the side.jpg

Plant a microphone

If there is an object between the camera and the actors, you could use it to hide the microphone in shot; such as a tree a bin or a car. Aim the microphone towards your actors and get it as close as possible. You might have to position your actors closer to the planted microphone to capture your actor’s lines better.

planting a mic.jpg

Again, try to find a middle ground between standing to your creative vision and capturing solid audio. There’s nothing worse than bad audio in a film.

Paint out your sound recordist

If the other 2 options simply won’t work: you need to see their lips, and there are no objects to plant a mic, you can still capture great audio by employing some post-production movie magic.

As long as the sound recordist isn’t physically in the way of the actor in the scene you can use something called a clean plate to remove the sound recordist in post production.

Film your scene with the sound recordist booming the mic beside the actor, then ask the sound recordist to leave the frame and keep rolling so you have plenty of footage of empty space.

Clean-Plate.gif

In post-production you can use the empty frame you captured to place it in front of the sound recordist, masking them out of the shot. Add a little feathering to the mask layer and you should have yourself a convincing clean plate.

There are some things that might disrupt the effectiveness of this technique.

Please be aware of any shadows or reflections being cast by the sound recordist, as well as any drastic changes in light. You can avoid the shadows and reflections by having the sound recordist stand on the other side of the frame. A ghostly reflection of a sound recordist will break the illusion. And if the sun just went behind the clouds - your clean plate will no longer work.

3 Tricks to Recording Dialogue in a Wide Shot

This video was Sponsored By

🚀 http://bit.ly/illuminate-pack - RocketStock’s light leak pack, "Illuminate", is sure to impress your viewers. Shot using digital cinema cameras in 4K, it’s an unbeatable way to lift your video to new, cinematic heights.

🎵 http://bit.ly/pb-funkyblues - Click here to download this episode's track. Check out Premiumbeat.com to discover a huge range of exclusive royalty free music!


DISCLAIMERS:

Some of these links are affiliate links, if you purchase gear via these links The Film Look will receive a small commission, but there will be no additional cost to you. Thank you!

"Locks" with Max of Valley Films! | Story in a Can

Max of Valley Films joins us this week for a session of STORY IN A CAN. From 160,000 possible ideas, STORY IN A CAN is a way to break writer's block, get past the creative funk, and start to think of more original and creative ideas.

In each can there are 20 locations, 20 objects, 20 characters, and 20 scenarios. We pick one from each of the cans and try to come up with a film idea on the spot. Sometimes they are bad, but sometimes we turn the idea into a film.

Watch the video to see what stories were made.

We were also recently featured on Max's podcasting talking about collaborating with others. 

And you haven't already, check out his channel and get subsrcibed to stay notified with his films.

Click here for Max's Channel


DISCLAIMERS:

Some of these links are affiliate links, if you purchase gear via these links The Film Look will receive a small commission, but there will be no additional cost to you. Thank you!

100 Filmmaking Tips in 10 minutes

With every film we make we always learn something new. That could be a tip, trick, hack, or piece of advice which we did not know. In this video we are going to share 100 filmmaking tips, tricks, hacks, and things we’ve learnt whilst making films, in under 10 minutes.


  1. Add labels with the size of lens to each of your lens caps. It makes it much easier to find in your bag.

  2. Can’t draw? take photos to use as your storyboards.

  3. Never place the microphone on the hot shoe of your camera if you are recording dialogue.

  4. Buy a 3.5mm extension cable so you can still plug it into your camera to get it closer to your actor.

  5. If you have a flip out screen on your camera, create a little tap out of tape to make it easier to flip it out.

  6. Use white baking paper as cheap diffusion paper

  7. If you are making DIY equipment or doing hacks to it, make it look as professional as possible. You don’t what to turn up on set with something that looks janky.

  8. Add velcro to a dry wipe pen and your clapper board so you always have a place to store the pen.

  9. Ask personal questions to your actor whilst they are in character to get to know more about your character's backstory. This is called Hot Seating.

  10. Number your batteries so you know how many you have used and have left.

  11. Get the actor to say their dialogue at their highest level they would when performing, then set your levels so you aren’t peaking.

  12. A 5in1 reflector has a 6th use. You can use the cover to wrap around a hanging light to flag it off the walls and focus the light downwards.

  13. Print off a small shot list and clip it to your belt. It will not get in the way, and it will save time as you always have a shot list next to you.

  14. Play music on set to help people get in the role, especially for your actors.

  15. Shoot at a higher f-stop. It’s better to have your shot in focus than shallow depth of field.

  16. Get your actor to perform the action and dialogue that is a couple of lines before the shot you are shooting. This will give them momentum and lead them into the shot.

  17. Watch lots of films.

  18. Watch short films.

  19. Add LED lights to your camera bag.

  20. Go to the Film Riot YouTube channel, click sort by, oldest date added, and watch all of their videos. Also make notes.

  21. Use a headphone splitter so two people can listen during recording and playback.

  22. When your actor/characters sits down, the drama sits down. So have them doing something in the scene, it’s boring just watching two people sitting or standing talking to each other.

  23. Spend time organising your files before you start to edit, you will thank yourself later.

  24. When you have the first draft of your edit complete, don't look at it for a week.

  25. Show it to others, and ask for feedback.

  26. Work on other peoples short films, you will learn a lot more than watching videos.

  27. Take a notepad and a pen with you to make notes about the shoot, being on your phone does not look professional

  28. Don’t be on your phone, you don’t need to check Facebook and Instagram when you’re making a film.

  29. Ask before you take a set photo for your social media, the production team might want a closed set.

  30. Have someone on set that is taking behind the scenes photos, these are nice to have for promotional and portfolio material.

  31. Learn the rules of filmmaking before you start to break them.

  32. And if you break them, make it for a good reason because if you don't get it right people will know.

  33. Some audio recorders have a dual record mode, one can be set lower just incase your audio does peak.

  34. If you are the sound recordist and the audio peaks or there is an external noise that can be heard whilst shooting, don’t shout cut as you still might be able to use some of that take.

  35. But once cut has been called, say you were not happy with that take. It’s better to record it again now than to try and fix it in post.

  36. Don't struggle to reach a light up high which is on a stand, lower it, adjust it, raise it back up.

  37. Use a frosted shower curtain to create a large diffused light source.

  38. If you need your actor to be out of breath, make them go for a jog as you can't fake out of breath.

  39. Make a playlist for each of your characters to help get them in the role of the character.

  40. Get people to read your script

  41. Learn to take feedback

  42. Ask questions to those who read your script. “Is the dialogue okay? Are the actions clear?” This will invite them to give feedback.

  43. If someone says ‘Martini Shot’ on set, it means it's the final shot set-up of the day.

  44. If you're actor stumbles over a line, just keep rolling and go back a couple of lines. Cutting will break the flow and waste time.

  45. If you forget to mark the start of the take or the clapper board could not be in shot, make sure you clap at the end of the take, which is called second sticks.

  46. If you notice the take wasn’t marked, make everyone aware before the camera and sound is cut.

  47. Add Neoprene pads to the bottom of shoes or objects to deaden the noise they make.

  48. Place a CD, Piece of Plastic, Torch, Glass, anything with a reflective surface in front of your lens to add weird flares to your image.

  49. But use them as a reason to help tell your story, not just because they look cool.

  50. Make Films

  51. Whilst we are on the subject, learn to trust others to help make your film, people will be willing to help.

  52. Pre-line your script so you know exactly when to start and finish covering a shot.

  53. Date your camera batteries so you know how long you have had them. Batteries lose charge over time and this way you will know how long you have had them.

  54. The type of equipment you shoot on does not matter, but it also does depending on the type of film you are making.

  55. Learn how to use new equipment before you get on set. If you have to learn it whilst shooting it's an unnecessary stress you do not need.

  56. Work with the camera team to find out how low you can boom before you dip it in shot.

  57. And don’t get your microphone in the shot. I’m counting that as another tip.

  58. Get a camera slider.

  59. Don’t over use slider shots, use the movement to help tell a better story not just because the shot looks cool.

  60. Make a movie poster for each of your short films, print it out, and put it up to remind you what you have achieved.  

  61. Always have a few large coins in your bag for tripod plate screws.

  62. Or buy a flat headed screwdriver which stays in your bag and is just for tripod plate screws.

  63. Make sure your microphone is no more than 3 feet away from your subject.

  64. Have your camera slate in the shot before the camera starts to role. This means the first frame will have all of the shot information which will save time when naming and syncing up your shots as you will not have to go looking for the information.

  65. Freesound.org has thousands of free sounds effects and foley. They have everything from someone eating and apple……..to gun shots.

  66. When you are packing your equipment for your film, test your camera, turn on every light, test extension cables, microphones, audio cables, make sure your batteries are charged. Basically test everything before the shoot.

  67. You can never have to many extension cables

  68. A tripod can be called legs or sticks.

  69. If you have to adjust your tripod legs to make your camera level, buy one of these neewer leveling bases. You’ll wonder how you lived without one.

  70. Buy old prime lenses. They are cheaper, sometimes sharper and have different characteristics that you will not find on newer lens.

  71. Try taking a couple of frames off the start and end of each shot. It may work well to tighten up your edit.

  72. Before editing your audio, play your favourite song and adjust your volume to a comfortable level. Make a note and always monitor your audio at this level.

  73. Your dialogue should lie between -6dB and -24dB in the mix.

  74. Condense your shot list. Find way to join the shots together with pans and tilts. Movement is always more cinematic than a cut.

  75. Before the shoot, sit down with your cast and crew and go through the entire plan to get everyone on the same page.

  76. At the end of the shoot, once all of your equipment is out of the location, do one last check to see if you have missed anything.

  77. When you are handing someone a piece of equipment, don’t let go until they say ‘Hands on’ then you can say ‘hands off’. Safety is key on set.  

  78. Before you turn on a light shout ‘Lights going hot’ this will give people a warning and time to avert their eyes.

  79. Get a small LED torch like this one. It can fit in your pocket and costs about £3. You wouldn’t believe how useful it can be.

  80. Use bungee cords to stop lights stands and tripod from falling over when stored.

  81. Remember, achieving the film look is not about camera setting, fancy shots, and the LUT you apply to your footage. It’s everything you see in the frame, props, costumes, acting, locations, everything.

  82. You don’t always have to shoot using a flat profile like S-Log 2 or 3. Learn how to shoot using other profiles as well, it will save you time if the project needs to be turn around faster, or if you do not have a lot of experience color grading flat footage.

  83. Have brightly coloured audio cables. You can see them on the floor and if the cable drops into frame.

  84. If your actor is performing an action whilst delivering dialogue, try to minimise the noise of the action so it doesn’t infect your dialogue.

  85. Don’t have a shoulder rig? Use your Tripod

  86. Unclip the bottom tripod legs first, it will be easier to access the next leg as they are in the middle of your tripod and not at the bottom.

  87. If you have a plastic lightweight tripod do it the other way.

  88. Feed your cast and crew

  89. A fishing seat box trolley is a cheap and good way to move your equipment around.

  90. Watch your film and make a list of the sounds that you should be hearing. Clothes rustling, chairs creaking, cups clinking on the table. Fill your sound space.

  91. Hot swap between your film and your favourite movie when mixing audio. Your audio should be a similar level. You’ll know if its too loud or too quiet.

  92. Understand that people will not turn up and drop you in it at the last minute.   

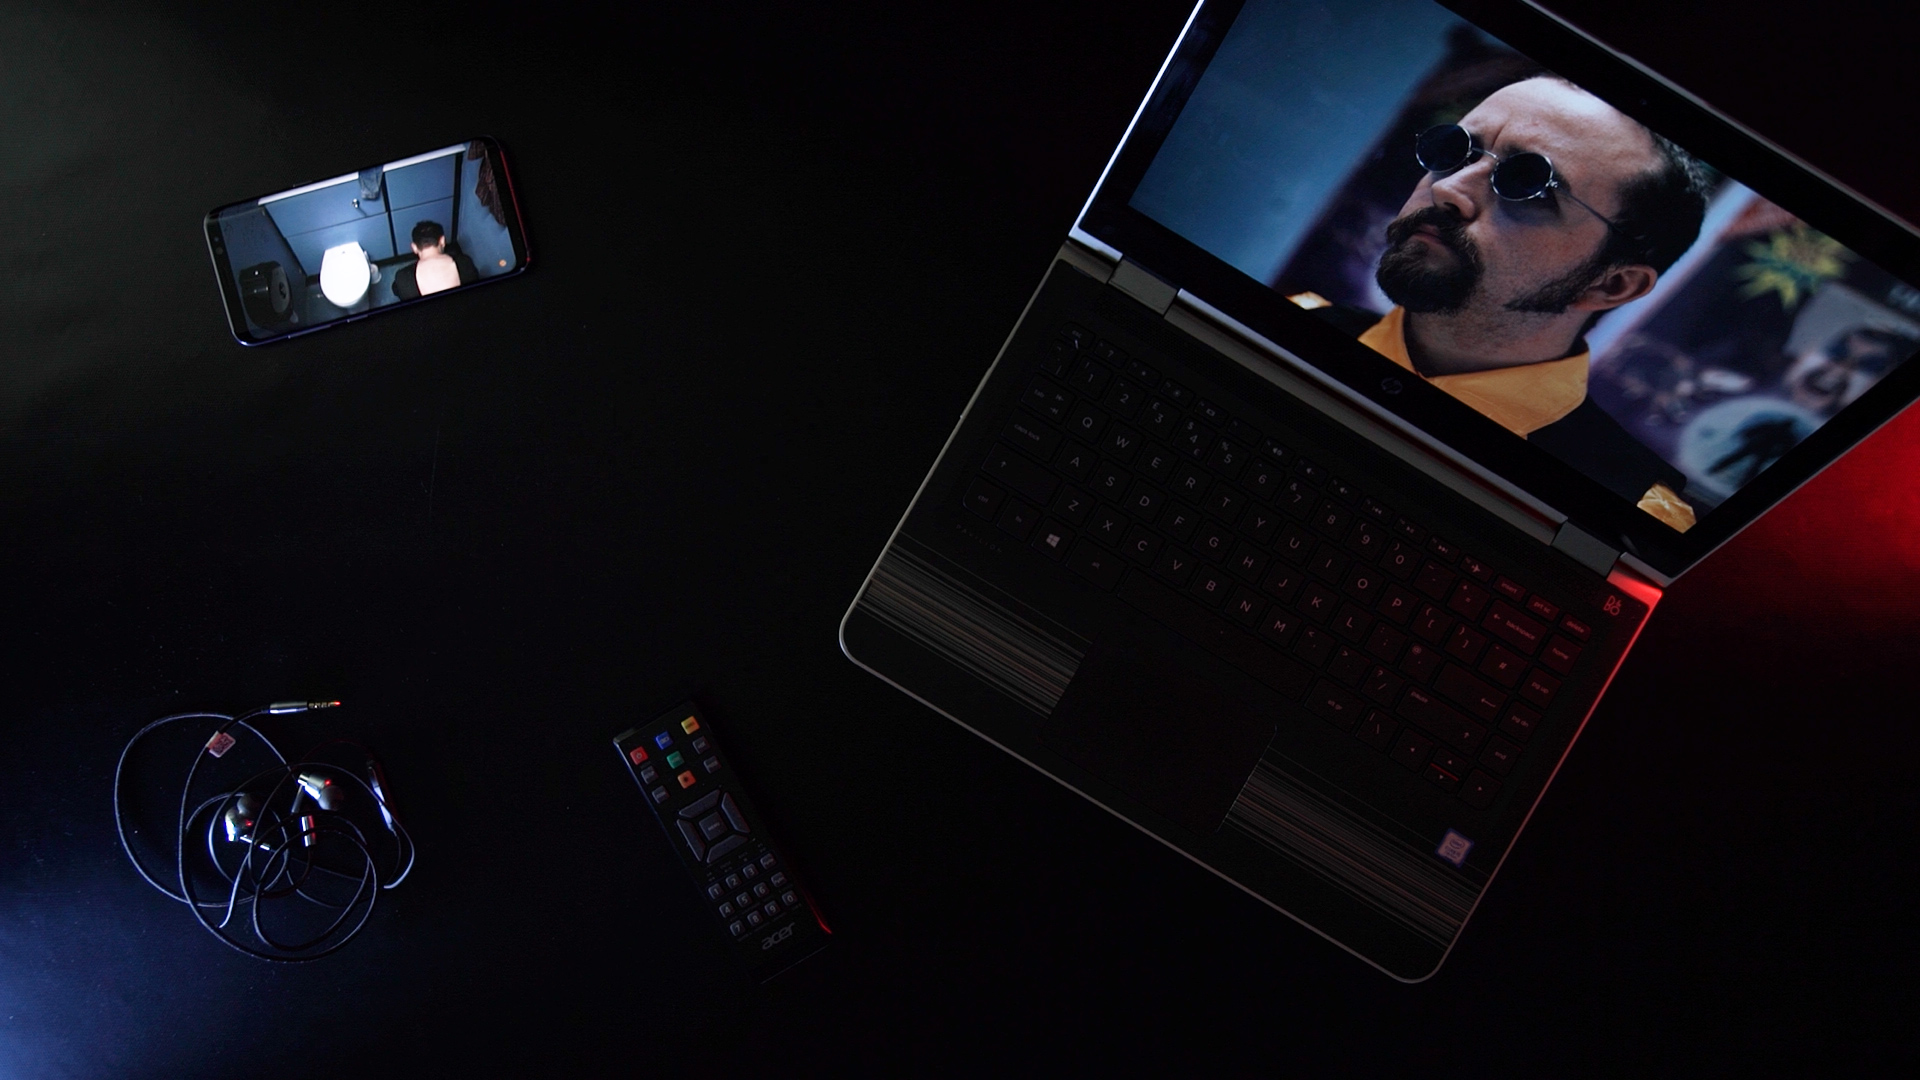
  93. Before your final export, watch your film on a phone, tablet, and TV to see what it looks like. Every device will look different.

  94. Also listen to your film on a phone, tablet, TV, with cheap headphones and on studio monitors if you can. Can you hear all of the sounds on each device? If not, trying to make changes and listen again.

  95. Clip the script and shot list to the back out our clapperboard. This works great if your clapper loader and your 1st AD are the same person.

  96. Recording clean dialogue is your highest priority, don’t worry about recording foley yet, you can record all of that after if needed.

  97. If you can not apply aspect ratio bars to your camera or monitor, work out where they need to be and stick card to them.

  98. Spray Paint your lens caps Orange, they’re easier to find.

  99. When you rip of a piece of tape, leave a little tap on the roll so it is easier to get the next piece of tape.

  100. Making films is the coolest thing, so remember to have fun.


This video was Sponsored By

🎵 http://bit.ly/pbheat-tfl - Click here to download this episode's track. Check out Premiumbeat.com to discover a huge range of exclusive royalty free music!


DISCLAIMERS:

Some of these links are affiliate links, if you purchase gear via these links The Film Look will receive a small commission, but there will be no additional cost to you. Thank you!

Writing Apps to keep you Focused

Links to app mentioned in the video


Trello - http://trello.com

Flux - http://justgetflux.com

Rainy Mood - http://rainymood.com

Script Speaker - https://scriptspeaker.com/

If you're anything like us, when you sit down to write you need to make sure you are sitting in the perfect location. You need your notebook with your favourite pen. All your notes need to be set out correctly, and you can not start writing without a cup of tea.

We can’t help you find out what you need to start writing, but here are a few apps to keep you focused when you get passed the hurdle of sitting down to start.

Trello

Trello.jpg

Trello is a website and app which allows you to organise projects. It is built so you can add lists, and in those lists you can add cards. In each card you can add notes, photos, videos, create checklists, set deadlines, and sync Google Drive documents.

When writing you can make a list for your characters and make individual cards for each person. In each card you can make notes for each of your characters, attach photos of the type of person you would cast or even costume choices.

The list can also be used to help organise the structure of your story. You can have a list for Act 1, 2, and 3. In those lists you can treat each card as a scene, the same way you would use index cards.

By using Trello you can quickly and easily move the cards around if the structure changes in your film or if a scene works better elsewhere. Adding notes to each scene card will help you keep organised and each card can be customised with its own colour to help identify it.

Basically Trello works like using post it notes, but you can quickly move them around, and attach more information.

Trello has many other features that you might like, the ones we have mentioned are just the ones we use the most. It’s great if you are working as a team as many people can have access to the same board.

This is what we use to help organise The Film Look YouTube channel.

Flux

Flux.jpg

Flux is a program which adapts the color of your computer's display. During the day your screen will be running at a cool temperature of 5500k. When the sun starts to set, night mode will gradually change the colour temperature of your screen to a warm 2300k.

If you are a night owl and do most of your writing when everyone else has gone to bed, get flux.

Writing-apps-Flux.gif

Your eyes will adjust to the colour change without you noticing. Reducing the blue light coming from your screen will protect your eyes from light strain and will allow you to write more comfortably.

RainyMood

Rainy Mood.jpg

We find white noise can help distract us from what is happening around us and the best white noise out there is Rainy Mood. Rainy Mood is exactly that; it plays the sounds of rain and thunder.

When you’ve been listening to rainymood for over an hour you become very relaxed, and it definitely feels weird when you take off your headphones and you can’t hear it anymore.

Music

Alternatively, put on a soundtrack to a film or TV show similar to the idea you are wanting to write.

If you’re writing a horror, listening to horror music will help you get in the mood. In the past we have listened to the song Time from the Inception Soundtrack on repeat for hours and played rainy mood alongside it.

This combination can help you to immerse yourself into your writing.

Writing-Apps-to-Keep-you-focused.gif

Script Speaker

If you are writing scripts you should also be reading them. Finding the time to do this can be difficult, but if you listen to podcasts or audiobooks whilst you are walking or on your daily commute there is an app called Script Speaker which turns a script into an audio book.

Script-Speaker.gif

If you sign up to Script Speaker you can upload your first 3 scripts for free, and after that it is $0.99 each. All you have to do is upload your script and review any changes the app makes. Normally this is just changing INT and EXT to Interior and Exterior.

Then you can choose between Laura, Sharon, Peter, or Will to narrate your script. We’ve found Peter to have the least robotic voice.

Script Speaker.jpg

A 15 page script took around 1 minute to convert. After that you can download it onto your phone and listen to it on the go. It does take a little while to get used to.

Don’t just use Script Speaker to listen to other peoples scripts, use it to listen to yours too. Listening back will allow to approach your work from a different angle and allow you to be independently critical. When writing any script you can become so familiar it is easy to miss mistakes in the story, so listening back rather than reading can help you identify any issues.

If you have any suggestions for programs you use to help you write let us know in the comments below...and stop wasting your time reading this blog post and go and write!


This video was Sponsored By

🎵 http://bit.ly/track-tell-me - Click here to download this episode's track. Check out Premiumbeat.com to discover a huge range of exclusive royalty free music!


DISCLAIMERS:

Some of these links are affiliate links, if you purchase gear via these links The Film Look will receive a small commission, but there will be no additional cost to you. Thank you!

Understanding White Balance

White balance can be confusing. You've got all these different settings to choose from; degrees, kelvin, tints, gels, temperature. So when, what, and why do you choose certain settings?

It becomes a lot more clear once you wrap your head around a few simple things. Today we’re going to try to understand white balance. 

The Starting Point: Sunlight

Sunlight is pure white, the whitest of white. It's the global standard for all things light and colour because that big shiny ball in the sky is what illuminates our world.

White Balance - Day Light.jpg

So this is our starting position - our default, and we can compare all other light to sunlight.

Cameras measure colour temperature in Degrees Kelvin. The colour of sunlight is 5500K. Everything up the scale is cooler and everything down the scale is warmer. You can go across the scale, but for today we are concentrating on the essentials.

Fooling Your Camera

The pre-made white balance settings in your camera are there to trick the camera into believing a different colour is white.

 Tungsten lights AKA household bulbs, for example, are naturally warmer than sunlight. They appear, compared to the white of sunlight, quite orange. On the Kelvin scale, they sit at 3200k.

This is where the trick comes in. You can fool the camera into believing these warmer lights are white.

If you were shooting a scene indoors and needed to add white light but only had tungsten lights, you can tell the camera to turn those white.

White-Balance-Change.gif

But be warned, once you start fooling the camera, you are sliding the entire Kelvin scale in that direction too.

If you tell the camera warm is white, that means everything the camera sees becomes colder. The warm light becomes white, white becomes cold and blue-ish, and all colour gets adjusted in that direction.

Sticking to Daylight Balance

If you are shooting a night scene indoors beside a desk with a warm desk lamp, you might think you have to set this lamp to white, because...white balance. But what if you want it warm? What if the warm, orange evening look is what you are going for? Then keep the white balance to daylight.

White-Balance-Keeping-it-warm.gif

There is no law that says the light HAS to be white.

Shoot the image as close to the intentional final image. If you want it warm, shoot it warm. But shooting it safe, and shooting it white, then adding a little warmth in post isn't a bad decision either.It's customary to provide some white light into the warm scene to see the colour contrast between the warm and cold tones. It helps the warmth stand out and prevent it from becoming muddy.

Sunlight must be white

It’s fair to say that if you have sunlight in your scene, it needs to be white.

If you have a scene with a warm lamp in it but also have a window with daylight pouring in, you will want to set the white balance back to daylight. If you set the warm light to daylight balance, the sunlight coming through the window will turn very blue which will make the scene look really strange. This is a clear sign of the ameuter look.

White-Balance--Day-Light.gif

Simulating moonlight is a whole different ball game, but if it's supposed to be sunlight, it should really be white.

Gels

Gels are there to adjust the white balance of a light directly from its source, rather than in camera. It's very similar to adjusting the settings on the camera, but instead of fooling the camera from inside, you are fooling the source of light. 

White-Balance--Adding-Gels.gif

Let's go back to the warm desk lamp during the day. You might not want the desk lamp to be so warm, but changing the camera settings to fool the warm light to look white will mess up the colour of the sunlight. By adding a blue gel to the warm lamp, and keeping the camera's settings to daylight balance, the sunlight will be white, and the lamp will be significantly cooled down. 

So that’s the very basics of white balance! 


This video was Sponsored By

🚀 http://bit.ly/pack-emulsion - Make your video look like it was tailor-made for the silver screen with RocketStock’s film grain overlay pack, Emulsion!

🎵 http://bit.ly/pbheat-tfl - Click here to download this episode's track. Check out Premiumbeat.com to discover a huge range of exclusive royalty free music!


DISCLAIMERS:

Some of these links are affiliate links, if you purchase gear via these links The Film Look will receive a small commission, but there will be no additional cost to you. Thank you!

2 Stories in Less Than 10 Minutes | Story in a Can

In each can there are 20 locations, 20 objects, 20 characters, and 20 scenarios. We pick one from each of the cans and try to come up with a film idea on the spot. Sometimes they are bad, but sometimes we turn the idea into a film.

This week we created 2 film ideas from the location of a City Bridge, object of a Toy Car, character who is a Teacher, and the scenario of Just lost your job. One film is called "Flash Mob" and another titled "Young Blood". 

Watch the video to see what stories were made.


DISCLAIMERS:

Some of these links are affiliate links, if you purchase gear via these links The Film Look will receive a small commission, but there will be no additional cost to you. Thank you!

How to Tell Better Vlog Stories

One of our subscribers asked us how they can tell better stories in their vlogs.

Well with a little filmmaking knowledge and some basic storytelling techniques, we can help YOU make your vlogs more entertaining, informative, and engaging - all without spending a single penny more!

First, let's define what a vlog actually is! It’s a broad term, so lets put down some ground rules: a vlog is a piece of video content posted by a creator who features AS themselves in front of the camera and shares their thoughts and knowledge on something.

To put it simply, vlogs are videos of people sharing their world.

“My camera isn’t good enough”

camera-doesnt-matter.gif

Let’s get this first one out of the way. Your kit is the last thing you have to worry about when making vlogs. You don’t need a fancy camera, cool lights, and a top of the line microphone.

As long as the footage isn’t blurry and we can hear you clearly, it’s perfectly good enough for a vlog. Most smartphones are more than good enough for shooting content. So don’t blame your tools!

“I’m not interesting”

core-subject.gif

When something isn’t quite right with your vlogs, the first thing you’ll probably do is blame yourself. “I’m not interesting in front of the camera” you might say. WRONG. It’s not that you aren’t INTERESTING, it’s that you are not INTERESTED.

Successful vlogs are about people who love what they do. They have a passion.

Whatever subject it is you are talking about, you must be invested in it. This is your core subject, and it’s this single core subject which will help give your vlog some structure. More on structure in a bit.

Cody’s Lab is a prime example of being interesting by being interested. He makes videos about mining ore, smelting, and science experiments. He even has a series about Beekeeping. Until I watched his videos, I had literally no interest in Beekeeping, but because Cody is so passionate about his core subject I kept watching.

You don’t have to be the most charismatic and exciting person in the world, but by simply having a real interest in what you are talking about, you will automatically shine on screen.

Have a plan

A mistake a lot of new vloggers make is hitting record on the camera and waiting for something interesting to happen in front of them. Unless you are a rich superstar rapper who ends up in crazy situations every single day, you’ll need to plan your vlog to make it more entertaining.

Write down some subjects, places, things, or topics you want to cover in your vlog; just make sure they are things that interest YOU.

Before you go out for the day, you should have an idea of the type of video you want to make. This will give you a stronger backbone when you shoot, it will give you a focused subject, and it will help you craft the story as you go along.

Storytelling 101

storytelling-101.gif

“Character -> Conflict -> Goal” is an essential storytelling technique. Every great story follows this rule and your vlog should too if you want to stand out from the crowd.

Who is the character? YOU are! Interesting characters have strengths AND weaknesses, so don’t be afraid to show what you are AFRAID OF, CAN’T DO, AND DON’T LIKE, as well as the positives.

What is your goal? Tell us about what you want to achieve inside the vlog. In the filmmaking world this is called exposition. It’s the information the audience needs to know in order to follow along with the plot.

For example, in the movie Inception, they need to explain the whole thing about dreams, implanting memories, and stealing thoughts in order for the audience to be able to follow along.

So tell your audience your goal, document your journey, and show us the obstacles that get in your way.

Arrive Late - Leave Early

arrive-late---leave-early.gif

In filmmaking there is a term called “Arrive Late - Leave Early”. You see this executed in film and TV all the time. It’s that cut between the Police Officer grabbing his jacket off his chair and arriving at the scene.

You don’t need to see everything in between to understand the change of time and location - your brain works it all out.  YOU can use this technique to help improve the pace of your vlogs.

If you want to show the passage of time, for example, you can actually do this in very few shots. End your scene by picking up your jacket, insert a quick shot of your watch, then close the door at the next location.

We understand in just a few seconds that you’ve left one place and arrived at another without masses of filler material. Your shots give the audience visual information, so don’t give them too much useless information just to fill up the timeline. Use your time wisely, and try to cut the fat from your edit.

If you are simply telling the audience that you’re moving location, you don’t need to show: tying your shoes, grabbing your food, closing the door, shots of your feet, getting in the car, putting on your seat belt, a timelapse of you driving, parking, getting out…

This is not very entertaining, nor is it informing the audience to further the plot of the film.

Some people might not agree with what I’m saying. Some people might prefer the organic, no-format, whimsical style of a vlog. And that’s totally fine! But if you want to compete with the best, using some storytelling and filmmaking techniques will certainly help you stand out.


This video was Sponsored By

🚀 http://bit.ly/tflrs-creator - Become a social media powerhouse with RocketStock's video element pack, Creator. This collection comes packed with logo reveals, end screens, subscribe animations, and much more.

🎵 http://bit.ly/pbbluenotes-tfl - Click here to download this episode's track. Check out Premiumbeat.com to discover a huge range of exclusive royalty free music!


DISCLAIMERS:

Some of these links are affiliate links, if you purchase gear via these links The Film Look will receive a small commission, but there will be no additional cost to you. Thank you!

Palette Gear Review

In the last 2 years we have uploaded around 200 videos to this channel. This means we have spent a lot of time editing so any new shortcut we find to make the process quicker is like winning the jackpot.

The team over at Palette have sent over their Palette gear to try,  and see if it can improve our editing workflow. 

What is the Palette Gear

Palette Gear Review.jpg

Palette is a modular hardware device that allows you to set program shortcuts by using the buttons, sliders, and dials.

For example, instead of using the mouse to click on the volume and move it up and down, you can use the slider or dial to do this.

Using a physical button is quicker, easier, and it just feels much nicer to carry out such a task.

The Palette Gear can do much more than just change the volume of your computer’s sound, but we will get into that later on in the video.

There are a few different kits you can buy, and the one we have is the expert kit which goes for $300.

How to Set Up

I am not going to go into all of the details of how to set up the Palette as there are lot of videos already on YouTube from Palette that explain that, and also it is super easy to do.

It’s really just plug and play. Dive into the functions and work out what layout works for you.

If you are used to using programs like Adobe Premiere, Photoshop, or Lightroom, this will be a breeze to set up. It just takes time to get used to it.

Palette Gear Review Layout.jpg

The Design

You will not be disappointed with the design of the of the Palette Gear, it’s actually made filming the b-roll for this video very easy because it looks so cool.

The arcade style buttons feel like arcade buttons, the sliders are smooth but have a nice hard stop, the dials turn with ease and have a nice click when you press them down.

The LEDs come in handy to customise your setup, and it helps you colour code your setup.

Palette Gear Review LED Lights.jpg

For my editing profile in Premiere Pro I have them set to purple, with the two buttons set to green as they control something else.

When I switch to my colour correction profile I have the buttons set to red, and when I am using Spotify I have the two controls set to green.

And the rest are black out as they have no controls assigned to them, which was my choice.

Changing the colours is super easy and there are thousand different design and workflow combinations.

Palette Gear Review Desk Setup Top.jpg

I have the Palette setup right above my keyboard. I did have it to the side at first but that meant I could only really use one hand to access it, and having it above the keyboard means I can work with the buttons from left to right which feels a lot more natural.

Palette Gear Review Desk Setup Side.jpg

Everyone's desk setup will be different, you just need to spend a little bit of time to work out what is best for you, and like I said earlier it’s easy to change the setup.

At first I selected one of the many pre built profile which are supplied with the Palette, but you can also download other user profiles from their website.

Start with these and learn what you do and don’t need, then it’s time to customise.

This is my setup.

The first two buttons are set to simply skip forwards and backwards between the different profiles, this will be come clear in a minute.

I have a number of different profiles installed with my most used being for Adobe Premiere Pro where I have 5 different profiles.

The first profile is for when I am just editing a project together, with controls to zoom in and out of the timeline, jog through the timeline, and change the audio track height which makes doing this simple task much easier.

The next two profiles are for when I am using the Lumetri colour grading plug in. I have it set up so grade 1 can change the temperature, tint, exposure, contrast controls.

Then grade 2 has the controls for highlights, shadows, whites, blacks, and saturation just like the basic colour correction in the Lumetri panel.

Palette Gear Review Colour Greading.jpg

This is why I have the first two buttons set to switch forwards and backwards between the profiles so I can quickly access all of the setting I use the most.

You can just use one of these buttons to skip through the profiles, but it does mean you can only skip forwards until you get back to the start.

Other profiles I have for Premiere Pro are controls for the creative tab in Lumetri to change the percentage of the LUT, add a film fade, and change the vibrance.

Then a profile to change the scale, X and Y position of a clip.

I did try to use the Palette to edit audio as there is a profile already setup which has all of the shortcuts to add keyframes and edit, but I felt it was slowing me down.

Using the mouse and keyboard shortcuts does this same task a lot quicker.

The other profiles i use are for Lightroom, which has a similar set as the colour grading options from Premiere Pro, and also for Spotify which is a nice bonus to have as I use it every day.

You can also use the Palette for other programs like After Effects, Audition, InDesign and many others are being added.

My Recommendations

Like I said we have the Expert Kit which is the middle kit, but what's good about the Palette gear is that you can buy everything separately.

So if you find out that you need more buttons you can just buy the buttons.

For my current workflow which is mainly using the Palette for colour, I think I would get rid off the sliders completely and add more of the dials.

The reason is because the dials can perform 3 actions, they can dail left and right which can change a number value higher or lower, and you can also press them down to perform a different action, like reset the setting it controls.

Palette Gear Review Sliders.jpg

Also if the slider is not in the center when you start to move it, the controlling value jumps to where the slider is so you have to move it back to the center to start from 0. The dials always start from 0.

Final Thoughts

So, should you get a Palette Gear?

If you are like me and use Lumetri to colour correct and colour grade or use lightroom to do the same with your photos on a daily basis, I think it is a must.

You can definitely do all of this without the Palette, but it does make it a lot easier and quicker.

The Palette is not a replacement for your mouse and keyboard, it is an extension and helps you fine tune your control over your workflow to allow you to be more creative.

Palette Gear Review The Film Look.jpg

This video was Sponsored By

🚀 http://bit.ly/rs-aspect - Give your video a clean look with Aspect by RocketStock. It features over 200 logo reveals, intros, lower thirds, overlays, icons, and transitions.

🎵 http://bit.ly/track-tell-me - Click here to download this episode's track. Check out Premiumbeat.com to discover a huge range of exclusive royalty free music!


Equipment Links

🎥 This episode's kit/gear/equipment:

https://palettegear.com/


DISCLAIMERS:

Some of these links are affiliate links, if you purchase gear via these links The Film Look will receive a small commission, but there will be no additional cost to you. Thank you!