Generating Story Ideas for your Film

Writers block can happen to the best of us. We don’t know when it will happen and we can rarely tell when it will end. But there are ways to tackle writers block, and one in particular is by forcing creativity using some sticky notes, an online word generator, and a little imagination.

Like we say a lot of the time, getting the film look is more than just camera settings and fancy shots. If your film doesn’t have a story, it won’t feel like a real film, and if you are struggling to get ideas for a story, you can use a technique we call “Story in a can”.

Story-in-a-Can.jpg

It’s a simple trick. You want to create 4 categories; character, location, object, and scenario. Using an online word generator, write out 20 of each category onto some paper, fold them up, and place them into some sort of container. We used 4 tin cans and labelled them. 

Then it’s a case of picking out one bit of paper from each can and creating a storyline using each category.

Story-in-a-Can-1.jpg

If every unique combination creates a different story, 20 to the power of 4 gives us 160,000 combinations…we think! We’re probably wrong, leave us a comment with the right answer.

Each item doesn’t have to be super detailed. We stuck to a few bog standard occupations for characters like teacher, bartender, and bank manager, and added a few obscure ones like medium and funeral director.

The locations were things like public toilet, a beach, and a supermarket.

The objects were things like matches, a fork, and added some more complex ones like somebody else’s wallet. And the scenarios we wrote down were things like a job interview, nana going mental, an eating contest, and an exam.

By keeping them a bit simple, strange, and vague, it gives you more blanks to fill in and stretches your creative muscles. Sometimes combinations can be difficult, and if this happens, you can always cheat a little bit.

For example, if the location you picked was a mountain top but it didn’t fit very well with your other items you can always say it’s a restaurant named the mountain top. 

Story-in-a-Can-2.jpg

Use the notes however you want to use them. The story ideas you come up with might not be very good and you might just overcome writer’s blocks with this exercise. There is always a chance you might stumble on to your next script idea.

We actually did this technique for a vlog episode which is linked on screen and down below. We thought it was an awesome idea and wanted to share it with you!


Generating Story Ideas for your Film.jpg

DISCLAIMERS:

Some of these links are affiliate links, if you purchase gear via these links The Film Look will receive a small commission, but there will be no additional cost to you. Thank you!

DIY Overhead Shooting Rig


Nearly every video we shoot for this channel uses our top down shooting table in some way. We use the setup when we are trying to explain something on the white board, to show something we are building, it helps when you need to be hands free or just as an extra table to work and shoot on.

The Table

Let’s start off with the table, the top is made out of MDF which has been varnished so it can be easily cleaned. The best thing about the table is that is folds away into the wall when we need more space.

The legs are on hinges and have a magnetic catch, so they fold away under the table and stay in place. The table top is also connected to the wall by hinges and folds flat against the wall.

This comes in handy as we can put our big pop out back drop on the wall when we are taking head shots for example.

DIY-Overhead-Shooting-Rig.jpg

Backdrop

Since the colour of the table is not the best, we have a few different backdrops to use depending on what we are shooting. The backdrops roll off a metal bar we have setup and clip on to the edge of the table. We also us a white board so we can write and draw, also we use one of these cutting mats as the green gives a nice contrast.

DIY-Overhead-Shooting-Rig-Backdrop.jpg

TV Table Mount

The way we mount the camera is using a monitor stand that you would normally use on your desk. We modified it by connecting a quick release plate to a piece of wood, the one we used is a Manfrotto 323 RC2 Quick Release Adapter. Then we attached this to the monitor stand just like you would if you were attaching a monitor to the stand.

Since the cameras we use on the shooting rig are small mirrors cameras, there is no weight issues as this stand is built to hold monitors that are much heavier than our cameras.

With the arm you can adjust the height, move it backwards, forwards, and tilt it left and right to adjust the framing of your shot.

DIY-Overhead-Shooting-Rig-Mount.jpg

Monitor

After testing we worked out which settings are best to use on your camera when shooting on the table. So we can see what we were shooting we use our feel world monitor mounted onto the shelf.

DIY-Overhead-Shooting-Rig-Monitor.jpg

Lights

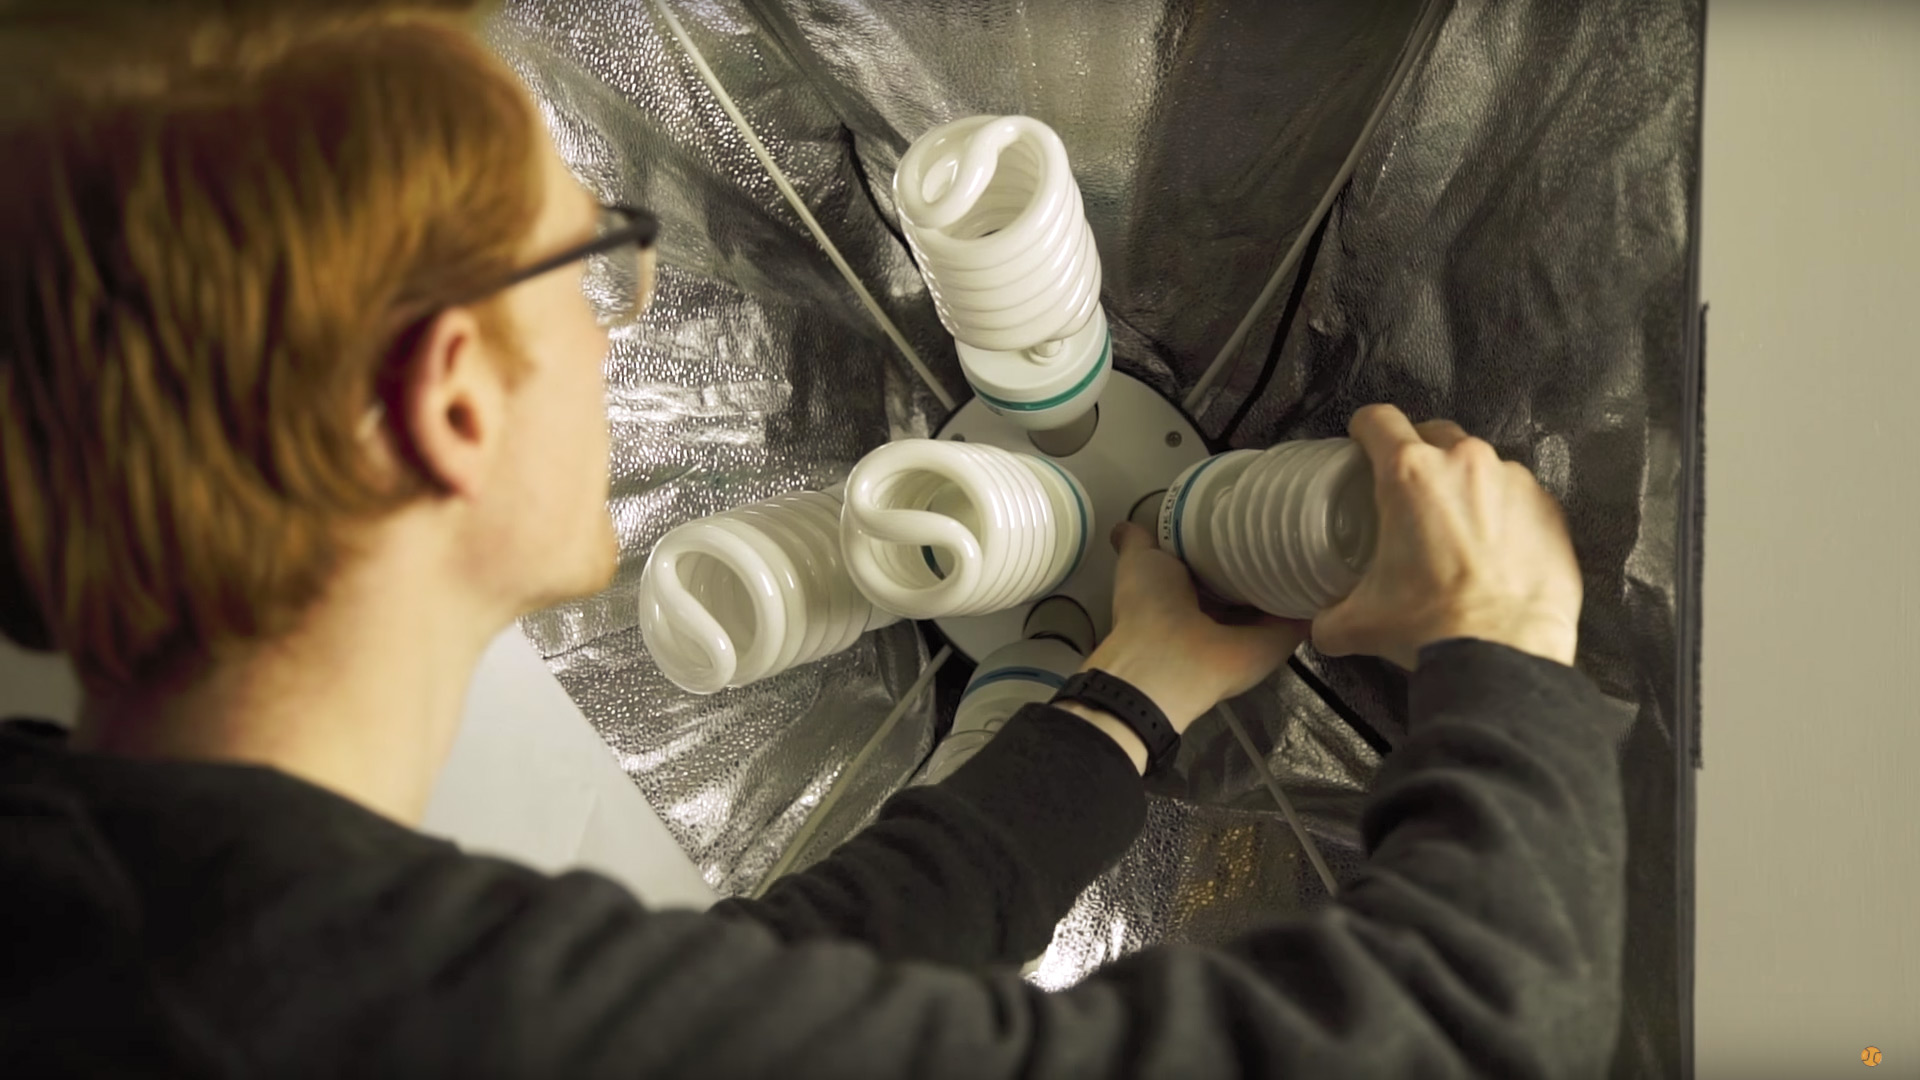
Lastly we use 2 soft boxes which have 5 115w bulbs in each of them, at a colour temperature of 5500K. 

DIY-Overhead-Shooting-Rig-Lights.jpg

This shooting table comes in handy for many different things and there are many different ways you can set up a shooting table just like this, just work out what is best to the space you have.


DIY Overhead Shooting Rig.jpg

DISCLAIMERS:

Some of these links are affiliate links, if you purchase gear via these links The Film Look will receive a small commission, but there will be no additional cost to you. Thank you!

Upgrade Your Camera Battery


The Sony a7s is a mirrorless camera with some great video capabilities. We’ve been using them for about a year now and would recommend them to anyone who is considering buying one.

The problem is, with it being a camera primarily built for photography, the batteries only last about 40 minutes. If you are shooting all day, you’ll need a hand full of these batteries to last the whole day.

So we needed to find a solution to this problem. It’s time to customise.

So this is the standard Sony a7s battery; the NP-FW50. It’s nice and compact to fit in the small form factor of the camera, and has a charge of 1020mAh.

This is plenty if you are shooting photos, but for video, it sucks the juice out in less than one hour.

Compare that to this, the Sony NP-F750. This has a charge of 5200mAh, over 5x that of the standard a7s battery. These are the batteries we use to power the LED panel and the camera monitor.

Sony-a7s-Battery-life2.jpg

So finding a way to use this battery to power our cameras will give the most compatible solution to our kit. This is what we did.

Firstly, we bought a Sony a7s dummy battery. These can be found online, we picked this one up on eBay for a few quid, and what it does is allow you to plug in an external power source into the camera by using a dummy a7s battery on one end, and a female jack on the other.

Secondly, we picked up a battery plate adapter for the Sony NP-F750, the big guy here. So by connecting the parts together and putting in the battery, it all seems to work!

Sony-a7s-Dummy-Battery.jpg

The voltage difference between the original battery and the big sony battery is only .2 volts, so this will be safe to run your camera.

Lastly, we needed a mounting solution. We already have cages for the Sony a7s, so by utilising the 15mm rod mount on the top, we bought a cheese plate, a small 15mm rod, and a strip of Velcro to mount it onto the camera.

Tidy up your cables with a rubber band or some tape, and you’re all set!

We have shot using this solution for months now, and using this battery works just fine. We also have a larger battery, the Sony NP-F970.

Sony-a7s-NP-Battery.jpg

This works too, but every now and then the camera likes to stay idle instead of waking up. We haven’t figured this issue out yet, so we suggest if you do plan on hacking your Sony battery, stick to the F750.

On an all-day shoot, we have got up to 6 hours out of this battery.

Another advantage of this external mount is being able to replace the batteries incredibly easily when it is on a tripod. Sometimes taking the original a7s batteries out when it is locked on a tripod can be difficult as it is accessed from the bottom. This rectifies the issue.


Upgrade Your Camera Battery.jpg

DISCLAIMERS:

Some of these links are affiliate links, if you purchase gear via these links The Film Look will receive a small commission, but there will be no additional cost to you. Thank you!

Should You Go To Film School?


The big question is “Should I go to Film  School?”.

This is a question that will be answered differently by every person you speak to. Me and Rob both went to university and studied a form of filmmaking. I studied Visual Effects & Animation, and Rob studied Media Production.

Film school is perfect for those who want to create a filmmaking network. If you don’t have any filmmaking friends, you’ll find some at film school. It’s great for accessing equipment too. They will have everything you need and more, and it’s all available to you. It’s also a good way to give you a target when you begin making movies. Assignments and coursework will give you a goal to aim towards, so it’s perfect for someone who might not have the mind-set to create their own tasks. If this is what you need, then go for it. Film School is for you, and you’ll get a lot out of it.

But there is another option. Both myself and Rob have learned a load more about making films from YouTube videos and free online tutorials, than we ever did at Film School. You can teach yourself the techniques you’d learn at film school by grabbing whatever camera you can get access to, including your phone, and heading out and just start shooting stuff, using YouTube videos as a guide.

Because of this, we thought we would create a “YouTube Film School”; a list of all of our favourite YouTube and online resources which have made us better filmmakers throughout the years.

Let’s start off with some great variety filmmaking shows:

Film Riot (Film Riot is a household name in terms of YouTube filmmaking resources. If you could only sub to one channel, make it Film Riot. They cover pretty much everything on their channel, all super high quality)

https://www.youtube.com/user/filmriot

Indy Mogul (Indy Mogul has been around forever, and they cover videos about DIY practical effects, visual effects, hacks, and filmmaking tools. Their catalogue is worth watching from the very start)

https://www.youtube.com/user/indymogul

D4Darious (Darious Britt has one of the most underrated YouTube channels. He has cinematography breakdowns of films, a massive list of writing techniques, and a bunch of others that are all worth watching)

https://www.youtube.com/user/D4Darious

Cinematography Database (Cinematography Database breaks down the Cinematography of films like no other, along with his knowledge of the industry you’re sure to pick up some tips)

https://www.youtube.com/user/cinematographydb

Next we have some channels that are great for kit reviews and DIY solutions:

Dave Dugdale (Dave creates some of the most in-depth kit reviews you can find. If you are thinking of getting a new camera and Dave Dugdale reviews it, you’ll know the entire A-Z.)

https://www.youtube.com/user/drumat5280

Philip Bloom (The good thing about Philip Bloom’s reviews are that he spends a good couple of weeks with a camera or a monitor before reviewing it. He goes very in-depth and talks about the kit in a practical sense)

https://www.youtube.com/user/philipbloom

DLSR Video Shooter ( DSLR Video Shooter is hosted by Caleb Pike and is another one of those channels that reviews camera equipment, he also loves a good camera DIY hack)

https://www.youtube.com/user/dslrvideoshooter

DIY Perks (This channel is not all about filmmaking as he builds lots of DIY projects, but his most notable projects involved building DIY lights and as filmmakers we need light)

https://www.youtube.com/user/DIYPerks

The Basic Filmmaker (The Basic Filmmaker has a lot of variety on his channel, and his kit reviews are especially great.)

https://www.youtube.com/user/TheBasicFilmmaker

If Post Production and Visual Effects takes your fancy, here are our favourites:

HitFilm (Hit film’s YouTube channel teaches you many different techniques about filmmaking, mainly in the post production side, this is because they also have an editing and visual effects program which you can download for free)

https://www.youtube.com/user/FXhomeHitFilm

Mike Russell (Mike Russell from Music Radio Creative has some really great tutorials for post-production sound. Making voices sound better, getting a Stephen hawking voice. He’s got you covered!)

https://www.youtube.com/user/musicradiocreative

Video Copilot (Most visual effects artists will know the name Andrew Kramer. The guy is a god of visual effects and has over 10 years’ worth of tutorials on his page. If it’s post production visual effects you want to study, he’s the guy to follow).

https://www.youtube.com/user/videocopilot

We have two channels we watch for interviews with filmmakers, actors, writers, and directors:

Film Courage (Film Courage interviews people in the industry, giving their insight into writing, producing, acting, directing, and more. These videos are great to put on in the background and listen to, like a podcast.)

https://www.youtube.com/user/filmcourage

The Hollywood Reporter (The Hollywood Reporter interviews the top Hollywood stars, getting an insight into their world. Their series The Roundtable has Hollywood stars chatting about the industry and their views, and some last over an hour.)

https://www.youtube.com/user/thrnetwork

Video Essays are a great way get grips with studying film, and learning the theory behind techniques helps you understand WHY you are using that technique. Get subscribed to these guys for some great binge watching videos about film and filmmaking:

Extras:

The Art of Photography (The Art of Photography is not strictly about filmmaking, it’s about Photography, but these videos from Ted will help you learn all you need to know about some of the best Photographs)

https://www.youtube.com/user/theartofphotography

Websites:

No Film School (Whether it’s on their website or their Facebook page, No Film School is a site you should be following. They post articles and videos daily, giving you the best resources from around the globe into one news feed. And a quick shout out to V from No Film School; Thanks for posting our videos, we really appreciate it!)

http://nofilmschool.com/

If we didn’t mention any channels that you think we should be following, leave us a comment! We’d love to know what we are missing out on. As always, we are on Facebook, Twitter, and Instagram. Thanks for watching, and we’ll see you next week.

Should You Go To Film School.jpg

DISCLAIMERS:

Some of these links are affiliate links, if you purchase gear via these links The Film Look will receive a small commission, but there will be no additional cost to you. Thank you!

Should You Buy a Vintage Lens?


The Canon L series 24-105.

It’s arguably the most versatile lens you can buy in terms of its price, quality, and focal range. It gives a very clean, smooth and reliable image. But what if you want something with a bit more character? This is where vintage lenses come in.

So why use older, cheaper lenses when you have a relatively new lenses.

Well vintage lenses where used on film cameras and there is something about the look they produce which is so applying.

When you attach it to a modern DLSR or mirrorless camera, it produces a classic vintage aesthetic, getting you closer to achieving the film look. And because it is now in front of a modern sensor, the resolution of the image is not compromised; giving you something both modern and characteristic.

There are two avenues to go down when buying vintage glass.

You can go for something beaten or well loved. A lens which has been used to death or a bit mistreated will give you look that is the opposite of sterile, perfect for a highly-stylised image.

Then there are well looked-after vintage lenses.

You’d think they are less common than those that have collected dust and dirt, but most people take special care of their camera equipment.

The quality of the glass inside most of these old lenses is far superior to the modern equivalent in a similar price range. For a fraction of the price, you’ll get top quality glass.

Jupiter9-85mm-Lens-Review.jpg

This Jupiter 9, 85mm f2 lens, which I picked up for £80! I’ve been wanting an 85mm lens for a while now, but could not justify the price of a Canon or Sony version of this lens. So I went with this one as it is much cheaper than the Canon or Sony alternatives, for a lens that will not be used on a daily basis and might just sit in my camera bag until I need it. This is a real benefit of picking up vintage lens.

But be warned! Vintage lenses, even those that are pristine, have some visual characteristics that you will either love or hate.

This 85 has some serious lens flares! But in all honesty, they do look pretty cool!

Jupiter9-85mm-Lens-Review-1.jpg

If there is a light source just out of frame, you get this awesome soft, bright lens flare. Add a coloured gel to your light and you are now shooting some really stylistic stuff. But, if you want to shoot clean, you can always put a lens hood on it or flag the light from hitting the lens.

This 35mm has a heavy vignette. Vignettes are something people add to their image in post-production, so I don’t consider this a downside to the lens. If anything, I quite like the look it gives, as it guides the audience’s eye to the subject. The vignette is very natural as it does it in camera, so there are no banding issues like vignettes applied in post.

Takumar-35mm-lens-review.jpg


So compared to modern lenses, each vintage lens has its own visual style that is unique to each lens.

Back in the day, changing your f stop was done mechanically and not electronically, meaning that adjusting the aperture is done on the lens.

What’s great about some vintage lenses is the aperture doesn’t click – it’s smooth, like a focus ring. This means if you wanted to, you can adjust exposure during the take and it doesn’t jump from f stop to f stop. This is handy if you need to adjustment exposure if the camera travels from outside to inside.

So vintage lenses are a bit quirky, they give something unique, authentic, and just something a bit different. But here’s the downside.

Vintage lenses don’t have image stabilisation. So if you are shooting handheld or run and gun, you’ll probably experience micro jitters. With a modern lens that has IS like the 24-105, it will remove those micro jitters from you image.

Lastly, if you aren’t planning on embracing the quirky flaws of a vintage lens because the project needs a clean look, then you will have to use something like a 24-105.


Should You Buy a Vintage Lens.jpg

DISCLAIMERS:

Some of these links are affiliate links, if you purchase gear via these links The Film Look will receive a small commission, but there will be no additional cost to you. Thank you!

Filter Your Writing Changes


Editing your script when it has an excess of 20, 30, and 40 pages can be really difficult to wrap your head around. You now have so much content in your script that making changes to plot points or character tweaks feels like you're biting off too much in one go.

Wrapping your head around everything all at once is a mind melting task. So I needed to come up with a way that helped alleviate some of that mind melting. I call it: The Coffee Filter Method.

Let’s say you have 4 main characters. They all have their own character arcs in the story line, and the main plot that drives their actions has 6 unique instances.

At this point, if you want to change something half way through, there are a lot of points that will need altering on each side of this scene for it to make sense. Making this change just got really complex because it really isn’t just this scene you'll need to edit.

Filter-Your-Writing-Changes-1.jpg

So the Coffee Filter Method is really simple, and works like this:

First of all, make a list of all of the changes you want to make. This can be altering lines, changing the action, or even continuity issues like “what is this guy doing when the other dude is over there?”.

Now they are all in a list, pick one and write it at the top of each page as you read through the script.

You want to read through your entire script only thinking about the change that you’ve chosen to write at the top of your page. Make that change and start over with another task on your list.

Filter-Your-Writing-Changes-2.jpg

This method isolates all of the other complications you might have and gives you a single goal. This might seem like a more time consuming method compared to tackling everything head on, but, at least for me, it removed that horrible dark cloud in my head and let me concentrate on the single task at hand.

So next time you have a shed load of changes to make, set yourself a task list and re-read your script with only one particular change in mind at a time. I have some filters that I use for every script I write. Here are a few examples:

  • Are these characters being tortured? Are they hitting rock bottom?

  • Does every scene change, turning from peace to violence?

  • Does every character have an independent activity in the scene? Get them to do something!

  • What is this line of dialog providing? If it was taken out, would this scene still make sense?

  • Are there any lines of dialog that can be replaced with action?

So next time you are tackling a massive script and don’t know where to start, try looking through a filter.


Filter Your Writing Changes.jpg

DISCLAIMERS:

Some of these links are affiliate links, if you purchase gear via these links The Film Look will receive a small commission, but there will be no additional cost to you. Thank you!

DIY Light Diffusion


Diffused light (or soft light) is one of the easiest lighting methods to help achieve the film look. It’s a straight forward technique that you can use to reduce those hard shadows. We have a few ways to get diffused lighting on the cheap, so let’s talk about them.

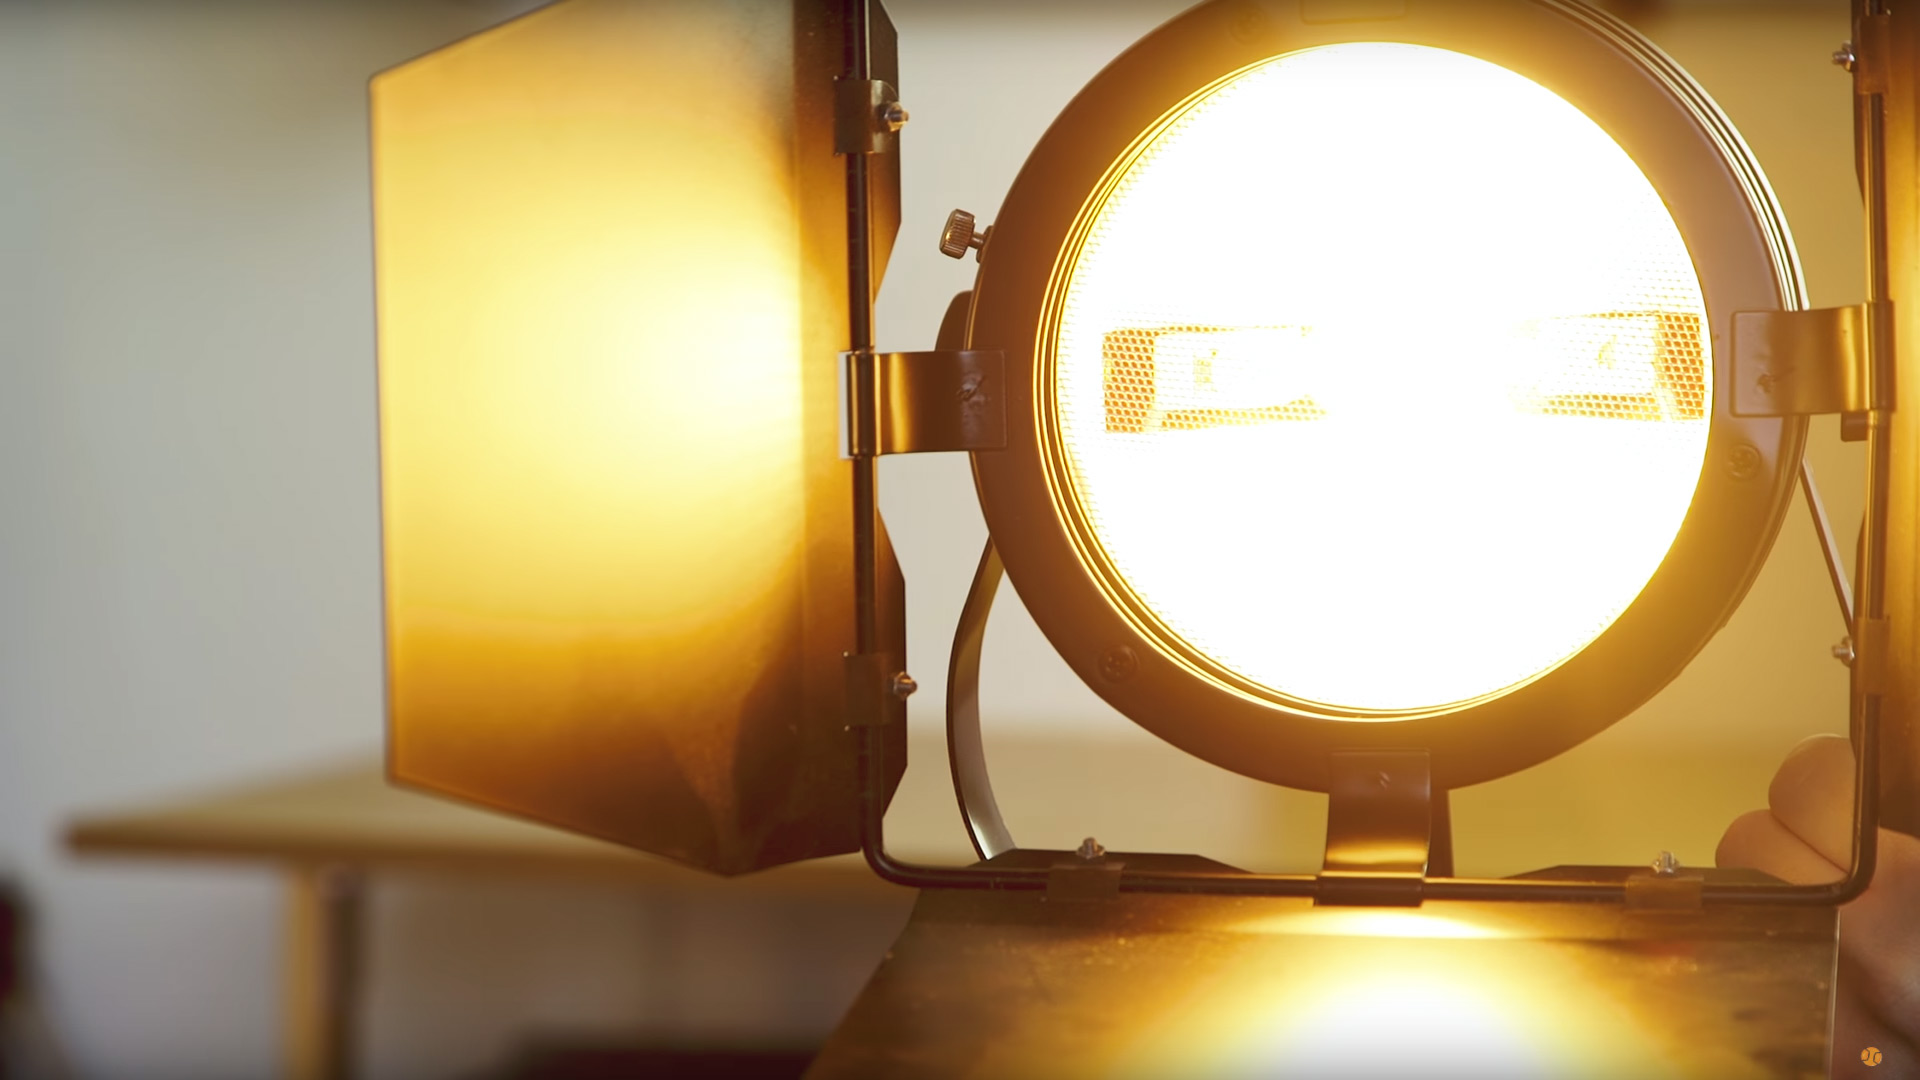
One of the main lights we use here at Film Look HQ are a set of 800 watt lights. They are super bright and you can even dim them! Problem is, they produce a very powerful hard light.

800w-Lights.jpg

After buying these, I knew straight away the light needed to be softened. This is usually where diffusion paper comes in, but have you seen how expensive this stuff is!? For what is essentially just paper!

At this point I needed to find something that did the same thing but for a fraction of the price.

Easy, printer paper! I have a stockpile for my printer, the light can shine through, and it doesn’t cost an arm and a leg. But wait…those 800 watt lights get hot, REALLY hot! We have to use gardening gloves to touch these lights when they are on, and sticking paper to the front of them was just playing with fire…literally!

So printer paper was out of the question. What I needed was something cheap, easy to get, but something that also withstand a lot of heat. Grease proof paper! It’s made to be used in an oven, so it’s perfect. I picked up a roll for £1.

Cheap-DIY-Light-Diffusion.jpg

Cut it to shape and peg it to your lights. If you have to replace it, it only costs pennies. Just remember to get the white grease proof paper, not the brown stuff. I made that mistake.

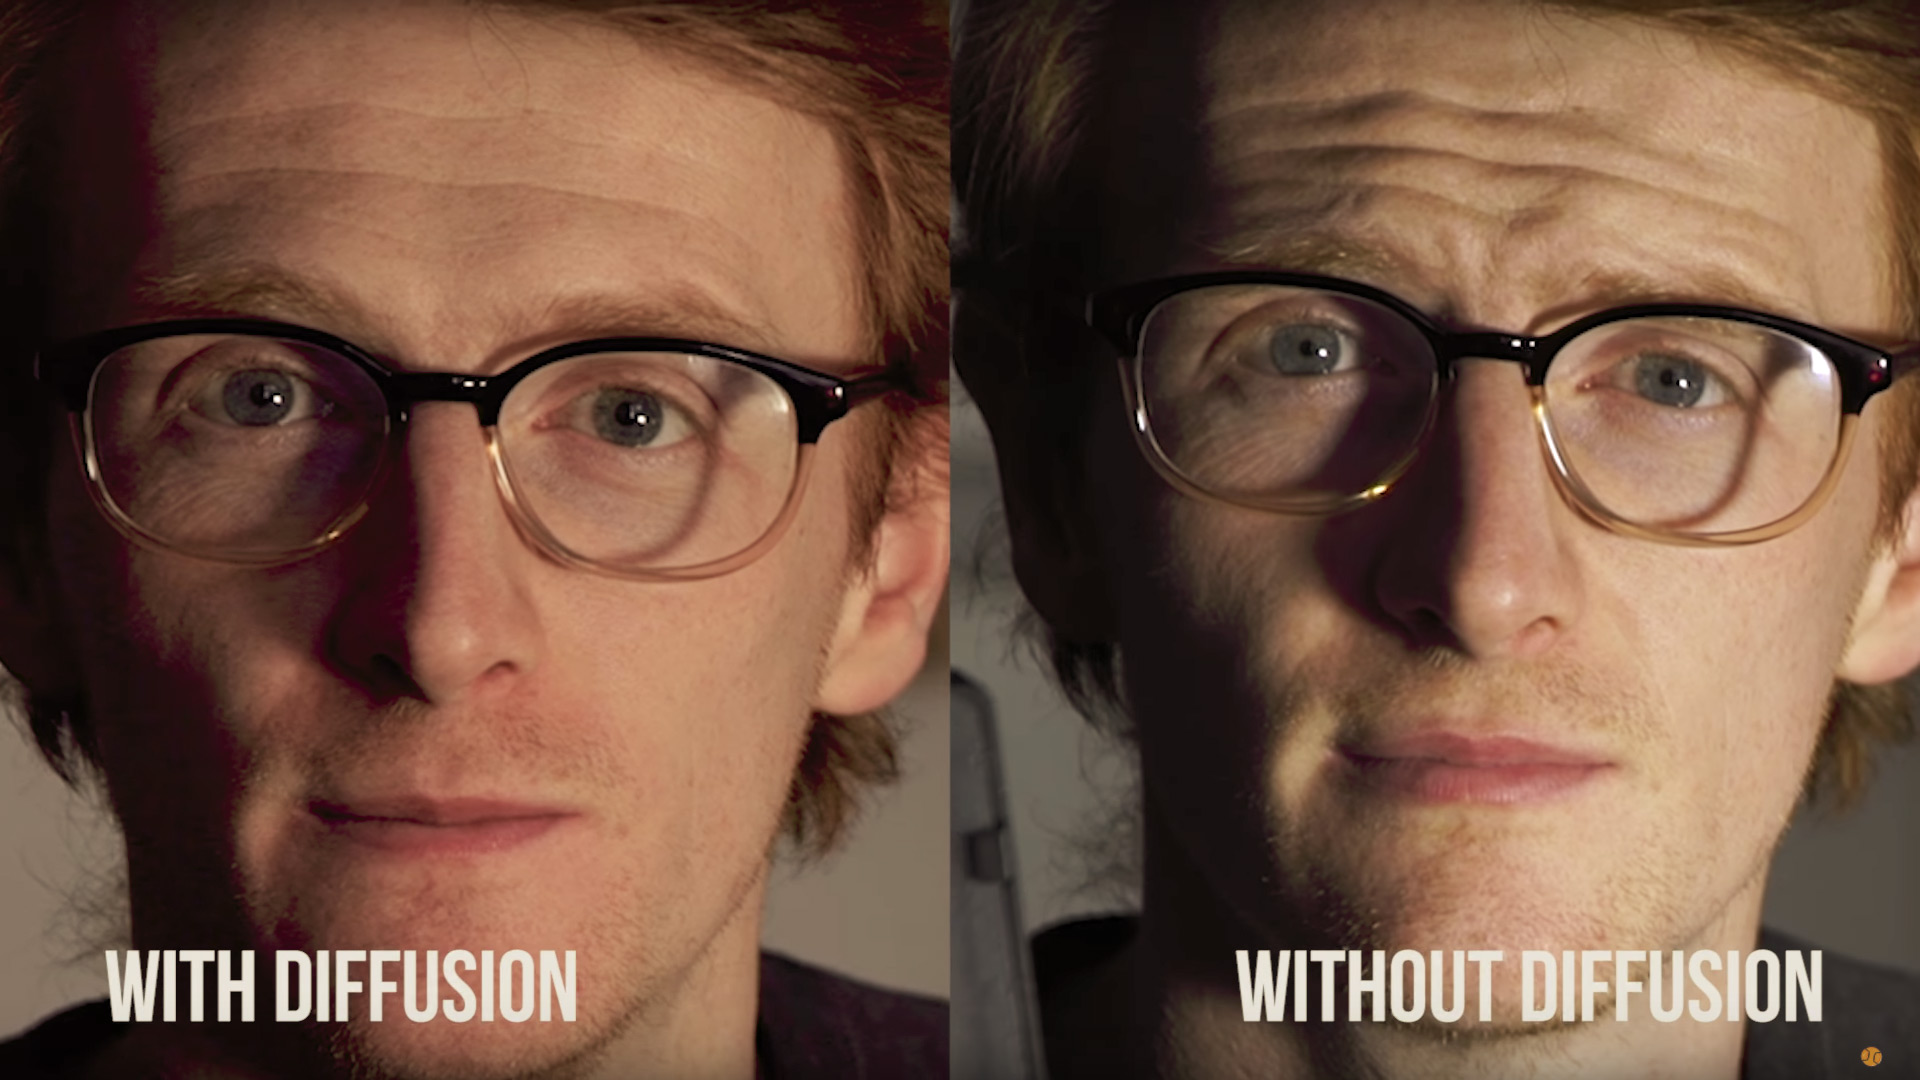
So how well does grease proof paper work? Well here are 3 examples of using it in front of 3 of our lights.

Firstly, the 800 watt light. Here it is without…and here it is with it.

With-and-without-Diffusion-800w-light.jpg

Next is the a 70w blub. Again, here is it on its own…and with the greaseproof paper.

With-and-without-Diffusion70w-blub.jpg

Finally, our little 160 LEDs.

With-and-without-Diffusion-160LED.jpg

Another way we use it is to cover windows in your scene. If you have bright direct sunlight coming through, it can sometimes give you trouble in terms of dynamic range and exposure. If your window is out of frame or out of focus, you can throw some greaseproof paper on the window panes with some sticky tack to soften the light.

Here at The Film Look we often give our equipment nicknames. So what do we call this stuff? Over to Richard.

It’s greaseproof paper. There is a musical and a motion picture called Grease. The main character in Grease is called Danny Zuko. So how about Dannies? “Can we throw a Danny on this!?” Yeah, that’s work.

So what if you need to diffuse a lot more light? The paper isn’t massive, so we have a few other cheap DIY and super low budget methods.

If you don’t already have a 5 in 1 reflector panel, get one. They are really cheap and can be used in a million different ways. It has: White fill, negative fill, silver sheen, and Hip Hop Video Mode.

In terms of diffusion, if you remove the cover you have a large translucent panel. With something bigger you can create distance between the light and the panel, which makes the light even softer.

We also use a blind from Ikea. You can peg it to a light stand or a mic stand, like we do. This one is super lightweight and always in my lighting bag.

With-and-without-Diffusion1.jpg

If you need something even bigger, a shower curtain is the way to go. This one is frosted so it works really well. It does need a bigger area to setup, but you can easily fit 3 800 watt lights behind it and blast soft light into your scene.


DIY Light Diffusion.jpg

DISCLAIMERS:

Some of these links are affiliate links, if you purchase gear via these links The Film Look will receive a small commission, but there will be no additional cost to you. Thank you!

How to Record Stabbing Sound Effects


Today we are gonna record some stabbing sound effects!

Recording your own sound effects does a few things. Firstly, you don’t have to deal with copyright issues! Secondly, you have complete control over the sound you are producing.

Some sound packs can be awesome, I use downloaded sound effects all the time. But if you are able to record your own sounds, you might get something unique and authentic.

So we got a bunch of blankets and wooden boards and set up what I’m calling the ‘pyramid of silence’. We bought some melons, got various weapons, and smashed the crap out of them while recording in the pyramid.

Recording-Stabbing-Sound-Effects.jpg

Unfortunately, because I live so close to a motorway, the sound was poisoned by a horrible white noise throughout the entire take. Basically, it wasn’t usable. I wanted to record outside because of the juicy mess from the melons, but it didn’t work out as well I had hoped.

So, we started again. We bought some more melons, grabbed the weapons, but this time we recorded everything in our studio, in a pop out tent. We covered the tent with blankets and recorded the stabbing sound effects inside there.

Setup-For-Recording-Sound-Effects.jpg

So this is how we recorded it!

You want to get your microphone as close to your subject of sound as possible. This is so you can turn down the sensitivity on your audio recorder which will reduce any background noise and records a nice, clean take.

Your audio sensitivity (also referred to as gain) is like ISO on your camera.

You can push it higher, but you will start to introduce elements you don’t want – with video you get grainy visual noise, and for audio you get audible noise, or hiss. Try to close the distance between the microphone and the subject the best results.

Stabbing-a-Melon.jpg

So where do you set your gain? When you get yourself positioned and ready to record, perform the sound you want to record. In this case it’s stabbing a melon.

Looking at the read out on your audio recorder, and adjust your sensitivity to around 3-6dB under the peak line. This will give you room for the sound to raise and lower in volume without you having to adjust your gain further.

Record-Sound-Effects-Levels.jpg

So once we got set up, we stabbed the melons. When handling something round like a melon, you might find yourself holding it down with your unarmed hand to stop it from rolling. Instead, make a ring or a wedge to do this. You don't want any of your body part anywhere near the stab zone because if the knife slips, you’re gonna have a bad time!

You want to record your sound effects as singles. By this, I mean record one stab, give it a second or so, and go for another. If you record multiple stabs in quick succession, you won’t be able to separate the sounds out in post as they are baked together. If you need to have quicker stabbing sounds, you can group the single stabs together to create a succession.

Speaking of multiple fast stabs, we recorded a bunch of whooshy sound effects by whipping a coat hanger and my lightsaber stunt blade in front of the microphone. You can use these together with the stabbing sounds for emphasis of the stabbers fast moving arm.

And for good measure, both myself and Rob threw a few punches to record clothing foley. So you have the soft sound of my hoodie, and a stiffer sound coming from Rob's waterproof jacket.

You can find all of these sound effects for free in our store.


How to Record Stabbing Sound Effects.jpg

DISCLAIMERS:

Some of these links are affiliate links, if you purchase gear via these links The Film Look will receive a small commission, but there will be no additional cost to you. Thank you!

Sony A7s Cage Battle | MovCam vs. Tilta


Myself and Rob both have the Sony a7s. But, we have 2 different camera cages.

This week we are going head to head to see which is a better cage: The Movcam, or the Tilta.

We recently upgraded from shooting on Canon T3i’s to the Sony a7s. Big upgrade; both in terms of quality and cost. We wanted to add extra protection to them, as well as more functionality, so this is where the camera cage comes in!

I went with the Sony a7s cage from MovCam and Rob went with one from Tilta. Both great cages; if you purchased either of these, you’ll be happy with your purchase. But which one is better?

For this battle, we aren’t comparing like for like versions of each camera cage. We thought it would be better to compare what we consider the best value version of each product. The MovCam base model, and the Tilta with wooden handle grip.

So, we’ve created this chart. It’s a list of all the functionality, pros, and cons of the cages that we can think of which we are able to compare.

Sony-A7s-Cage-Battle-MovCam-vs.jpg

Let’s start off with build quality: Both the MovCam and the Tilta are made really solid. From using these cages for a few months now, they are both just as tough as each other.

Top Handle: Both points go to the Tilta for this one. The top handle on the Tilta is better in several ways. It’s generally just more comfortable, it’s really easy to take off, and you are even able to rotate it. This is perfect if you need extra space in your camera bag. The MovCam is not as great. It’s certainly not uncomfortable, but it does require a screw driver to remove. It’s a good solid handle, but that’s about it.

Cold Shoe Placement: both are in the exact same place and work just as identically. So we’ve given a point to both.

Cable socket protectors: Both do a good job of protecting your doors from getting bashed as well as holding your cables in place to stop them from snagging. The MovCam wins just barely with this one, as compared to the Tilta, you can add grip to your sockets with these hand tightening nuts, whereas on the Tilta you do need an alan key. Not a major difference, but being able to function without tools is always a better choice in our opinion.

Sony-A7s-Cage-Battle-MovCam-Size.jpg

Size: Both cages are almost identical in size. The Tilta is a bit bigger because of the handle, but you can take it off. A point to both.

Speaking about assembly, let’s talk a bit about it: We’ve got a little contest here. We raced to see who can disassemble the camera and put it back together the quickest. As you can see, the Tilta is faster to put together. This is because it’s just one solid bit of metal, whereas the MovCam is connected using 3 separate parts.

Sony-A7s-Cage-Tilta.jpg

Tilta Cage

Sony-A7s-Cage-MovCam.jpg

MovCam

Purchase options: We’ve given both points to the MovCam for this one, as you can get the basic cage just on its own, or buy it with the riser block. Unfortunately, the Tilta has to be bought with the riser block, which adds to its cost. The wooden handle is an optional choice for the Tilta, but if you are not planning on getting the wooden side handle, it’s worth just getting the MovCam instead as it’s a fair bit cheaper to what is practically the same product.

Future Proofing: Unfortunately, for the MovCam it’s lost out on both points here because you can only fit the Mark 1 Sony A7s to it. MovCam does sell an a7sII version, but what’s good about the Tilta is that you can fit The a7s, a7sII, a7r, and a7rII into this single cage. So if you are planning on upgrading to a mark II at some point, you can add this to your price justification.

Sony-A7s-Cage-Tilta-Cage.jpg

Comfort: The Tilta wins this time. Because of its wooden side grip, it’s just a lot more comfortable to use over a long space of time. It also has a record button which plugs into the USB slot so you don’t need to find the awkward record button that we all hate on the Sony Alpha camera range. As we said before, the top handle is also a bit more comfortable.

15mm Rod Mount: And the Tilta wins again. Both cages have a 15mm rod mount, but we had to give the points to the Tilta because unfortunately, the MovCam’s rod mount is attached to the top handle. So you can only use the mount if the top handle is attached. On the Tilta, this isn’t an issue as it’s mounted to the main cage. We use the 15mm rod mount for attaching an external battery, so this feature is really handy.

Weight: The weight difference between these cages is negligible. The MovCam comes in at 840 grams, and the Tilta comes in at 656 grams. But lighter is better, so the Tilta wins.

Colour: We contemplated not adding this because it’s a bit of a daft one, but I suppose the MovCam wins this time. You can get the MovCam in black and silver, whereas with the Tilta, it’s just silver. It’s really not a big deal, but it might be for someone else.

Sony-A7s-MovCam-Cage-Review.jpg

So from the date of upload of this video, the prices are: $520 for the Tilta (this includes the wooden side grip), and $400 for the MovCam (which is the base model).

So if we divide the cost of the cage by the number of points it scored, we will get a number which represents the price performance. The lower the better.

The Tilta got 15 points, so $520 divided by 15 scores the Tilta: 34.7

The MovCam got 13 points, so $400 divided by 13 scores the MovCam: 30.8

So the MovCam is the winner!

Sony-A7s-Cage-MovCam-vs-Tilta-Winner.jpg

So basically, both of these cages are solid. If you want the extra features of the Tilta, go for it. If not, it just depends on your budget.


Sony A7s Cage Battle  MovCam vs. Tilta.jpg

DISCLAIMERS:

Some of these links are affiliate links, if you purchase gear via these links The Film Look will receive a small commission, but there will be no additional cost to you. Thank you!