How to Give Your Shots Reason

The shots YOU use in your film aren’t just there to look fancy. Your shots convey the story on screen, and by giving your shots REASON and MOTIVATION, you can get a step closer to achieving the film look.

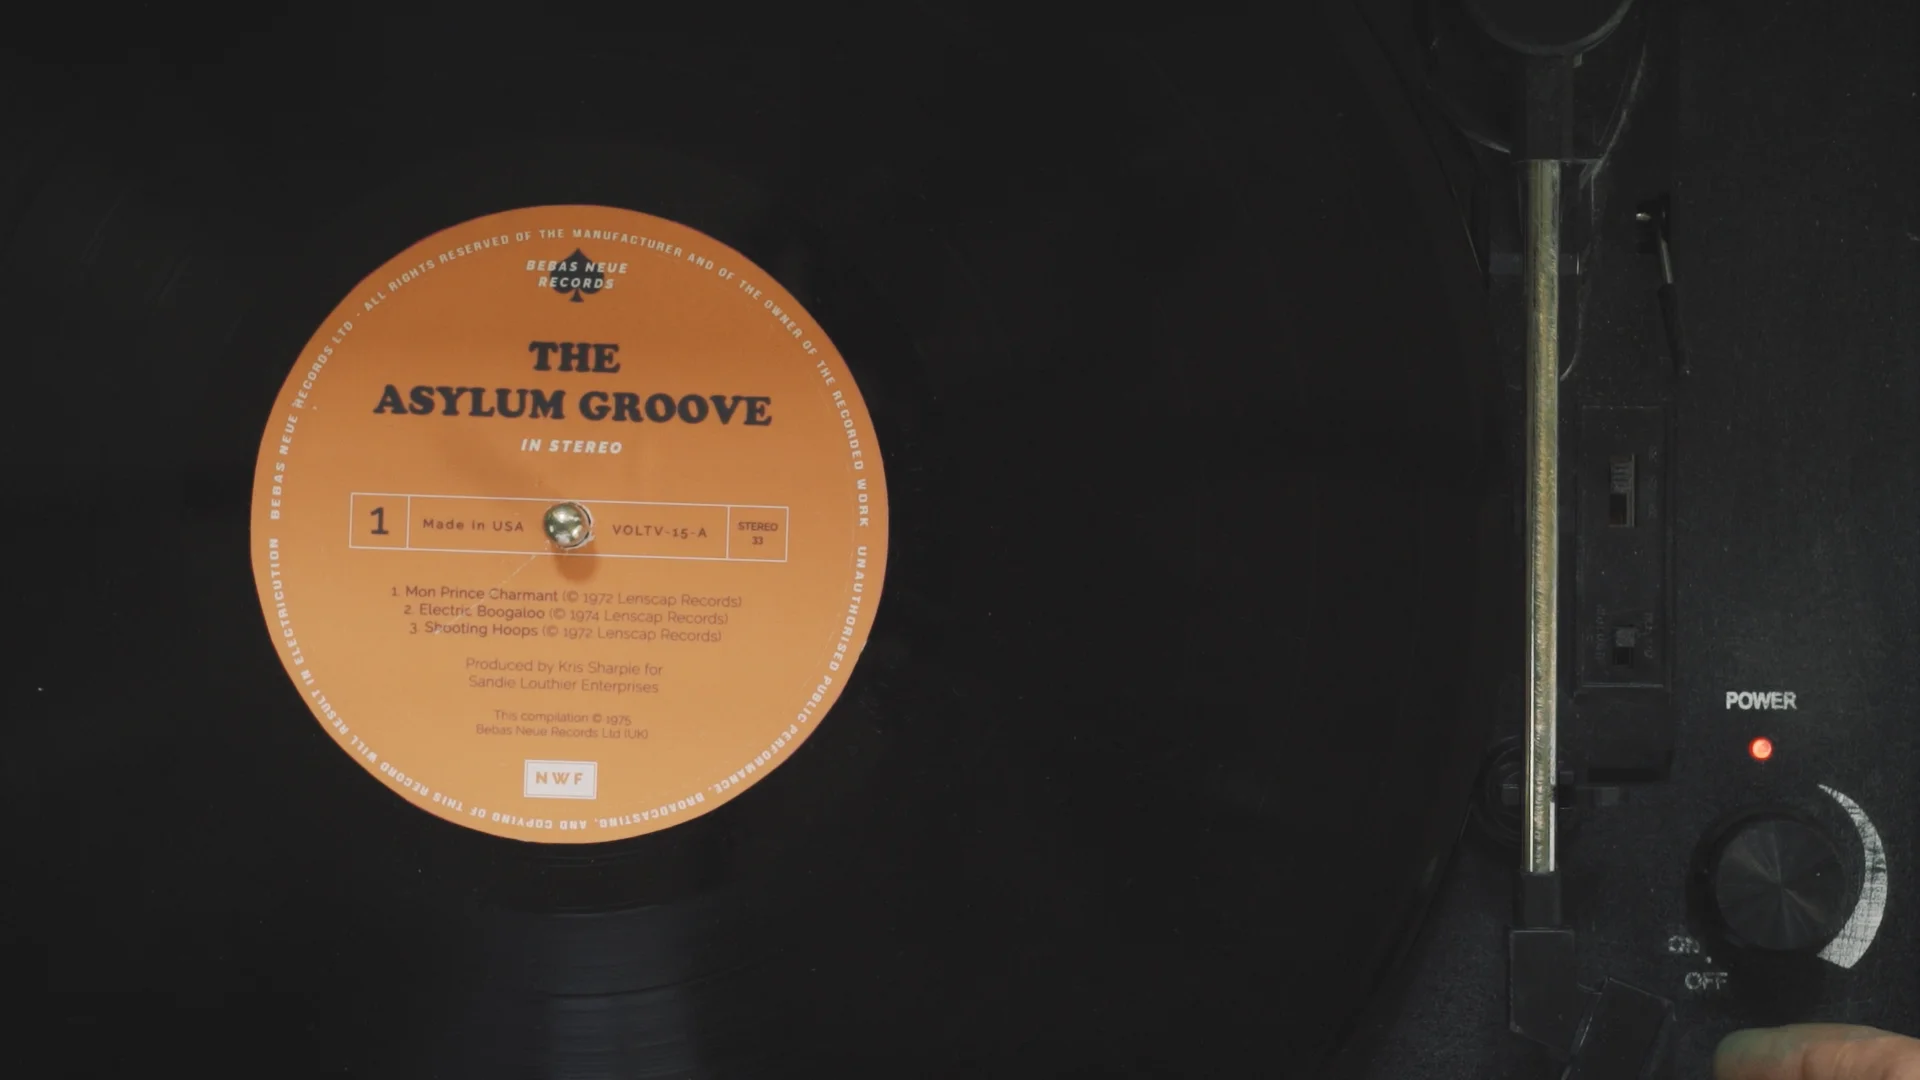
We’re breaking down how we applied reason and motivation to the shots in our latest film The Asylum Groove, you can watch it right here:

One thing we wanted to do with The Asylum Groove was give the camera characteristics. This way we could apply reason and motivation to every shot and try to tell the story as if the camera was alive.

So we thought of the camera as a really curious child. They have stumbled into an intriguing situation and throughout the scene they will want to learn more.

Episode.00_01_13_08.Still004.jpg

This curious child will be trying to soak up all the important information in the scene and will be giving it back to the audience as entertainment.

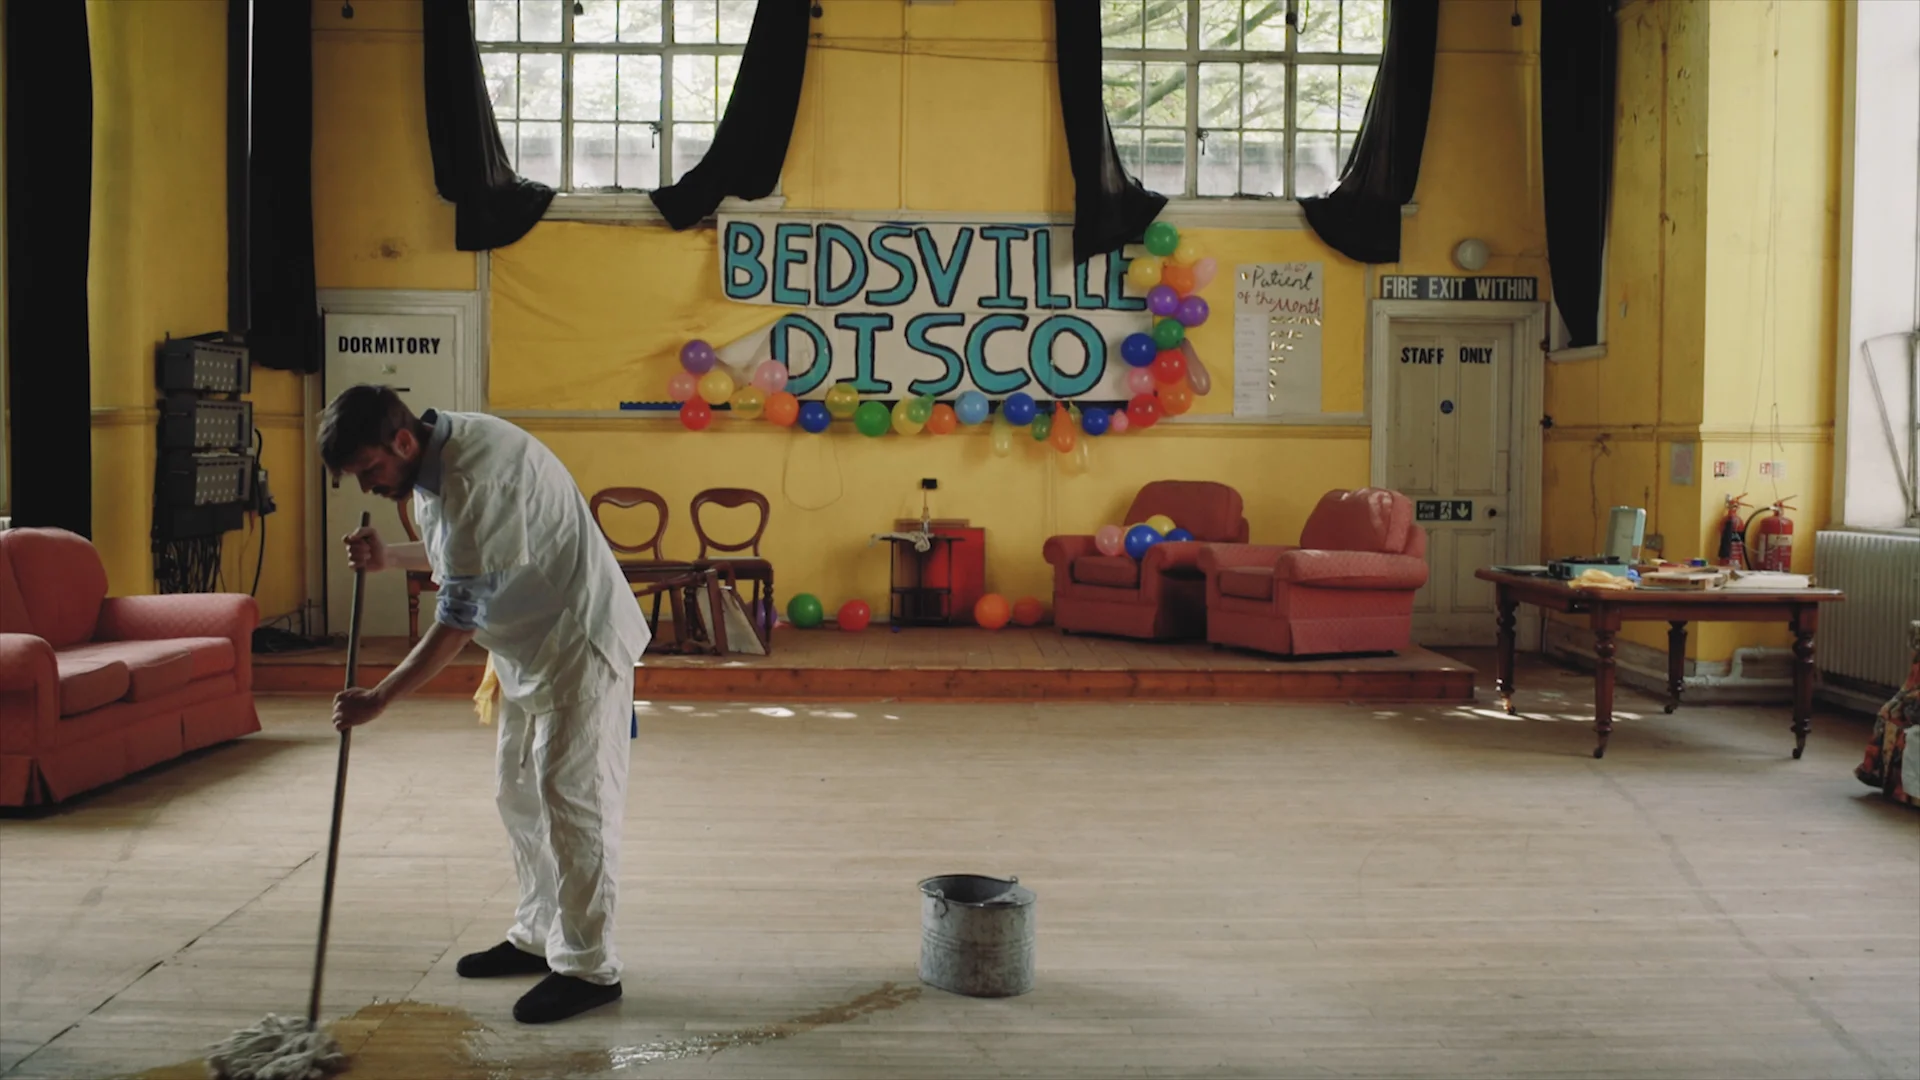
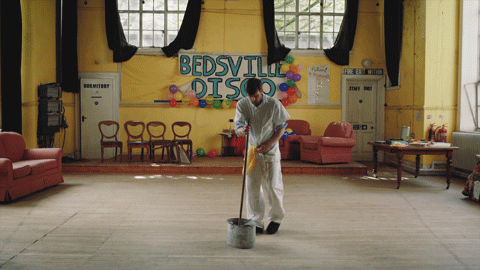
Our character Sam has decided to lift his mop and dance to the music. But the camera stays in place. Our reasoning for this movement, or lack of movement, is because his dancing starts very suddenly.

The camera, AKA the curious child, is surprised by what is happening. They stay still and watch as they try to figure out this new piece of information. Sam dances backwards, distancing himself from the curious child. So what does the camera want to do? Get closer.

Episode.00_01_32_18.Still001.jpg

Then we cut to a close up of the character. This is needed to clearly see the new expression of love and compassion on his face, a key emotional beat in the sequence. It is motivated by the curious child wanting to find out more about our character.

As humans we tend to read people’s facial expressions, so when there isn’t a lot of BIG information in the scene, we read the MICRO information.

The next big camera move compliments the two previous shots.

This time the curious child knows the character is about to resume dancing. The camera is intrigued and is now invested in the situation. The next shot cuts t o a wide, but this time the curious child follows along with the movement of the character and physically moves forward in order to get another look on his face.

Episode.00_01_52_21.Still002.jpg

All of the shots in the Asylum Groove follow this process of the curious child. You can make your shots even more interesting by thinking of the child as someone who doesn’t always tell the truth and doesn’t always want to tell you everything straight away.

The entire beginning sequence of the film is shot with close up inserts, mostly of details, hinting story elements without outright displaying them. In this case, the curious child has joined the scene BEFORE the audience and is slowly giving clues, teasing the audience with small chunks of information.

Episode.00_02_13_07.Still003.jpg

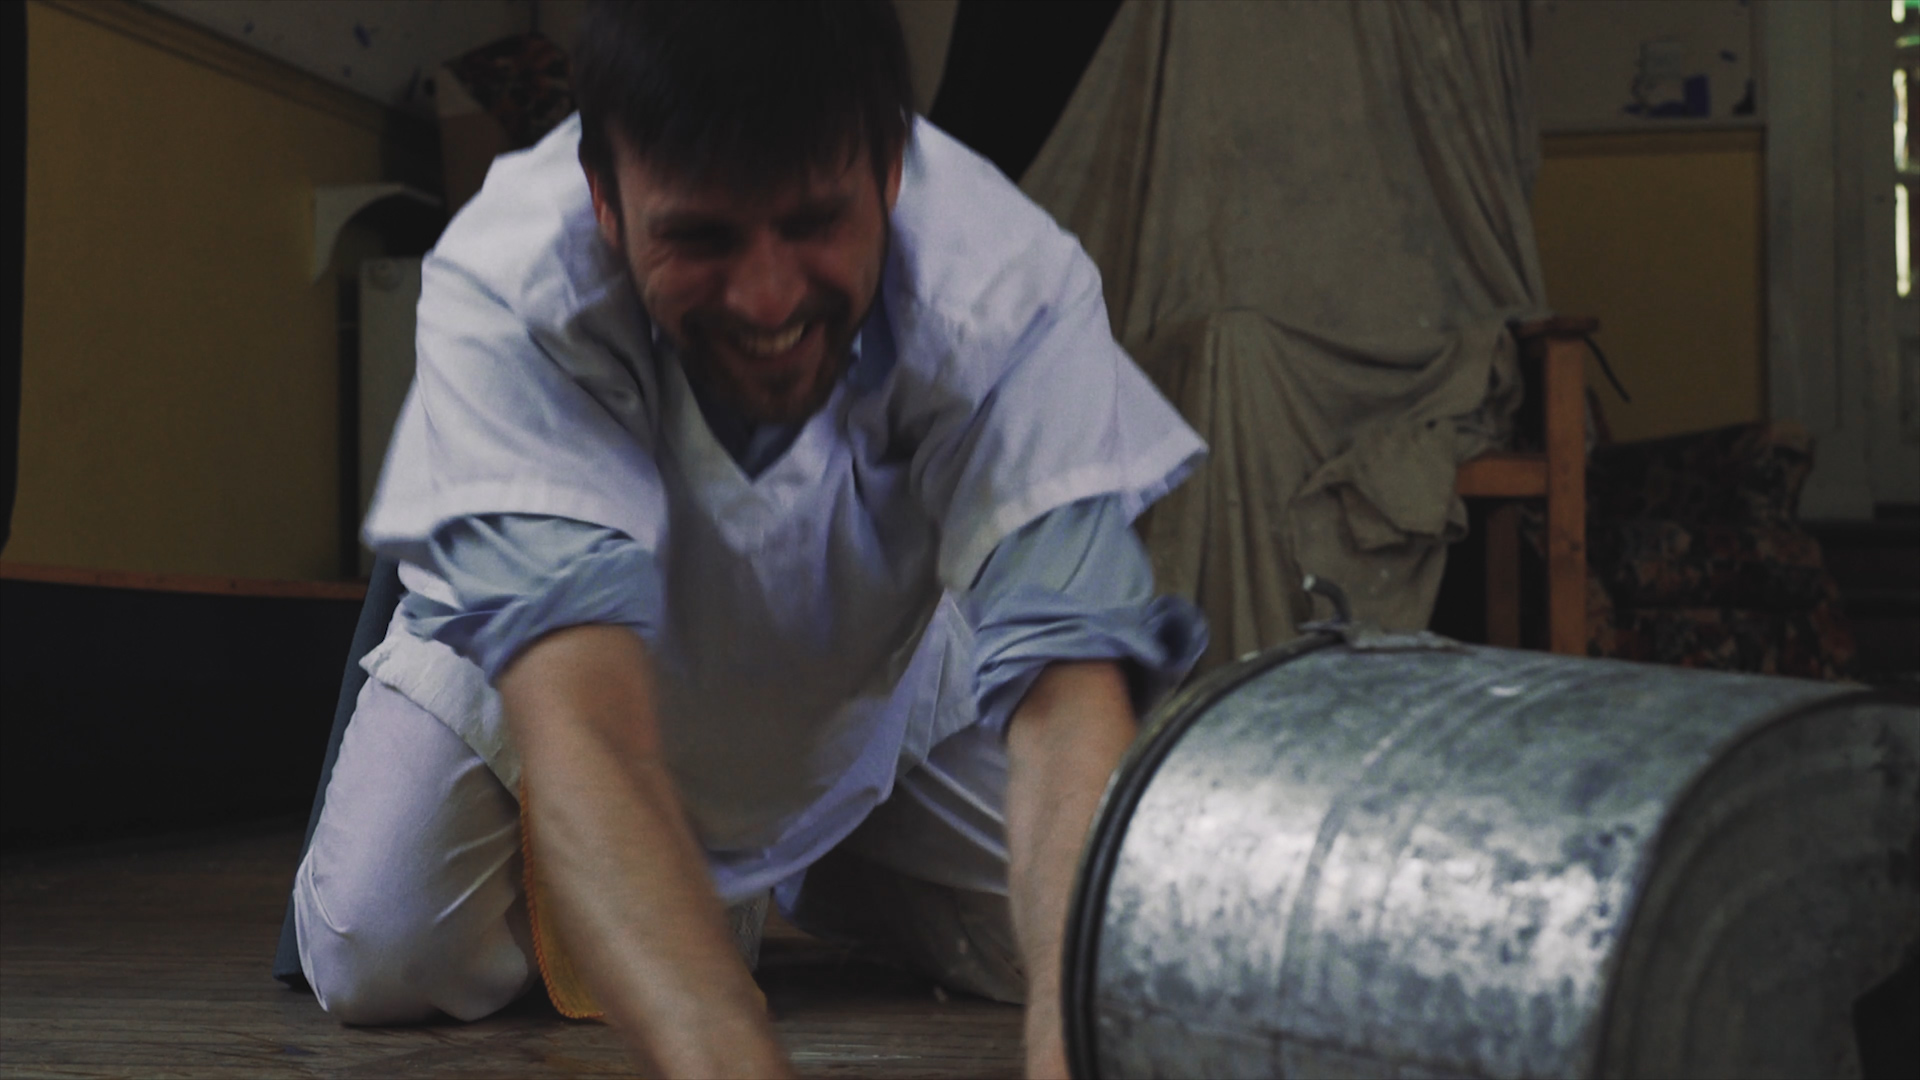
At the end, when we find out Sam is being electrocuted, the camera is confused. The curious child has just been transported to this new scene all of a sudden, so they are initially looking around their environment to figure out what is going on.

Once the camera understands the situation, and is faced with our character Sam RAGING on screen, it distances itself from him and the disturbing scene, pulling back, and ending in a wide shot.

Episode.00_02_48_09.Still007.jpg

Your shots should have a place in the story. Instead of just shooting coverage, try to find the emotional or dramatic beats in the scene and bring the audience along for the journey - after all, the curious child is dictating what the audience can see. If the camera isn’t interested in the scene, why should the audience even pay attention?


This video was Sponsored By

🚀 http://bit.ly/pack-emulsion - Make your video look like it was tailor-made for the silver screen with RocketStock’s film grain overlay pack, Emulsion!

🎵 http://bit.ly/pbtfl-wildestdreams - Click here to download this episode's track. Check out Premiumbeat.com to discover a huge range of exclusive royalty free music!


DISCLAIMERS:

Some of these links are affiliate links, if you purchase gear via these links The Film Look will receive a small commission, but there will be no additional cost to you. Thank you!

Making of: The Asylum Groove Part 3 | Behind The Scenes

This is part one of the making of our short film The Asylum Groove. Let us know in the comments below if you see anything in the behind the scenes which you would like to more about. 

Part 1 - https://youtu.be/mSbNZNrZHdg
Part 2 - https://youtu.be/-zSvTmWIZP4


🎬 In case you missed it

The Asylum Groove - Short Film - https://youtu.be/aysGfZyQEiM


DISCLAIMERS:

Some of these links are affiliate links, if you purchase gear via these links The Film Look will receive a small commission, but there will be no additional cost to you. Thank you!

Stop Making Films by Yourself

Taking on multiple filmmaking roles is a great way to find out which areas you want to pursue. But there comes a time when you MUST give some of the key jobs to others if you want to make the best film possible.

We’ve made films were we’ve had a crew of 10 and we’ve made films where we had a crew of 2. On the barebones projects, this meant we were taking the role of: writer, director, camera operator, 1st AC, AD, sound recordist, and we were also the costume & props department.

Taking on all of these roles is great because you get to gain experience in different areas and it can help you work out which areas of filmmaking you want to pursue.

Stop-Making-Films-by-Yourself.gif

The downside to multi-role projects is that you can’t give 100% of your time and energy to one role. If you’re the camera operator and director, you’ll spend half your time setting up the shot while the actors stand around, then spend the other half directing the performance while the crew stands around.

All of these roles are actually super fun and sometimes at the beginning you NEED to take on these roles just to get your film finished.

But spreading yourself too thin can make the film suffer. For our short film Keep the Change, I was camera operator and 1st AC, Rich was the sound recordist and we both directed when we got the chance.

Stop-Making-Films-by-Yourself1.gif

Directing is one of the areas of filmmaking we are the most passionate about, but because we were doing many other roles, the project suffered.

To help combat this, we started collaborating with more filmmakers.

We built up this small crew of filmmakers over the past few of years by attending local filmmaking networking groups, working on other people’s short films to get to know them, and looking at filmmaking Facebook pages to see if there was anyone in our local area making films.

At first, there was 2 of us, then 3, 4, 5, and on our latest short, The Asylum Groove, we had a core crew of 10. This is still a very small crew but it allowed everyone take on roles we were all passionate about, and it gave everyone a specific department and responsibility on set, which meant NO waiting around and wasting time.

I operated the camera, The other Rob was 1st AC and focus puller, Adam was the 2nd AC and clapper loader, and both Rob and Adam provided their invaluable grip skills.

For us, this still feels like a luxury, but we could see the benefit of having a larger camera department straight away.

At no point did I have to step away to do a different job. I concentrated on the image; the lighting, framing, and camera movement. Having the other Rob pull focus meant it was nailed every time, and having Adam set up the marks and frame edges meant we did very little technical retakes.

With me being on camera, Richard could concentrate on just directing. He could spend more time with our actor Chris, dialing in the different emotions he needed to feel at different points of the shoot.

If you’ve wrote a script and plan on directing the film, maybe think about getting someone else to shoot it.

You know the story more than anyone else, you know when each character needs to hit different emotional beats, so why not give your full attention to the performance?

Getting someone else to shoot your film is a big role to give away. If you know someone who can shoot, you can work closely with them in pre-production and plan how you would like the film to look. Onset you will both be working from the same plan and share a stronger collaborative vision.

For The Asylum Groove, we still had to double up roles. Emily, the producer, was also the 1st assistant director, and she even had a cameo at the end of the film. During takes, Rich held the reflector when we needed more light, Jack shot BTS but also recorded sound for the last two shots.

The people who help you make your film don’t all need to be experienced filmmakers. An extra pair of hands on set is a massive bonus, and there are roles such as boom operating, grip assistance, and being the reflector-holder which contribute so much to a film and don’t take a lot of practice to become sufficient.

When collaborating with other filmmakers, find out which areas they are most interested in. Take advantage of their knowledge and passion. From our experience, they are usually more skilled in a certain area than we are.

Don’t let having a small crew stop you from making your film, do whatever you can to make it, you might have a wicked time making it anyway. If you struggle through the process and things don’t come out as planned, at least you still went out there, made something, made mistakes and learned new skills. You can take all of the lessons you learn and apply them on your next film.

In the comments below let us know about your experiences of making short films and how other people have made them better. Also, if you haven't already hit the orange lens cap to subscribe, check out our short film here and remember to achieve it one shot at a time.


This video was Sponsored By

🚀 http://bit.ly/tflrs-creator - Become a social media powerhouse with RocketStock's video element pack, Creator. This collection comes packed with logo reveals, end screens, subscribe animations, and much more.

🎵 http://bit.ly/pb-finestimports - Click here to download this episode's track. Check out Premiumbeat.com to discover a huge range of exclusive royalty free music!


DISCLAIMERS:

Some of these links are affiliate links, if you purchase gear via these links The Film Look will receive a small commission, but there will be no additional cost to you. Thank you!

Making of: The Asylum Groove Part 2 | Behind The Scenes

This is part one of the making of our short film The Asylum Groove. Let us know in the comments below if you see anything in the behind the scenes which you would like to more about. 

Part 1 - https://youtu.be/mSbNZNrZHdg


🎬 In case you missed it

The Asylum Groove - Short Film - https://youtu.be/aysGfZyQEiM


DISCLAIMERS:

Some of these links are affiliate links, if you purchase gear via these links The Film Look will receive a small commission, but there will be no additional cost to you. Thank you!

Get The Film Look with Art Direction

If there is one aspect of zero budget filmmaking that gets overlooked more than any other, I feel it’s art direction and production design.

I’m talking about costumes, set dressing, props, graphics; the things that give a movie life. These are things which contribute towards achieving the film look and will give your film a convincing visual identity and will embed it into your make-believe world. But art direction also serves a bigger purpose than just making your film look cinematic.

Today we are going to talk about how YOU can use art direction to help tell a better story by giving the audience visual clues on screen. 

Today we are taking lessons we learned from shooting our latest short The Asylum Groove.

We were challenged to make a film with only a single word of dialogue.

With this in mind, we knew we would want to take advantage of cinema’s visual medium and use art direction to help tell the story, expose the universe, and give the audience clues as to when and where the film is set.

There are three main groups of art direction for a zero budget movie: You’ve got costume design, set design, and props. They all contribute something in their own way but all come together to create a fully fledged world.

First, lets cover costume.

The costume of your character, and the way they wear that costume, is a visual representation of their characteristics and their situation in the film. You can tell a lot about a character by the way they dress.

For The Asylum Groove, we wanted to use the costume as a way to give the audience the character’s backstory and to help him pop on screen, so we designed it in a few different ways.

Firstly, ill-fitting white scrubs. Yes, this costume is also worn by a doctor, nurse, or a surgeon, but by making them worn, unironed, and stamped with a registration number, it would help give the impression that the scrubs are a mass produced, unkempt, mandatory uniform.

Episode.00_01_38_13.Still004.jpg

The creases and weathering also gives the costume some texture on screen, and as the scrubs are the brightest colour on screen, it also helps the character stand out from the background.

Costume design seems to work best when you give your costume a history or backstory. Most people don’t wear clothes that they’ve literally just bought that day, so think about your character, the types of clothes they would wear, and how long they have been wearing them before the moment the film begins.

The scrubs weren’t the only costume detail we added. His blue shirt underneath was to give the impression that he still retains some independence by wearing his own clothes underneath. This design also pays massive homage to One Flew Over the Cuckoo’s Nest, which this film is heavily inspired by.

We gave him cheap slippers which instantly negate any question that he might be a janitor or caretaker. The slippers also represent comfort and a relaxed attitude, so clearly he lives or stays in this location for a long period of time.

Episode.00_02_43_13.Still001.jpg

The last detail are the rags hanging from his waist and pocket. We included these for a few reasons. Firstly, it shows he’s cleaning. Secondly, having something long and hanging down helps compliment the energy of him dancing and spinning as it flows and lifts when he moves.

Episode.00_03_04_18.Still003.jpg

Next up we have props!

Props, and the design of those props, tell us about the character, the world, but most importantly, a prop is a totem of a character’s purpose in the story.

If you see someone flash a badge, you instantly think they are police or a detective, even without them wearing a uniform or saying a word.

Episode.00_03_16_22.Still010.jpg

We wanted the audience to know within a few moments that our character had a job to do. So we gave him a mop and bucket. In terms of specifics, we wanted an old tin bucket.

This is a classic-look, and helps gives the film a pre-modern aesthetic. The mop needed to be old, dirty, and with a wooden handle, also helping set the film in the past and maybe even tell the audience that he’s been given sub-standard cleaning supplies for his job.

Episode.00_03_32_08.Still011.jpg

The last major prop in the film was the vinyl record. From the get-go we knew this film would involve dancing to an old-school song. We wanted to help place the film around the 1970s, so we took an old record and designed, what we thought, was the most 70s label as possible: orange background, groovy disco font, and a simple design without anything super fancy in terms of graphics.

Episode.00_03_55_21.Still007.jpg

This prop was also designed to be used as the title of the film, so we knew we wanted it to look as genuine as we could. Last up, we have set design!

Set design is arguably the hardest part of art direction for an indie and zero budget filmmaker. Whereas things like props and costume are usually quite small and personal, creating a convincing set (depending on the film you are making) is a mammoth task, but if done right, can be a powerful provider of clues to the audience about the world, the period, the state of the location, and the character’s situation.

We cheated a little bit with the set on The Asylum Groove: we actually wrote the script around the pre-existing location. We knew of the school assembly hall before we were even given the one word challenge, and we knew we wanted to use it for a film about people in an insane asylum.

Episode.00_04_52_16.Still012.jpg

The location was already old, worn, dirty, and had the most horrible bright yellow walls. Instead of trying to convert it into something completely different, we used the location as the basis for the script and embraced the old, grimy look.

Building a world around an interesting looking location you already have access to will give you an easier job of creating a convincing set and also save you a lot of money.

Episode.00_05_01_21.Still013.jpg

If there was one thing we wanted to tell the audience without OUTRIGHT telling them, it was WHY the character was cleaning. His reason for mopping isn’t necessarily a major plot point, but giving the character a true purpose on screen helps the audience settle into the film and not question it from the very first frame.

If the audience had to ask “Why’s he mopping?” at the beginning of the film, it just means we didn’t give the audience enough clues to his situation.

So we added a banner and balloons onto the back wall with “Bedsville Disco” painted on. We deliberately made a poor job of  he back wall, the banner is falling off and the balloons are not even finished. This was to give the audience the impression that the disco wasn’t a glamorous affair, and would fit closer to the derelict hall we had access to.

Episode.00_06_00_20.Still015.jpg

We added small details such as signs on the door with “dormitory” and “staff only”. We actually took these from the set of the One Flew Over the Cuckoo’s Nest stage play.

Episode.00_06_17_12.Still016.jpg

Colour design was another thing we wanted to focus on with this film. Because of the bright yellow walls of the assembly hall, we knew we could use yellow’s complementary colour, BLUE, as an accent colour for the character and as a visual device to lead the audience's eyes.

Episode.00_06_26_07.Still017.jpg

This is why we picked a blue shirt, blue paint on his hand and the brush, a blue balloon placed on the wall, a bright blue record player, and blue nail varnish for the mother at the end. We wanted everything he interacted with to be blue.

The Asylum Groove FILM V1.247.Still005.jpg
Episode.00_06_32_03.Still018.jpg

One last we did was take advantage of the furniture left over in the room. The chairs and sofas were already there, so we placed them in a way which we left created a vacant audience for the character to dance to.

Episode.00_06_40_18.Still019.jpg

All of the furniture points in the direct of the character, and the angle of the chairs on stage actually point directly towards the framing of the execution, foreshadowing the audience viewing of the execution at the very end.

Not a hugely important detail, but we thought it could be a cool little bit to add in and maybe, subconsciously, it would add something to the storytelling. 

We even included the execution chair in the background after the moment the character snaps back into the reality when he trips over the bucket.

Episode.00_07_06_15.Still020.jpg

Obviously this is only our experience of art direction so far, and we have a lot to learn.

With this film, we suddenly realised how powerful of a storytelling device art direction can be. It can reduce your dialogue, give your audience visual hints towards the story and the world, and there’s no denying a great-looking set makes your film look a hell of a lot more cinematic.

A picture is worth a thousand words, and we as filmmakers should take advantage of that.


This video was Sponsored By

🎵 http://bit.ly/pbtrack-links - Click here to download this episode's track. Check out Premiumbeat.com to discover a huge range of exclusive royalty free music!


DISCLAIMERS:

Some of these links are affiliate links, if you purchase gear via these links The Film Look will receive a small commission, but there will be no additional cost to you. Thank you!

Making of: The Asylum Groove Part 1 | Behind The Scenes

This is part one of the making of our short film The Asylum Groove. Let us know in the comments below if you see anything in the behind the scenes which you would like to more about.


🎬 In case you missed it

The Asylum Groove - Short Film - https://youtu.be/aysGfZyQEiM


DISCLAIMERS:

Some of these links are affiliate links, if you purchase gear via these links The Film Look will receive a small commission, but there will be no additional cost to you. Thank you!

How to Write a Film with NO Dialogue

Dialogue is both a pleasure and a pain. Throwing lines on a page is an easy way to increase your word count but writing well-written dialogue can be one of the most difficult parts of the screenwriting process.

Today we are going to share with YOU what WE learned from making a film that included only one word of dialogue. Check out The Asylum Groove below if you want to see the finished film. 

Nate over at Nate’s Film Tutorials challenged us to make a film with one key restriction: “you can only use one word of dialogue”.

This was a great challenge for us because we’ve been learning about different screenwriting techniques on the channel and wanted to put them all into practice.

So we knew a few things which would help us along the way:

- Firstly, the story needed to be 100% visual; no bloated backstory, a nice simple structure, a single goal, a single obstacle, and all represented on-screen through action.

- Secondly, limiting a character’s lines on screen is easier if they don’t have someone with which to communicate. So we decided to make it about one character in a single location.

This also helped keep the costs down and would speed up the production process, so happy days!

We knew we had access to an old school assembly hall through a contact with our previous film. From the moment we saw the location, we knew we wanted to make a film which looked and felt like the film One Flew Over a Cuckoo’s Nest.

At first we found writing the initial idea quite difficult. What should the word be? When should it be said? We soon realised that the word was becoming the focus of the script. Instead we decided to write the film without ANY dialogue and add a word back in where it would pack a punch.

So now we had a location, a character, and an initial direction to base the script on. We just had to give him a goal to achieve, some conflict to overcome, and some interesting characteristics.

A film without dialogue needs to get the character off their feet, moving around, and completing a task. This creates movement in the scene, gives the actor something to do, and gives the audience something to look at.

We gave the character a mop and a bucket and tasked him with cleaning the assembly hall for the Bedville Disco. Because we can’t explain the backstory of the character through interaction with another character or any form of dialogue, we had to make sure that it was his costume and the set which gave the audience clues about him and his surroundings.

How-to-Write-a-Film-with-NO-Dialogue.gif

His goal to mop the floor is soon taken over by his desire to dance to the music, which can be considered an obstacle.

How-to-Write-a-Film-with-NO-Dialogue2.gif

Dancing then transforms into his goal, which means another obstacle must be written in. He soon trips over the bucket and spills the water.

How-to-Write-a-Film-with-NO-Dialogue3.gif

His next goal is to clean up the water. What’s stopping him at this point is his moment of ecstasy as he splashes in the water.

How-to-Write-a-Film-with-NO-Dialogue4.gif

His final obstacle is when he is trapped in the electric chair. He wants answers, he wants to be set free. His final tactic is to cry for help and thrash around in the chair.

How-to-Write-a-Film-with-NO-Dialogue6.gif

We now have a character with a set of obstacles to overcome in order to achieve his goals, but there is something missing. We need to give him character.

Because this film is so short and essentially quite simple (one character, one location, and mundane tasks) the focus of the film was to create a lovable character through his actions and reactions, then flip our perception of the character on its head right at the end.

Because it's such a short film, we wanted to make sure it had a strong bite which left you remembering the story.

So how do you build up a likeable character without dialogue? Empathy.

The story is told through the character’s actions, and we learn the type of character he is through the way in which he performs them.

To create an empathetic character; someone we can relate to, enjoy their on-screen presence, and understand their troubles, we needed to familiarise his actions in this unique scenario.

Not everyone has been locked inside an insane asylum, but i’m sure we’ve all danced like nobody's watching. And if you are new to screenwriting, we have a video about the basics:

So, even though our character is in a place which most of us have little experience with, he’s human after all, and its those human moments which we connect to. We’ve all experienced: boredom, confusion, nostalgia, delight, panic, and rage.

Adding the word “Mama” into the story was the final moment of impact.

Because we only had a single word to use, it became very powerful. Everything was held up by this word, and the choice of word was important.

We toyed with having the character accepting death in the electric chair, saying the word “Ready”. We thought that way he was technically achieving his goal of accepting death.

Then we changed it to “No!” which flipped the film on its head and gave us the impact which we wanted.

Then we decided on using the word “Mama”. This helped couple the childlike mannerisms of the character, almost everyone understands a relationship between mother and son, and because that word is universally understood and means so much in so little, it gave us the hard hitting impact which we wanted.

Alfred Hitchcock is quoted as saying “Dialogue should simply be a sound among other sounds, just something that comes out of the mouths of people whose eyes tell the story in visual terms.”

Try grabbing your latest script, remove the dialogue, and see how much of the story is retained. This will test your script to see if you are writing something visual and you’ll be able to work out if you are relying too much on dialogue to further the plot.

Making a film without any dialogue, or in our case, a single repeated word, definitely gives you a better perspective on how precious dialogue can be and why we don’t always need to use words to tell a visual story.

This is just our process, so let us know what tips YOU have for writing a film with very limited dialogue.


This video was Sponsored By

🚀 http://bit.ly/tflrs-creator - Become a social media powerhouse with RocketStock's video element pack, Creator. This collection comes packed with logo reveals, end screens, subscribe animations, and much more.

🎵 http://bit.ly/pbtfl-howweroll - Click here to download this episode's track. Check out Premiumbeat.com to discover a huge range of exclusive royalty free music!


DISCLAIMERS:

Some of these links are affiliate links, if you purchase gear via these links The Film Look will receive a small commission, but there will be no additional cost to you. Thank you!

The Asylum Groove | Short Film

Sam doesn't get a lot of time to himself in Bedsville Asylum. When tasked with cleaning the assembly hall for the annual disco, he takes the opportunity to dance like nobody is watching.


DISCLAIMERS:

Some of these links are affiliate links, if you purchase gear via these links The Film Look will receive a small commission, but there will be no additional cost to you. Thank you!

Coming to a Halt | Motivated Camera Moves

The best shots in a film aren’t always just the fancy, super expensive ones. The most effective shots in a film connect the cinema to the story and communicate the plot; whether that's using a tripod, a stabiliser, or even simply handheld.

This is what motivated camera moves are all about - and today we are going to talk about a move we call “coming to a halt”. Welcome to The Film Look.

Today we are using a page from the book “Master Shots” by Christopher Kenworthy. In particular, his chapter on “Revelations & Discoveries”, page 112, titled “MOVING ON”.

If you want to step up your game and learn how to connect your shots directly to your story, this is the book for you. We haven’t been paid to speak about this book, it’s just a great resource that every filmmaker should have access to.

Coming to a Halt.jpg

US links: 

Master Shots Volume 1: https://amzn.to/2tcPMlo

UK links:

Master Shots Volume 1: https://amzn.to/2ln4ZMv

Let’s set the scene: EXT. BACK ALLEY - DAY

Jimmy Nine Fingers is being pursued by the police for stealing priceless necklaces from the jewellers. He’s finally made a break from the fuzz and runs into a back alley only to be stopped by Detective Rusty Johnson.

Coming-to-a-Halt-2.gif

There are a few things that aid the effectiveness of this shot, and it all links to the character and story motivation. Firstly you have the character. They are trying to escape a situation, this is why they are running. Then they collide with an obstacle, this is why they stop.

The shot type changes during the move. The motivation for this is to convey the BEST POSSIBLE story at that particular cinematic moment. We begin with a wide shot then land in a close up.

The actor’s performance at the beginning of the shot is almost entirely physical. They are running and we understand they are being chased. By the time they stop, the performance is in the actor’s facial expression. This is why we are landing so close at the end of the move - the performance is now all in the details.

The movement of the shot is complimented in two ways. Firstly the character is moving at great speed. The camera matches this speed and closes in. The actor and the camera land on their marks at the same time, which gives us a sense of fast movement coming to a rapid halt. It’s almost like the camera is the one stopping the character which serves as motivation for the camera move itself.

If we remove the camera movement and instead use a static camera, the effect of rapid movement coming to a halt is lost but we do retain the effect of the camera becoming the obstacle.

Coming-to-a-Halt-3.gif

This type of shot would work well if the character knows they have failed to reach their target in time...such as in Raiders of the Lost Ark when Indy know he will never find Marion in the crowd.

Coming-to-a-Halt-4.gif

If we have a static character coupled with a moving camera which stops, the rapid change in speed is lost and feels more like the camera move emphasises the character’s slow but strong reaction to something.

Coming-to-a-Halt-5.gif

This type of shot is also known as The Spielberg Face. 

Having three versions of this move is a powerful thing: you can make the choice to add or subtract emphasis on certain parts of this move and tailor it to suit YOUR film.

The tools you use to achieve this move will give you slightly different results. If you use a stabilizer for instance, in our case this is a handheld gimbal, you will get something which looks more clean cut and Hollywood-esque.

If you go handheld, the story beats will be the same but the move will contribute a more brutal approach, which would lend well to a war scene or documentary-style of film.

You can use this technique for a bunch of different scenarios:

  • A boy needs to get home before his mother gets back from the supermarket only to discover when he reaches the house that the car is already on the drive, or

  • The protagonist and his love interest are escaping a glass-walled facility but get stopped by a robot killing machine from the future.

Kenworthy goes into more detail about this move including shot height and blocking details. It’s definitely worth picking up a copy of Master Shots if direction and cinematography is your passion.


This video was Sponsored By

🚀 http://bit.ly/pack-emulsion - Make your video look like it was tailor-made for the silver screen with RocketStock’s film grain overlay pack, Emulsion!

🎵 http://bit.ly/track-losinggames - Click here to download this episode's track. Check out Premiumbeat.com to discover a huge range of exclusive royalty free music!


DISCLAIMERS:

Some of these links are affiliate links, if you purchase gear via these links The Film Look will receive a small commission, but there will be no additional cost to you. Thank you!

Don't Underestimate Feedback from your Cast and Crew | Behind The Scenes

With only a week to go until our new short film The Asylum Groove is released we break down the final moments before we hit export and speak about the episodes to come on the channel.


DISCLAIMERS:

Some of these links are affiliate links, if you purchase gear via these links The Film Look will receive a small commission, but there will be no additional cost to you. Thank you!

Why you need a door wedge in your Camera Bag

In order to shoot your film, you’ll need to pack the following: your camera, extra batteries, lenses, shoulder rig, extra cards, a microphone, and... a door wedge.

Yes, this video is all about why you should include a door wedge in the essential equipment you take to a shoot.

A door wedge was something I didn’t know I needed in my camera bag until we were on set shooting our latest short film The Asylum Groove.

The shot was 1L, a medium close up of Sam, our main character. He walks into the frame and starts to mop. The shot was low down so we could not use a tripod. Instead we rested the camera on the handles of the shoulder rig so the camera would have a steady point to rest on and not be too shaky.

Door-Wedge.gif

This worked great, but the shot wasn’t level. So I asked the camera team if there was anything we could stick underneath to make it level. Adam Opie, the 2nd AC on the film, handed me a door wedge which was the perfect tool for the job. I was able to incrementally tilt the camera until it was level.

After this epiphanny, we went out and bought a few door wedges, and they have been coming in handy for lot of different setups.

Sometimes in the studio, when presenting, we can’t always fit a tripod into a corner, so we build up some boxes then use a lens cap or some paper to tilt the camera up to get the correct angle. You can never get the lens cap in the right position, but the door wedge has solved that problem.

On set, the door wedge can also be used to help level out a track. You possibly may need a few wedges depending on how long and the type of surface you’re building the track on so making them out of wood will be your cheapest option.

Door-Wedge1.gif

If the chair your talent is sitting on is wobbly, you can use a wedge to solve that problem as long as it is not in shot.

And finally, if you have a shot of a character walking through a doorway, you can use the door wedge to keep it open. It’s the right tool for the job.

🎥 This episode's kit/gear/equipment:

🇺🇸 US links: Door Wedge - https://amzn.to/2MkSvkC

🇬🇧 UK links: Door Wedge - https://amzn.to/2y6uvP9


This video was Sponsored By

🚀http://bit.ly/tflrs-creator - Become a social media powerhouse with RocketStock's video element pack, Creator. This collection comes packed with logo reveals, end screens, subscribe animations, and much more.

🎵 http://bit.ly/track-phenomenal - Click here to download this episode's track. Check out Premiumbeat.com to discover a huge range of exclusive royalty free music!


DISCLAIMERS:

Some of these links are affiliate links, if you purchase gear via these links The Film Look will receive a small commission, but there will be no additional cost to you. Thank you!

Dialogue is MORE than Exposition

One thing we can get wrong is NOT utilizing dialogue to its full potential. It's easy to write on a page but can be difficult to get sounding great. I don’t think it's because of any lack of creativity or imagination - I think we may simply be approaching dialogue from the wrong angle.

Dialogue is MORE than just a tool for exposition. “Show don’t tell” is a trick used in writing to force ourselves to find a visual way to give audience information without resorting to lines of dialogue.

Instead of Jimmy shouting “I’m so angry, Mindy!”, have him smash a plate. No lines - all visual.

Episode.00_01_01_10.Still001.jpg
Episode.00_01_03_20.Still002.jpg

If you apply this rule to your writing, you now have a vacant space where the dialogue used to be. This gives you the opportunity to use dialogue to demonstrate character traits.

If you think of dialogue as a tool to open up characters, they actions, and better yet their REACTIONS to statements and questions, it starts to open up a lot more opportunities to see who a character really is.

Let's go back to Jimmy in the kitchen. Originally we had Jimmy’s line, “I’m so angry, Mindy!”. Then we found the action in that line, ANGRY, and replaced the dialogue with an action, “Jimmy smashes a plate on the floor.” It shows us his anger.

Let's add a line back in before he smashes the plate. Smashing the plate shows us his emotion. So we can use a line of dialogue to further unravel his relationship with Mindy.

Jimmy: “You are just like your mother, Mindy!” Jimmy smashes a plate on the floor. With a line like that, we are given information about their relationship dynamic.

Episode.00_01_53_20.Still003.jpg

“You are just like your mother, Mindy”: this signifies Jimmy’s distaste of Mindy’s mother. It also shows that Jimmy is starting to see traits of Mindy’s mother in Mindy. He is now perceiving her in a different light. A line like that could also tell us that Jimmy has been holding in this feeling as he expresses it during a moment of anger, so maybe Jimmy keeps most of his feeling to himself.

But we can go one step further! Dialogue is not JUST delivered. It is also received.

Episode.00_02_45_12.Still004.jpg

There are AT LEAST two people in a conversation. So we can show two sides of a conversation using the delivery of a line and the other person’s reaction to the line. Dialogue is ACTIVE then REACTIVE.

“You are just like your mother, Mindy!”...Mindy could then say something like “She’s a better mother than yours!” which gives us the impression that Mindy doesn’t like Jimmy’s mother but also that she is the type of person who isn’t afraid to say what she is feeling.

Let’s try changing the line and see how it changes the reaction to the previous line

“You are just like your mother, Mindy!”....Mindy then responds “Oh my god. You’re right.”. So in this instance she has realised she has messed up, and is able to perceive her attitude.

But we can actually use the rule “Show - Don’t tell” here!

Instead of the line “Oh my god. You’re right”, she could simply freeze from the conversation, give a moment of stuttering dialogue, but then hold back and drop her eye contact with Jimmy.

Once you start to think of dialogue as being an element which can be received and not simply delivered, you are increasing the opportunities for developing a character’s personality.

One last thing: The reaction to a line of dialogue doesn’t always have to be the clean-cut correct answer. Misinterpretation is something we can include to give dialogue more realism.

Mindy says the line “You shouldn't be sleeping on the sofa anymore”. The reaction to this by default be may that she is inviting Jimmy to sleep upstairs again and she wants to resolve the situation. But let's play the scene out.

Mindy: “You shouldn't be sleeping on the sofa anymore”.

Jimmy: “So I can sleep in our bed again?”

Mindy: “No, you need to move out.” This adds a bit of a twist to the conversation and confirms her ACTUAL interpretation to that line.

Obviously this is a very simple scene with some super basic one dimensional characters, but hopefully that gets the point across.

Try to find the emotion in a line and replace it with action. Then think of the REACTION of a line as a way to show character traits. If you want dialogue to sound more realistic, try having the characters NOT QUITE understand the question or statement, and then have them confirm the real answer.


This video was Sponsored By

🚀 http://bit.ly/pack-emulsion - Make your video look like it was tailor-made for the silver screen with RocketStock’s film grain overlay pack, Emulsion!

🎵 https://bit.ly/track-blue-lounge - Click here to download this episode's track. Check out Premiumbeat.com to discover a huge range of exclusive royalty free music!


DISCLAIMERS:

Some of these links are affiliate links, if you purchase gear via these links The Film Look will receive a small commission, but there will be no additional cost to you. Thank you!

DIY Equipment Cart

We’ve all been on set were all of your camera equipment is spread out on the floor in various black camera bags, hidden in a side pocket, or out of reach.

To solve this problem we have made a DIY equipment cart which can be used in a studio or on set.

The cart we used can be found on amazon: it is 75cm long, 70cm tall, the width is 35cm, and has 3 shelves. The wheels that come with this cart work for the amount of weight we are going to store on it, but you can always add some heavy duty wheels if you want.

We added pieces of carpet to each shelf, creating a softer surface for our equipment to be placed onto, and so it wouldn’t roll around.

We kept the top shelf of the cart clear so when setting up our camera rig we had a place for all of the pieces of equipment to go, whilst we assembled the rig on a tripod.

One thing we did attach to the top shelf was a flat headed screwdriver so anytime you need to add or remove the tripod plate you don’t need to be searching around for a coin in your pocket. Also, we added a bunch of Allen keys we use for our camera rigs.

Most equipment on the cart can be accessed from both sides, but we have made one side the front and one the back.

We’ve done this so everything will be setup in the same order, and if you are in a small place you can park it up correctly so you still have access to everything.

The second shelf is where most of the action is happening. On the right hand side we have all of the chargers we use which are connected to a extension cable that hangs off the side when not being used.

The main charger we use is for our Sony NP batteries as we use them to power our camera via a dummy battery, which you can find a video about that here.

Video Block
Double-click here to add a video by URL or embed code. Learn more

The charger we has a battery level percentage which comes in very handy.

The box behind has extra batteries and chargers that we do not use often, and it is also used to store the batteries and chargers when in transport.  

Once a battery is fully charged they move to a section on the left hand side.

We divided this section up with some white backing card, but cardboard would do the same job. Having it divided clearly shows were the charged batteries go.

Next we have a small section for the lenses we are using on the shoot. For our short films we switch between a 35, 58, and 85mm and having them on hand in a safe place saves time finding them in a bag. When a lens is being used, the caps from the lens are left on the cart, so they don’t go missing.

Since camera batteries and lenses are the thing you will will change the most, having a dedicated space allows everything to be stored correctly and safely.

It’s also a lot easier to direct someone to one place when changing a battery or lens, instead of them trying to find a battery in the pocket of a camera bag.

On the second shelf we also added LED lights so when it gets dark we can still see where everything goes.

The bottom shelf is where we store small equipment cases, as these normally still have power and audio cables, clips, and extra accessories inside which we might still need.

Next we have a place for our tool bag which is always handy on set, and the final box is where the flat batteries go when all of the charges are being used. Having this on a separate shelf makes sure the flat batteries do not get mixed with the charged ones.

On the front of the cart we have a plastic tube which holds our coloured gels, a velcro tape holder, a tin to store pens. These are all connect via bolts and wing nuts so everything can be easily removed if needed.

We also have a place for all of our metal clips and pegs to go. These are clipped on a piece of card so when in transport they can all be taken out of a camera bag and clipped to the cart.

This cart works well for us in our studio or on our short films. We already had some of the materials we used for this cart like the carpet and bolts, but we have estimated it would cost around £60 to make it from scratch and you can just keep adding to it until it suits you.

A professional equipment cart can cost over £1000, but this is because they are being used on films which has camera equipment that are much heavier and can cost hundreds of thousands pounds, so you will probably want to use a cart that costs thousands.

We still have a few things we want to add to this cart and we would love to hear your suggestions.

🎥 This episode's kit/gear/equipment:

🇺🇸 US links:

Cart - https://amzn.to/2JkVz1E

Flat-headed screwdriver - https://amzn.to/2xuUH5E

Allen Keys - https://amzn.to/2Hb3uJF

Sony NP Battery Charger - https://amzn.to/2sw4p27

Sony NP USB Charger - https://amzn.to/2J5S4bN

LED Lights - http://amzn.to/2fQ67ZF


🇬🇧 UK links:

Cart - https://amzn.to/2sri5ft

Cart Carpet - https://amzn.to/2sri5ft

Flat-headed screwdriver - https://amzn.to/2J7kWoo

Allen Keys - https://amzn.to/2J7kWoo

Sony NP Battery Charger - https://amzn.to/2xydkFP

Sony NP USB Charger - https://amzn.to/2kEbs50

LED Lights - https://amzn.to/2smXUPW


This video was Sponsored By

🎵 http://bit.ly/track-tell-me - Click here to download this episode's track. Check out Premiumbeat.com to discover a huge range of exclusive royalty free music!


DISCLAIMERS:

Some of these links are affiliate links, if you purchase gear via these links The Film Look will receive a small commission, but there will be no additional cost to you. Thank you!

Get Better Looking Gunshots in the Dark

Gunshots: one of the most popular visual effects techniques used on YouTube. Getting gunshots to look great can take some tweaking - and achieving a realistic gunshot effect in the dark is even more difficult. But there are some things YOU can do to help achieve a realistic gunshot in the dark.

Shooting gun.jpg

A gunshot is essentially a small explosion. And an explosion primarily produces light and sound. The sound part of this technique is pretty straight forward. You download a gunshot sound effect, sync it to the muzzle flash, tweak the sound a bit, and away you go.

If your gunshots are sounding too similar and you are starting to hear some repetition, we have a video about how to make them sound better:

The explosion from the gunshot produces a massive amount of light in a split second, and in a dark scene this will be amplified.

You CAN add some fake light spill in post-production for your daytime shots. You can do this by duplicating your layer, mask around the subject where you want it to brighten, brighten it up with something like a curves or exposure adjustment, and feather out the mask to blend it all together. It only shows for a single frame so it works well enough. But this won’t work for a dark environment because you simply can’t fake a realistic fall-off of light.

fake light.jpg

In this case, you’ll need to produce a real-life flash during the gunshot. This is what we learned from the process:

Using a Flash

flash#.jpg

The initial idea was to use a portable camera flash. It has a button on it to test the flash so the plan was to hit the flash whenever the subject fires. After trying this out we soon realised that because of the small differences in shutter speed, frame rate, and rolling shutter, the flash was giving us shutter interference, resulting in a frame that looked like this. No good.

Gunshots in the Dark.00_01_45_21.Still001.jpg

Flashlight

flashlight.jpg

Next on the list was a flashlight. This was getting us closer to the result but it simply wasn’t bright enough.

Aputure LED panel

LED panel.jpg

Finally we tried this LED panel from Aputure. The great thing about this light for this effect in particular is that it has a light switch separate from the intensity dial. Some cheaper lights have a dial which clicks on then turns up. But if you can get a light which switches on and off with a simple click, it will make this effect a lot easier. 

Gunshot in the Dark.jpg

Our findings

So the light must be super bright. You want it to highlight your subjects face and light up some of the background for maximum effect. We dialled it in so it didn’t completely blow out but produced a very hot highlight.

Now the most important part of making this effect look good are the steps you’ll take to capture the light flash.

A muzzle flash from the gun happens directly after pulling the trigger, but BEFORE the recoil from the explosion. The recoil is the pressure of the gun jolting your wrist back, so the steps are very important to make it look realistic.

LED wide.jpg

Pull the trigger, then freeze in place. Flick the light on, then flick the light off. Then simulate the recoil. Rinse and repeat.

In your editor you will make a cut on the frame the trigger is pulled. Then go to where the light is at its brightest, make a cut, delete the footage in between and join it together. Then scroll along and find the moment of recoil. Make a cut and take out the gap here too. The light should be on screen for only a single frame, and this is where you will add your muzzle flash and smoke elements.

One downside to this effect is that we were only able to produce it from a static camera angle. We tested a few different ways to simulate the light in a moving shot: one by shooting a take without the light, then shooting a take with the light on, and trying to match up the takes. But unless the takes are near identical, the cut looks far too jarring. So if you guys think you have a solution for producing this in a moving shot, let us know in the comments below, or better yet, show us how you did it in a video!

Visual effects work most effectively when they EMBED into the physical scene. Compositing effects onto footage without ANY physical interaction will result in tacky-looking VFX. So if you want your visual effects to shine, think about what those effects would produce in the real-world and try to replicate it.


This video was Sponsored By

🚀 http://bit.ly/tflrs-ricochet - Give your action scenes extra impact with RocketStock’s muzzle flash and gun smoke VFX library, Ricochet. This high-caliber pack features over 450 stunning elements.

🎵 http://bit.ly/track-rollthedice - Thanks to PremiumBeat for providing the music for this week's episode. Check out Premiumbeat.com to discover a huge range of exclusive royalty free music!


🎥 This episode's kit/gear/equipment:

US links: 

Aputure HR672S: https://amzn.to/2s15wY2

UK links:

Aputure HR672S: https://amzn.to/2GICoJu


DISCLAIMERS:

Some of these links are affiliate links, if you purchase gear via these links The Film Look will receive a small commission, but there will be no additional cost to you. Thank you!

Turn Your Script into a Powerful Blueprint

A screenplay is not only the plot of the film written on paper - it is the blueprint which the whole production team and the actors will follow, breakdown, research, and prepare when making the movie. Because of this, everything you see in the script, you must be able to shoot.

For example: “Gary is nervous before his interview with Derek.” Nervousness is an emotion Gary is feeling internally. We can’t simply shoot “nervousness” because nothing is actually being outputted.

Imagine you are on a film shoot and you read the line “Gary is nervous before his interview with Derek”. You then have to ask yourself “How do I show Gary is nervous?”. You have to find a way to then SHOW that Gary is nervous.

Episode.00_01_06_18.Still002.jpg

Instead, try this: “Gary nervously taps on his knee.”. This is clearly an ACTION which suggests Gary is nervous. We can physically shoot Gary’s nervousness from the tapping on his knee because it is a clear indication of nervous body language.

To go one step further with this rule: How much emphasis do you put on this emotion? How important is Gary’s nervousness in this scene?

Episode.00_01_46_21.Still003.jpg

If his nervous feeling before meeting Derek is a critical plot or character development moment then you might want to scale up the nervous action to something bigger than tapping on his knee.

The stronger you express this emotion in the script, the more the audience will pay attention to it. If his nervousness is is crucial to Gary’s character, you may want to go with Number 5. If it isn’t as important, maybe lessen the impact. Or if it isn’t important at all, don’t even write it.


This video was Sponsored By

🚀 http://bit.ly/corruption-pack - With glitchy overlays, distorted logo reveals and more, RocketStock’s "Corruption" is an ideal way to give your project a dramatic edge.

🎵 http://bit.ly/pb-happyfunkyday - Click here to download this episode's track. Check out Premiumbeat.com to discover a huge range of exclusive royalty free music!


DISCLAIMERS:

Some of these links are affiliate links, if you purchase gear via these links The Film Look will receive a small commission, but there will be no additional cost to you. Thank you!